

How to install the Group Policy Management Console on Windows 11

Today’s topic is how to install the Group Policy Management Console (also known as GPMC) on Windows 11. The tools we're discussing improve Group Policy management and make it easier for IT and system administrators to understand.
Please be careful not to confuse the Local Group Policy Editor (gpedit.msc) with the Group Policy Management Console (GPMC). In terms of local system settings, Gpedit is used with the registry, but GPMC is used with server management settings for domain-based networks.
You need to download and install the Windows Remote Server Administration Tools, sometimes called RSAT, to complete this operation.
Using remote server management tools, IT administrators can manage roles and features that have been installed on computers located in different locations.
After we look at what this tool does in more detail, we’ll show you how to install the Group Policy Management Console on Windows 11. Follow us!
What is GPMC used for?
To make Group Policy settings, you need to configure them using Group Policy objects (GPOs) that can be linked to domains, sites, and organizational units (OUs).
GPOs can be applied based on the results of Windows Management Instrumentation (WMI) filters, providing greater flexibility. WMI filters should be avoided if possible because they significantly increase policy processing time.

Administrators can use the Group Policy Management Console (GPMC) to manage Group Policy in an Active Directory forest and collect information to resolve related issues.
GPMC is also a built-in Windows management tool that allows administrators to manage Group Policy in an Active Directory forest and collect information to solve their problems.
In Microsoft Windows Server Manager, GPMC can be accessed through the Tools menu. Because domain controllers are not recommended for day-to-day management operations, you should download and install the Remote Server Administration Tools (RSAT) for your operating system.
If you don't use Group Policy Editor often, you probably don't need it at all. GPMC is primarily used as a Group Policy Editor management tool for domain-based network environments. Therefore, the type of user who needs GPMC is the user responsible for information technology.
If you want to know the specific functions of the Group Policy Management Console, please install it and check it out. If you change your mind, you can uninstall it at any time.
How to install Group Policy Management Console on Windows 11?
1. Use optional features
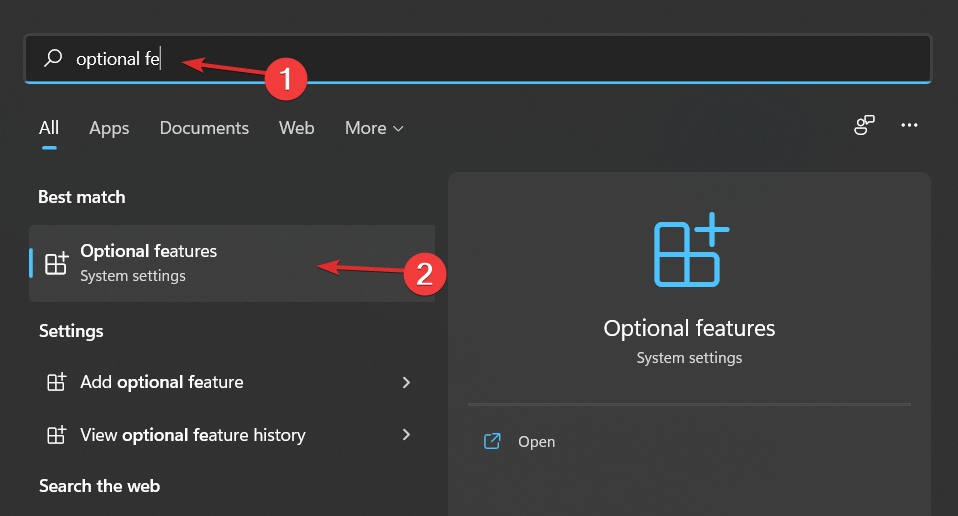
- Press the Windows S key to open the search bar and enter Optional features , then click on the top result to open it.

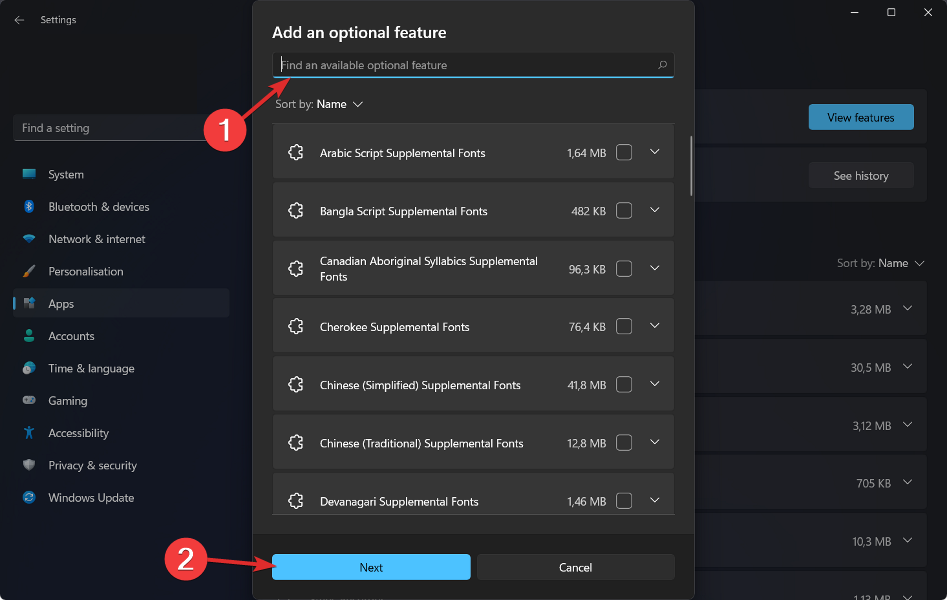
- Next, click Add Optional Features and search for RSAT: Group Policy Management Tool, select it and click Next, then follow the on-screen instructions.
It should be noted that only certain versions of Windows 11, such as Pro and Enterprise, can access Gpedit and GPMC. "Optional Features" is exactly what it sounds like, you are free to enable or disable features as you see fit.
However, adding functionality just for the sake of having it is a waste of time. Some features were developed specifically to give administrators in business or educational environments greater control over computer networks, such as remote access.
Individual machines should not enable these features as there is no need to do so. There are some old Windows tools that are no longer required and are now considered optional. These include programs such as Internet Explorer, Windows Media Player, and WordPad.
2. Using PowerShell
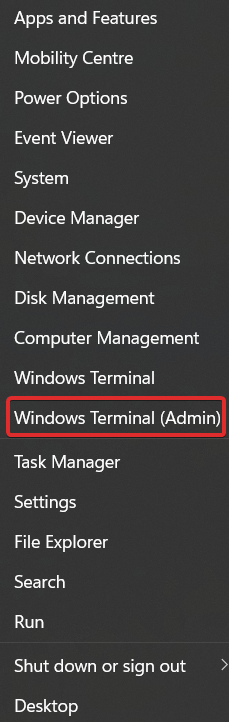
- Right-click the Start icon and click the Windows Terminal (Administrator) option. The PowerShell interface will open as a result.
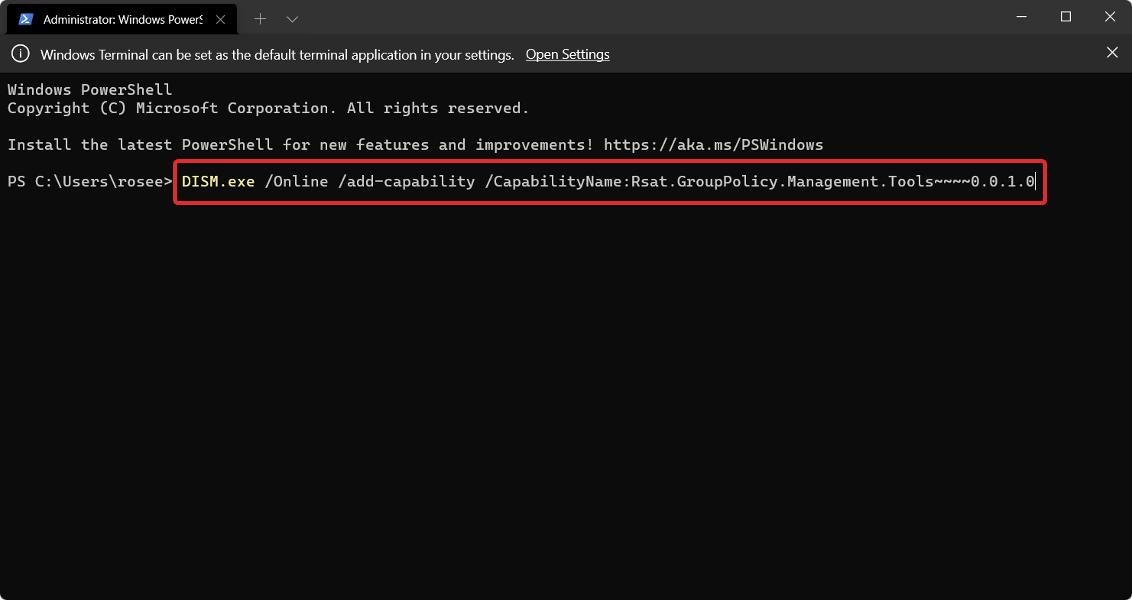
- Type or copy-paste the following command in PowerShell, then press Enter and let it run:
<strong>DISM.exe /Online /add-capability / CapabilityName:Rsat.GroupPolicy.Management.Tools~~~~0.0.1.0</strong>
How to open the Group Policy Management Console in Windows 11?
- Press the Windows R key to open the run box.
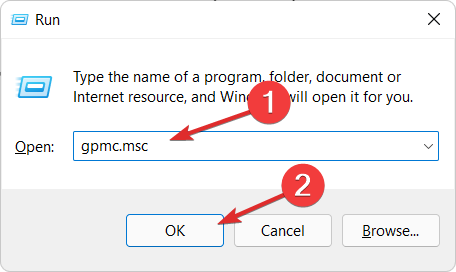
- Now enter gpmc.msc and hit Enter or press OK.
What is the difference between Gpedit MSC and Gpmc MSC?
Group Policy is a Windows feature that lets you manage the activity of accounts, applications, and the operating system itself. It is primarily intended for enterprise use, although it is useful for home users as well.
Settings that apply to a single computer are called single computer settings. While it's possible to build a complete configuration, it's not really useful on its own. Therefore, using Group Policy with Active Directory is a common practice in business environments.
Gpedit MSC is a Windows module or utility that allows administrators and Group Policy Administrators to manage and change them.

The Group Policy Editor terminal is represented by the file name gpedit.msc. It is primarily a graphical user interface for modifying registry keys, with some additional features. Manually editing entries is difficult because they are scattered throughout the registry.
The subfolder named Machine is used to store policies that apply to the computer itself, while the subfolder named User is used to store policies that apply to individual users.
Before the introduction of GPMC, administrators had to use various tools to maintain Group Policy.
It combines the functionality of tools such as Active Directory Users and Computers, Active Directory Sites and Services, Resultant Set of Policy (RSoP), and Access Control List Editor into one convenient package.
In addition to this, it includes a set of scriptable interfaces for managing Group Policy using C/C, allowing developers to create, backup and restore their objects as well as import, copy and rename them . It also allows developers to link GPO and Windows Management Instrumentation filters.
The above is the detailed content of How to install the Group Policy Management Console on Windows 11. For more information, please follow other related articles on the PHP Chinese website!

Hot AI Tools

Undresser.AI Undress
AI-powered app for creating realistic nude photos

AI Clothes Remover
Online AI tool for removing clothes from photos.

Undress AI Tool
Undress images for free

Clothoff.io
AI clothes remover

Video Face Swap
Swap faces in any video effortlessly with our completely free AI face swap tool!

Hot Article
Hot Tools

Notepad++7.3.1
Easy-to-use and free code editor

SublimeText3 Chinese version
Chinese version, very easy to use

Zend Studio 13.0.1
Powerful PHP integrated development environment

Dreamweaver CS6
Visual web development tools

SublimeText3 Mac version
God-level code editing software (SublimeText3)
Hot Topics


 What is the reason why PS keeps showing loading?
Apr 06, 2025 pm 06:39 PM
What is the reason why PS keeps showing loading?
Apr 06, 2025 pm 06:39 PM
PS "Loading" problems are caused by resource access or processing problems: hard disk reading speed is slow or bad: Use CrystalDiskInfo to check the hard disk health and replace the problematic hard disk. Insufficient memory: Upgrade memory to meet PS's needs for high-resolution images and complex layer processing. Graphics card drivers are outdated or corrupted: Update the drivers to optimize communication between the PS and the graphics card. File paths are too long or file names have special characters: use short paths and avoid special characters. PS's own problem: Reinstall or repair the PS installer.
 How to speed up the loading speed of PS?
Apr 06, 2025 pm 06:27 PM
How to speed up the loading speed of PS?
Apr 06, 2025 pm 06:27 PM
Solving the problem of slow Photoshop startup requires a multi-pronged approach, including: upgrading hardware (memory, solid-state drive, CPU); uninstalling outdated or incompatible plug-ins; cleaning up system garbage and excessive background programs regularly; closing irrelevant programs with caution; avoiding opening a large number of files during startup.
 How to solve the problem of loading when PS is always showing that it is loading?
Apr 06, 2025 pm 06:30 PM
How to solve the problem of loading when PS is always showing that it is loading?
Apr 06, 2025 pm 06:30 PM
PS card is "Loading"? Solutions include: checking the computer configuration (memory, hard disk, processor), cleaning hard disk fragmentation, updating the graphics card driver, adjusting PS settings, reinstalling PS, and developing good programming habits.
 Is slow PS loading related to computer configuration?
Apr 06, 2025 pm 06:24 PM
Is slow PS loading related to computer configuration?
Apr 06, 2025 pm 06:24 PM
The reason for slow PS loading is the combined impact of hardware (CPU, memory, hard disk, graphics card) and software (system, background program). Solutions include: upgrading hardware (especially replacing solid-state drives), optimizing software (cleaning up system garbage, updating drivers, checking PS settings), and processing PS files. Regular computer maintenance can also help improve PS running speed.
 How to solve the problem of loading when the PS opens the file?
Apr 06, 2025 pm 06:33 PM
How to solve the problem of loading when the PS opens the file?
Apr 06, 2025 pm 06:33 PM
"Loading" stuttering occurs when opening a file on PS. The reasons may include: too large or corrupted file, insufficient memory, slow hard disk speed, graphics card driver problems, PS version or plug-in conflicts. The solutions are: check file size and integrity, increase memory, upgrade hard disk, update graphics card driver, uninstall or disable suspicious plug-ins, and reinstall PS. This problem can be effectively solved by gradually checking and making good use of PS performance settings and developing good file management habits.
 Is PS slow loading related to other programs that are running?
Apr 06, 2025 pm 06:03 PM
Is PS slow loading related to other programs that are running?
Apr 06, 2025 pm 06:03 PM
The secrets to mastering Office software include: understanding different versions and platforms, correctly installing and configuring, proficient in using the software interface, in-depth understanding of feature operations, application collaboration and sharing functions, utilizing templates and styles, mastering advanced skills, and solving common problems. In addition, you need to choose a version that suits your needs, make good use of templates and styles, develop backup habits, and learn shortcut keys and advanced techniques to improve efficiency.
 How to solve the problem of loading when PS is started?
Apr 06, 2025 pm 06:36 PM
How to solve the problem of loading when PS is started?
Apr 06, 2025 pm 06:36 PM
A PS stuck on "Loading" when booting can be caused by various reasons: Disable corrupt or conflicting plugins. Delete or rename a corrupted configuration file. Close unnecessary programs or upgrade memory to avoid insufficient memory. Upgrade to a solid-state drive to speed up hard drive reading. Reinstalling PS to repair corrupt system files or installation package issues. View error information during the startup process of error log analysis.
 How to use mysql after installation
Apr 08, 2025 am 11:48 AM
How to use mysql after installation
Apr 08, 2025 am 11:48 AM
The article introduces the operation of MySQL database. First, you need to install a MySQL client, such as MySQLWorkbench or command line client. 1. Use the mysql-uroot-p command to connect to the server and log in with the root account password; 2. Use CREATEDATABASE to create a database, and USE select a database; 3. Use CREATETABLE to create a table, define fields and data types; 4. Use INSERTINTO to insert data, query data, update data by UPDATE, and delete data by DELETE. Only by mastering these steps, learning to deal with common problems and optimizing database performance can you use MySQL efficiently.