








优化服务器 dns 解析的核心做法是启用本地缓存并缩短超时时间。通过部署 dnsmasq 或 systemd-resolved,将频繁访问的域名解析结果缓存在内存中,从而减少对外部递归服务器的请求次数。同时,合理设置 timeout 和 attempts 参数,确保在解析失败时能快速切换备用方案,避免应用层长时间阻塞。

dnsmasq 如何配置为本地缓存服务
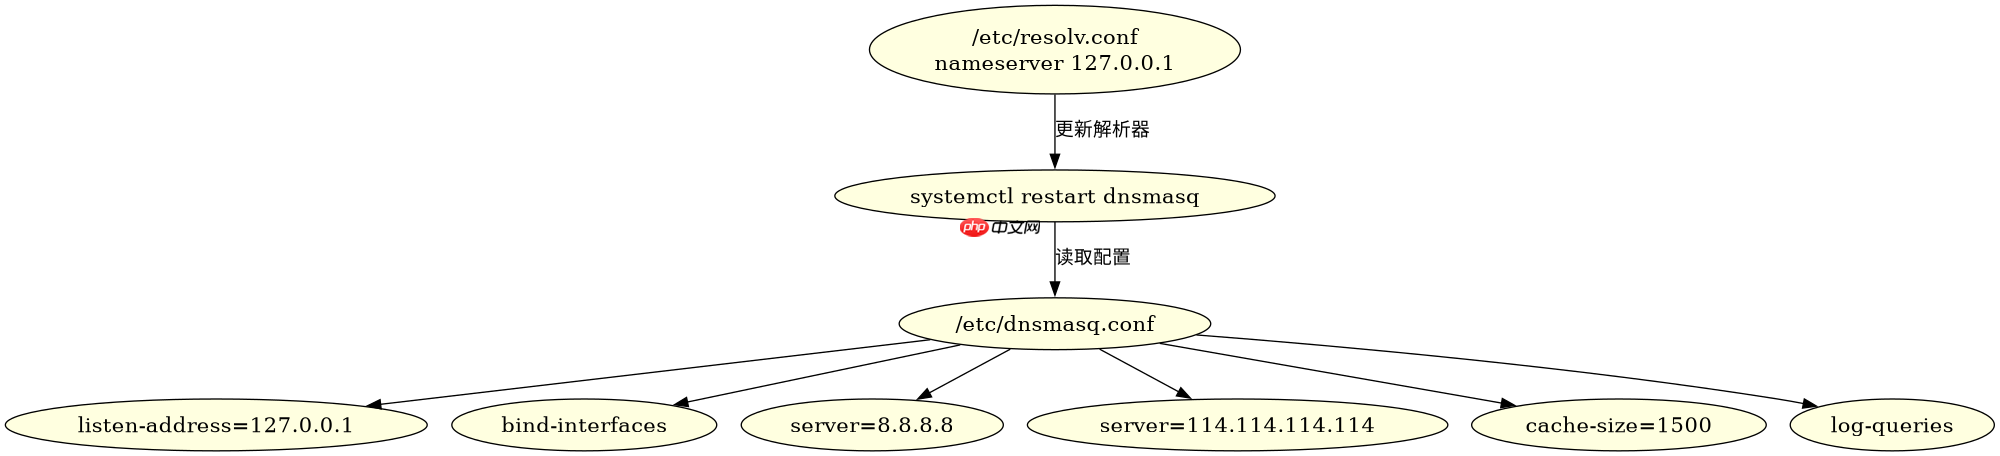
使用 dnsmasq 作为本地 DNS 缓存服务是最常见的优化手段。它监听本地回环地址,应用程序只需将 DNS 查询指向 127.0.0.1,即可享受毫秒级的响应速度。配置时需指定上游公共 DNS 服务器,如 8.8.8.8 和 114.114.114.114,并设置合理的缓存 TTL。
sudo apt-get install dnsmasq
sudo cp /etc/dnsmasq.conf /etc/dnsmasq.conf.bak

cat > /etc/dnsmasq.conf <<EOF
listen-address=127.0.0.1
bind-interfaces
server=8.8.8.8
server=114.114.114.114
cache-size=1500
log-queries
EOF

sudo systemctl restart dnsmasq
sudo systemctl enable dnsmasq

echo "nameserver 127.0.0.1" | sudo tee /etc/resolv.conf
预期结果:首次查询耗时约 50ms(取决于上游网络),后续相同域名的查询耗时低于 1ms。通过 dnsmasq --test 可验证配置语法正确性。

如何调整系统级 DNS 超时与重试策略
除了缓存,调整操作系统的 DNS 客户端行为也能显著降低延迟。在 Linux 系统中,可以通过修改 /etc/gai.conf 来优化 IPv6/IPv4 的回退顺序,或者使用 nsswitch.conf 调整名称服务切换顺序。对于应用层,许多语言运行时允许自定义 DNS 解析器超时时间,例如 Go 语言的 DialContext 或 Python 的 socket.setdefaulttimeout。

# /etc/gai.conf 示例配置
# 优先使用 IPv4,如果失败再尝试 IPv6
precedence ::ffff:0:0/96  100

# 或者使用 systemd-resolved 配置
sudo systemctl edit systemd-resolved
[Service]
Environment="DNSSEC=no"
Environment="LLMNR=no"

sudo systemctl restart systemd-resolved

# 验证当前 DNS 状态
resolvectl status
预期结果:gai.conf 配置生效后可减少因 IPv6 不可用导致的连接延迟。通过 resolvectl 可查看当前使用的 DNS 服务器及缓存命中率。
当上游 DNS 服务器无响应时程序如何处理
当配置的 upstream DNS 服务器无响应时,dnsmasq 会自动切换到下一个配置的服务器,并在 cache-size 未命中时继续尝试。如果所有上游均失败,dnsmasq 会返回 NXDOMAIN 或 SERVFAIL,具体取决于查询类型。应用程序应捕获这些错误并进行重试或降级处理,而不是无限等待。