

-

- Windows10无法打开安全模式命令行提示符怎么办_Windows10安全模式命令行打不开修复方法
- 首先重置系统配置中的引导设置,若无效则修复注册表SafeBoot项,接着可通过强制触发恢复环境直接进入命令提示符,再使用DISM和SFC修复系统文件,最后用安装介质重建MBR与BCD引导记录以恢复安全模式功能。
- Windows系列 . 系统教程 225 2025-10-20 13:34:01
-

- win10系统日志中大量出现“User Profile Service”事件ID 1534警告怎么办_解决用户配置文件服务警告事件的方法
- 首先检查UserProfileService启动类型是否设为自动并确保其正在运行;接着通过注册表编辑器定位HKEY_LOCAL_MACHINE\SOFTWARE\Microsoft\WindowsNT\CurrentVersion\ProfileList,找到对应用户SID,将其State值修改为0以清除无效通知条目;若问题仍存在,则创建新管理员账户,迁移旧账户数据后删除原账户,重建用户配置文件。
- Windows系列 . 系统教程 984 2025-10-20 13:32:02
-

- win10提示“找不到恢复环境”怎么解决 _Win10 找不到恢复环境修复方法
- 首先启用Windows恢复环境,若无效则修复BCD引导配置,最后重建WinRE映像文件。具体步骤:1.管理员运行reagentc/enable启用恢复环境;2.使用bcdedit命令检查并修复恢复路径;3.从正常系统或ISO提取winre.wim至C:\Recovery\WindowsRE,并重新注册。
- Windows系列 . 系统教程 451 2025-10-20 13:15:05
-

- Windows10开机速度特别慢怎么优化_Windows10开机慢优化加速方法
- 首先管理开机启动项,禁用高影响非必要程序;接着启用快速启动功能以缩短关机开机时间;然后优化视觉效果,选择最佳性能释放系统资源;再进行磁盘清理与优化,清除临时文件并执行TRIM(SSD)或碎片整理(HDD);最后通过msconfig调整引导设置,增加处理器个数,缩短超时时间,并在服务管理中禁用ConnectedUserExperiencesandTelemetry等非必要服务,提升启动效率。
- Windows系列 . 系统教程 963 2025-10-20 13:02:01
-

- win11运行虚拟机(VMware/VirtualBox)提示不兼容怎么办_Win11虚拟机运行不兼容解决方法
- 先禁用Hyper-V和核心隔离,再配置虚拟机支持UEFI与TPM,并清除兼容性缓存文件。具体步骤:1.管理员运行bcdedit/sethypervisorlaunchtypeoff并重启;2.在安全中心关闭内存完整性;3.VMware中设置固件为UEFI并启用安全启动;4.添加可信平台模块并加密虚拟机;5.删除C:$WINDOWS.~BT\Sources\Panther下的compatscancache.dat文件。
- Windows系列 . 系统教程 478 2025-10-20 13:00:01
-

- win10无法打开Windows沙盒功能怎么办_恢复沙盒功能正常使用的步骤
- 首先检查并启用Hyper-V与虚拟化支持,确保BIOS中开启VT-x;其次卸载KB4483214等冲突更新;接着使用DISM命令修复系统映像;然后重置组策略配置;最后临时禁用安全软件以排除干扰。
- Windows系列 . 系统教程 606 2025-10-20 12:55:01
-

- windows11怎么关闭UAC用户账户控制_windows11关闭UAC提示的方法
- 1、可通过系统设置将UAC滑块调至“从不通知”以关闭提示;2、控制面板中同样可调整UAC级别至最低;3、本地组策略编辑器可设置管理员权限提示行为为直接提升;4、注册表修改EnableLUA值为0可彻底禁用UAC,需重启生效。
- Windows系列 . 系统教程 647 2025-10-20 12:50:02
-

- win11运行某些旧版软件提示不兼容怎么办_Win11旧版软件兼容性解决方法
- 首先使用程序兼容性疑难解答,若无效则手动设置兼容模式并以管理员身份运行;其次更新软件、驱动及运行库;最后可通过虚拟机运行旧软件。
- Windows系列 . 系统教程 780 2025-10-20 12:28:02
-

- win10“此电脑”中出现多余的设备和驱动器怎么删除 _Win10 此电脑多余设备驱动器删除方法
- 可通过磁盘管理、设备管理器、注册表编辑和组策略四种方法移除Windows10此电脑中多余驱动器图标,提升文件浏览效率。
- Windows系列 . 系统教程 941 2025-10-20 12:17:01
-

- Windows11摄像头打不开提示找不到摄像头0xA00F4244怎么办_Windows11摄像头无法打开修复方法
- 0xA00F4244错误通常由权限、驱动或硬件设置问题引起,首先检查相机隐私权限是否开启,确保应用有访问权限;接着更新或重新安装相机驱动程序,可通过设备管理器操作;运行Windows内置相机疑难解答工具自动修复常见问题;重置相机应用以清除损坏数据;最后检查BIOS中摄像头是否启用,并确认无物理开关关闭摄像头。
- Windows系列 . 系统教程 767 2025-10-20 12:17:01
-

- win11资源管理器地址栏无法输入或搜索怎么办_Win11资源管理器地址栏无法使用修复方法
- 地址栏无法输入或搜索时,可依次尝试重启Windows资源管理器、重启Windows搜索服务、清除搜索索引缓存、重置Windows搜索应用、运行SFC和DISM命令修复系统文件、使用系统内置的“搜索和索引”疑难解答工具,以及创建新用户账户排查配置文件损坏问题。
- Windows系列 . 系统教程 233 2025-10-20 12:10:01
-

- win11安装iTunes提示“发生了一个有关windows installer程序包的错误”怎么办_Win11iTunes安装错误修复方法
- 1、以管理员身份运行iTunes安装程序;2、检查并启动WindowsInstaller服务;3、卸载残留程序并删除Apple相关文件夹;4、使用微软官方修复工具排查安装问题;5、运行sfc和DISM命令修复系统文件。
- Windows系列 . 系统教程 153 2025-10-20 12:03:01
-

- Windows10无法打开“颜色管理”设置怎么办_Windows10颜色管理设置打不开修复方法
- 首先检查并重启WindowsColorSystem服务,确保其启动类型为自动且正在运行;接着使用sfc/scannow命令修复系统文件,若无效则通过DISM工具执行系统映像修复;最后手动注册colorui.dll、mscms.dll和colbatt.dll文件以解决颜色管理无法打开的问题。
- Windows系列 . 系统教程 364 2025-10-20 12:00:01
-

- windows10如何修改注册表_windows10注册表修改教程
- 可通过注册表编辑器、批处理脚本或.reg文件修改Windows10注册表,实现系统深度调整;遇权限问题需先获取所有权并设置完全控制权限。
- Windows系列 . 系统教程 665 2025-10-20 11:40:02
-

- win11添加语言包时一直卡在搜索Windows更新怎么办_win11语言包安装卡在搜索更新解决方法
- 首先运行Windows更新疑难解答,然后重置WindowsUpdate服务并清除SoftwareDistribution缓存,接着使用SFC和DISM命令修复系统文件,最后检查微软商店下载位置是否为系统盘,确保语言包正常添加。
- Windows系列 . 系统教程 680 2025-10-20 11:28:02

PHP讨论组
组员:3305人话题:1500
PHP一种被广泛应用的开放源代码的多用途脚本语言,和其他技术相比,php本身开源免费; 可以将程序嵌入于HTML中去执行, 执行效率比完全生成htmL标记的CGI要高许多,它运行在服务器端,消耗的系统资源相当少,具有跨平台强、效率高的特性,而且php支持几乎所有流行的数据库以及操作系统,最重要的是


工具推荐


cqcms蓝色通用企业网站源码(带手机端)2.9
cqcms通用企业建站介绍 cqcms蓝色通用企业网站源码(带手机端)后台非常简单,一个后台同时管理PC和wap。把图片和文字稍加修改,就可以使用。适合任何企业网站 安装步骤: 1、下载文件,并且解压到网站的根目录,配置好apache/IIS虚拟主机以及伪静态;2、安装网址http://localhost/(localhost为您网址地址)3、网站后台入口 http://localhost/admin/index.php4、环境要求:PHP + Mysql5、伪静态安装Apache Web Serve
企业站源码
2025-10-27

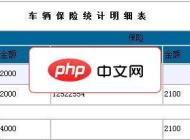
白月工作室车辆与车辆保险管理系统GBK1.0
本系统是为四川九寨运业所定制的车辆保险管理与报表管理系统。其主要的功能是对车辆的管理与保险的管理:车辆管理:1、车辆的增加编辑与修改,以及承包和驾驶员信息2、车辆的报废(删除)保险管理:1、针对车辆的保险增加2、针对车辆的保险编辑和修改3、保险报表用户管理:1、简单的用户管理,单级权限用户名:admin密码:123456
企业站源码
2025-10-27


万圣节主题活动方形海报ps素材下载
万圣节主题活动方形海报ps素材适用于万圣节主题活动海报设计 本作品提供万圣节主题活动方形海报ps素材的图片会员免费下载,格式为PSD,文件大小为34.0M; 请使用软件Photoshop进行编辑,作品中文字及图均可以通过软件修改和编辑;
psd素材
2025-10-27


休闲运动鞋折扣海报PSD素材下载
休闲运动鞋折扣海报PSD素材适用于运动鞋折扣海报设计 本作品提供休闲运动鞋折扣海报PSD素材的图片会员免费下载,格式为PSD,文件大小为24.2M; 请使用软件Photoshop进行编辑,作品中文字及图均可以通过软件修改和编辑;
psd素材
2025-10-27

驾照考试驾校HTML5网站模板
驾照考试驾校HTML5网站模板是一款适合提供驾驶培训和组织驾照考试服务机构宣传网站模板下载。提示:本模板调用到谷歌字体库,可能会出现页面打开比较缓慢。
前端模板
2025-06-10

驾照培训服务机构宣传网站模板
驾照培训服务机构宣传网站模板是一款适合提供一般驾驶和计划培训的驾校宣传网站模板下载。提示:本模板调用到谷歌字体库,可能会出现页面打开比较缓慢。
前端模板
2025-01-07


HTML5房地产公司宣传网站模板
HTML5房地产公司宣传网站模板是一款适合从事房地产服务行业宣传网站模板下载。提示:本模板调用到谷歌字体库,可能会出现页面打开比较缓慢。
前端模板
2025-01-06


