








在 spring boot 中配置 service 层依赖注入,核心做法是在 service 实现类上添加 @service 注解,并在需要使用的地方通过 @autowired 或构造器注入该 bean。spring 容器会自动扫描并注册这些组件,开发者只需声明依赖字段即可使用,无需手动实例化对象。

如何自动发现并注册 Service 实现类
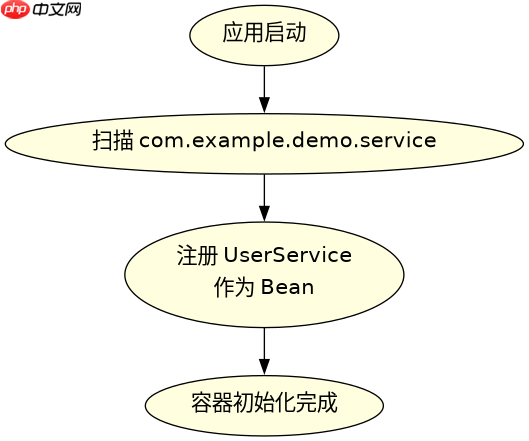
要让 Service 层被 Spring 管理,必须在类路径下定义带有 @Service 注解的类。Spring Boot 的 @SpringBootApplication 默认开启了组件扫描,它会查找 @Component 及其衍生注解(包括 @Service)。只要类名符合规范且位于启动类包或其子包下,容器就会自动将其注册为单例 Bean。这种机制消除了传统 XML 配置的繁琐,使得业务逻辑层的加载变得透明且自动化。
package com.example.demo.service;

import org.springframework.stereotype.Service;

@Service
public class UserService {
    public String getUserInfo() {
        return "User Data";
    }
}
上述代码展示了最基础的 Service 定义。当应用启动时,Spring 会识别 @Service 注解,并将 UserService 实例放入 IoC 容器中。此时,该类已经具备了被其他组件依赖注入的条件。开发者不需要编写任何额外的配置类来显式注册它,除非使用了非标准包结构或需要自定义 Bean 名称。

设置基于 systemd 的看门狗,使 Node.js 长运行服务(如 Telegram 机器人、Express 仪表盘等)在 shell 退出、SSH 断开等情况下保持运行。
如何在 Controller 中注入 Service 实例
在 Controller 或其他组件中使用 Service 时,推荐使用构造器注入方式。这种方式不仅代码更简洁,而且能保证依赖不可变,便于单元测试。通过在构造函数参数前添加 @Autowired(或在 Spring 4.3+ 中若只有一个构造函数可省略注解),Spring 会在创建 Controller 实例时自动传入已初始化的 Service 对象。这确保了在使用 Service 方法前,其所有依赖都已就绪。

package com.example.demo.controller;

import org.springframework.beans.factory.annotation.Autowired;
import org.springframework.web.bind.annotation.GetMapping;
import org.springframework.web.bind.annotation.RestController;

@RestController
public class UserController {
    private final UserService userService;

    @Autowired
    public UserController(UserService userService) {
        this.userService = userService;
    }

    @GetMapping("/user")
    public String getUser() {
        return userService.getUserInfo();
    }
}
这段代码演示了 Controller 如何通过构造器接收 UserService。当请求到达 /user 接口时,Controller 内部持有的 userService 引用指向的是容器中那个唯一的单例实例。这种注入方式避免了字段注入可能导致的循环依赖问题,同时也让类的依赖关系在构造函数签名中一目了然,提升了代码的可读性和健壮性。
如果 Service 依赖另一个 Service 会发生什么
当 Service A 依赖 Service B 时,Spring 会通过递归解析依赖链来完成初始化。只要在 Service A 中声明了对 Service B 的依赖,Spring 就会先确保 Service B 被创建并注入到 A 中。这种嵌套注入是 Spring 的核心特性之一,它允许构建复杂的业务逻辑网络。需要注意的是,如果存在循环依赖(A 依赖 B,B 又依赖 A),Spring 默认会抛出异常,除非使用 @Lazy 注解或开启三级缓存支持来解决。