
 Web Front-end
JS Tutorial
Detailed explanation of automatic refresh and parsing steps using webpack
Web Front-end
JS Tutorial
Detailed explanation of automatic refresh and parsing steps using webpack
Detailed explanation of automatic refresh and parsing steps using webpack
This time I will give you a detailed explanation of the steps of automatic refreshing and parsing using webpack. What are the precautions for using webpack to automatically refresh and parse. The following is a practical case, let's take a look.
The front end needs to frequently modify js and styles, and needs to be constantly adjusted according to the browser's page effect; and often our development directory and the local release directory are not the same, and we need to publish them after modification; another point That is, not all effects can be seen directly by double-clicking the page. We often need to use nginx to build a site locally to observe (it is ok on our own computer before putting it into the test environment). So if you have to manually refresh the browser and manually (or click) publish, and start the site, it is indeed a lot of physical work. And these three points webpack can help us do it.
webpack-dev-serverwebpack
realizes automatic refresh through webpack-dev-server (WDS). WDS is a development server (an express) running in memory. After starting, it will detect whether the file has changed and automatically compile again.
1. Installation
npm install webpack-dev-server --save-dev
First install it to the development directory through npm. After the installation is complete, it will be found under node_modules/bin.
2.npm start
Then modify package.json: (based on the previous section)
"scripts": {
  "start": "webpack-dev-server --env development",
  "build": "webpack --env production"
}You can now run start through npm or npm start to start.
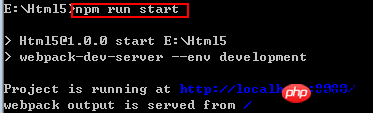
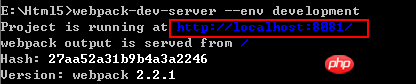
After starting, you can see that Project is running at http://localhost:8080. Opening the page
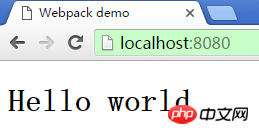
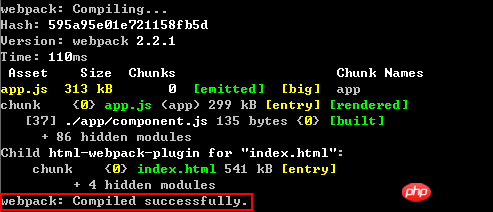
shows that WDS has automatically built a site for us. We modify component.js, compilation will appear in cmd, and the page will automatically refresh.
3. Start WDS directly
The official website introduces that you can start WDS directly through the following command.
webpack-dev-server --env development
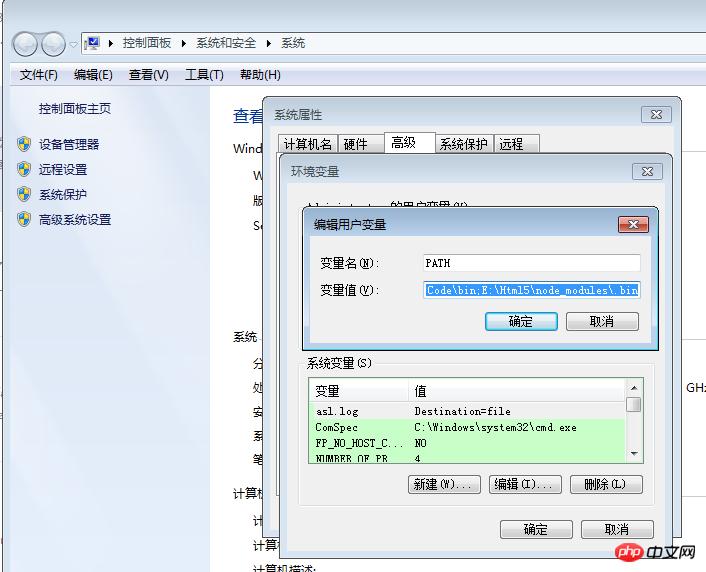
But there will be a prompt that webpack-dev-server --env development is not an internal command. This kind of problem is a problem with environment variables. Just set the bin directory you developed to the environment variable, such as My directory is 'E:\Html5\node_modules\.bin', just add a semicolon at the end.
C:\Users\Administrator.9BBOFZPACSCXLG2\AppData\Roaming\npm;C:\Program Files (x86)\Microsoft VS Code\bin;E:\Html5\node_modules\.bin
4.8080 port occupation
If the default 8080 port is occupied, WDS will change it. For example, use nginx to publish one first.
server{
   listen    8080;
   location / {
      root  E:/Html5/build;
      index index.html index.htm;
    }
}Restart WDS:
The port is switched to 8081. You can also manually configure the port:
 devServer:{
  //...
  port: 9000
}nodemon automatic startup
WDS monitors development files, and changes in webpack.config.js will not cause automatic startup. So we need nodemon to do this.
npm install nodemon --save-dev
First install it in the development directory, and then modify package.json:
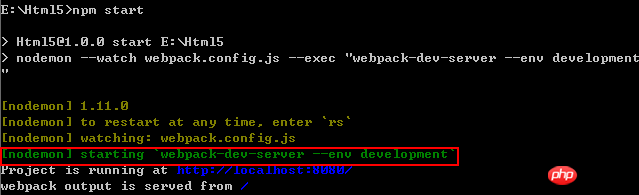
 "scripts": {
  "start": "nodemon --watch webpack.config.js --exec \"webpack-dev-server --env development\"",
  "build": "webpack --env production"
},It is equivalent to letting nodemon monitor webpack.config.js and start it if it changes.
This way you can let your hands concentrate on development.
Agent
But I have a little doubt about the substitutability of the WDS site, because the nginx we deployed ourselves has some API proxies. If it is hung on the default site of WDS, it will naturally be inaccessible. In other words, can you configure a refresh path for WDS? If the file changes, refresh the specified address, or ask me to configure a proxy. Since it is an http server itself, it must also have proxy functions. After searching, it turned out to be: https://github.com/webpack/webpack-dev-server/tree/master/examples/proxy-advanced
module.exports = {
  context: dirname,
  entry: "./app.js",
  devServer: {
    proxy: {
      "/api": {
        target: "http://jsonplaceholder.typicode.com/",
        changeOrigin: true,
        pathRewrite: {
          "^/api": ""
        },
        bypass: function(req) {
          if(req.url === "/api/nope") {
            return "/bypass.html";
          }
        }
      }
    }
  }
}即将api这个字段替换成http://jsonplaceholder.typicode.com/,并将其从原地址中删掉,这样就可以自己实现代理了。皆大欢喜!WDS是通过http-proxy-middleware来实现代理。更多参考:http://webpack.github.io/docs/webpack-dev-server.html;https://github.com/chimurai/http-proxy-middleware#options
but,这种刷新是怎么实现的呢?因为页面上没有嵌入什么别的js,去翻原码 web-dev-server/server.js中有这么一段:
Server.prototype._watch = function(path) {
  const watcher = chokidar.watch(path).on("change", function() {
    this.sockWrite(this.sockets, "content-changed");
  }.bind(this))
  this.contentBaseWatchers.push(watcher);
}用chokidar来监视文件变化,server的内部维护的有一个socket集合:
Server.prototype.sockWrite = function(sockets, type, data) {
  sockets.forEach(function(sock) {
    sock.write(JSON.stringify({
      type: type,
      data: data
    }));
  });
}sock是一个sockjs对象。https://github.com/sockjs/sockjs-client,从http://localhost:8080/webpack-dev-server/页面来看,sockjs是用来通信记录日志的。
var onSocketMsg = {
  hot: function() {
    hot = true;
    log("info", "[WDS] Hot Module Replacement enabled.");
  },
  invalid: function() {
    log("info", "[WDS] App updated. Recompiling...");
    sendMsg("Invalid");
  },
  hash: function(hash) {
    currentHash = hash;
  },
...
}我们在看app.js,其中有一个OnSocketMsg 对象。
var onSocketMsg = {
  hot: function() {
    hot = true;
    log("info", "[WDS] Hot Module Replacement enabled.");
  },
  invalid: function() {
    log("info", "[WDS] App updated. Recompiling...");
    sendMsg("Invalid");
  },
  hash: function(hash) {
    currentHash = hash;
  },
  "still-ok": function() {
    log("info", "[WDS] Nothing changed.")
    if(useWarningOverlay || useErrorOverlay) overlay.clear();
    sendMsg("StillOk");
  },
  "log-level": function(level) {
    logLevel = level;
  },
  "overlay": function(overlay) {
    if(typeof document !== "undefined") {
      if(typeof(overlay) === "boolean") {
        useWarningOverlay = overlay;
        useErrorOverlay = overlay;
      } else if(overlay) {
        useWarningOverlay = overlay.warnings;
        useErrorOverlay = overlay.errors;
      }
    }
  },
  ok: function() {
    sendMsg("Ok");
    if(useWarningOverlay || useErrorOverlay) overlay.clear();
    if(initial) return initial = false;
    reloadApp();
  },
  "content-changed": function() {
    log("info", "[WDS] Content base changed. Reloading...")
    self.location.reload();
  },
  warnings: function(warnings) {
    log("info", "[WDS] Warnings while compiling.");
    var strippedWarnings = warnings.map(function(warning) {
      return stripAnsi(warning);
    });
    sendMsg("Warnings", strippedWarnings);
    for(var i = 0; i < strippedWarnings.length; i++)
      console.warn(strippedWarnings[i]);
    if(useWarningOverlay) overlay.showMessage(warnings);
    if(initial) return initial = false;
    reloadApp();
  },
  errors: function(errors) {
    log("info", "[WDS] Errors while compiling. Reload prevented.");
    var strippedErrors = errors.map(function(error) {
      return stripAnsi(error);
    });
    sendMsg("Errors", strippedErrors);
    for(var i = 0; i < strippedErrors.length; i++)
      console.error(strippedErrors[i]);
    if(useErrorOverlay) overlay.showMessage(errors);
  },
  close: function() {
    log("error", "[WDS] Disconnected!");
    sendMsg("Close");
  }
};ok的时候触发一个reloadApp
function reloadApp() {
  if(hot) {
    log("info", "[WDS] App hot update...");
    var hotEmitter = webpack_require("./node_modules/webpack/hot/emitter.js");
    hotEmitter.emit("webpackHotUpdate", currentHash);
    if(typeof self !== "undefined") {
      // broadcast update to window
      self.postMessage("webpackHotUpdate" + currentHash, "*");
    }
  } else {
    log("info", "[WDS] App updated. Reloading...");
    self.location.reload();
  }
}也就是说WDS先检测文件是否变化,然后通过sockjs通知到客户端,这样就实现了刷新。之前WebSocket的第三方只用过socket.io,看起来sockjs也蛮好用的。不必外带一个js,在主js里面就可以写了。
小结:效率提高的一方面是将一些机械的重复性流程或动作自动化起来。WDS和nodemon就是两个为你干活的小弟。
相信看了本文案例你已经掌握了方法,更多精彩请关注php中文网其它相关文章!
推荐阅读:
The above is the detailed content of Detailed explanation of automatic refresh and parsing steps using webpack. For more information, please follow other related articles on the PHP Chinese website!

Hot AI Tools

Undresser.AI Undress
AI-powered app for creating realistic nude photos

AI Clothes Remover
Online AI tool for removing clothes from photos.

Undress AI Tool
Undress images for free

Clothoff.io
AI clothes remover

Video Face Swap
Swap faces in any video effortlessly with our completely free AI face swap tool!

Hot Article
Hot Tools

Notepad++7.3.1
Easy-to-use and free code editor

SublimeText3 Chinese version
Chinese version, very easy to use

Zend Studio 13.0.1
Powerful PHP integrated development environment

Dreamweaver CS6
Visual web development tools

SublimeText3 Mac version
God-level code editing software (SublimeText3)
Hot Topics


 A deep dive into the meaning and usage of HTTP status code 460
Feb 18, 2024 pm 08:29 PM
A deep dive into the meaning and usage of HTTP status code 460
Feb 18, 2024 pm 08:29 PM
In-depth analysis of the role and application scenarios of HTTP status code 460 HTTP status code is a very important part of web development and is used to indicate the communication status between the client and the server. Among them, HTTP status code 460 is a relatively special status code. This article will deeply analyze its role and application scenarios. Definition of HTTP status code 460 The specific definition of HTTP status code 460 is "ClientClosedRequest", which means that the client closes the request. This status code is mainly used to indicate
 iBatis and MyBatis: Comparison and Advantage Analysis
Feb 18, 2024 pm 01:53 PM
iBatis and MyBatis: Comparison and Advantage Analysis
Feb 18, 2024 pm 01:53 PM
iBatis and MyBatis: Differences and Advantages Analysis Introduction: In Java development, persistence is a common requirement, and iBatis and MyBatis are two widely used persistence frameworks. While they have many similarities, there are also some key differences and advantages. This article will provide readers with a more comprehensive understanding through a detailed analysis of the features, usage, and sample code of these two frameworks. 1. iBatis features: iBatis is an older persistence framework that uses SQL mapping files.
 Detailed explanation of Oracle error 3114: How to solve it quickly
Mar 08, 2024 pm 02:42 PM
Detailed explanation of Oracle error 3114: How to solve it quickly
Mar 08, 2024 pm 02:42 PM
Detailed explanation of Oracle error 3114: How to solve it quickly, specific code examples are needed. During the development and management of Oracle database, we often encounter various errors, among which error 3114 is a relatively common problem. Error 3114 usually indicates a problem with the database connection, which may be caused by network failure, database service stop, or incorrect connection string settings. This article will explain in detail the cause of error 3114 and how to quickly solve this problem, and attach the specific code
 Parsing Wormhole NTT: an open framework for any Token
Mar 05, 2024 pm 12:46 PM
Parsing Wormhole NTT: an open framework for any Token
Mar 05, 2024 pm 12:46 PM
Wormhole is a leader in blockchain interoperability, focused on creating resilient, future-proof decentralized systems that prioritize ownership, control, and permissionless innovation. The foundation of this vision is a commitment to technical expertise, ethical principles, and community alignment to redefine the interoperability landscape with simplicity, clarity, and a broad suite of multi-chain solutions. With the rise of zero-knowledge proofs, scaling solutions, and feature-rich token standards, blockchains are becoming more powerful and interoperability is becoming increasingly important. In this innovative application environment, novel governance systems and practical capabilities bring unprecedented opportunities to assets across the network. Protocol builders are now grappling with how to operate in this emerging multi-chain
 Analysis of the meaning and usage of midpoint in PHP
Mar 27, 2024 pm 08:57 PM
Analysis of the meaning and usage of midpoint in PHP
Mar 27, 2024 pm 08:57 PM
[Analysis of the meaning and usage of midpoint in PHP] In PHP, midpoint (.) is a commonly used operator used to connect two strings or properties or methods of objects. In this article, we’ll take a deep dive into the meaning and usage of midpoints in PHP, illustrating them with concrete code examples. 1. Connect string midpoint operator. The most common usage in PHP is to connect two strings. By placing . between two strings, you can splice them together to form a new string. $string1=&qu
 How to enable administrative access from the cockpit web UI
Mar 20, 2024 pm 06:56 PM
How to enable administrative access from the cockpit web UI
Mar 20, 2024 pm 06:56 PM
Cockpit is a web-based graphical interface for Linux servers. It is mainly intended to make managing Linux servers easier for new/expert users. In this article, we will discuss Cockpit access modes and how to switch administrative access to Cockpit from CockpitWebUI. Content Topics: Cockpit Entry Modes Finding the Current Cockpit Access Mode Enable Administrative Access for Cockpit from CockpitWebUI Disabling Administrative Access for Cockpit from CockpitWebUI Conclusion Cockpit Entry Modes The cockpit has two access modes: Restricted Access: This is the default for the cockpit access mode. In this access mode you cannot access the web user from the cockpit
 Analysis of new features of Win11: How to skip logging in to Microsoft account
Mar 27, 2024 pm 05:24 PM
Analysis of new features of Win11: How to skip logging in to Microsoft account
Mar 27, 2024 pm 05:24 PM
Analysis of new features of Win11: How to skip logging in to a Microsoft account. With the release of Windows 11, many users have found that it brings more convenience and new features. However, some users may not like having their system tied to a Microsoft account and wish to skip this step. This article will introduce some methods to help users skip logging in to a Microsoft account in Windows 11 and achieve a more private and autonomous experience. First, let’s understand why some users are reluctant to log in to their Microsoft account. On the one hand, some users worry that they
 Apache2 cannot correctly parse PHP files
Mar 08, 2024 am 11:09 AM
Apache2 cannot correctly parse PHP files
Mar 08, 2024 am 11:09 AM
Due to space limitations, the following is a brief article: Apache2 is a commonly used web server software, and PHP is a widely used server-side scripting language. In the process of building a website, sometimes you encounter the problem that Apache2 cannot correctly parse the PHP file, causing the PHP code to fail to execute. This problem is usually caused by Apache2 not configuring the PHP module correctly, or the PHP module being incompatible with the version of Apache2. There are generally two ways to solve this problem, one is
