

How to reference verification code in Vue project
This time I will show you how to quote the verification code in the Vue project. What are the precautions for quoting the verification code in the Vue project. The following is a practical case, let's take a look.
What is Tencent verification code? It looks like this...:point_down:

Recent company projects require the introduction of Tencent Cloud verification. The requirements are as follows: In order to prevent others from maliciously swiping SMS verification codes, when users short When you get the verification code multiple times within a certain period of time, you need to call Tencent Verification Code. After the verification is successful, the verification code will continue to be sent automatically. At first, I was confused. There were not many related articles in the online search. However, now I am connected. La, discovery is a very simple thing (perhaps because it is too simple, so no one writes 2333...)
Not much BB, let’s get started!
Let’s first look at the interface calling process of the document:

(Document address: cloud.tencent.com/document/pr… )
It is divided into several small steps:
The background goes to Tencent Cloud to obtain a JS address;
-
The background passes it to the front end through the interface;
The front end loads the verification code based on the JS address;
After successful verification, you will get a ticket (which is a bunch of strings ), and then pass it to the background;
Backend verification ticket, if passed, you will receive a SMS (or email) verification code.
If we don’t care about the backend, what do we need to do on the front end?
First add a label: point_down: in the .vue component that needs to introduce Tencent verification code:
Then when you frequently call the interface for sending text messages until the Tencent verification code is triggered (this judgment is told to you by the background, for example, the interface in our project passes There is an isShow variable in the JSON parameter. If it is equal to 1, Tencent Cloud verification will be triggered. The default state is 0, which means that Tencent verification is not required. Please ask your backend for the specific situation, manual operation is funny)

The picture above is the actual interface callback in our project. You can see that there is a Js address and businessId in the callback;
This Js address is how you get cloud verification. You need to write a method to dynamically add this Js to the body tag: point_down::

The parameter src is to pass the Js address when calling the verification code interface to return data. come over.
The capInit function is only available when you introduce JS, otherwise an error will be reported, so set a delay (the code is relatively simple, you can use promise).
Then this callbackCallback function is that after user verification, this function will be called and the json format verification parameters will be passed in. :point_down:
//回调函数:验证码页面关闭时回调
cbfn(res) {
 if (res.ret == 0) {
  // 用户验证成功,获取到ticket,然后你需要将这个ticket和之前的businessId一起传给后台
  // 若后台验证成功,用户就可以收到验证码了,无需你再做其他操作
  alert(res.ticket);
  capDestroy()
 }
 else {
  //用户关闭验证码页面,没有验证
  capDestroy() //销毁之前创建的script标签
 }
}Repeat: The user is authenticated successfully and the ticket is obtained. Then you need to pass this ticket and the previous businessId to the backend. If the background verification is successful, the user can receive the verification code without you needing to do other operations
Finally (copy)capInit(iframe_p, options) This function, options is a Json object, multiple parameters can be set. :point_down:
1. iframe_p (required): element that embeds the verification code iframe.
2. options: {callback:xxx,showheader:xxx, themeColor:xxxxxx,type:"embed"}, json format object
callback: Verification code page closing callback function . After the user is authenticated, this function will be called and the json format verification parameters will be passed in.
{ret:xxx,ticket:"xxx"}
ret=0 means the user verification is completed and the business can verify the ticket;
ret=1 means the user has not been verified Verification code, there is no ticket parameter at this time.
Parameter ticket needs to be submitted to the business backend. For specific fields to fill in, please refer to the backend server development section later.
themeColor: Set the theme color of the page, the value is a hexadecimal color, such as ff572d. After setting, the buttons and icons on the page will change to the set color
showHeader
: Display the header of the verification code page (return and help, only valid for mobile pages)false: Do not display
type: Optional option on the PC side to configure the style of the verification code. For specific style performance, please check the official website of the verification code
"point": Triggered (default)
"embed": Embedded
"popup": Pop-up style
pos: Set the position attribute of the pop-up verification code. This parameter is only valid for PC pop-up verification code
absolute: Absolute positioning
fixed: relative Absolute positioning of the browser window
static: static positioning
relative: relative positioning
keepOpen: set the page attributes that pass the verification
false: pass the verification Refresh (default)
lang: Set verification code language type
Simplified Chinese: 2052 (default)
Traditional Chinese: 1028
English: 1033
Remember to call capDestroy() in time to destroy the script tag you created, otherwise there will be many script tags...
The document says it is before calling capInit() Call capDestroy(), but I tried it, but it didn't work, so I finally put it in the callback. Regardless of whether the verification is successful or the user has not verified, and the verification pop-up window is closed, capDestroy() is called.
I believe you have mastered the method after reading the case in this article. For more exciting information, please pay attention to other related articles on the php Chinese website!
Recommended reading:
How to upgrade vue cli to webapck4
vue todo-list component case details
vue-cli 3.0 What beginners need to know
The above is the detailed content of How to reference verification code in Vue project. For more information, please follow other related articles on the PHP Chinese website!

Hot AI Tools

Undresser.AI Undress
AI-powered app for creating realistic nude photos

AI Clothes Remover
Online AI tool for removing clothes from photos.

Undress AI Tool
Undress images for free

Clothoff.io
AI clothes remover

Video Face Swap
Swap faces in any video effortlessly with our completely free AI face swap tool!

Hot Article
Hot Tools

Notepad++7.3.1
Easy-to-use and free code editor

SublimeText3 Chinese version
Chinese version, very easy to use

Zend Studio 13.0.1
Powerful PHP integrated development environment

Dreamweaver CS6
Visual web development tools

SublimeText3 Mac version
God-level code editing software (SublimeText3)
Hot Topics


 How to set up the keyboard boot function on a GIGABYTE motherboard (enable keyboard boot mode on GIGABYTE motherboard)
Dec 31, 2023 pm 05:15 PM
How to set up the keyboard boot function on a GIGABYTE motherboard (enable keyboard boot mode on GIGABYTE motherboard)
Dec 31, 2023 pm 05:15 PM
How to set up keyboard startup on Gigabyte's motherboard. First, if it needs to support keyboard startup, it must be a PS2 keyboard! ! The setting steps are as follows: Step 1: Press Del or F2 to enter the BIOS after booting, and go to the Advanced (Advanced) mode of the BIOS. Ordinary motherboards enter the EZ (Easy) mode of the motherboard by default. You need to press F7 to switch to the Advanced mode. ROG series motherboards enter the BIOS by default. Advanced mode (we use Simplified Chinese to demonstrate) Step 2: Select to - [Advanced] - [Advanced Power Management (APM)] Step 3: Find the option [Wake up by PS2 keyboard] Step 4: This option The default is Disabled. After pulling down, you can see three different setting options, namely press [space bar] to turn on the computer, press group
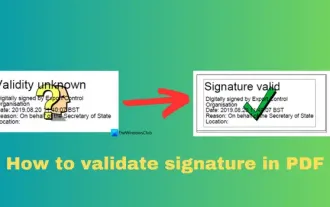 How to verify signature in PDF
Feb 18, 2024 pm 05:33 PM
How to verify signature in PDF
Feb 18, 2024 pm 05:33 PM
We usually receive PDF files from the government or other agencies, some with digital signatures. After verifying the signature, we see the SignatureValid message and a green check mark. If the signature is not verified, the validity is unknown. Verifying signatures is important, let’s see how to do it in PDF. How to Verify Signatures in PDF Verifying signatures in PDF format makes it more trustworthy and the document more likely to be accepted. You can verify signatures in PDF documents in the following ways. Open the PDF in Adobe Reader Right-click the signature and select Show Signature Properties Click the Show Signer Certificate button Add the signature to the Trusted Certificates list from the Trust tab Click Verify Signature to complete the verification Let
 Detailed method to unblock using WeChat friend-assisted verification
Mar 25, 2024 pm 01:26 PM
Detailed method to unblock using WeChat friend-assisted verification
Mar 25, 2024 pm 01:26 PM
1. After opening WeChat, click the search icon, enter WeChat team, and click the service below to enter. 2. After entering, click the self-service tool option in the lower left corner. 3. After clicking, in the options above, click the option of unblocking/appealing for auxiliary verification.
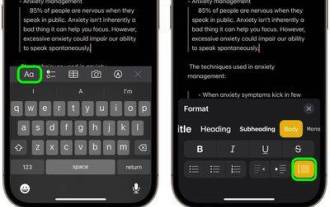 How to use block quotes in Apple Notes
Oct 12, 2023 pm 11:49 PM
How to use block quotes in Apple Notes
Oct 12, 2023 pm 11:49 PM
In iOS 17 and macOS Sonoma, Apple has added new formatting options for Apple Notes, including block quotes and a new Monostyle style. Here's how to use them. With additional formatting options in Apple Notes, you can now add block quotes to your notes. The block quote format makes it easy to visually offset sections of writing using the quote bar to the left of the text. Just tap/click the "Aa" format button and select the block quote option before typing or when you are on the line you want to convert to a block quote. This option applies to all text types, style options, and lists, including checklists. In the same Format menu you can find the new Single Style option. This is a revision of the previous "equal-width"
 C++ compilation error: undefined reference, how to solve it?
Aug 21, 2023 pm 08:52 PM
C++ compilation error: undefined reference, how to solve it?
Aug 21, 2023 pm 08:52 PM
C++ is a popular programming language, but during use, the compilation error "undefined reference" often occurs, which brings a lot of trouble to program development. This article will discuss the solution to the "undefined reference" error from both the cause and the solution. 1. Cause of error When the C++ compiler compiles a source file, it will be divided into two stages: the compilation stage and the link stage. The compilation phase converts the source code in the source files into assembly code, while the linking phase combines different source files into an executable file.
 How to validate IFSC code using regular expressions?
Aug 26, 2023 pm 10:17 PM
How to validate IFSC code using regular expressions?
Aug 26, 2023 pm 10:17 PM
Indian Financial System Code is the abbreviation. Indian bank branches participating in the electronic funds transfer system are identified by a special 11-character code. The Reserve Bank of India uses this code in internet transactions to transfer funds between banks. IFSC code is divided into two parts. Banks are identified by the first four characters, while branches are identified by the last six characters. NEFT (National Electronic Funds Transfer), RTGS (Real Time Gross Settlement) and IMPS (Immediate Payment Service) are some of the electronic transactions that require IFSC codes. Method Some common ways to validate IFSC codes using regular expressions are: Check if the length is correct. Check the first four characters. Checkthefifthcharacter.Che
 New features in PHP 8: Added verification and signing
Mar 27, 2024 am 08:21 AM
New features in PHP 8: Added verification and signing
Mar 27, 2024 am 08:21 AM
PHP8 is the latest version of PHP, bringing more convenience and functionality to programmers. This version has a special focus on security and performance, and one of the noteworthy new features is the addition of verification and signing capabilities. In this article, we'll take a closer look at these new features and their uses. Verification and signing are very important security concepts in computer science. They are often used to ensure that the data transmitted is complete and authentic. Verification and signatures become even more important when dealing with online transactions and sensitive information because if someone is able to tamper with the data, it could potentially
 How to enable direct connection of independent graphics card on Shenzhou Xuanlong m7e8s3?
Jan 04, 2024 am 09:24 AM
How to enable direct connection of independent graphics card on Shenzhou Xuanlong m7e8s3?
Jan 04, 2024 am 09:24 AM
How to enable the direct connection of the independent graphics card of the Shenzhou Xuanlong m7. To enable the direct connection function of the independent graphics card of the Shenzhou Xuanlong m7, you can follow the following steps: 1. First, make sure that you have installed the driver of the independent graphics card. You can go to the official Shenzhou website or the official website of the independent graphics card manufacturer to download and install the latest driver suitable for your graphics card model. 2. On the computer desktop, right-click a blank space and select "NVIDIA Control Panel" in the pop-up menu (if it is an AMD graphics card, select "AMDRadeon Settings"). 3. In the control panel, find "3D Settings" or a similarly named option and click to enter. 4. In "3D Settings" you need to find "Global Settings" or a similarly named option. Here you can specify the use of a unique
