

深度学习有哪些好玩的且易于实现的论文?

擅长python,theano,keras框架,求大神介绍一些新鲜的好玩的论文,注:画画的已经实现了。

Hot AI Tools

Undresser.AI Undress
AI-powered app for creating realistic nude photos

AI Clothes Remover
Online AI tool for removing clothes from photos.

Undress AI Tool
Undress images for free

Clothoff.io
AI clothes remover

Video Face Swap
Swap faces in any video effortlessly with our completely free AI face swap tool!

Hot Article
Hot Tools

Notepad++7.3.1
Easy-to-use and free code editor

SublimeText3 Chinese version
Chinese version, very easy to use

Zend Studio 13.0.1
Powerful PHP integrated development environment

Dreamweaver CS6
Visual web development tools

SublimeText3 Mac version
God-level code editing software (SublimeText3)
Hot Topics


 Let's talk about how to delete a folder in the GitHub repository
Mar 27, 2023 am 11:33 AM
Let's talk about how to delete a folder in the GitHub repository
Mar 27, 2023 am 11:33 AM
GitHub is a very popular version control system that allows users to store and share their code bases on the Internet. It is one of the must-have tools for programmers. However, sometimes we may need to delete a folder in the GitHub repository. This article will introduce how to delete a folder in the GitHub repository.
 How to install GitHub Copilot on Windows 11/10
Oct 21, 2023 pm 11:13 PM
How to install GitHub Copilot on Windows 11/10
Oct 21, 2023 pm 11:13 PM
GitHubCopilot is the next level for coders, with an AI-based model that successfully predicts and autocompletes your code. However, you might be wondering how to get this AI genius on your device so that your coding becomes even easier! However, using GitHub isn't exactly easy, and the initial setup process is a tricky one. Therefore, we created this step-by-step tutorial on how to install and implement GitHub Copilot in VSCode on Windows 11, 10. How to install GitHubCopilot on Windows There are several steps to this process. So, follow the steps below now. Step 1 – You must have the latest version of Visual Studio installed on your computer
 Let's talk about how to set up a protected branch and submit a PR in Gitlab
Mar 30, 2023 pm 09:01 PM
Let's talk about how to set up a protected branch and submit a PR in Gitlab
Mar 30, 2023 pm 09:01 PM
This article is about learning Gitlab, talking about how to set up a protected branch and submit a PR to your leader. I hope it will be helpful to everyone!
 How to install tensorflow in conda
Dec 05, 2023 am 11:26 AM
How to install tensorflow in conda
Dec 05, 2023 am 11:26 AM
Installation steps: 1. Download and install Miniconda, select the appropriate Miniconda version according to the operating system, and install according to the official guide; 2. Use the "conda create -n tensorflow_env python=3.7" command to create a new Conda environment; 3. Activate Conda environment; 4. Use the "conda install tensorflow" command to install the latest version of TensorFlow; 5. Verify the installation.
 Let's talk about how to convert your GitHub projects into QR codes
Mar 27, 2023 am 11:33 AM
Let's talk about how to convert your GitHub projects into QR codes
Mar 27, 2023 am 11:33 AM
In modern software development, GitHub is one of the most popular project hosting platforms. It provides developers with a convenient platform for storing and managing their open source projects. An interesting feature of GitHub is converting project links into QR codes. This article will introduce you how to convert your GitHub project into a QR code.
 Git installation process on Ubuntu
Mar 20, 2024 pm 04:51 PM
Git installation process on Ubuntu
Mar 20, 2024 pm 04:51 PM
Git is a fast, reliable, and adaptable distributed version control system. It is designed to support distributed, non-linear workflows, making it ideal for software development teams of all sizes. Each Git working directory is an independent repository with a complete history of all changes and the ability to track versions even without network access or a central server. GitHub is a Git repository hosted on the cloud that provides all the features of distributed revision control. GitHub is a Git repository hosted on the cloud. Unlike Git which is a CLI tool, GitHub has a web-based graphical user interface. It is used for version control, which involves collaborating with other developers and tracking changes to scripts and
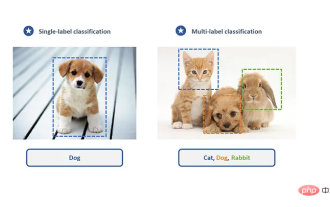 Create a deep learning classifier for cat and dog pictures using TensorFlow and Keras
May 16, 2023 am 09:34 AM
Create a deep learning classifier for cat and dog pictures using TensorFlow and Keras
May 16, 2023 am 09:34 AM
In this article, we will use TensorFlow and Keras to create an image classifier that can distinguish between images of cats and dogs. To do this, we will use the cats_vs_dogs dataset from the TensorFlow dataset. The dataset consists of 25,000 labeled images of cats and dogs, of which 80% are used for training, 10% for validation, and 10% for testing. Loading data We start by loading the dataset using TensorFlowDatasets. Split the data set into training set, validation set and test set, accounting for 80%, 10% and 10% of the data respectively, and define a function to display some sample images in the data set. importtenso
 pip installation tensorflow tutorial
Dec 07, 2023 pm 03:50 PM
pip installation tensorflow tutorial
Dec 07, 2023 pm 03:50 PM
Installation steps: 1. Make sure that Python and pip have been installed; 2. Open the command prompt or terminal window and enter the "pip install tensorflow" command to install TensorFlow; 3. If you want to install the CPU version of TensorFlow, you can use "pip install tensorflow- cpu" command; 4. After the installation is complete, you can use TensorFlow in Python.
