

Git installation process on Ubuntu

Git is a fast, reliable, and adaptable distributed version control system. It is designed to support distributed, non-linear workflows, making it ideal for software development teams of all sizes. Each Git working directory is an independent repository with a complete history of all changes and the ability to track versions even without network access or a central server.
GitHub is a Git repository hosted on the cloud that provides all the features of distributed revision control. GitHub is a Git repository hosted on the cloud. Unlike Git which is a CLI tool, GitHub has a web-based graphical user interface. It is used for version control, which involves collaborating with other developers and tracking changes made to scripts and code over time. With GitHub, every team member can create a central cloud-based repository and make changes to data, enabling project collaboration.
This article demonstrates how to get Git on an Ubuntu system.
Git installation on Ubuntu
There are three main ways to install Git on Ubuntu:
- Using Ubuntu Package Manager (APT)
- Using Git Maintainers PPA
- Source: Git
Method 1: Install GIT using the default APT repository on Ubuntu 22.04
Step 1: Update the system
When installing Git on an Ubuntu system, it is crucial to use updated packages. Doing so can help mitigate package conflicts that may arise during the installation process and ensure a smooth installation process.
You can use the "Update" command in the "Advanced Packaging Tool" to update the system's software package.
Sudoku APT update
Output:

It is recommended to upgrade any outdated packages after the update is complete. Use this command to perform this upgrade:
sudo apt upgrade
Output:

Step 2: Check if Git exists on Ubuntu
It is recommended to confirm whether Git already exists on your computer before proceeding with the installation. This allows us to avoid repeated installations and keep the system clean.
Use the "git" command and --version to check whether Git already exists in the system. If Git is installed, the previously installed version is displayed:
git——version
Output:

Step 3: Use APT command
If the previous command returns nothing, it will verify that Git is not installed on your machine. Now it's time to set up Git.
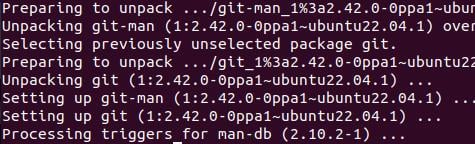
Because it provides an easy-to-use process, we install Git using Ubuntu's repository. Run the "Install" command using sudo apt to install Git.
Sudo apt install git
Output:

Step 4: Verify that Ubuntu’s GIT installation is successful
After the installation is complete, you should ensure that Git is installed correctly.
Once again, we can use -version to verify the installation. At this point, the following command should return the most recently installed Git version:
Git-version
When the command runs, you should see something like this:

Method 2: Install GIT on Ubuntu via Git Maintainer PPA
It is sometimes better to use the latest Git version, especially when new features or critical bug fixes are needed. The Ubuntu Git maintenance team maintains the Personal Package Archive (PPA), which is usually the source of the latest stable version of Git. Depending on your specific needs and your work environment, this approach may have a number of major benefits.
Step 1: Import Git Maintainer PPA
We need to add the Git PPA to the system's repository list. Access to the latest stable Git version is guaranteed by this PPA. Even though your system may already have the following packages installed, it's not a bad thing to recheck.
SUDO add-apt-repository-ppa:git-core/ppa
Output:

Step 2: Refresh package index after PPA import
After importing a Git PPA into the system's repository list, the package index must be refreshed. Now that the repository has been added, your system is able to recognize recently downloaded packages.
To update the package index, do the following:
Sudoku APT update
Step 3: Install git using apt ppa command
Step 3: Install git using apt ppa command
You can upgrade or install Git once the PPA is set up. This command performs this task:
Sudo apt install git-y
Output:
If you have installed GIT from the Ubuntu repository, you can upgrade Git from the additional PPA to the latest version by running this command.
After the upgrade or installation is completed, confirm the installed Git version:
git——version
Output:
You should see something like this:

This indicates that the latest version of Git is installed correctly on your computer.
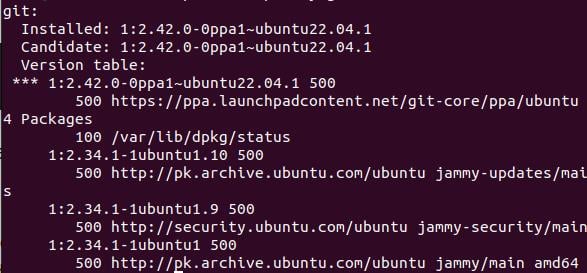
Checking the repository your Git installation came from can give you more information. Because PPAs usually contain a newer version of Git, using the following command should reflect the latest PPA additions:
APT-Cache Strategy Git
Output:
Method 3: Install Git from source
This method gives the user more control over the installation process and grants access to specific features that may not be included in the prepackaged distribution.
Step 1: Configure Ubuntu using GIT Build Predencies
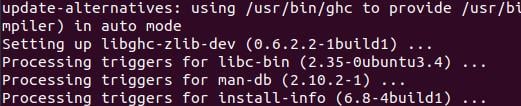
First, you need to install the necessary build dependencies on your Ubuntu system. These requirements are required for Git compilation. To configure these, use the following commands:
Sudo apt install make libssl-dev libghc-zlib-dev libcurl4-Gnutls-dev libexpat1-dev gettext decompression-y
Output:
Step 2: Get the GIT source code
Go to the Git release page to get the source code. To download the required version, use the following command. Don't forget to replace {version} with the desired Git version.
curl—o git.tar.gz www.example.com
Output:

Step 3: Extract and install GIT source code
Now, now compile and install git. To start compilation, use the following command:
sudo tar—xf git.tar.gz
Find and open the unzipped directory:
cd git—2.37.1
Output:

Now, compile and install git. Start compilation using the following command:
sudo make prefix =/usr/local all

This command instructs the build system to install in the "/usr/local" folder at the end of the compilation process. The "all" flag ensures a complete build including all components.
After compilation is completed, start the installation:
sudo make prefix =/usr/local install
Output:
Git is now installed in the "/usr/local" directory. The process involves copying the necessary files and granting the necessary permissions to make Git accessible on your machine.
Verify that the build is accurate and the installation was successful.
git——version
Output:

This command should confirm that Git is properly integrated into your system by returning your installed version.
in conclusion
Git is a widely used and powerful distributed version control system. This article demonstrates how to install Git on Ubuntu 22.04 and earlier. We discussed three methods: using the Ubuntu Package Manager (apt), using the Git Maintainer PPA, and using Git source code. You can find many online resources, such as the official Git manual, to help you learn how to use Git.
The above is the detailed content of Git installation process on Ubuntu. For more information, please follow other related articles on the PHP Chinese website!

Hot AI Tools

Undresser.AI Undress
AI-powered app for creating realistic nude photos

AI Clothes Remover
Online AI tool for removing clothes from photos.

Undress AI Tool
Undress images for free

Clothoff.io
AI clothes remover

Video Face Swap
Swap faces in any video effortlessly with our completely free AI face swap tool!

Hot Article
Hot Tools

Notepad++7.3.1
Easy-to-use and free code editor

SublimeText3 Chinese version
Chinese version, very easy to use

Zend Studio 13.0.1
Powerful PHP integrated development environment

Dreamweaver CS6
Visual web development tools

SublimeText3 Mac version
God-level code editing software (SublimeText3)
Hot Topics
 1655
1655
 14
1414
52
1307
25
1254
29
1228
24
14
1414
52
1307
25
1254
29
1228
24

 How to update code in git
Apr 17, 2025 pm 04:45 PM
How to update code in git
Apr 17, 2025 pm 04:45 PM
Steps to update git code: Check out code: git clone https://github.com/username/repo.git Get the latest changes: git fetch merge changes: git merge origin/master push changes (optional): git push origin master
 How to download git projects to local
Apr 17, 2025 pm 04:36 PM
How to download git projects to local
Apr 17, 2025 pm 04:36 PM
To download projects locally via Git, follow these steps: Install Git. Navigate to the project directory. cloning the remote repository using the following command: git clone https://github.com/username/repository-name.git
 How to merge code in git
Apr 17, 2025 pm 04:39 PM
How to merge code in git
Apr 17, 2025 pm 04:39 PM
Git code merge process: Pull the latest changes to avoid conflicts. Switch to the branch you want to merge. Initiate a merge, specifying the branch to merge. Resolve merge conflicts (if any). Staging and commit merge, providing commit message.
 What to do if the git download is not active
Apr 17, 2025 pm 04:54 PM
What to do if the git download is not active
Apr 17, 2025 pm 04:54 PM
Resolve: When Git download speed is slow, you can take the following steps: Check the network connection and try to switch the connection method. Optimize Git configuration: Increase the POST buffer size (git config --global http.postBuffer 524288000), and reduce the low-speed limit (git config --global http.lowSpeedLimit 1000). Use a Git proxy (such as git-proxy or git-lfs-proxy). Try using a different Git client (such as Sourcetree or Github Desktop). Check for fire protection
 How to solve the efficient search problem in PHP projects? Typesense helps you achieve it!
Apr 17, 2025 pm 08:15 PM
How to solve the efficient search problem in PHP projects? Typesense helps you achieve it!
Apr 17, 2025 pm 08:15 PM
When developing an e-commerce website, I encountered a difficult problem: How to achieve efficient search functions in large amounts of product data? Traditional database searches are inefficient and have poor user experience. After some research, I discovered the search engine Typesense and solved this problem through its official PHP client typesense/typesense-php, which greatly improved the search performance.
 How to use git commit
Apr 17, 2025 pm 03:57 PM
How to use git commit
Apr 17, 2025 pm 03:57 PM
Git Commit is a command that records file changes to a Git repository to save a snapshot of the current state of the project. How to use it is as follows: Add changes to the temporary storage area Write a concise and informative submission message to save and exit the submission message to complete the submission optionally: Add a signature for the submission Use git log to view the submission content
 How to update local code in git
Apr 17, 2025 pm 04:48 PM
How to update local code in git
Apr 17, 2025 pm 04:48 PM
How to update local Git code? Use git fetch to pull the latest changes from the remote repository. Merge remote changes to the local branch using git merge origin/<remote branch name>. Resolve conflicts arising from mergers. Use git commit -m "Merge branch <Remote branch name>" to submit merge changes and apply updates.
 How to delete a repository by git
Apr 17, 2025 pm 04:03 PM
How to delete a repository by git
Apr 17, 2025 pm 04:03 PM
To delete a Git repository, follow these steps: Confirm the repository you want to delete. Local deletion of repository: Use the rm -rf command to delete its folder. Remotely delete a warehouse: Navigate to the warehouse settings, find the "Delete Warehouse" option, and confirm the operation.
