

Use ThinkPHP to generate thumbnails and display them

This article mainly introduces the relevant information of using ThinkPHP to generate thumbnails and display in detail. It has certain reference value. Interested friends can refer to
Using ThinkPHP to generate thumbnails and display. Display, has certain reference value, interested friends can refer to
First understand some functions in the parent class Image.class.php (ThinkPHP/Library/Think/Image.class.php)
1:open() opens the processed image
2:thumb() generates a thumbnail with a default scaling of 1 (for the meaning of 2, 3, 4, 5, 6, please refer to the parent page Class file Image.class.php)
3:save() Thumbnail to server
The steps to generate thumbnail are divided into the following four steps
* 1. Instantiation
* 2. Open the image open()
* 3. Generate a thumbnail thumb() with the default scaling
* 4. Save save()
Controller code:
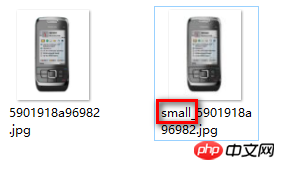
//大图路径(此处大图路径可参考上篇 “使用ThinkPHP实现附件上传”的上传路径)
$bigimg_path = $upload->rootPath.$file_info['savepath'].$file_info['savename'];
//小图路径
$smallimg_path = $upload->rootPath.$file_info['savepath'].'small_'.$file_info['savename'];

$img = new \Think\Image(); //实例化
$img->open($bigimg_path); //打开被处理的图片
$img->thumb(100,100); //制作缩略图(100*100)
$img->save($smallimg_path); //保存缩略图到服务器

//把上传好的附件及缩略图存到数据库
$_POST['goods_big_img']=$bigimg_path;
$_POST['goods_small_img']=$smallimg_path;
Entry file setting constants
It is convenient to display thumbnail paths in the front desk. Set constants in the entry file index.php to represent the site path and splice them with the image paths stored in the database
define('SITE_URL', 'http://www.tp.com/TP/shop/');
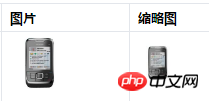
Display large and thumbnail images at the front desk Sketch
<td><!-- 大图 -->
 <img src="<{$smarty.const.SITE_URL}><{$v.goods_big_img}>" height="60" width="60">
</td>
<td><!-- 小图 -->
 <img src="<{$smarty.const.SITE_URL}><{$v.goods_small_img}>" height="40" width="40">
</td>Result
Storage path in database

Picture
Foreground display
The above is the entire content of this article. I hope it will be helpful to everyone’s study. For more related content, please pay attention to PHP Chinese net!
Related recommendations:
Analysis on ThinkPHP watermarking and setting watermark location
How to use thinkphp to obtain the client IP
The above is the detailed content of Use ThinkPHP to generate thumbnails and display them. For more information, please follow other related articles on the PHP Chinese website!

Hot AI Tools

Undresser.AI Undress
AI-powered app for creating realistic nude photos

AI Clothes Remover
Online AI tool for removing clothes from photos.

Undress AI Tool
Undress images for free

Clothoff.io
AI clothes remover

Video Face Swap
Swap faces in any video effortlessly with our completely free AI face swap tool!

Hot Article
Hot Tools

Notepad++7.3.1
Easy-to-use and free code editor

SublimeText3 Chinese version
Chinese version, very easy to use

Zend Studio 13.0.1
Powerful PHP integrated development environment

Dreamweaver CS6
Visual web development tools

SublimeText3 Mac version
God-level code editing software (SublimeText3)
Hot Topics


 How to disable taskbar thumbnail preview in Win11? Turn off the taskbar icon display thumbnail technique by moving the mouse
Feb 29, 2024 pm 03:20 PM
How to disable taskbar thumbnail preview in Win11? Turn off the taskbar icon display thumbnail technique by moving the mouse
Feb 29, 2024 pm 03:20 PM
This article will introduce how to turn off the thumbnail function displayed when the mouse moves the taskbar icon in Win11 system. This feature is turned on by default and displays a thumbnail of the application's current window when the user hovers the mouse pointer over an application icon on the taskbar. However, some users may find this feature less useful or disruptive to their experience and want to turn it off. Taskbar thumbnails can be fun, but they can also be distracting or annoying. Considering how often you hover over this area, you may have inadvertently closed important windows a few times. Another drawback is that it uses more system resources, so if you've been looking for a way to be more resource efficient, we'll show you how to disable it. but
 How to run thinkphp project
Apr 09, 2024 pm 05:33 PM
How to run thinkphp project
Apr 09, 2024 pm 05:33 PM
To run the ThinkPHP project, you need to: install Composer; use Composer to create the project; enter the project directory and execute php bin/console serve; visit http://localhost:8000 to view the welcome page.
 There are several versions of thinkphp
Apr 09, 2024 pm 06:09 PM
There are several versions of thinkphp
Apr 09, 2024 pm 06:09 PM
ThinkPHP has multiple versions designed for different PHP versions. Major versions include 3.2, 5.0, 5.1, and 6.0, while minor versions are used to fix bugs and provide new features. The latest stable version is ThinkPHP 6.0.16. When choosing a version, consider the PHP version, feature requirements, and community support. It is recommended to use the latest stable version for best performance and support.
 How to display thumbnails in Vscode_How to display thumbnails in Vscode
Apr 02, 2024 pm 02:43 PM
How to display thumbnails in Vscode_How to display thumbnails in Vscode
Apr 02, 2024 pm 02:43 PM
1. First enter Visual Studio Code and click [File] in the upper left corner. 2. Then click [Preferences]. 3. Click the [Settings] item. 4. Then click [Text Editor-Thumbnail]. 5. Finally, in the thumbnail item, turn on [Control whether to display thumbnails].
 How to run thinkphp
Apr 09, 2024 pm 05:39 PM
How to run thinkphp
Apr 09, 2024 pm 05:39 PM
Steps to run ThinkPHP Framework locally: Download and unzip ThinkPHP Framework to a local directory. Create a virtual host (optional) pointing to the ThinkPHP root directory. Configure database connection parameters. Start the web server. Initialize the ThinkPHP application. Access the ThinkPHP application URL and run it.
 Which one is better, laravel or thinkphp?
Apr 09, 2024 pm 03:18 PM
Which one is better, laravel or thinkphp?
Apr 09, 2024 pm 03:18 PM
Performance comparison of Laravel and ThinkPHP frameworks: ThinkPHP generally performs better than Laravel, focusing on optimization and caching. Laravel performs well, but for complex applications, ThinkPHP may be a better fit.
 Development suggestions: How to use the ThinkPHP framework to implement asynchronous tasks
Nov 22, 2023 pm 12:01 PM
Development suggestions: How to use the ThinkPHP framework to implement asynchronous tasks
Nov 22, 2023 pm 12:01 PM
"Development Suggestions: How to Use the ThinkPHP Framework to Implement Asynchronous Tasks" With the rapid development of Internet technology, Web applications have increasingly higher requirements for handling a large number of concurrent requests and complex business logic. In order to improve system performance and user experience, developers often consider using asynchronous tasks to perform some time-consuming operations, such as sending emails, processing file uploads, generating reports, etc. In the field of PHP, the ThinkPHP framework, as a popular development framework, provides some convenient ways to implement asynchronous tasks.
 How to install thinkphp
Apr 09, 2024 pm 05:42 PM
How to install thinkphp
Apr 09, 2024 pm 05:42 PM
ThinkPHP installation steps: Prepare PHP, Composer, and MySQL environments. Create projects using Composer. Install the ThinkPHP framework and dependencies. Configure database connection. Generate application code. Launch the application and visit http://localhost:8000.
