

How to integrate zTree code in Angular
This article mainly introduces the sample code of Angular integrating zTree. Now I will share it with you and give you a reference.
1 Prerequisite preparation
1.1 Create a new angular4 project
Reference blog post: Click to go
1.2 Go to zTree official website to download zTree
zTree official website: Click to go to
##2 Programming steps

<!doctype html>
<html lang="en">
<head>
 <meta charset="utf-8">
 <title>TestZtree</title>
 <base href="/" rel="external nofollow" >

 <meta name="viewport" content="width=device-width, initial-scale=1">
 <link rel="icon" type="image/x-icon" href="favicon.ico" rel="external nofollow" >

 <link rel="stylesheet" type="text/css" href="./assets/zTree/css/zTreeStyle/zTreeStyle.css" rel="external nofollow" >
 <link rel="stylesheet" type="text/css" href="./assets/zTree/css/demo.css" rel="external nofollow" >
 <script src="./assets/zTree/js/jquery-1.4.4.min.js"></script>
 <script src="./assets/zTree/js/jquery.ztree.core.js"></script>
</head>
<body>
 <app-root></app-root>
</body>
</html>
declare var $ : any;

import { Component, OnInit } from '@angular/core';
declare var $ : any;
@Component({
selector: 'app-root',
templateUrl: './app.component.html',
styleUrls: ['./app.component.scss']
})
export class AppComponent implements OnInit {
// setting = {
// view: {
// showLine: true,
// showIcon: true,
// fontCss: this.getFont
// },
// data: {
// simpleData: {
// enable: true,
// idKey: 'id',
// pIdKey: 'pId'
// }
// },
// callback: {
// onClick: this.onCzTreeOnClick
// }
// };
// zNodes = [
// {id: 1, pId: 0, name: '1 一级标题', open: true, iconOpen:"assets/zTree/css/zTreeStyle/img/diy/1_open.png", iconClose:"assets/zTree/css/zTreeStyle/img/diy/1_close.png"},
// {id: 11, pId: 1, name: '1.1 二级标题', open: true, font:{'background-color':'skyblue', 'color':'white'}},
// {id: 111, pId: 11, name: '1.1.1 三级标题 -> 博客园', url: 'http://www.cnblogs.com/NeverCtrl-C/'},
// {id: 112, pId: 11, name: '1.1.2 三级标题 -> 单击', click: "alert('你单击了')"},
// {id: 12, pId: 1, name: '1.2 二级标题'},
// {id: 2, pId: 0, name: '2 一级标题'}
// ]
// getFont(treeId, node) {
// return node.font ? node.font : {};
// }
// onCzTreeOnClick(event, treeId, treeNode, clickFlag) {
// alert(treeNode.name);
// }
setting = {
data: {
simpleData: {
enable: true
}
}
};
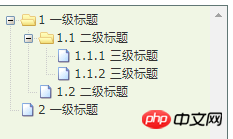
zNodes = [
{id: 1, pId: 0, name: '1 一级标题'},
{id: 11, pId: 1, name: '1.1 二级标题'},
{id: 111, pId: 11, name: '1.1.1 三级标题'},
{id: 112, pId: 11, name: '1.1.2 三级标题'},
{id: 12, pId: 1, name: '1.2 二级标题'},
{id: 2, pId: 0, name: '2 一级标题'}
];
constructor() { }
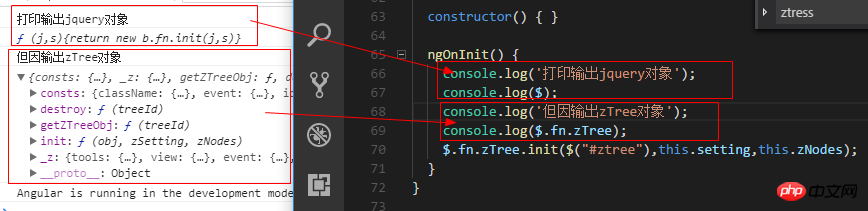
ngOnInit() {
console.log($);
console.log($.fn.zTree);
$.fn.zTree.init($("#ztree"),this.setting,this.zNodes);
}
}<ul id="ztree" class="ztree"><ul></ul>
3 Basic functions of zTree
3.1 Do not display connecting lines
3.1.1 Official documentationDoes not display connecting lines between titles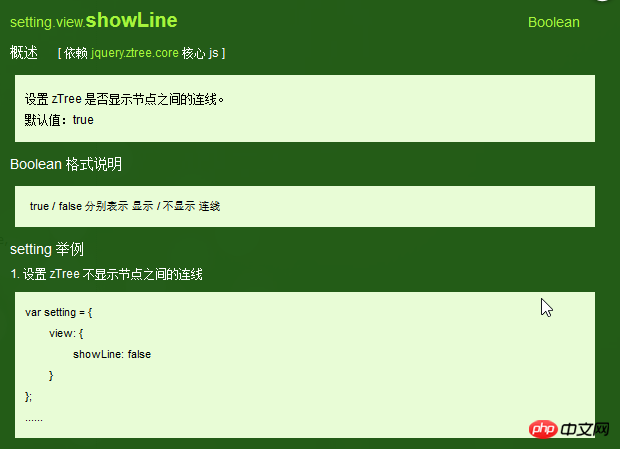
3.1.2 Programming Steps
Specify the value of showLine attribute as false in the basic configuration object
 setting = {
  data: {
   simpleData: {
    enable: true
   }
  },
  view: {
   showLine: false
  }
};3.2 Do not display the node icon
3.2. 1 Official documentRemove the icon in front of the node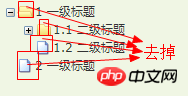

setting = {
  data: {
   simpleData: {
    enable: true
   }
  },
  view: {
   showLine: false,
   showIcon: false
  }
};3.3 Customize the node icon
3.3.1 Official documentChange the node icon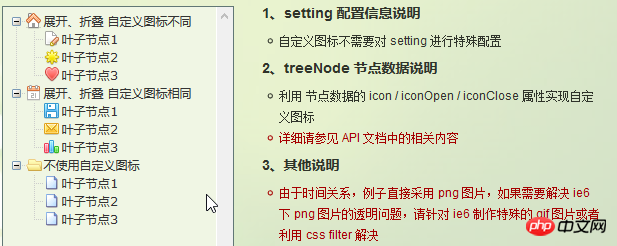

3.4 Custom font
3.4.1 Official documentationChange the style of node font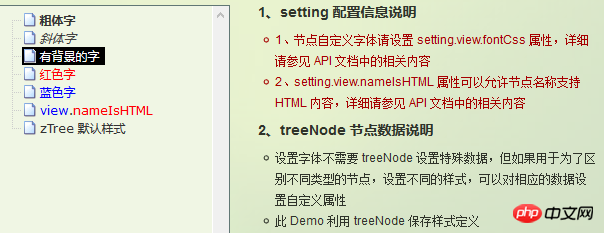


3.5 Hyperlink
3.5.1 Official document Clicking on the node title will automatically jump to the corresponding urlNote 01: The click attribute can only perform the simplest click event operation. Equivalent to onclick="...". If the operation is more complex, use the onClick event callback function.
3.5.2 Programming steps
Set the url and click attributes for the treeNode node dataTips 01: When setting the click attribute, the attribute value must be some simple onClick event Tip 02: When setting the target attribute, the attribute values are _blank and _self_blank -> Use one Open in new window_self -> Open in original window
zNodes = [
  {id: 1, pId: 0, name: '1 一级标题', open: true, iconOpen:"assets/zTree/css/zTreeStyle/img/diy/1_open.png", iconClose:"assets/zTree/css/zTreeStyle/img/diy/1_close.png"},
  {id: 11, pId: 1, name: '1.1 二级标题', open: true, font:{'background-color':'skyblue', 'color':'white'}},
  {id: 111, pId: 11, name: '1.1.1 三级标题 -> 博客园1', url: 'http://www.cnblogs.com/NeverCtrl-C/', target: '_blank'},
  {id: 113, pId: 11, name: '1.1.1 三级标题 -> 博客园2', url: 'http://www.cnblogs.com/NeverCtrl-C/', target: '_self'},
  {id: 112, pId: 11, name: '1.1.2 三级标题 -> 单击', click: "alert('你单击了')"},
  {id: 12, pId: 1, name: '1.2 二级标题'},
  {id: 2, pId: 0, name: '2 一级标题'}
]3.6 Click Control
3.6.1 Official Document
The corresponding method is triggered when the node title is clickedTip 01: You can use this usage to implement route jump in angular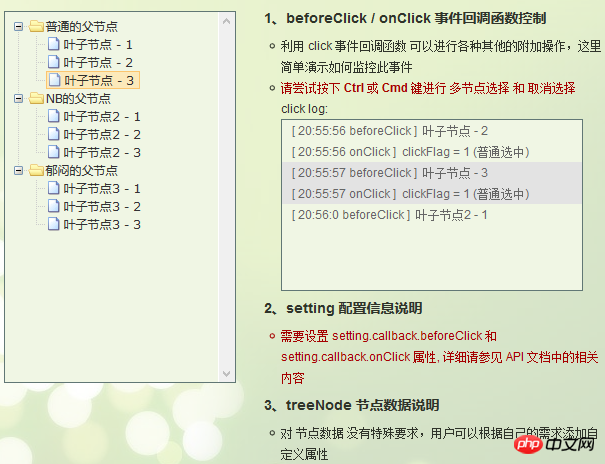
3.6.2 Programming steps
设置基本配置对象的onClick属性
技巧01:onClick属性值是一个方法的引用,我们需要自己编写这个方法
 setting = {
  view: {
    showLine: true,
    showIcon: true,
    fontCss: this.getFont
  },
  data: {
   simpleData: {
    enable: true,
    idKey: 'id',
    pIdKey: 'pId'
   }
  },
  callback: {
   onClick: this.onCzTreeOnClick
  }
 };
编写onClick触发方法
 onCzTreeOnClick(event, treeId, treeNode, clickFlag) {
  alert(treeNode.name);
}上面是我整理给大家的,希望今后会对大家有帮助。
相关文章:
在Webpack中路径压缩图片上传尺寸获取的问题(详细教程)
The above is the detailed content of How to integrate zTree code in Angular. For more information, please follow other related articles on the PHP Chinese website!

Hot AI Tools

Undresser.AI Undress
AI-powered app for creating realistic nude photos

AI Clothes Remover
Online AI tool for removing clothes from photos.

Undress AI Tool
Undress images for free

Clothoff.io
AI clothes remover

Video Face Swap
Swap faces in any video effortlessly with our completely free AI face swap tool!

Hot Article
Hot Tools

Notepad++7.3.1
Easy-to-use and free code editor

SublimeText3 Chinese version
Chinese version, very easy to use

Zend Studio 13.0.1
Powerful PHP integrated development environment

Dreamweaver CS6
Visual web development tools

SublimeText3 Mac version
God-level code editing software (SublimeText3)
Hot Topics


 Let's talk about metadata and decorators in Angular
Feb 28, 2022 am 11:10 AM
Let's talk about metadata and decorators in Angular
Feb 28, 2022 am 11:10 AM
This article continues the learning of Angular, takes you to understand the metadata and decorators in Angular, and briefly understands their usage. I hope it will be helpful to everyone!
 How to install Angular on Ubuntu 24.04
Mar 23, 2024 pm 12:20 PM
How to install Angular on Ubuntu 24.04
Mar 23, 2024 pm 12:20 PM
Angular.js is a freely accessible JavaScript platform for creating dynamic applications. It allows you to express various aspects of your application quickly and clearly by extending the syntax of HTML as a template language. Angular.js provides a range of tools to help you write, update and test your code. Additionally, it provides many features such as routing and form management. This guide will discuss how to install Angular on Ubuntu24. First, you need to install Node.js. Node.js is a JavaScript running environment based on the ChromeV8 engine that allows you to run JavaScript code on the server side. To be in Ub
 Detailed explanation of angular learning state manager NgRx
May 25, 2022 am 11:01 AM
Detailed explanation of angular learning state manager NgRx
May 25, 2022 am 11:01 AM
This article will give you an in-depth understanding of Angular's state manager NgRx and introduce how to use NgRx. I hope it will be helpful to you!
 An article exploring server-side rendering (SSR) in Angular
Dec 27, 2022 pm 07:24 PM
An article exploring server-side rendering (SSR) in Angular
Dec 27, 2022 pm 07:24 PM
Do you know Angular Universal? It can help the website provide better SEO support!
 How to use PHP and Angular for front-end development
May 11, 2023 pm 04:04 PM
How to use PHP and Angular for front-end development
May 11, 2023 pm 04:04 PM
With the rapid development of the Internet, front-end development technology is also constantly improving and iterating. PHP and Angular are two technologies widely used in front-end development. PHP is a server-side scripting language that can handle tasks such as processing forms, generating dynamic pages, and managing access permissions. Angular is a JavaScript framework that can be used to develop single-page applications and build componentized web applications. This article will introduce how to use PHP and Angular for front-end development, and how to combine them
 Angular + NG-ZORRO quickly develop a backend system
Apr 21, 2022 am 10:45 AM
Angular + NG-ZORRO quickly develop a backend system
Apr 21, 2022 am 10:45 AM
This article will share with you an Angular practical experience and learn how to quickly develop a backend system using angualr combined with ng-zorro. I hope it will be helpful to everyone!
 A brief analysis of how to use monaco-editor in angular
Oct 17, 2022 pm 08:04 PM
A brief analysis of how to use monaco-editor in angular
Oct 17, 2022 pm 08:04 PM
How to use monaco-editor in angular? The following article records the use of monaco-editor in angular that was used in a recent business. I hope it will be helpful to everyone!
 A brief analysis of independent components in Angular and see how to use them
Jun 23, 2022 pm 03:49 PM
A brief analysis of independent components in Angular and see how to use them
Jun 23, 2022 pm 03:49 PM
This article will take you through the independent components in Angular, how to create an independent component in Angular, and how to import existing modules into the independent component. I hope it will be helpful to you!
