
 Web Front-end
JS Tutorial
Detailed explanation of the steps to implement server-side rendering in Angular
Web Front-end
JS Tutorial
Detailed explanation of the steps to implement server-side rendering in Angular
Detailed explanation of the steps to implement server-side rendering in Angular
This time I will bring you a detailed explanation of the steps to implement server-side rendering in Angular. What are the precautions for Angular to implement server-side rendering? The following is a practical case, let's take a look.
Angular Universal
Angular provides a set of front-end and back-end isomorphic solutions for server-side rendering. It is Angular Universal (unified platform), a server-side rendering solution. Technology for running Angular applications. A standard Angular application will be executed in the browser, and it will render the page in the DOM in response to user operations. Angular Universal generates static application pages on the server through a process called server-side rendering (SSR). It can generate these pages and respond directly with them when the browser requests them. It can also pre-generate pages into HTML files and then serve them as static files for the server.Working principle
To make a Universal application, you need to install theplatform-server package. The platform-server package provides server-side DOM implementation, XMLHttpRequest and other low-level features, but no longer relies on the browser.
platform-server module instead of the platform-browser module to compile the client application and run the Universal application on a web server.
renderModuleFactory function.
tag in the template and creates a completed HTML page for the client.
Why server-side rendering
Three main reasons:- ##Help web crawlers (SEO)
- Improve performance on mobile phones and low-power devices
- Display the first page quickly
Google, Bing, Baidu, Facebook, Twitter and other search engines or social media sites rely on web crawlers to index your app content and make it Content is searchable via the web.
These web crawlers may not navigate to and index your highly interactive Angular app like a human would.
Angular Universal can generate a static version of your application that is searchable, linkable, and browseable without the need for JavaScript. It also allows the site to be previewed, since each URL returns a fully rendered page.
Enabling web crawlers is often referred to as search engine optimization (SEO).
Improve performance on mobile phones and low-power devicesSome devices do not support JavaScript or JavaScript is executed poorly, resulting in an unacceptable user experience. For these cases, you may want a server-rendered, JavaScript-free version of the app. Although there are some limitations, this version may be the only option for those who have no way to use the app at all.
Display the homepage quicklyDisplaying the homepage quickly is crucial to attracting users.
53% of mobile websites are abandoned if a page takes more than three seconds to load. Your app needs to launch faster to grab the user's attention before they decide to do something else.
Using Angular Universal, you can generate "landing pages" for your application that look just like the full application. These landing pages are pure HTML and display even if JavaScript is disabled. These pages do not handle browser events, but they can be navigated within the site using routerLink.
In practice, you may want to use a static version of the landing page to keep the user's attention. At the same time, you will also be loading the complete Angular application behind the scenes. Users will expect the landing page to appear almost instantly, and once the full app has loaded, they will have a fully interactive experience.
Sample analysis
The following will be explained based on my sample project angular-universal-starter on GitHub.
This project, like the example project in the first article, is developed and built based on Angular CLI, so the only difference between them is the configuration required for server-side rendering.
Installation tools
Before starting, the following packages must be installed (the sample projects have been configured, just npm install ):
@angular/platform-server- Universal's server-side component.@nguniversal/module-map-ngfactory-loader- Used to handle lazy loading in server-side rendering environment.@nguniversal/express-engine- Express engine for Universal applications.ts-loader- Used to translate server-side applications.express- Node Express Server
Install them using the following command:
npm install --save @angular/platform-server @nguniversal/module-map-ngfactory-loader ts-loader @nguniversal/express-engine express
Project Configuration
Configuration work includes:
Create server application module: src/app/app.server.module.ts
Modify the client application module: src/app/app.module.ts
Create the bootloader file of the server application: src/main.server.ts
Modify the bootstrap file of the client application: src/main.ts
Create the TypeScript server configuration: src/tsconfig.server.json
Modify the configuration file of @angular/cli: .angular-cli.json
Create the service program of Node Express: server. ts
Create the server-side pre-rendering program: prerender.ts
Create the server-side configuration of Webpack: webpack.server.config.js
1. Create a server application module: src/app/app.server.module.ts
import { NgModule } from '@angular/core';
import { ServerModule, ServerTransferStateModule } from '@angular/platform-server';
import { ModuleMapLoaderModule } from '@nguniversal/module-map-ngfactory-loader';
import { AppBrowserModule } from './app.module';
import { AppComponent } from './app.component';
// 可以注册那些在 Universal 环境下运行应用时特有的服务提供商
@NgModule({
  imports: [
    AppBrowserModule, // 客户端应用的 AppModule
    ServerModule, // 服务端的 Angular 模块
    ModuleMapLoaderModule, // 用于实现服务端的路由的惰性加载
    ServerTransferStateModule, // 在服务端导入,用于实现将状态从服务器传输到客户端
  ],
  bootstrap: [AppComponent],
})
export class AppServerModule {
}Server application module (custom (called AppServerModule) is an Angular module that wraps your application's root module AppModule so that Universal can coordinate between your application and the server. AppServerModule also tells Angular how to bootstrap your application when it is run as Universal.
2. Modify the client application module: src/app/app.module.ts
@NgModule({
  imports: [
    AppRoutingModule,
    BrowserModule.withServerTransition({appId: 'my-app'}),
    TransferHttpCacheModule, // 用于实现服务器到客户端的请求传输缓存,防止客户端重复请求服务端已完成的请求
    BrowserTransferStateModule, // 在客户端导入,用于实现将状态从服务器传输到客户端
    HttpClientModule
  ],
  declarations: [
    AppComponent,
    HomeComponent
  ],
  providers: [],
  bootstrap: [AppComponent]
})
export class AppBrowserModule {
  constructor(@Inject(PLATFORM_ID) private platformId: Object,
        @Inject(APP_ID) private appId: string) {

    // 判断运行环境为客户端还是服务端
    const platform = isPlatformBrowser(platformId) ? 'in the browser' : 'on the server';
    console.log(`Running ${platform} with appId=${appId}`);
  }
}Change the metadata of NgModule to the BrowserModule Change the import to BrowserModule.withServerTransition({appId: 'my-app'}) and Angular will add the appId value (which can be any string) to the style name of the server-rendered page so that they are displayed when the client application starts can be found and removed.
At this time, we can obtain information about the current platform and Runtime information of appId: constructor(@Inject(PLATFORM_ID) private platformId: Object,
@Inject(APP_ID) private appId: string) {
// 判断运行环境为客户端还是服务端
const platform = isPlatformBrowser(platformId) ? 'in the browser' : 'on the server';
console.log(`Running ${platform} with appId=${appId}`);
}src/main.server.tsThis file exports the server module:
export { AppServerModule } from './app/app.server.module';4. Modify the bootstrap file of the client application: src/main.ts
Listen to the DOMContentLoaded event and run our code when the DOMContentLoaded event occurs to Make TransferState work properly
import { enableProdMode } from '@angular/core';
import { platformBrowserDynamic } from '@angular/platform-browser-dynamic';
import { AppBrowserModule } from './app/app.module';
import { environment } from './environments/environment';
if (environment.production) {
  enableProdMode();
}
// 在 DOMContentLoaded 时运行我们的代码,以使 TransferState 正常工作
document.addEventListener('DOMContentLoaded', () => {
  platformBrowserDynamic().bootstrapModule(AppBrowserModule);
});5. Create TypeScript server configuration: src/tsconfig.server.json
{
 "extends": "../tsconfig.json",
 "compilerOptions": {
  "outDir": "../out-tsc/app",
  "baseUrl": "./",
  "module": "commonjs",
  "types": [
   "node"
  ]
 },
 "exclude": [
  "test.ts",
  "**/*.spec.ts"
 ],
 "angularCompilerOptions": {
  "entryModule": "app/app.server.module#AppServerModule"
 }
}and
tsconfig.app.json The difference is: The module attribute must be commonjs so that it can be imported into your server application by the require() method. The
angularCompilerOptions section has some options for the AOT compiler:
entryModule - the root module of the server application, with the format path/to/file#ClassName.
6、修改 @angular/cli 的配置文件:.angular-cli.json
在 apps 下添加:
{
  "platform": "server",
  "root": "src",
  "outDir": "dist/server",
  "assets": [
   "assets",
   "favicon.ico"
  ],
  "index": "index.html",
  "main": "main.server.ts",
  "test": "test.ts",
  "tsconfig": "tsconfig.server.json",
  "testTsconfig": "tsconfig.spec.json",
  "prefix": "",
  "styles": [
   "styles.scss"
  ],
  "scripts": [],
  "environmentSource": "environments/environment.ts",
  "environments": {
   "dev": "environments/environment.ts",
   "prod": "environments/environment.prod.ts"
  }
}7、创建 Node Express 的服务程序:server.ts
import 'zone.js/dist/zone-node';
import 'reflect-metadata';
import { enableProdMode } from '@angular/core';
import * as express from 'express';
import { join } from 'path';
import { readFileSync } from 'fs';
// Faster server renders w/ Prod mode (dev mode never needed)
enableProdMode();
// Express server
const app = express();
const PORT = process.env.PORT || 4000;
const DIST_FOLDER = join(process.cwd(), 'dist');
// Our index.html we'll use as our template
const template = readFileSync(join(DIST_FOLDER, 'browser', 'index.html')).toString();
// * NOTE :: leave this as require() since this file is built Dynamically from webpack
const {AppServerModuleNgFactory, LAZY_MODULE_MAP} = require('./dist/server/main.bundle');
// Express Engine
import { ngExpressEngine } from '@nguniversal/express-engine';
// Import module map for lazy loading
import { provideModuleMap } from '@nguniversal/module-map-ngfactory-loader';
// Our Universal express-engine (found @ https://github.com/angular/universal/tree/master/modules/express-engine)
app.engine('html', ngExpressEngine({
  bootstrap: AppServerModuleNgFactory,
  providers: [
    provideModuleMap(LAZY_MODULE_MAP)
  ]
}));
app.set('view engine', 'html');
app.set('views', join(DIST_FOLDER, 'browser'));
/* - Example Express Rest API endpoints -
 app.get('/api/**', (req, res) => { });
*/
// Server static files from /browser
app.get('*.*', express.static(join(DIST_FOLDER, 'browser'), {
  maxAge: '1y'
}));
// ALl regular routes use the Universal engine
app.get('*', (req, res) => {
  res.render('index', {req});
});
// Start up the Node server
app.listen(PORT, () => {
  console.log(`Node Express server listening on http://localhost:${PORT}`);
});8、创建服务端预渲染的程序:prerender.ts
// Load zone.js for the server.
import 'zone.js/dist/zone-node';
import 'reflect-metadata';
import { readFileSync, writeFileSync, existsSync, mkdirSync } from 'fs';
import { join } from 'path';
import { enableProdMode } from '@angular/core';
// Faster server renders w/ Prod mode (dev mode never needed)
enableProdMode();
// Import module map for lazy loading
import { provideModuleMap } from '@nguniversal/module-map-ngfactory-loader';
import { renderModuleFactory } from '@angular/platform-server';
import { ROUTES } from './static.paths';
// * NOTE :: leave this as require() since this file is built Dynamically from webpack
const {AppServerModuleNgFactory, LAZY_MODULE_MAP} = require('./dist/server/main.bundle');
const BROWSER_FOLDER = join(process.cwd(), 'browser');
// Load the index.html file containing referances to your application bundle.
const index = readFileSync(join('browser', 'index.html'), 'utf8');
let previousRender = Promise.resolve();
// Iterate each route path
ROUTES.forEach(route => {
  const fullPath = join(BROWSER_FOLDER, route);
  // Make sure the directory structure is there
  if (!existsSync(fullPath)) {
    mkdirSync(fullPath);
  }
  // Writes rendered HTML to index.html, replacing the file if it already exists.
  previousRender = previousRender.then(_ => renderModuleFactory(AppServerModuleNgFactory, {
    document: index,
    url: route,
    extraProviders: [
      provideModuleMap(LAZY_MODULE_MAP)
    ]
  })).then(html => writeFileSync(join(fullPath, 'index.html'), html));
});9、创建 Webpack 的服务端配置:webpack.server.config.js
Universal 应用不需要任何额外的 Webpack 配置,Angular CLI 会帮我们处理它们。但是由于本例子的 Node Express 的服务程序是 TypeScript 应用(server.ts及prerender.ts),所以要使用 Webpack 来转译它。这里不讨论 Webpack 的配置,需要了解的移步 Webpack官网
// Work around for https://github.com/angular/angular-cli/issues/7200
const path = require('path');
const webpack = require('webpack');
module.exports = {
  entry: {
    server: './server.ts', // This is our Express server for Dynamic universal
    prerender: './prerender.ts' // This is an example of Static prerendering (generative)
  },
  target: 'node',
  resolve: {extensions: ['.ts', '.js']},
  externals: [/(node_modules|main\..*\.js)/,], // Make sure we include all node_modules etc
  output: {
    path: path.join(dirname, 'dist'), // Puts the output at the root of the dist folder
    filename: '[name].js'
  },
  module: {
    rules: [
      {test: /\.ts$/, loader: 'ts-loader'}
    ]
  },
  plugins: [
    new webpack.ContextReplacementPlugin(
      /(.+)?angular(\\|\/)core(.+)?/, // fixes WARNING Critical dependency: the request of a dependency is an expression
      path.join(dirname, 'src'), // location of your src
      {} // a map of your routes
    ),
    new webpack.ContextReplacementPlugin(
      /(.+)?express(\\|\/)(.+)?/, // fixes WARNING Critical dependency: the request of a dependency is an expression
      path.join(dirname, 'src'),
      {}
    )
  ]
};测试配置
通过上面的配置,我们就制作完成一个可在服务端渲染的 Angular Universal 应用。
在 package.json 的 scripts 区配置 build 和 serve 有关的命令:
{
  "scripts": {
    "ng": "ng",
    "start": "ng serve -o",
    "ssr": "npm run build:ssr && npm run serve:ssr",
    "prerender": "npm run build:prerender && npm run serve:prerender",
    "build": "ng build",
    "build:client-and-server-bundles": "ng build --prod && ng build --prod --app 1 --output-hashing=false",
    "build:prerender": "npm run build:client-and-server-bundles && npm run webpack:server && npm run generate:prerender",
    "build:ssr": "npm run build:client-and-server-bundles && npm run webpack:server",
    "generate:prerender": "cd dist && node prerender",
    "webpack:server": "webpack --config webpack.server.config.js --progress --colors",
    "serve:prerender": "cd dist/browser && http-server",
    "serve:ssr": "node dist/server"
  }
}开发只需运行 npm run start执行 npm run ssr 编译应用程序,并启动一个Node Express来为应用程序提供服务 http://localhost:4000
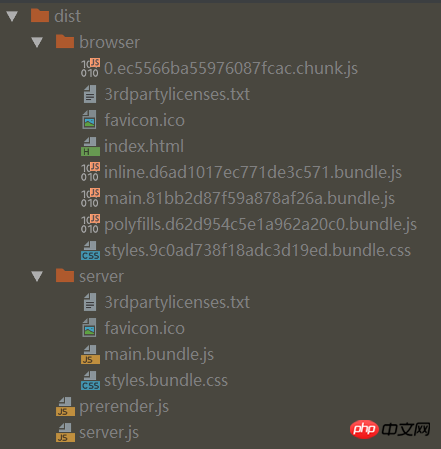
dist目录:
执行npm run prerender - 编译应用程序并预渲染应用程序文件,启动一个演示http服务器,以便您可以查看它 http://localhost:8080
注意: 要将静态网站部署到静态托管平台,您必须部署dist/browser文件夹, 而不是dist文件夹
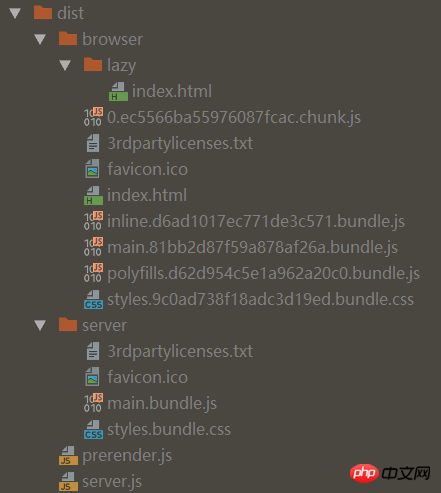
dist目录:
根据项目实际的路由信息并在根目录的 static.paths.ts 中配置,提供给 prerender.ts 解析使用。
export const ROUTES = [
  '/',
  '/lazy'
];
因此,从dist目录可以看到,服务端预渲染会根据配置好的路由在 browser 生成对应的静态index.html。如 / 对应 /index.html,/lazy 对应 /lazy/index.html。
服务器到客户端的状态传输
在前面的介绍中,我们在 app.server.module.ts 中导入了 ServerTransferStateModule,在 app.module.ts 中导入了 BrowserTransferStateModule 和 TransferHttpCacheModule。
这三个模块都与服务器到客户端的状态传输有关:
ServerTransferStateModule:在服务端导入,用于实现将状态从服务器传输到客户端BrowserTransferStateModule:在客户端导入,用于实现将状态从服务器传输到客户端TransferHttpCacheModule:用于实现服务器到客户端的请求传输缓存,防止客户端重复请求服务端已完成的请求
使用这几个模块,可以解决 http请求在服务端和客户端分别请求一次 的问题。
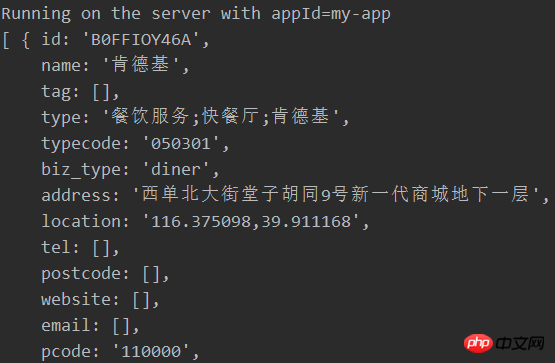
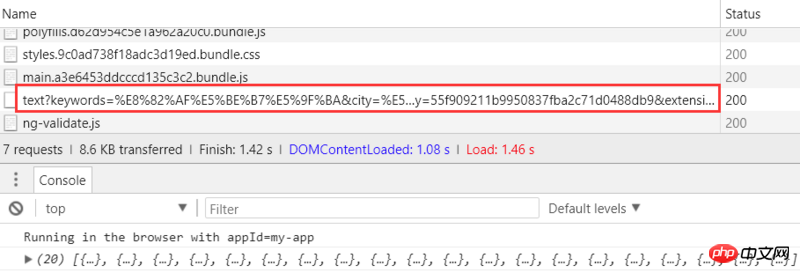
比如在 home.component.ts 中有如下代码:
import { Component, OnDestroy, OnInit } from '@angular/core';
import { HttpClient } from '@angular/common/http';
import { Observable } from 'rxjs/Observable';
@Component({
  selector: 'app-home',
  templateUrl: './home.component.html',
  styleUrls: ['./home.component.scss']
})
export class HomeComponent implements OnInit, OnDestroy {
  constructor(public http: HttpClient) {
  }

  ngOnInit() {
    this.poiSearch(this.keyword, '北京市').subscribe((data: any) => {
      console.log(data);
    });
  }

  ngOnDestroy() {
  }

  poiSearch(text: string, city?: string): Observable<any> {
    return this.http.get(encodeURI(`http://restapi.amap.com/v3/place/text?keywords=${text}&city=${city}&offset=20&key=55f909211b9950837fba2c71d0488db9&extensions=all`));
  }
}代码运行之后,
服务端请求并打印:
客户端再一次请求并打印:
方法1:使用 TransferHttpCacheModule
使用 TransferHttpCacheModule 很简单,代码不需要改动。在 app.module.ts 中导入之后,Angular自动会将服务端请求缓存到客户端,换句话说就是服务端请求到数据会自动传输到客户端,客户端接收到数据之后就不会再发送请求了。
方法2:使用 BrowserTransferStateModule
该方法稍微复杂一些,需要改动一些代码。
调整 home.component.ts 代码如下:
import { Component, OnDestroy, OnInit } from '@angular/core';
import { makeStateKey, TransferState } from '@angular/platform-browser';
import { HttpClient } from '@angular/common/http';
import { Observable } from 'rxjs/Observable';
const KFCLIST_KEY = makeStateKey('kfcList');
@Component({
  selector: 'app-home',
  templateUrl: './home.component.html',
  styleUrls: ['./home.component.scss']
})
export class HomeComponent implements OnInit, OnDestroy {
  constructor(public http: HttpClient,
        private state: TransferState) {
  }

  ngOnInit() {

    // 采用一个标记来区分服务端是否已经拿到了数据,如果没拿到数据就在客户端请求,如果已经拿到数据就不发请求
    const kfcList:any[] = this.state.get(KFCLIST_KEY, null as any);
    if (!this.kfcList) {
      this.poiSearch(this.keyword, '北京市').subscribe((data: any) => {
        console.log(data);
        this.state.set(KFCLIST_KEY, data as any); // 存储数据
      });
    }
  }

  ngOnDestroy() {
    if (typeof window === 'object') {
      this.state.set(KFCLIST_KEY, null as any); // 删除数据
    }
  }

  poiSearch(text: string, city?: string): Observable<any> {
    return this.http.get(encodeURI(`http://restapi.amap.com/v3/place/text?keywords=${text}&city=${city}&offset=20&key=55f909211b9950837fba2c71d0488db9&extensions=all`));
  }
}使用
const KFCLIST_KEY = makeStateKey('kfcList')创建储存传输数据的 StateKey在
HomeComponent的构造函数中注入TransferState在
ngOnInit中根据this.state.get(KFCLIST_KEY, null as any)判断数据是否存在(不管是服务端还是客户端),存在就不再请求,不存在则请求数据并通过this.state.set(KFCLIST_KEY, data as any)存储传输数据在
ngOnDestroy中根据当前是否客户端来决定是否将存储的数据进行删除
相信看了本文案例你已经掌握了方法,更多精彩请关注php中文网其它相关文章!
推荐阅读:
The above is the detailed content of Detailed explanation of the steps to implement server-side rendering in Angular. For more information, please follow other related articles on the PHP Chinese website!

Hot AI Tools

Undresser.AI Undress
AI-powered app for creating realistic nude photos

AI Clothes Remover
Online AI tool for removing clothes from photos.

Undress AI Tool
Undress images for free

Clothoff.io
AI clothes remover

Video Face Swap
Swap faces in any video effortlessly with our completely free AI face swap tool!

Hot Article
Hot Tools

Notepad++7.3.1
Easy-to-use and free code editor

SublimeText3 Chinese version
Chinese version, very easy to use

Zend Studio 13.0.1
Powerful PHP integrated development environment

Dreamweaver CS6
Visual web development tools

SublimeText3 Mac version
God-level code editing software (SublimeText3)
Hot Topics


 How to make Google Maps the default map in iPhone
Apr 17, 2024 pm 07:34 PM
How to make Google Maps the default map in iPhone
Apr 17, 2024 pm 07:34 PM
The default map on the iPhone is Maps, Apple's proprietary geolocation provider. Although the map is getting better, it doesn't work well outside the United States. It has nothing to offer compared to Google Maps. In this article, we discuss the feasible steps to use Google Maps to become the default map on your iPhone. How to Make Google Maps the Default Map in iPhone Setting Google Maps as the default map app on your phone is easier than you think. Follow the steps below – Prerequisite steps – You must have Gmail installed on your phone. Step 1 – Open the AppStore. Step 2 – Search for “Gmail”. Step 3 – Click next to Gmail app
 Steps to upgrade to the latest version of WeChat (Easily master the upgrade method to the latest version of WeChat)
Jun 01, 2024 pm 10:24 PM
Steps to upgrade to the latest version of WeChat (Easily master the upgrade method to the latest version of WeChat)
Jun 01, 2024 pm 10:24 PM
WeChat is one of the social media platforms in China that continuously launches new versions to provide a better user experience. Upgrading WeChat to the latest version is very important to keep in touch with family and colleagues, to stay in touch with friends, and to keep abreast of the latest developments. 1. Understand the features and improvements of the latest version. It is very important to understand the features and improvements of the latest version before upgrading WeChat. For performance improvements and bug fixes, you can learn about the various new features brought by the new version by checking the update notes on the WeChat official website or app store. 2. Check the current WeChat version We need to check the WeChat version currently installed on the mobile phone before upgrading WeChat. Click to open the WeChat application "Me" and then select the menu "About" where you can see the current WeChat version number. 3. Open the app
 This Apple ID is not yet in use in the iTunes Store: Fix
Jun 10, 2024 pm 05:42 PM
This Apple ID is not yet in use in the iTunes Store: Fix
Jun 10, 2024 pm 05:42 PM
When logging into iTunesStore using AppleID, this error saying "This AppleID has not been used in iTunesStore" may be thrown on the screen. There are no error messages to worry about, you can fix them by following these solution sets. Fix 1 – Change Shipping Address The main reason why this prompt appears in iTunes Store is that you don’t have the correct address in your AppleID profile. Step 1 – First, open iPhone Settings on your iPhone. Step 2 – AppleID should be on top of all other settings. So, open it. Step 3 – Once there, open the “Payment & Shipping” option. Step 4 – Verify your access using Face ID. step
 Shazam app not working in iPhone: Fix
Jun 08, 2024 pm 12:36 PM
Shazam app not working in iPhone: Fix
Jun 08, 2024 pm 12:36 PM
Having issues with the Shazam app on iPhone? Shazam helps you find songs by listening to them. However, if Shazam isn't working properly or doesn't recognize the song, you'll have to troubleshoot it manually. Repairing the Shazam app won't take long. So, without wasting any more time, follow the steps below to resolve issues with Shazam app. Fix 1 – Disable Bold Text Feature Bold text on iPhone may be the reason why Shazam is not working properly. Step 1 – You can only do this from your iPhone settings. So, open it. Step 2 – Next, open the “Display & Brightness” settings there. Step 3 – If you find that “Bold Text” is enabled
 Detailed explanation of the steps to obtain Win11 system administrator permissions
Mar 08, 2024 pm 09:09 PM
Detailed explanation of the steps to obtain Win11 system administrator permissions
Mar 08, 2024 pm 09:09 PM
Windows 11, as the latest operating system launched by Microsoft, is deeply loved by users. In the process of using Windows 11, sometimes we need to obtain system administrator rights in order to perform some operations that require permissions. Next, we will introduce in detail the steps to obtain system administrator rights in Windows 11. The first step is to click "Start Menu". You can see the Windows icon in the lower left corner. Click the icon to open the "Start Menu". In the second step, find and click "
 Clock app missing in iPhone: How to fix it
May 03, 2024 pm 09:19 PM
Clock app missing in iPhone: How to fix it
May 03, 2024 pm 09:19 PM
Is the clock app missing from your phone? The date and time will still appear on your iPhone's status bar. However, without the Clock app, you won’t be able to use world clock, stopwatch, alarm clock, and many other features. Therefore, fixing missing clock app should be at the top of your to-do list. These solutions can help you resolve this issue. Fix 1 – Place the Clock App If you mistakenly removed the Clock app from your home screen, you can put the Clock app back in its place. Step 1 – Unlock your iPhone and start swiping to the left until you reach the App Library page. Step 2 – Next, search for “clock” in the search box. Step 3 – When you see “Clock” below in the search results, press and hold it and
 iPhone screenshots not working: How to fix it
May 03, 2024 pm 09:16 PM
iPhone screenshots not working: How to fix it
May 03, 2024 pm 09:16 PM
Screenshot feature not working on your iPhone? Taking a screenshot is very easy as you just need to hold down the Volume Up button and the Power button at the same time to grab your phone screen. However, there are other ways to capture frames on the device. Fix 1 – Using Assistive Touch Take a screenshot using the Assistive Touch feature. Step 1 – Go to your phone settings. Step 2 – Next, tap to open Accessibility settings. Step 3 – Open Touch settings. Step 4 – Next, open the Assistive Touch settings. Step 5 – Turn on Assistive Touch on your phone. Step 6 – Open “Customize Top Menu” to access it. Step 7 – Now you just need to link any of these functions to your screen capture. So click on the first
 Safari zoom issue on iPhone: Here's the fix
Apr 20, 2024 am 08:08 AM
Safari zoom issue on iPhone: Here's the fix
Apr 20, 2024 am 08:08 AM
If you don't have control over the zoom level in Safari, getting things done can be tricky. So if Safari looks zoomed out, that might be a problem for you. Here are a few ways you can fix this minor zoom issue in Safari. 1. Cursor magnification: Select "Display" > "Cursor magnification" in the Safari menu bar. This will make the cursor more visible on the screen, making it easier to control. 2. Move the mouse: This may sound simple, but sometimes just moving the mouse to another location on the screen may automatically return it to normal size. 3. Use Keyboard Shortcuts Fix 1 – Reset Zoom Level You can control the zoom level directly from the Safari browser. Step 1 – When you are in Safari
