 Web Front-end
 JS Tutorial
 Detailed explanation of vue, node, and webpack environment building tutorials
Detailed explanation of vue, node, and webpack environment building tutorials
This article mainly introduces the vue+node+webpack environment construction tutorial in detail. It has certain reference value. Interested friends can refer to it. I hope it can help everyone.
1. Environment construction
Pay attention to the node version. Only nodes that support harmony mode will support es6. It will not be used when building the project name based on webpack. An error will be reported. The latest version is recommended.
After downloading the installation package, just click to install. The interface for testing successful installation is as follows:
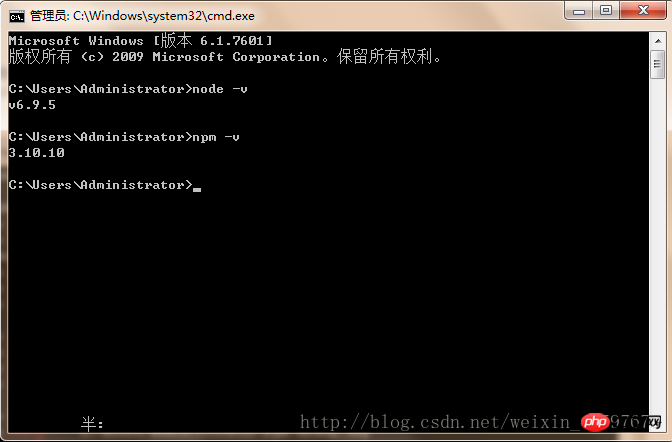
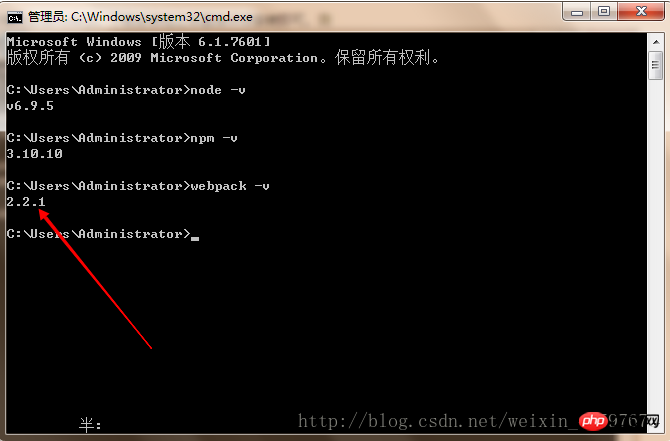
1.2. Use npm to install webpack. The command line statement is npm install webpack -g. The interface for successful test installation is as follows:
1.3. The following is to install the Taobao image, as shown below:

1.4. The next step is to install vue-cli globally. It should be noted that it takes a long time to install vue-cli using npm, which may take more than two hours.
The installation statement is: npminstall--globalvue-cli
##1.5 , Create a new project based on the webpack template The command line statement isvue init webpack my-project (where my-project is the file name, and the file name can only be lowercase letters). When creating a new template project, you need to go to the specified folder.
Inputvue init webpack my-project (project folder name) in cmd, press Enter, wait for a short while, items under 'git' will appear in sequence, you can press The following operation
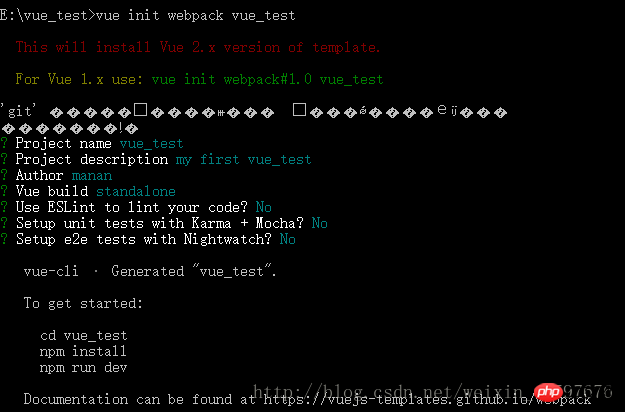
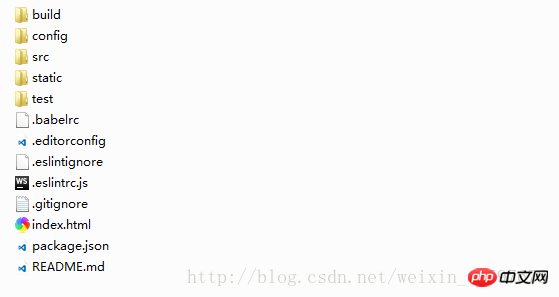
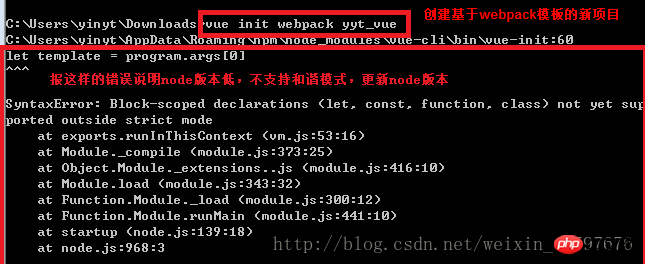
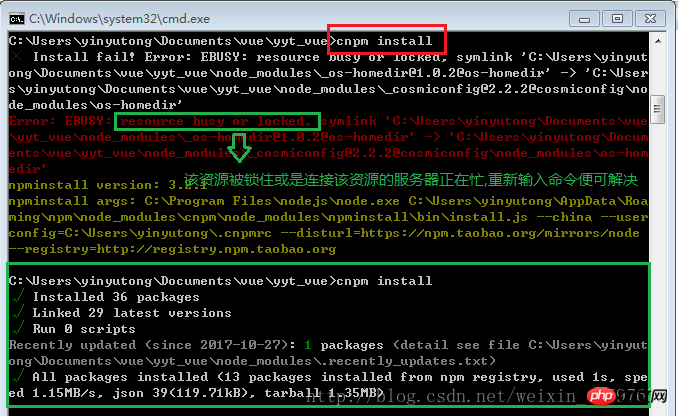
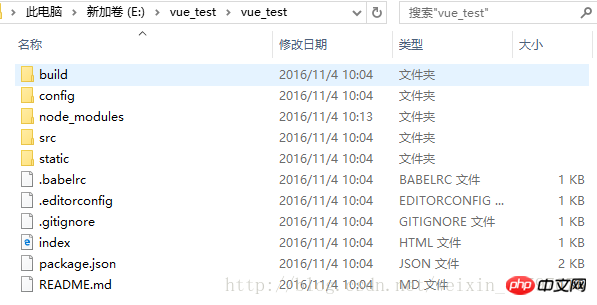
Method 1: Enter in cmd: cnpm rundev
(obviously every It is a very tedious process to modify the code every time and enter the command in cmd, so bring up the npm menu in webstorm Right-click on the package.json file -> click show npm scripts to bring up the menu. , to run in the future, just double-click dev in the npm menu.Note that running the project on the command line and running the dev project cannot be run at the same time. When running one, you need to close the other, otherwise an error that the port is occupied will be reported. . )Method 2: Enter in the browser: localhost:8080 (the default port is 8080)
If you enter the run command, an error will be reported. . There are two situations, as shown in the figure below: The first situation: port occupation problem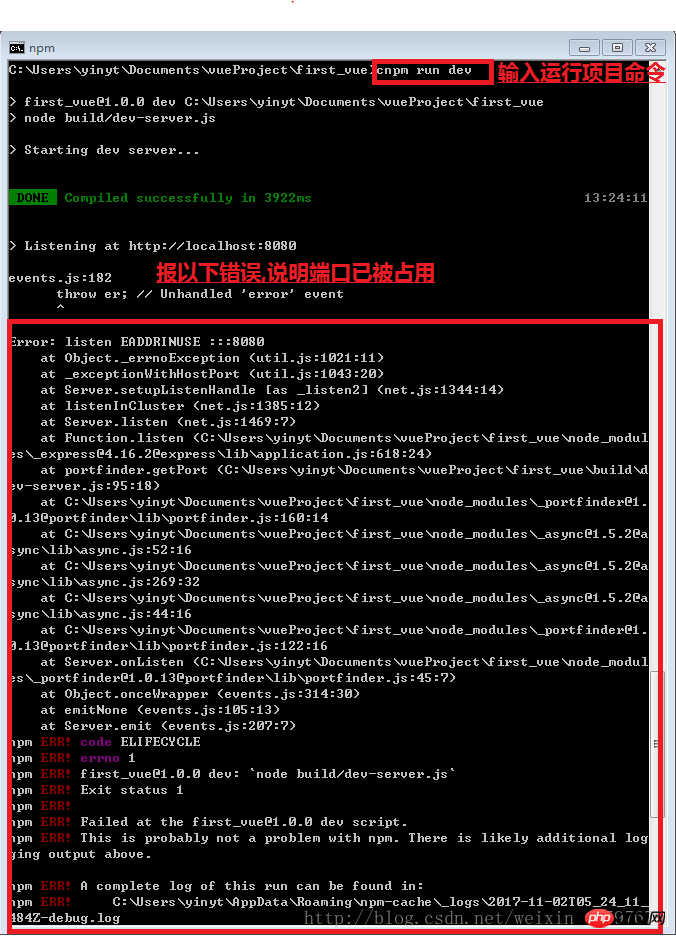
Solution is:
Solution 1: Close the port during the process.
a. Open cmd and enter the command netstat –ano. All port numbers will appear. b. Below local address is the port number, and PID is the process number of a program that occupies the port number ( Remember the process number)c. Open the task manager (ctrl + alt +delete), click on the process, then click on View, select "Select Column", click OK and you will find the process program occupying the port.d. Find the remembered process number and close it
Option 2: In the config/index.js file, modify the port number. Port: New port number.
Second type: npm version is too low and needs to be upgraded:
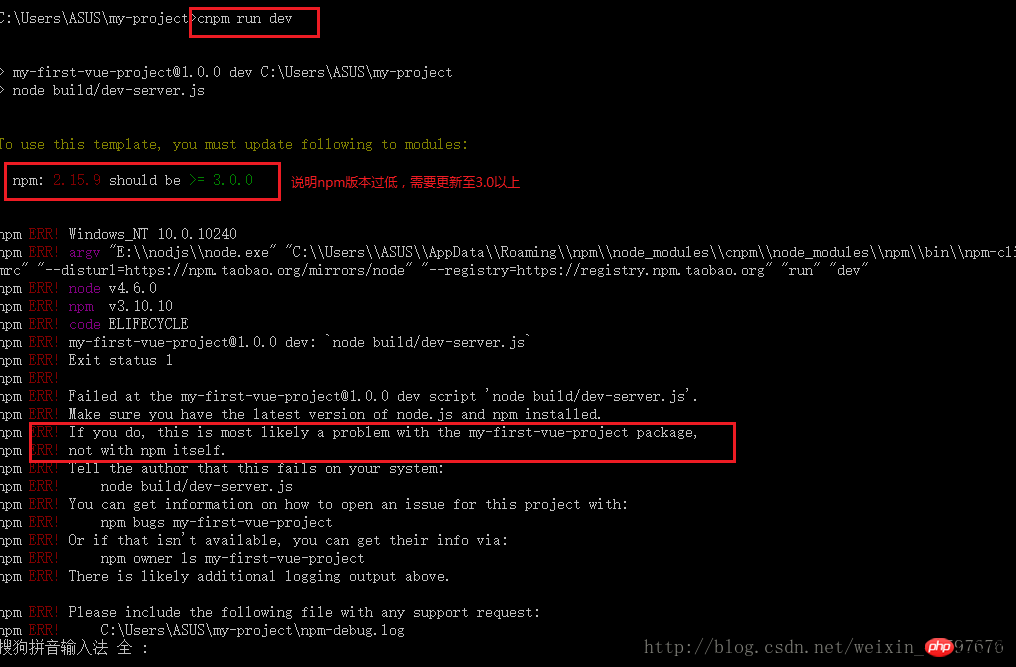
Solution:
a. Enter the command: npm install - g npm
b. Copy the files under C:\Users\{your Windows username}\AppData\Roaming\npm\node_modules\npm to \node_modules\npm in your NodeJS installation directory, Overwrite all the original files
(or use the comparative method and go through the previous steps again)
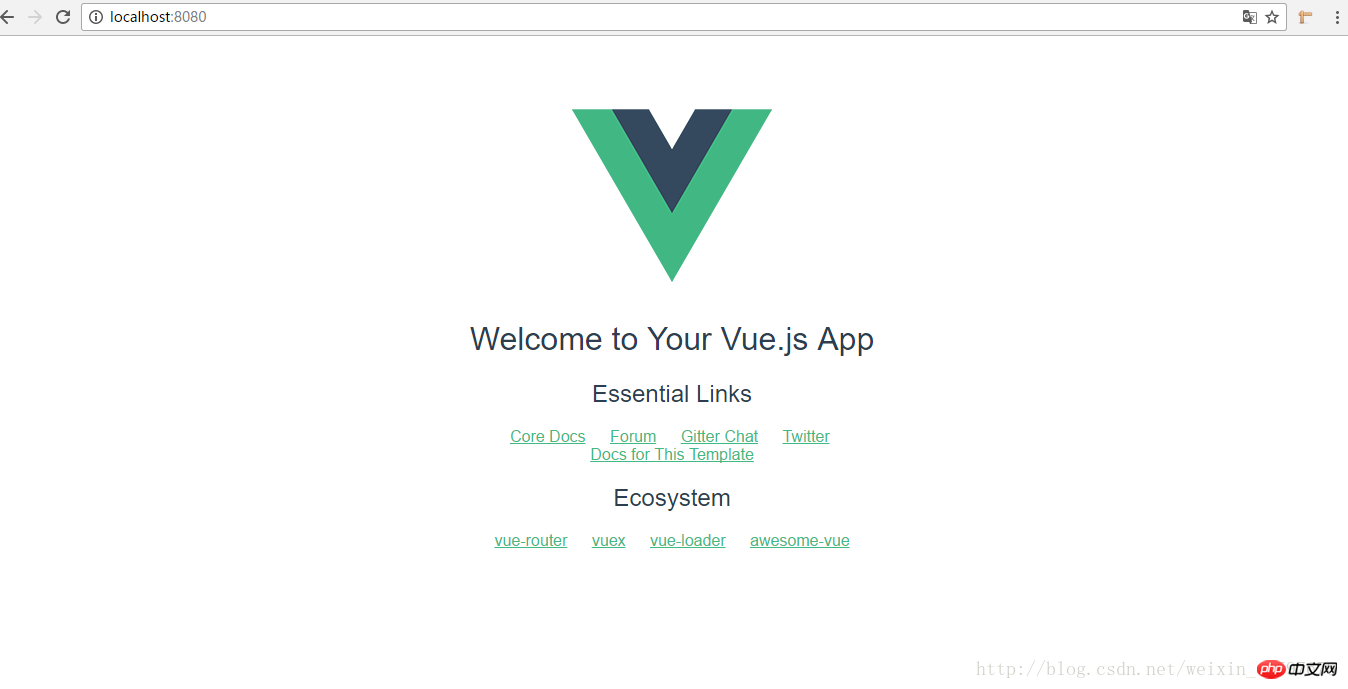
The effect after running is as shown below:
2. Changes based on personal needs
1. vue.js changes the default port number 8080 to the specified port:
Executing npm run dev actually calls package.json in the root directory
After opening package.json, you can find such a piece of code
"scripts":{
"dev":"nodebuild/dev-server.js",
"build":"nodebuild/build.js",
"lint":"eslint--ext.js,.vuesrc"

}From this It can be seen that we should check the dev-server.js file in the build directory
It can be found in the dev-server.js file
varuri='http://localhost:'+port
The port here is what we are looking for. At the beginning of dev-server.js we can find
varpath=require('path')
And where does path come from?
There is a config folder in the root directory. You can tell from the name that it is related to configuration. Open index.js in the config directory
dev:{
env:require('./dev.env'),
port:8080,
autoOpenBrowser:true,
assetsSubDirectory:'static',
assetsPublicPath:'/',
proxyTable:{},
cssSourceMap:false

}Not only can you Change the port and other configuration information as needed.
Related recommendations:
AngularJS environment building tutorial
A simple tutorial on how to build a vue environment with detailed examples
The clearest graphic tutorial on building a PHP server environment
The above is the detailed content of Detailed explanation of vue, node, and webpack environment building tutorials. For more information, please follow other related articles on the PHP Chinese website!

Hot AI Tools

Undresser.AI Undress
AI-powered app for creating realistic nude photos

AI Clothes Remover
Online AI tool for removing clothes from photos.

Undress AI Tool
Undress images for free

Clothoff.io
AI clothes remover

Video Face Swap
Swap faces in any video effortlessly with our completely free AI face swap tool!

Hot Article

Hot Tools

Notepad++7.3.1
Easy-to-use and free code editor

SublimeText3 Chinese version
Chinese version, very easy to use

Zend Studio 13.0.1
Powerful PHP integrated development environment

Dreamweaver CS6
Visual web development tools

SublimeText3 Mac version
God-level code editing software (SublimeText3)

Hot Topics
 VUE3 Getting Started Tutorial: Packaging and Building with Webpack
Jun 15, 2023 pm 06:17 PM
Vue is an excellent JavaScript framework that can help us quickly build interactive and efficient web applications. Vue3 is the latest version of Vue, which introduces many new features and functionality. Webpack is currently one of the most popular JavaScript module packagers and build tools, which can help us manage various resources in our projects. This article will introduce how to use Webpack to package and build Vue3 applications. 1. Install Webpack
 Pi Node Teaching: What is a Pi Node? How to install and set up Pi Node?
Mar 05, 2025 pm 05:57 PM
Detailed explanation and installation guide for PiNetwork nodes This article will introduce the PiNetwork ecosystem in detail - Pi nodes, a key role in the PiNetwork ecosystem, and provide complete steps for installation and configuration. After the launch of the PiNetwork blockchain test network, Pi nodes have become an important part of many pioneers actively participating in the testing, preparing for the upcoming main network release. If you don’t know PiNetwork yet, please refer to what is Picoin? What is the price for listing? Pi usage, mining and security analysis. What is PiNetwork? The PiNetwork project started in 2019 and owns its exclusive cryptocurrency Pi Coin. The project aims to create a one that everyone can participate
 How to implement form validation for web applications using Golang
Jun 24, 2023 am 09:08 AM
Form validation is a very important link in web application development. It can check the validity of the data before submitting the form data to avoid security vulnerabilities and data errors in the application. Form validation for web applications can be easily implemented using Golang. This article will introduce how to use Golang to implement form validation for web applications. 1. Basic elements of form validation Before introducing how to implement form validation, we need to know what the basic elements of form validation are. Form elements: form elements are
 Token-based authentication with Angular and Node
Sep 01, 2023 pm 02:01 PM
Authentication is one of the most important parts of any web application. This tutorial discusses token-based authentication systems and how they differ from traditional login systems. By the end of this tutorial, you will see a fully working demo written in Angular and Node.js. Traditional Authentication Systems Before moving on to token-based authentication systems, let’s take a look at traditional authentication systems. The user provides their username and password in the login form and clicks Login. After making the request, authenticate the user on the backend by querying the database. If the request is valid, a session is created using the user information obtained from the database, and the session information is returned in the response header so that the session ID is stored in the browser. Provides access to applications subject to
 Using Jetty7 for Web server processing in Java API development
Jun 18, 2023 am 10:42 AM
Using Jetty7 for Web Server Processing in JavaAPI Development With the development of the Internet, the Web server has become the core part of application development and is also the focus of many enterprises. In order to meet the growing business needs, many developers choose to use Jetty for web server development, and its flexibility and scalability are widely recognized. This article will introduce how to use Jetty7 in JavaAPI development for We
 How to configure nginx to ensure that the frps server and web share port 80
Jun 03, 2023 am 08:19 AM
First of all, you will have a doubt, what is frp? Simply put, frp is an intranet penetration tool. After configuring the client, you can access the intranet through the server. Now my server has used nginx as the website, and there is only one port 80. So what should I do if the FRP server also wants to use port 80? After querying, this can be achieved by using nginx's reverse proxy. To add: frps is the server, frpc is the client. Step 1: Modify the nginx.conf configuration file in the server and add the following parameters to http{} in nginx.conf, server{listen80
 Real-time protection against face-blocking barrages on the web (based on machine learning)
Jun 10, 2023 pm 01:03 PM
Face-blocking barrage means that a large number of barrages float by without blocking the person in the video, making it look like they are floating from behind the person. Machine learning has been popular for several years, but many people don’t know that these capabilities can also be run in browsers. This article introduces the practical optimization process in video barrages. At the end of the article, it lists some applicable scenarios for this solution, hoping to open it up. Some ideas. mediapipeDemo (https://google.github.io/mediapipe/) demonstrates the mainstream implementation principle of face-blocking barrage on-demand up upload. The server background calculation extracts the portrait area in the video screen, and converts it into svg storage while the client plays the video. Download svg from the server and combine it with barrage, portrait
 What are web standards?
Oct 18, 2023 pm 05:24 PM
Web standards are a set of specifications and guidelines developed by W3C and other related organizations. It includes standardization of HTML, CSS, JavaScript, DOM, Web accessibility and performance optimization. By following these standards, the compatibility of pages can be improved. , accessibility, maintainability and performance. The goal of web standards is to enable web content to be displayed and interacted consistently on different platforms, browsers and devices, providing better user experience and development efficiency.


