How to implement springboot paging function
1. The role of paging function
The paging function is an indispensable part of various websites and systems (such as pagination of Baidu search results, etc.). When a page has a large amount of data, the paging function is reflected. It has the following five functions.
(1) Reduce the consumption of system resources
(2) Improve the query performance of the database
(3) Improve the page access speed
(4 ) In line with the user’s browsing habits
(5) Adapt to the layout of the page
2. Establish a test database
Due to the need to implement the paging function, more data is required
DROP TABLE IF EXISTS tb_user;

CREATE TABLE tb_user (
    id int(11) NOT NULL AUTO_INCREMENT COMMENT '主键id',
    name varchar(100) NOT NULL DEFAULT '' COMMENT '登录名',
    password varchar(100) NOT NULL DEFAULT '' COMMENT '密码',
    PRIMARY KEY (id) USING BTREE
) ENGINE = InnoDB CHARACTER SET = utf8;

insert into tb_user (id,name,password)
value (1,'C','123456'),
(2,'C++','123456'),
(3,'Java','123456'),
(4,'Python','123456'),
(5,'R','123456'),
(6,'C#','123456');

insert into tb_user (id,name,password) value (7,'test1','123456');
insert into tb_user (id,name,password) value (8,'test2','123456');
insert into tb_user (id,name,password) value (9,'test3','123456');
insert into tb_user (id,name,password) value (10,'test4','123456');
insert into tb_user (id,name,password) value (11,'test5','123456');
insert into tb_user (id,name,password) value (12,'test6','123456');
insert into tb_user (id,name,password) value (13,'test7','123456');
insert into tb_user (id,name,password) value (14,'test8','123456');
insert into tb_user (id,name,password) value (15,'test9','123456');
insert into tb_user (id,name,password) value (16,'test10','123456');
insert into tb_user (id,name,password) value (17,'test11','123456');
insert into tb_user (id,name,password) value (18,'test12','123456');
insert into tb_user (id,name,password) value (19,'test13','123456');
insert into tb_user (id,name,password) value (20,'test14','123456');
insert into tb_user (id,name,password) value (21,'test15','123456');
insert into tb_user (id,name,password) value (22,'test16','123456');
insert into tb_user (id,name,password) value (23,'test17','123456');
insert into tb_user (id,name,password) value (24,'test18','123456');
insert into tb_user (id,name,password) value (25,'test19','123456');
insert into tb_user (id,name,password) value (26,'test20','123456');
insert into tb_user (id,name,password) value (27,'test21','123456');
insert into tb_user (id,name,password) value (28,'test22','123456');
insert into tb_user (id,name,password) value (29,'test23','123456');
insert into tb_user (id,name,password) value (30,'test24','123456');
insert into tb_user (id,name,password) value (31,'test25','123456');
insert into tb_user (id,name,password) value (32,'test26','123456');
insert into tb_user (id,name,password) value (33,'test27','123456');
insert into tb_user (id,name,password) value (34,'test28','123456');
insert into tb_user (id,name,password) value (35,'test29','123456');
insert into tb_user (id,name,password) value (36,'test30','123456');
insert into tb_user (id,name,password) value (37,'test31','123456');
insert into tb_user (id,name,password) value (38,'test32','123456');
insert into tb_user (id,name,password) value (39,'test33','123456');
insert into tb_user (id,name,password) value (40,'test34','123456');
insert into tb_user (id,name,password) value (41,'test35','123456');
insert into tb_user (id,name,password) value (42,'test36','123456');
insert into tb_user (id,name,password) value (43,'test37','123456');
insert into tb_user (id,name,password) value (44,'test38','123456');
insert into tb_user (id,name,password) value (45,'test39','123456');
insert into tb_user (id,name,password) value (46,'test40','123456');
insert into tb_user (id,name,password) value (47,'test41','123456');
insert into tb_user (id,name,password) value (48,'test42','123456');
insert into tb_user (id,name,password) value (49,'test43','123456');
insert into tb_user (id,name,password) value (50,'test44','123456');
insert into tb_user (id,name,password) value (51,'test45','123456');3. Encapsulation of the results returned by the paging function
Create a util package and create a new Result general result class in the package. The code is as follows:
package ltd.newbee.mall.entity;

public class User {
    private Integer id;
    private String name;
    private String password;

    public Integer getId() {
        return id;
    }

    public void setId(Integer id) {
        this.id = id;
    }

    public String getName() {
        return name;
    }

    public void setName(String name) {
        this.name = name;
    }

    public String getPassword() {
        return password;
    }

    public void setPassword(String password) {
        this.password = password;
    }
}Data returned by the back-end interface Data will be encapsulated according to the above format, including business code, return information, and actual data results. This format is set by the developers themselves, and can be adjusted appropriately if there are other better solutions.
Create a new PageResult general result class in the util package, the code is as follows:
package ltd.newbee.mall.util;

import java.util.List;

/**
 * 分页工具类
 */
public class PageResult {
    //总记录数
    private int totalCount;
    //每页记录数
    private int pageSize;
    //总页数
    private int totalPage;
    //当前页数
    private int currPage;
    //列表数据
    private List<?> list;

    /**
     *
     * @param totalCount 总记录数
     * @param pageSize 每页记录数
     * @param currPage 当前页数
     * @param list 列表数据
     */
    public PageResult(int totalCount, int pageSize, int currPage, List<?> list) {
        this.totalCount = totalCount;
        this.pageSize = pageSize;
        this.currPage = currPage;
        this.list = list;
        this.totalPage = (int) Math.ceil((double) totalCount / pageSize);
    }

    public int getTotalCount() {
        return totalCount;
    }

    public void setTotalCount(int totalCount) {
        this.totalCount = totalCount;
    }

    public int getPageSize() {
        return pageSize;
    }

    public void setPageSize(int pageSize) {
        this.pageSize = pageSize;
    }

    public int getTotalPage() {
        return totalPage;
    }

    public void setTotalPage(int totalPage) {
        this.totalPage = totalPage;
    }

    public int getCurrPage() {
        return currPage;
    }

    public void setCurrPage(int currPage) {
        this.currPage = currPage;
    }

    public List<?> getList() {
        return list;
    }

    public void setList(List<?> list) {
        this.list = list;
    }
}4. Specific implementation of paging function code
4.1 Data layer
In UserDao Two new methods, findUsers() and getTotalUser(), are added to the interface. The code is as follows:
/**
     * 返回分页数据列表
     *
     * @param pageUtil
     * @return
     */
    List<User> findUsers(PageQueryUtil pageUtil);

    /**
     * 返回数据总数
     *
     * @param pageUtil
     * @return
     */
int getTotalUser(PageQueryUtil pageUtil);Add the mapping statements of these two methods in the UserMapper.xml file. The code is as follows:
<!--分页-->
    <!--查询用户列表-->
    <select id="findUsers" parameterType="Map" resultMap="UserResult">
        select id,name,password from tb_user
        order by id desc
        <if test="start!=null and limit!=null">
            limit #{start}.#{limit}
        </if>
    </select>
    <!--查询用户总数-->
    <select id="getTotalUser" parameterType="Map" resultType="int">
        select count(*) from tb_user
</select>4.2 Business layer
Create a new service package and add a new business class UserService. The code is as follows:
import ltd.newbee.mall.dao.UserDao;
import ltd.newbee.mall.entity.User;
import ltd.newbee.mall.util.PageResult;
import ltd.newbee.mall.util.PageQueryUtil;
import org.springframework.beans.factory.annotation.Autowired;
import org.springframework.stereotype.Service;

import java.util.List;

@Service
public class UserService {

    @Autowired
    private UserDao userDao;

    public PageResult getUserPage(PageQueryUtil pageUtil){
        //当前页面中的数据列表
        List<User> users = userDao.findUsers(pageUtil);
        //数据总条数,用于计算分页数据
        int total = userDao.getTotalUser(pageUtil);
        //分页信息封装
        PageResult pageResult = new PageResult(users,total,pageUtil.getLimit(),pageUtil.getPage());
        return pageResult;
    }
}First query the current page based on the current page and the number of items per page Data collection, then call the select count (*) statement to query the total number of data to calculate the paging data, and finally encapsulate the obtained data into a PageResult object and return it to the control layer.
4.3 Control layer
Create a new PageTestController class in the controller package to process paging requests and return query results. The code is as follows:
@RestController
@RequestMapping("users")
public class PageTestController {

    @Autowired
    private UserService userService;

    //分页功能测试
    @RequestMapping(value = "/list",method = RequestMethod.GET)
    public Result list(@RequestParam Map<String,Object> params){
        Result result = new Result();
        if (StringUtils.isEmpty(params.get("page"))||StringUtils.isEmpty(params.get("limit"))){
            //返回错误码
            result.setResultCode(500);
            //错误信息
            result.setMessage("参数异常!");
            return result;
        }
        //封装查询参数
        PageQueryUtil queryParamList = new PageQueryUtil(params);
        //查询并封装分页结果集
        PageResult userPage = userService.getUserPage(queryParamList);
        //返回成功码
        result.setResultCode(200);
        result.setMessage("查询成功");
        //返回分页数据
        result.setData(userPage);
        return result;
    }
}Paging function Interaction process: The front-end transmits the required page number and number of items parameters to the back-end. The back-end calculates the paging parameters after receiving the paging request, and uses the limit keyword of MySQL to query the corresponding records. The query results are encapsulated and returned to front end. The @RestController annotation is used on the TestUserControler class, which is equivalent to the combined annotation of @ResponseBody+@Controller.
5.jqGrid paging plug-in
jqGrid is a jQuery plug-in used to display grid data. By using jqGrid, developers can easily implement Ajax asynchronous communication between the front-end page and the background data and implement paging functions. At the same time, jqGrid is an open source paging plug-in, and the source code has been in a state of iterative updates.
Download address: jqGrid
After downloading jqGrid, unzip the file and drag the unzipped file directly into the static directory of the project

The following are Steps to implement paging in jqGrid:
First, introduce the source files required by the jqGrid paging plug-in into the front-end page code. The code is as follows:
<link href="plugins/jqgrid-5.8.2/ui.jqgrid-bootstrap4.css" rel="external nofollow"  rel="stylesheet"/>
<!--jqGrid依赖jQuery,因此需要先引入jquery.min.js文件,下方地址为字节跳动提供的cdn地址-->
<script src="http://s3.pstatp.com/cdn/expire-1-M/jquery/3.3.1/jquery.min.js"></script>
<!--grid.locale-cn.js为国际化所需的文件,-cn表示中文-->
<script src="plugins/jqgrid-5.8.2/grid.locale-cn.js"></script>
<script src="plugins/jqgrid-5.8.2/jquery.jqGrid.min.js"></script>
Secondly, the paging data needs to be displayed on the page Add the code for jqGrid initialization in the area:
<!--jqGrid必要DOM,用于创建表格展示列表数据-->
<table id="jqGrid" class="table table-bordered"></table>

<!--jqGrid必要DOM,分页信息区域-->
<div id="jqGridPager"></div>
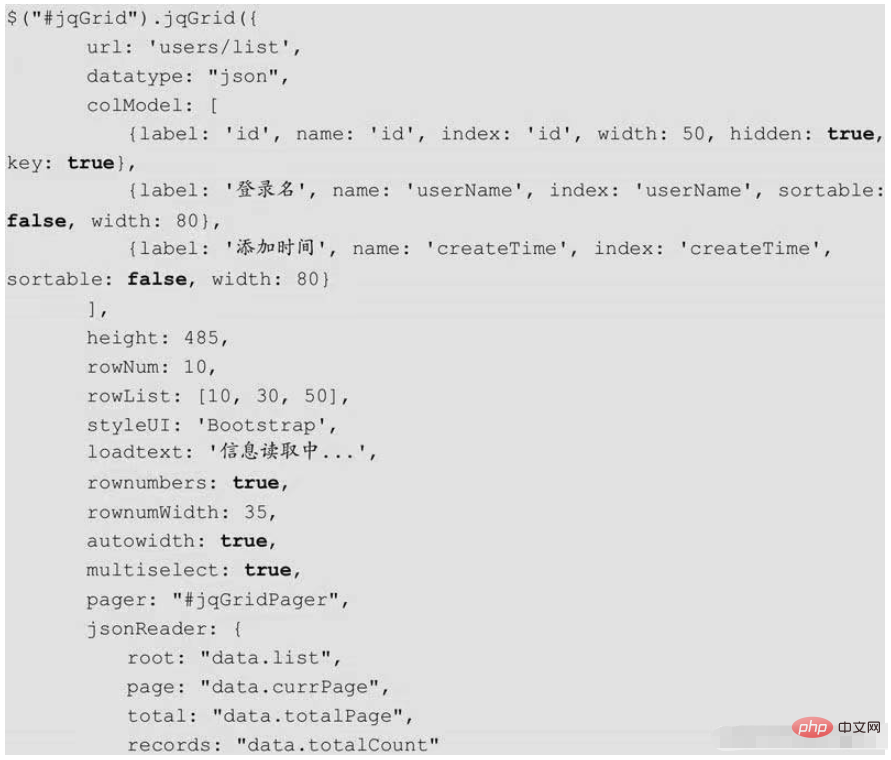
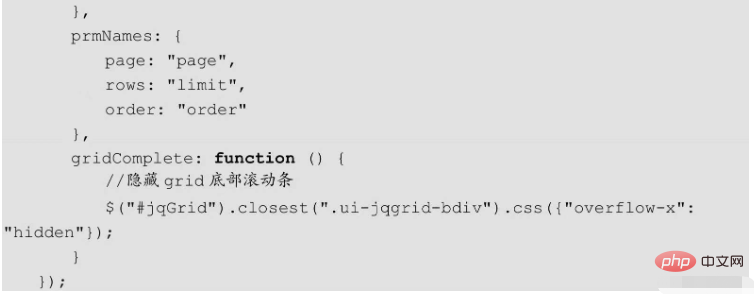
Finally, call the jqGrid() method of the jqGrid paging plug-in to render the paging display area. The code is as follows:


The parameters and meanings in the jqGrid() method are as shown in the figure.

jqGrid front-end page test:
Create a new jqgrid-page-test.html file in the resources/static directory, the code is as follows:
<!DOCTYPE html>
<html>
<head>
    <meta charset="UTF-8">
    <title>jqGrid分页测试</title>
    <!--引入bootstrap样式文件-->
    <link rel="stylesheet" href="/static/bootstrap-5.3.0-alpha3-dist/css/bootstrap.css" rel="external nofollow" />
    <link href="jqGrid-5.8.2/css/ui.jqgrid-bootstrap4.css" rel="external nofollow"  rel="stylesheet"/>
</head>
<body>
<div >
    <!--数据展示列表,id为jqGrid-->
    <table id="jqGrid" class="table table-bordered"></table>
    <!--分页按钮展示区-->
    <div id="jqGridPager"></div>
</div>
</body>
<!--jqGrid依赖jQuery,因此需要先引入jquery.min.js文件,下方地址为字节跳动提供的cdn地址-->
<script src="http://s3.pstatp.com/cdn/expire-1-M/jquery/3.3.1/jquery.min.js"></script>
<!--grid.locale-cn.js为国际化所需的文件,-cn表示中文-->
<script src="plugins/jqgrid-5.8.2/grid.locale-cn.js"></script>
<script src="plugins/jqgrid-5.8.2/jquery.jqGrid.min.js"></script>
<script src="jqgrid-page-test.js"></script>
</html>jqGrid initialization
Create a new jqgrid-page-test.js file in the resources/static directory. The code is as follows:
$(function () {
    $("#jqGrid").jqGrid({
        url: 'users/list',
        datatype: "json",
        colModel: [
            {label: 'id',name: 'id', index: 'id', width: 50, hidden: true,key:true},
            {label: '登录名',name: 'name',index: 'name', sortable: false, width: 80},
            {label: '密码字段',name: 'password',index: 'password', sortable: false, width: 80}
        ],
        height: 485,
        rowNum: 10,
        rowList: [10,30,50],
        styleUI: 'Bootstrap',
        loadtext: '信息读取中...',
        rownumbers: true,
        rownumWidth: 35,
        autowidth: true,
        multiselect: true,
        pager: "#jqGridPager",
        jsonReader:{
            root: "data.list",
            page: "data.currPage",
            total: "data.totalCount"
        },
        prmNames:{
            page: "page",
            rows: "limit",
            order: "order"
        },
        gridComplete: function () {
            //隐藏grid底部滚动条
            $("#jqGrid").closest(".ui-jqgrid-bdiv").css({"overflow-x": "hidden"});
        }
    });
    $(window).resize(function () {
        $("jqGrid").setGridWidth($(".card-body").width());
    });
});The above is the detailed content of How to implement springboot paging function. For more information, please follow other related articles on the PHP Chinese website!

Hot AI Tools

Undresser.AI Undress
AI-powered app for creating realistic nude photos

AI Clothes Remover
Online AI tool for removing clothes from photos.

Undress AI Tool
Undress images for free

Clothoff.io
AI clothes remover

Video Face Swap
Swap faces in any video effortlessly with our completely free AI face swap tool!

Hot Article

Hot Tools

Notepad++7.3.1
Easy-to-use and free code editor

SublimeText3 Chinese version
Chinese version, very easy to use

Zend Studio 13.0.1
Powerful PHP integrated development environment

Dreamweaver CS6
Visual web development tools

SublimeText3 Mac version
God-level code editing software (SublimeText3)

Hot Topics
 How Springboot integrates Jasypt to implement configuration file encryption
Jun 01, 2023 am 08:55 AM
Introduction to Jasypt Jasypt is a java library that allows a developer to add basic encryption functionality to his/her project with minimal effort and does not require a deep understanding of how encryption works. High security for one-way and two-way encryption. , standards-based encryption technology. Encrypt passwords, text, numbers, binaries... Suitable for integration into Spring-based applications, open API, for use with any JCE provider... Add the following dependency: com.github.ulisesbocchiojasypt-spring-boot-starter2. 1.1Jasypt benefits protect our system security. Even if the code is leaked, the data source can be guaranteed.
 How SpringBoot integrates Redisson to implement delay queue
May 30, 2023 pm 02:40 PM
Usage scenario 1. The order was placed successfully but the payment was not made within 30 minutes. The payment timed out and the order was automatically canceled. 2. The order was signed and no evaluation was conducted for 7 days after signing. If the order times out and is not evaluated, the system defaults to a positive rating. 3. The order is placed successfully. If the merchant does not receive the order for 5 minutes, the order is cancelled. 4. The delivery times out, and push SMS reminder... For scenarios with long delays and low real-time performance, we can Use task scheduling to perform regular polling processing. For example: xxl-job Today we will pick
 How to use Redis to implement distributed locks in SpringBoot
Jun 03, 2023 am 08:16 AM
1. Redis implements distributed lock principle and why distributed locks are needed. Before talking about distributed locks, it is necessary to explain why distributed locks are needed. The opposite of distributed locks is stand-alone locks. When we write multi-threaded programs, we avoid data problems caused by operating a shared variable at the same time. We usually use a lock to mutually exclude the shared variables to ensure the correctness of the shared variables. Its scope of use is in the same process. If there are multiple processes that need to operate a shared resource at the same time, how can they be mutually exclusive? Today's business applications are usually microservice architecture, which also means that one application will deploy multiple processes. If multiple processes need to modify the same row of records in MySQL, in order to avoid dirty data caused by out-of-order operations, distribution needs to be introduced at this time. The style is locked. Want to achieve points
 How to solve the problem that springboot cannot access the file after reading it into a jar package
Jun 03, 2023 pm 04:38 PM
Springboot reads the file, but cannot access the latest development after packaging it into a jar package. There is a situation where springboot cannot read the file after packaging it into a jar package. The reason is that after packaging, the virtual path of the file is invalid and can only be accessed through the stream. Read. The file is under resources publicvoidtest(){Listnames=newArrayList();InputStreamReaderread=null;try{ClassPathResourceresource=newClassPathResource("name.txt");Input
 How to implement Springboot+Mybatis-plus without using SQL statements to add multiple tables
Jun 02, 2023 am 11:07 AM
When Springboot+Mybatis-plus does not use SQL statements to perform multi-table adding operations, the problems I encountered are decomposed by simulating thinking in the test environment: Create a BrandDTO object with parameters to simulate passing parameters to the background. We all know that it is extremely difficult to perform multi-table operations in Mybatis-plus. If you do not use tools such as Mybatis-plus-join, you can only configure the corresponding Mapper.xml file and configure The smelly and long ResultMap, and then write the corresponding sql statement. Although this method seems cumbersome, it is highly flexible and allows us to
 Comparison and difference analysis between SpringBoot and SpringMVC
Dec 29, 2023 am 11:02 AM
SpringBoot and SpringMVC are both commonly used frameworks in Java development, but there are some obvious differences between them. This article will explore the features and uses of these two frameworks and compare their differences. First, let's learn about SpringBoot. SpringBoot was developed by the Pivotal team to simplify the creation and deployment of applications based on the Spring framework. It provides a fast, lightweight way to build stand-alone, executable
 How SpringBoot customizes Redis to implement cache serialization
Jun 03, 2023 am 11:32 AM
1. Customize RedisTemplate1.1, RedisAPI default serialization mechanism. The API-based Redis cache implementation uses the RedisTemplate template for data caching operations. Here, open the RedisTemplate class and view the source code information of the class. publicclassRedisTemplateextendsRedisAccessorimplementsRedisOperations, BeanClassLoaderAware{//Declare key, Various serialization methods of value, the initial value is empty @NullableprivateRedisSe
 SpringBoot+Dubbo+Nacos development practical tutorial
Aug 15, 2023 pm 04:49 PM
This article will write a detailed example to talk about the actual development of dubbo+nacos+Spring Boot. This article will not cover too much theoretical knowledge, but will write the simplest example to illustrate how dubbo can be integrated with nacos to quickly build a development environment.


