

How to Fix Explorer.exe High CPU Usage Windows 11

Unlike the Explorer.exe high CPU usage issue in Windows 11, a computer may experience high CPU usage. This is completely normal, as long as it happens rarely and doesn't significantly affect your PC's performance.
However, this can become a problem when it occurs repeatedly. It can heat up your system, delay loading times, and potentially freeze while you're working on important tasks.
Why is my computer experiencing high CPU usage from Explorer.exe?
Typically, a computer may experience high CPU usage due to one of the following reasons:
- Running programs that require higher CPU requirements: Video editing and gaming software can trigger high CPU usage CPU usage. Problems may occur if these applications are run on a computer that is less powerful than the publisher's recommendations. If you want to run them, you should launch them all at once, not simultaneously with other applications.
- Browser Extensions and System Add-ons: Browsers like Chrome and Edge tend to consume a lot of CPU usage, especially if you download a lot of extensions. Likewise, some plug-ins designed for Microsoft Word, Excel, etc. can also cause high CPU usage. Computers with compatible features should have no problem processing them efficiently.
- Computer Viruses: Different kinds of malware can eat away at your CPU. In fact, cybercriminals like crypto miners develop viruses specifically written for this purpose.
- Start Applications: Certain applications that launch when the computer starts may cause high CPU usage. This is because, even if they don't appear active in the taskbar, they often continue to run in the background.
Meanwhile, Windows 11 users have complained about Explorer.exe high CPU usage issues since they updated their Windows.
We know this is just one of many causes of high CPU usage. Keep reading as we highlight the process that can fix your problem, no matter the cause.
How to fix Explorer.exe high CPU usage in Windows 11?
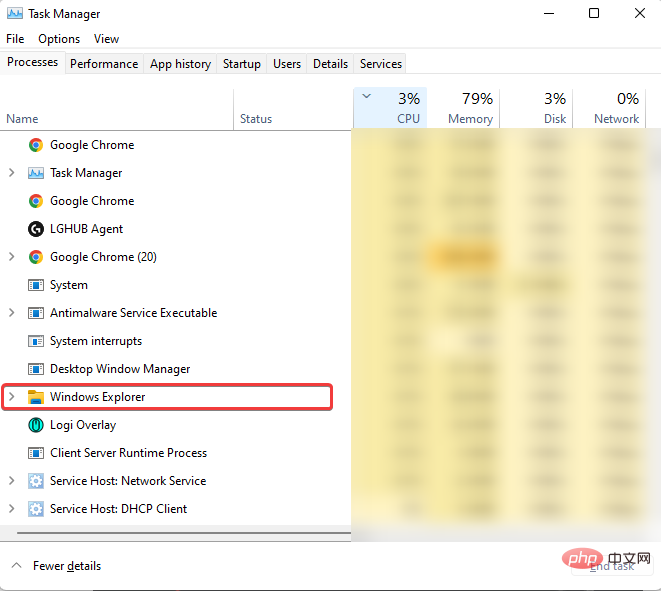
1. Close the Explorer.exe file in the Task Manager
- Press the Ctrl Shift Esc key Start Task Manager. Right-click Explorer.exe.

- Next, select End Mission.
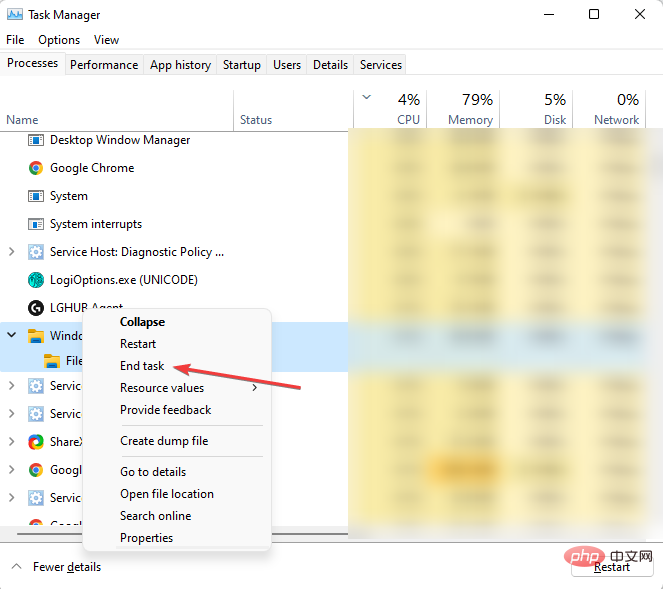
#Repeat the above process for any other programs that may be causing high CPU usage. If this doesn't resolve the issue or you can't fully open Task Manager, continue reading for other solutions. 2. Use System File Checker
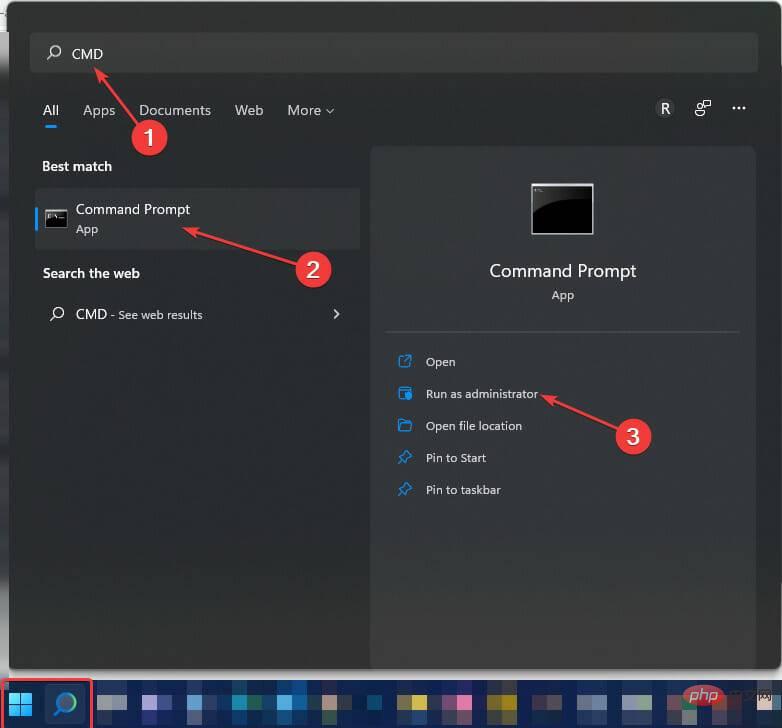
Open- Windows Search## by selecting the Search icon in the taskbar or left-clicking the Windows logo in the taskbar. #. Type
- CMD and select Run as administrator. Next, select Yes to launch the Command Prompt.
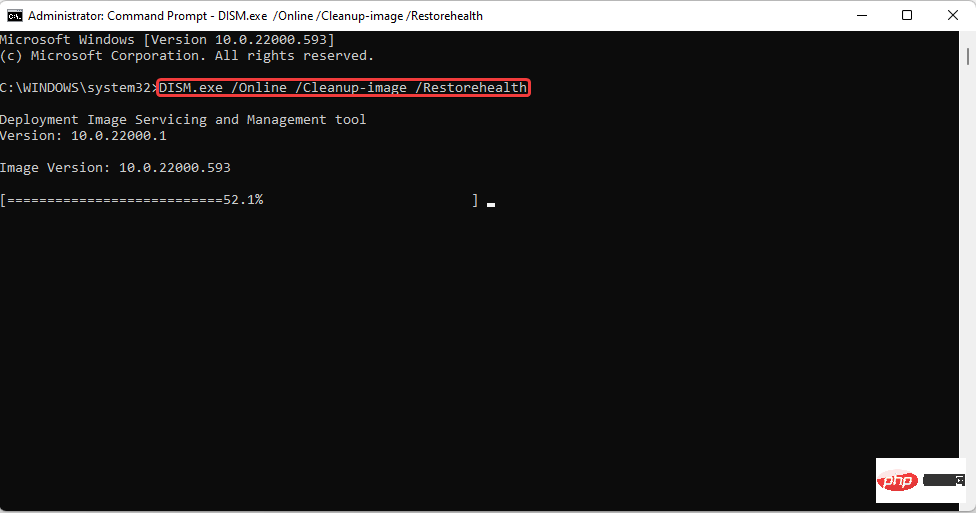
Type the following command: Observe the space in between. To avoid any mistakes, you can copy and paste. Next, press .
- DISM.exe /Online /Cleanup-image /Restorehealth
<strong>##Enter<br></strong>Wait a few seconds minutes (it may take up to 30 minutes) until you see a message saying
The operation completed successfully. - Next, type the following command: sfc /scannow
-
Observe the space in between. You may want to copy and paste it from here. After that, press <strong>Enter</strong>.
Wait until you see a message Verification 100% complete. Then, type exit. - 3. Update Windows
 .
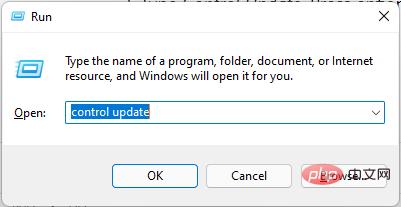
. Run
.- Windows
- R#Type to control updates. Press Enter.
-
Select
Check for Updates. If an update is available, download it. -
Restart the computer
Install. - 4. Disable Cloud Storage By default, Windows 11 comes with OneDrive cloud storage. This storage helps back up your system files in case you are attacked by ransomware. For clarity, ransomware is a type of virus used by cybercriminals to blackmail users.
 . If an update is available, download it.
 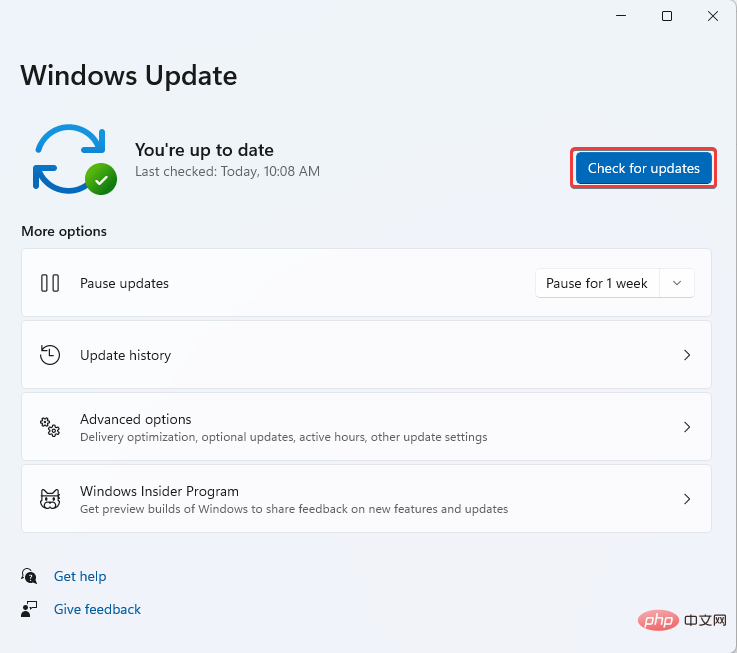 .
. It may be downloaded along with online files unknowingly and once installed, takes over all your files making them impossible to open.
After this the attacker will display a message to make a certain payment before you get the key to regain access. Even after payment.
Some users reported that disabling their OneDrive account helped resolve this issue. If you don’t know what to do, check out our tutorial on how to uninstall any app on Windows 11.
If you're not using OneDrive but another cloud storage (such as Dropbox), try doing the same thing and see if that resolves the issue.
5. Check your desktop for files with missing icons
Some applications may fail to create icons during shortcut creation. Although this may not seem like a problem, surprisingly, it can cause Explorer.exe high CPU usage.
Observe your desktop screen if any files are missing icons. If there are, delete them. Check if the issue has been resolved. You can also restart your PC to confirm.
6. Uninstall the latest Windows updates
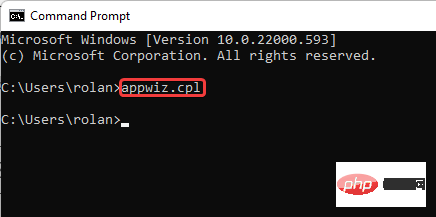
- Launch Command Prompt by typing CMD in Windows Search, right-click command prompt and run as administrator.
- Type or copy and paste the following command:
<strong>appwiz.cpl</strong>
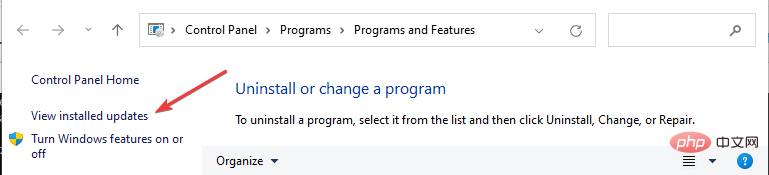
- Select View installed updates .
- Right-click on the latest Windows Update. Select Uninstall.

##Microsoft's typical practice is to always release patches to address one or another issue observed while using the Windows operating system (OS). Sometimes, these updates can be the source of problems on your PC.
To be fair, they just want to help and make sure you have the best experience. However, like any software, glitches are inevitable.
Users noted that the KB5010414 update was responsible for high CPU usage of Explorer.exe and was fixed immediately after uninstallation.
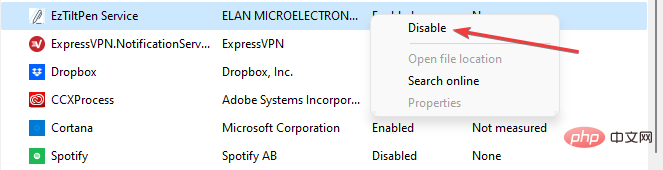
7. Disable startup applications
- Open Task Manager. Select Start.
- Right-click on the displayed application to select Disable except Windows Defender.

8. Run a virus scan
Malware may be the reason why your system is experiencing high CPU usage from Explorer.exe. If you have any antivirus/anti-malware software installed, it’s time to put them to use. Conduct a deep scan to detect any viruses on your system.
Use multiple antivirus software to make sure you don't miss anything. Don’t know what anti-virus software to use? You may want to consider some free antivirus apps like ESET Internet Security as it can effectively protect any Windows operating system from malware, ransomware, and phishing.
⇒ Get ESET Internet Security
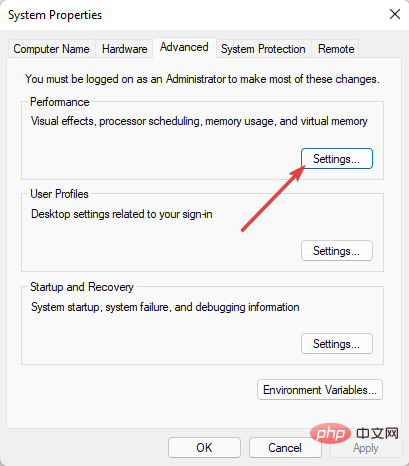
9. Tune your system for optimal performance
- In File Explorer, right-click on This PC from the left panel (you can launch it by pressing File ExplorerWindow). WindowsE
- Select properties. Select Advanced System Settings in the related links.
- Find Settings under Performance and click Performance.
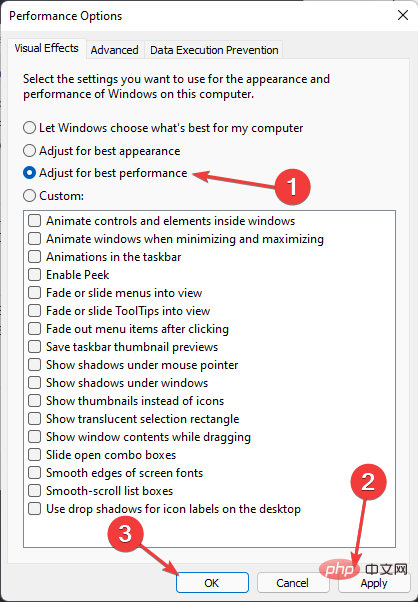
- Next, select Adjust for best performance. Click Apply. Then left click on OK.
- Restart the system for the changes to take full effect.

If none of the above methods seem to work, you can still try optimizing your hard drive using a defragmentation tool.
10. System Restore
- Press the logo key to open the Run prompt. WindowsR
- Type or copy and paste the following command:
<strong>rstrui.exe</strong> - Press the Shift Enter key to launch it with administrator privileges.
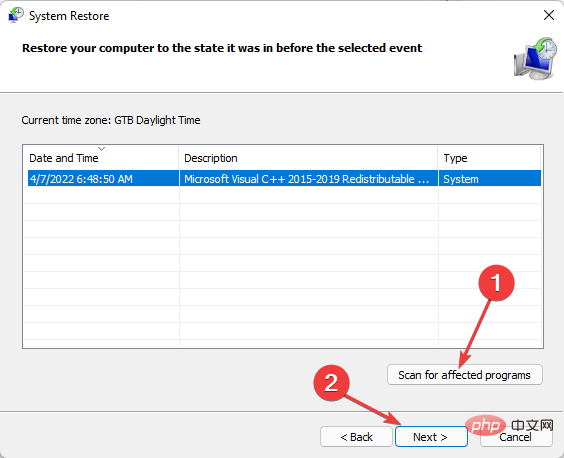
- Wait for system restore to start. Then select Next.
- Select a preferred restart point to restore your computer to the state it was in before the problem occurred.
- Before clicking Next Scan for affected programs. If the affected program is something you don't want to lose, you can select another restore point if one is available.
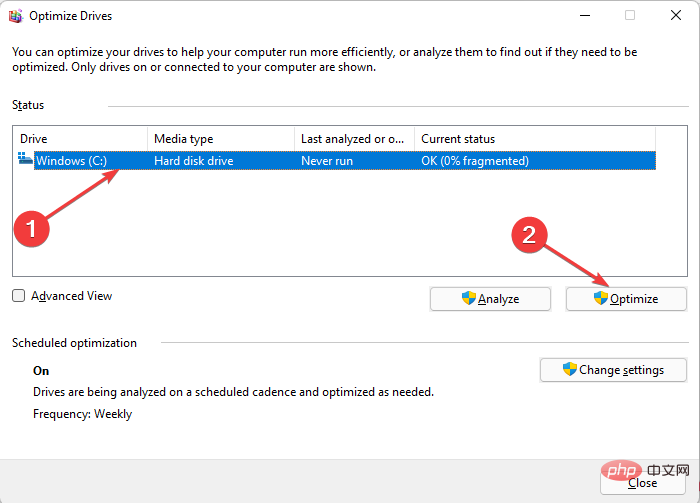
11. Optimize the system hard disk
- Press the key to startRun prompts. WindowsR
- Type the following command:
<strong>dfrgui</strong> - Select your choice harddisk. This is usually Windows C: and click Optimize.
- Wait until defragmentation is complete. You can also do this for all other drivers to reduce overall CPU usage.
To skip the above process, you can easily optimize using O&O Defrag 25. Instead of a long list of processes highlighted, you just install the software and relax while it takes care of the rest.
You have it all. At this stage, we believe that one of the solutions explained so far will help you resolve the Explorer.exe high CPU usage issue.
The above is the detailed content of How to Fix Explorer.exe High CPU Usage Windows 11. For more information, please follow other related articles on the PHP Chinese website!

Hot AI Tools

Undresser.AI Undress
AI-powered app for creating realistic nude photos

AI Clothes Remover
Online AI tool for removing clothes from photos.

Undress AI Tool
Undress images for free

Clothoff.io
AI clothes remover

Video Face Swap
Swap faces in any video effortlessly with our completely free AI face swap tool!

Hot Article
Hot Tools

Notepad++7.3.1
Easy-to-use and free code editor

SublimeText3 Chinese version
Chinese version, very easy to use

Zend Studio 13.0.1
Powerful PHP integrated development environment

Dreamweaver CS6
Visual web development tools

SublimeText3 Mac version
God-level code editing software (SublimeText3)
Hot Topics
 1659
1659
 14
1415
52
1310
25
1258
29
1232
24
14
1415
52
1310
25
1258
29
1232
24

 What is the reason why PS keeps showing loading?
Apr 06, 2025 pm 06:39 PM
What is the reason why PS keeps showing loading?
Apr 06, 2025 pm 06:39 PM
PS "Loading" problems are caused by resource access or processing problems: hard disk reading speed is slow or bad: Use CrystalDiskInfo to check the hard disk health and replace the problematic hard disk. Insufficient memory: Upgrade memory to meet PS's needs for high-resolution images and complex layer processing. Graphics card drivers are outdated or corrupted: Update the drivers to optimize communication between the PS and the graphics card. File paths are too long or file names have special characters: use short paths and avoid special characters. PS's own problem: Reinstall or repair the PS installer.
 How to speed up the loading speed of PS?
Apr 06, 2025 pm 06:27 PM
How to speed up the loading speed of PS?
Apr 06, 2025 pm 06:27 PM
Solving the problem of slow Photoshop startup requires a multi-pronged approach, including: upgrading hardware (memory, solid-state drive, CPU); uninstalling outdated or incompatible plug-ins; cleaning up system garbage and excessive background programs regularly; closing irrelevant programs with caution; avoiding opening a large number of files during startup.
 How to solve the problem of loading when PS is always showing that it is loading?
Apr 06, 2025 pm 06:30 PM
How to solve the problem of loading when PS is always showing that it is loading?
Apr 06, 2025 pm 06:30 PM
PS card is "Loading"? Solutions include: checking the computer configuration (memory, hard disk, processor), cleaning hard disk fragmentation, updating the graphics card driver, adjusting PS settings, reinstalling PS, and developing good programming habits.
 How to set color mode for export PDF on PS
Apr 06, 2025 pm 05:09 PM
How to set color mode for export PDF on PS
Apr 06, 2025 pm 05:09 PM
The secret to export PDFs with accurate colors: choose color mode according to the purpose: RGB for network display, CMYK for professional printing. Check Embed Profiles when exporting to maintain color consistency. Adjust compression settings to balance image quality and file size. For PDFs for networks, use RGB mode; for PDFs for printing, use CMYK mode.
 Does mysql need the internet
Apr 08, 2025 pm 02:18 PM
Does mysql need the internet
Apr 08, 2025 pm 02:18 PM
MySQL can run without network connections for basic data storage and management. However, network connection is required for interaction with other systems, remote access, or using advanced features such as replication and clustering. Additionally, security measures (such as firewalls), performance optimization (choose the right network connection), and data backup are critical to connecting to the Internet.
 Is slow PS loading related to computer configuration?
Apr 06, 2025 pm 06:24 PM
Is slow PS loading related to computer configuration?
Apr 06, 2025 pm 06:24 PM
The reason for slow PS loading is the combined impact of hardware (CPU, memory, hard disk, graphics card) and software (system, background program). Solutions include: upgrading hardware (especially replacing solid-state drives), optimizing software (cleaning up system garbage, updating drivers, checking PS settings), and processing PS files. Regular computer maintenance can also help improve PS running speed.
 Is PS slow loading related to other programs that are running?
Apr 06, 2025 pm 06:03 PM
Is PS slow loading related to other programs that are running?
Apr 06, 2025 pm 06:03 PM
The secrets to mastering Office software include: understanding different versions and platforms, correctly installing and configuring, proficient in using the software interface, in-depth understanding of feature operations, application collaboration and sharing functions, utilizing templates and styles, mastering advanced skills, and solving common problems. In addition, you need to choose a version that suits your needs, make good use of templates and styles, develop backup habits, and learn shortcut keys and advanced techniques to improve efficiency.
 How to solve the problem of loading when the PS opens the file?
Apr 06, 2025 pm 06:33 PM
How to solve the problem of loading when the PS opens the file?
Apr 06, 2025 pm 06:33 PM
"Loading" stuttering occurs when opening a file on PS. The reasons may include: too large or corrupted file, insufficient memory, slow hard disk speed, graphics card driver problems, PS version or plug-in conflicts. The solutions are: check file size and integrity, increase memory, upgrade hard disk, update graphics card driver, uninstall or disable suspicious plug-ins, and reinstall PS. This problem can be effectively solved by gradually checking and making good use of PS performance settings and developing good file management habits.