

Fix breakpoint errors on Windows 11: 10 effective methods

Since Windows 11 is still relatively new and is still expected to have a lot of improvements, users are bound to deal with a bug or two. One such error is the Breaking Point Reached error message on Windows 11.
This error can be due to many factors, some of which are known and others that are difficult to determine. Thankfully, these solutions are usually not far-fetched and in some cases only require a system update.
Regardless of the cause and complexity, we've collected ways to fix errors in this complete guide. You just need to follow the instructions and you'll be fine.
What does the error message "Breakpoint reached" mean?
The breakpoint reached is a common error message that Windows 11 users may encounter. This error message usually appears when a program or application crashes, and various factors can cause it.
Some common causes of this error message are:
- Outdated or Incompatible Drivers – Outdated or incompatible drivers may cause the error to appear information. This may be due to a problem with a specific driver or a conflict between drivers.
- Corrupted System Files – Corrupted system files may also cause error messages to appear. This may occur due to a malware infection, disk error, or other issues.
- Memory Problems – Memory problems (such as faulty RAM, incorrect memory settings in the BIOS, or other issues) may cause error messages.
- Overclocking – Overclocking may cause error messages to appear if the system is unstable or settings are not configured correctly.
- Software Issues –Errors in your code, corrupted files, or other software issues may cause error messages to appear. This may be due to an issue with the operating system, a specific application, or a third-party program.
- User Error –Finally, error messages may appear due to user error, such as incorrectly configuring system settings, installing incompatible software, or performing incorrect system modifications.
- Registry Issues – Registry Errors from Incorrectly Uninstalled Programs
These elements can have varying effects on your system; some can even prevent them entirely You use a PC, so following the steps below will help.
How to fix breakpoint errors on Windows 11?
1. Perform a system update
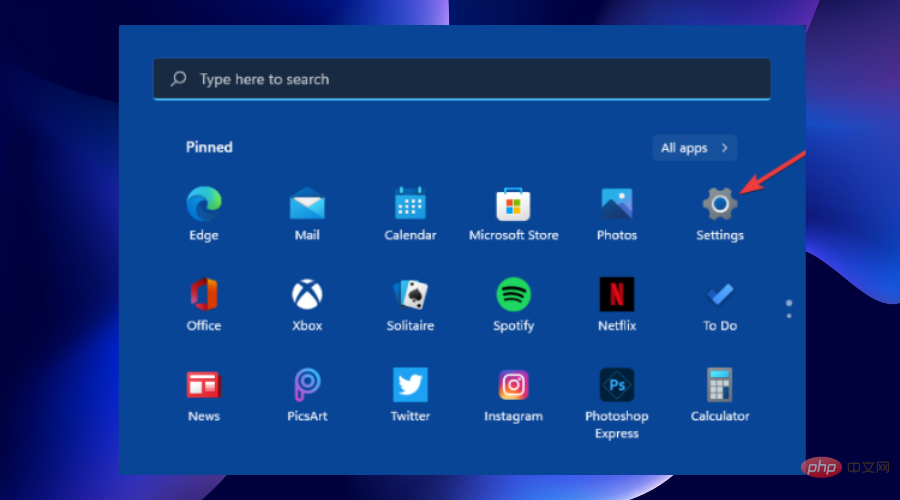
- Press the Windows key and select the "Settings" app.

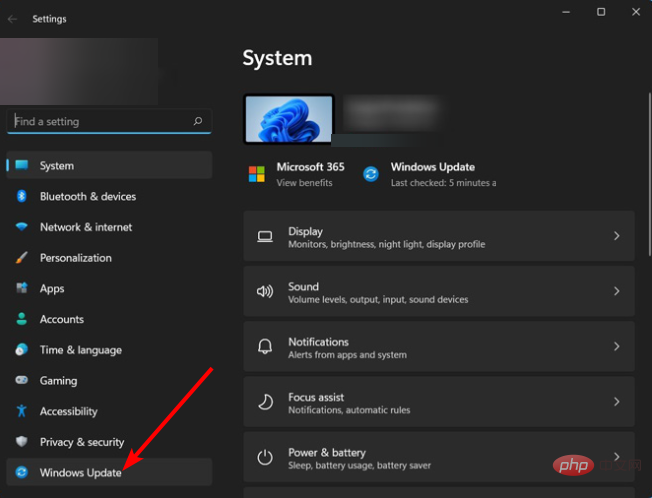
- Click Windows Update.
- Follow the on-screen instructions to complete the update.
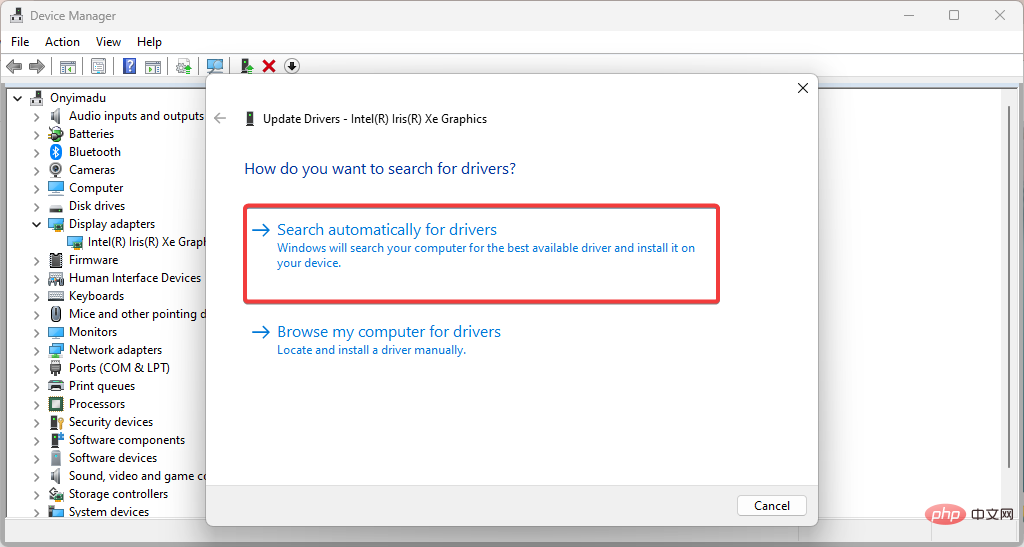
2. Update Driver
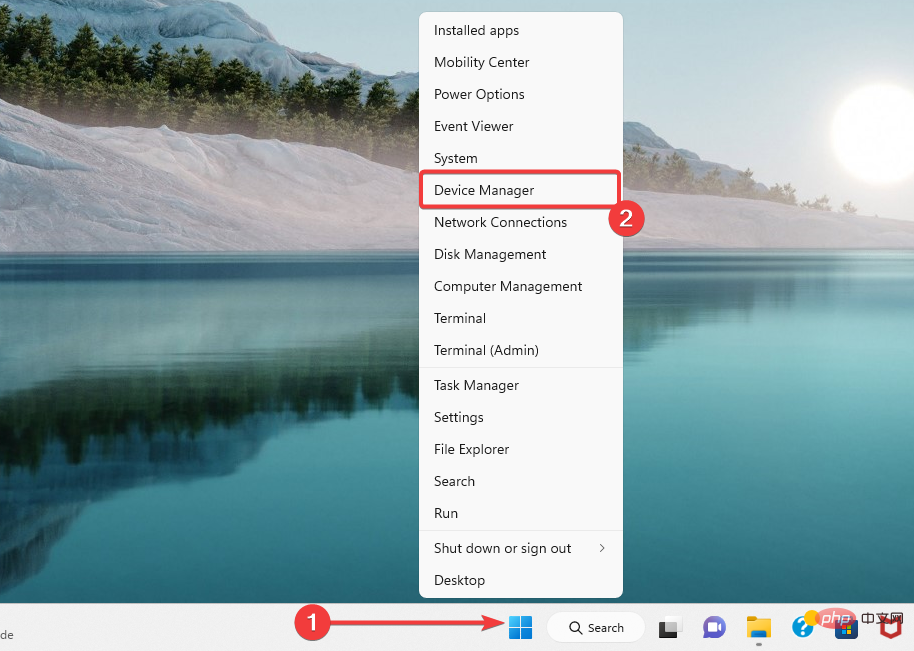
- Right-click the "Start" menu and select "Device Manager".
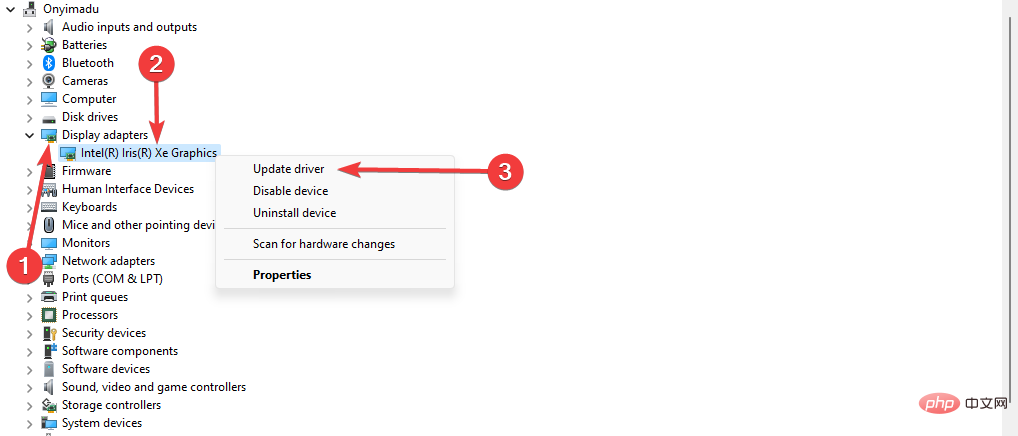
- Outdated drivers may carry a yellow badge. Expand the category, right-click on the driver, and select "Update Driver".
- Select Automatically search for drivers.
- Wait for the process to complete.
Drivers play an important role in running your PC easily. They act as a connection medium between hardware components and the operating system.
In addition, drivers establish connections between certain third-party applications and system devices. These connections can be broken due to corrupt, missing, or outdated drivers.
As a result, faulty drivers can cause various errors on Windows 11, including the breakpoint reached error.
To update your drivers, we recommend using the always reliable DriverFix driver update program. It is a reliable updater that automatically scans, recommends and installs drivers.
Furthermore, it only recommends and installs original drivers from trusted manufacturers.
It has a database of over 180,000 drivers, which contains all the drivers you need to restore your PC drivers to their best condition.
⇒ Get Driver Repair
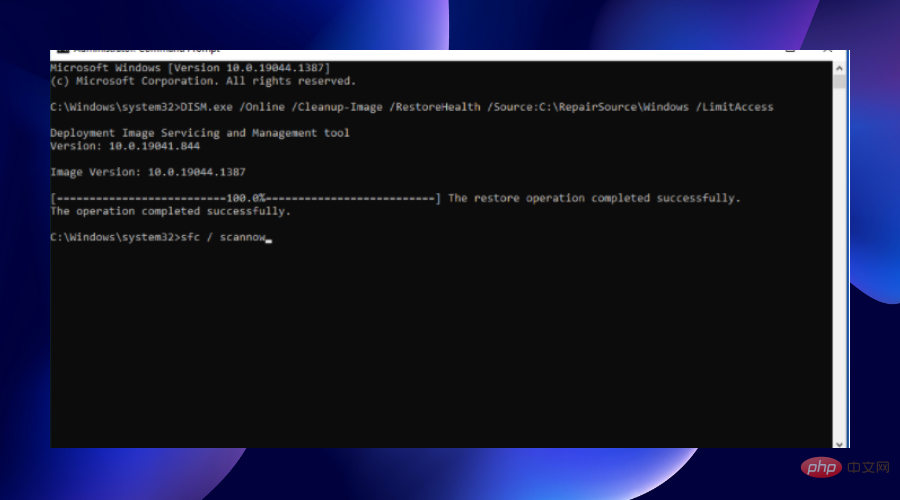
3. Run System File Checker (SFC) scan
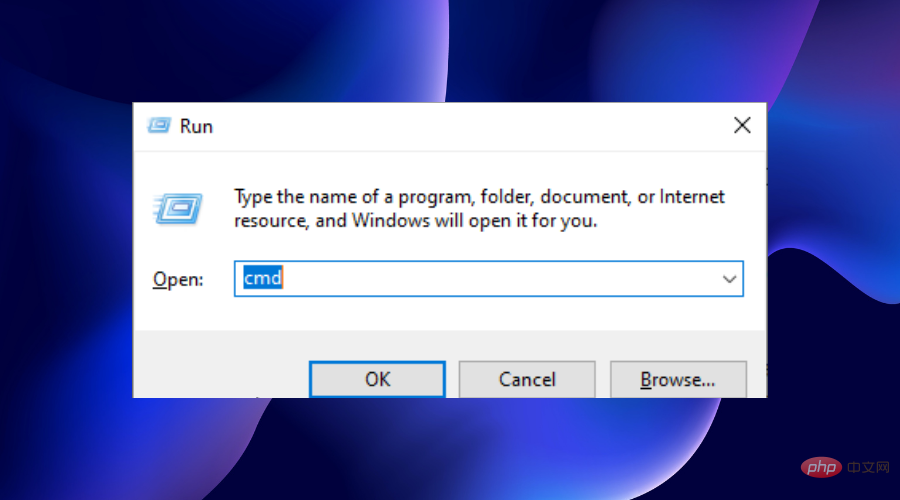
- Press the key to open the run utility. WindowsR
- Type cmd and click the OK button.
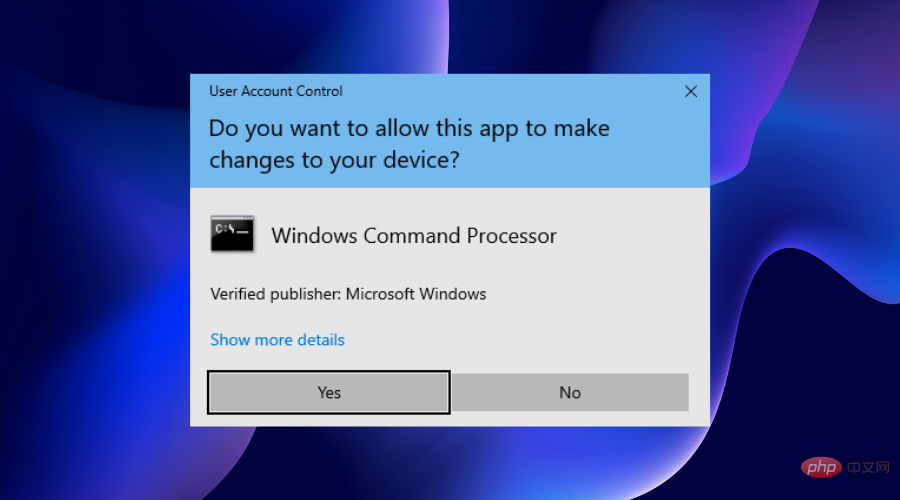
- Click the "Yes" button to allow Command Prompt to make changes to your computer.
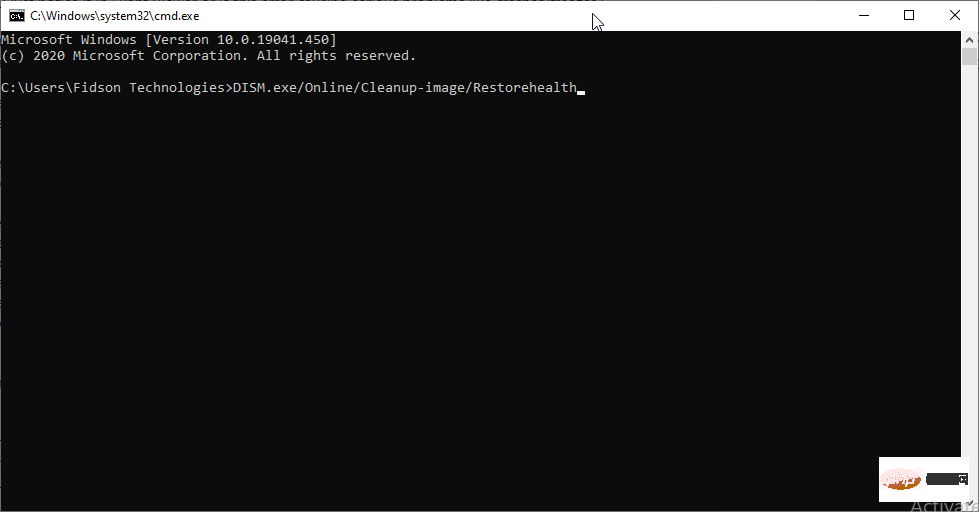
- Enter the script below and click: Enter
<strong>DISM.exe/Online/Cleanup-image/Restorehealth</strong>
- Wait until it says The operation completed successfully. Then type the following script and click: Enter
<strong>sfc /scannow</strong>
- Press the key to open the run utility.
- WindowsR Type cmd and click the
- OK button. Click the Yes button to allow Command Prompt to make changes to your computer.
-
Type the script below and click . Please note that the C in the command is the letter of your hard drive and should be replaced with the corresponding letter on your PC.
- Enter
chkdsk C: /f/r/b<strong></strong>

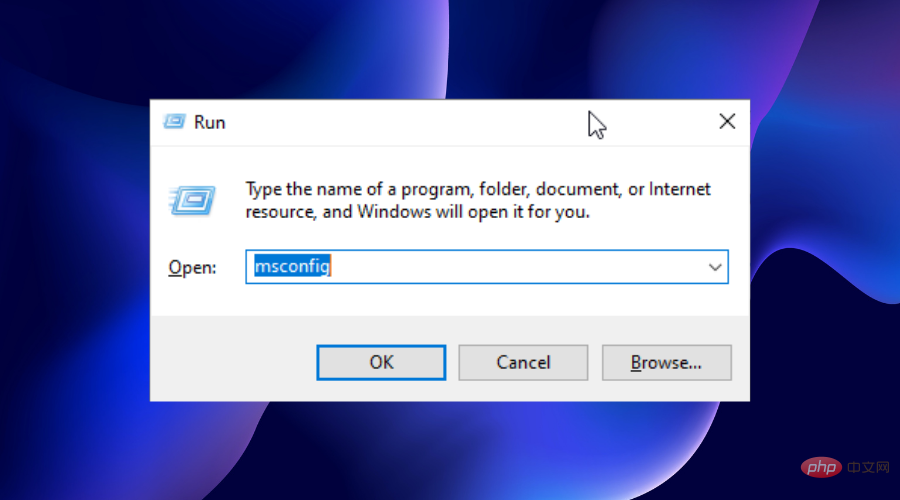
- Press the key to open the run utility. Now, type
- msconfig and click .WindowsREnter to go to the System Configuration window
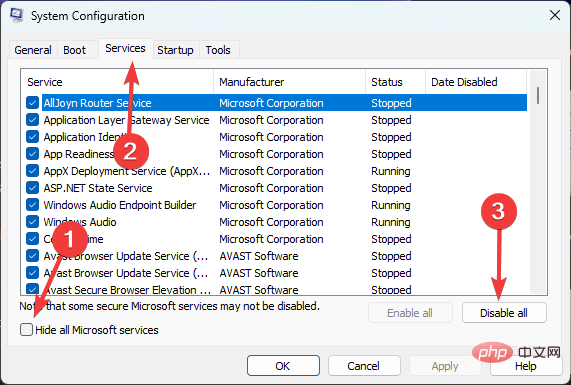
- "Service" tab in. Select the Hide all Microsoft services checkbox at the bottom of the page, then click the Disable all button. This will disable all startup services. Click the Startup tab and select Open Task Manager
- . Right-click on All Applications in the Task Manager window and click the Disable
- option. From here, return to the "System Configuration
- " window. Click the "Apply" button and then click the "OK" button. Finally, restart your PC to make the changes.
- When you turn on your computer, some apps and services automatically start running in the background.
 Click the Startup tab and select
  Right-click on All Applications in the Task Manager window and click the
 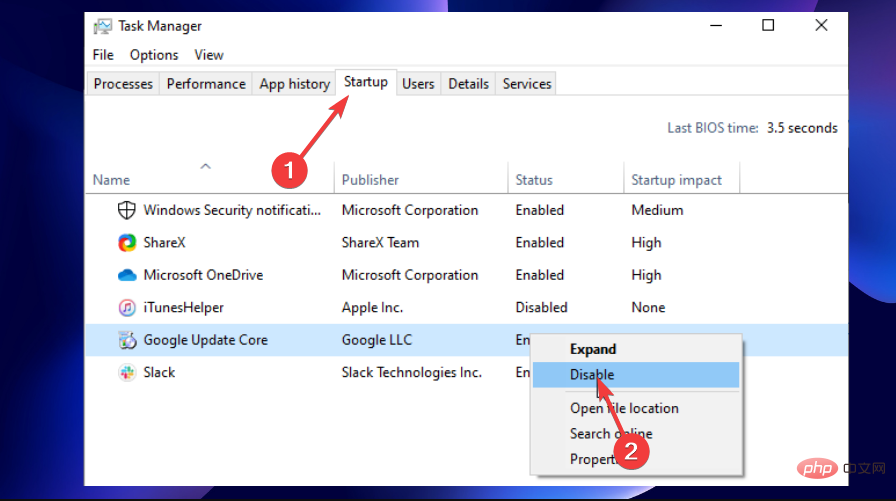 From here, return to the
 Some PC problems are difficult to solve, especially when they involve corrupted repositories or missing Windows files. If you are having trouble fixing errors, your system may be partially corrupted.
We recommend installing Restoro, a tool that will scan your machine and determine what the fault is.Click here to download and start repairing.
One of these applications may be a counter program that prevents the file you want to open from functioning properly. This eventually results in a breakpoint reached message.
After applying this fix, try opening the file again to see if the problem persists. If it opens without a breakpoint prompt, one of the applications is definitely the cause of the problem.
To find out which app or service is causing the problem, you can simply start batch activating apps and services and recheck your files until you encounter the problem.
Please note that each time you activate, you need to restart your computer.
6. Perform System Restore
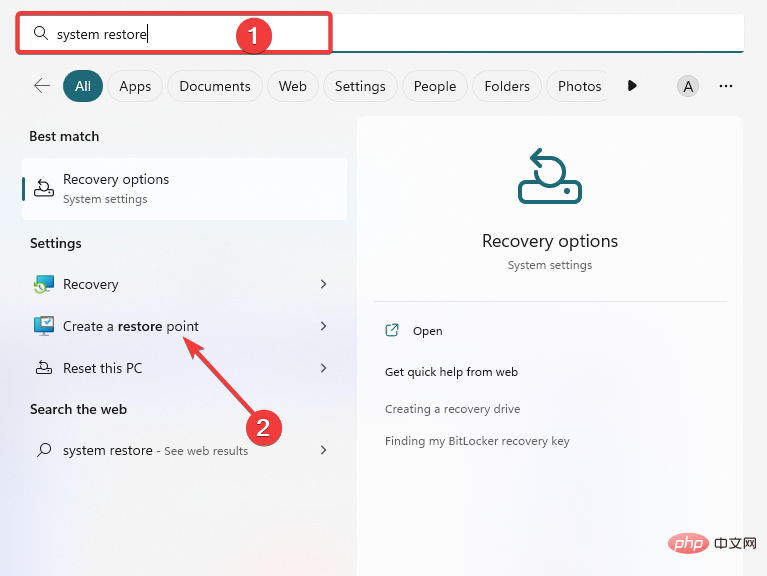
- Press the key, type System Restore, and then select the Create Restore Point option. Windows
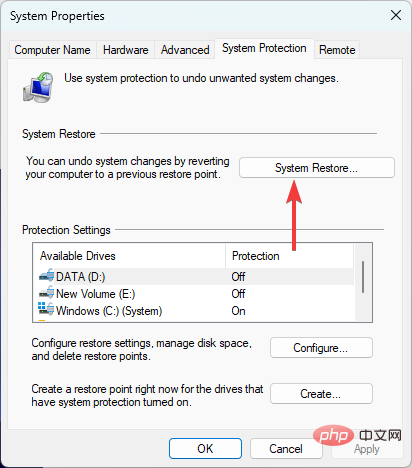
- Click the System Restore button.
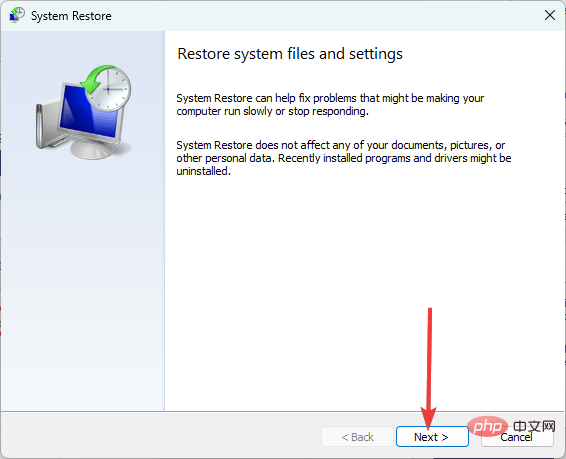
- Select the "Next" button.
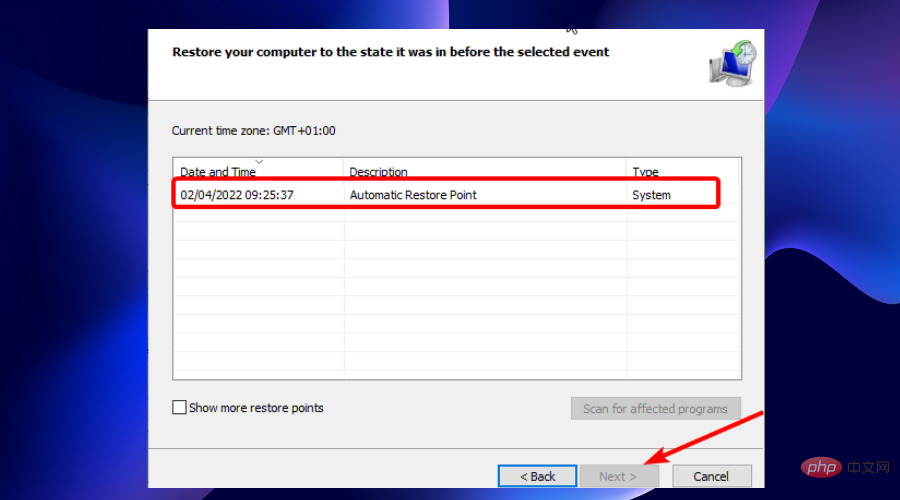
- Select a restore point from the available options and click the "Next" button.
- From here, follow the simple on-screen instructions to complete the process.
If you start to notice that breakpoints have been reached in Windows 11 after installing new updates, performing a system restore may resolve the issue.
7. Scan your PC for malware
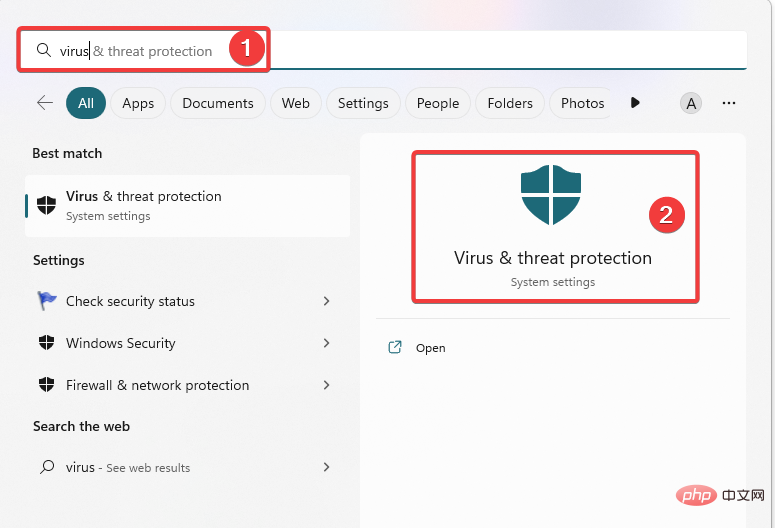
- Press the key and type viruses in the search box and select the Virus & Threat Protection option. WindowsS
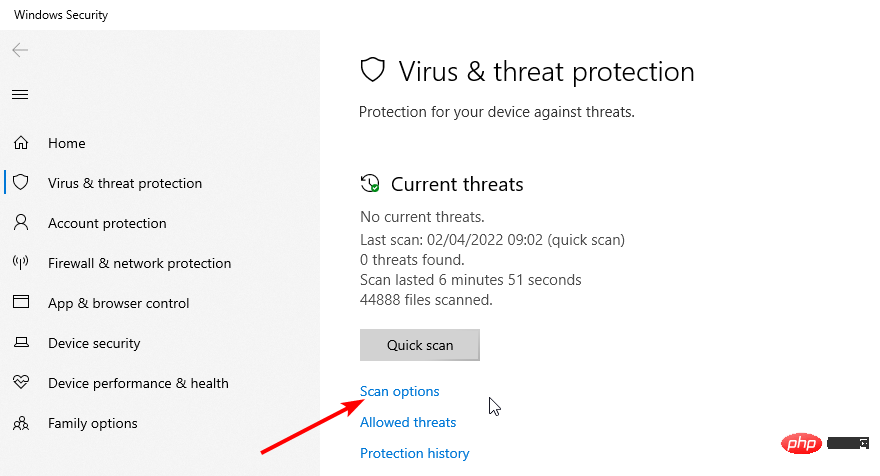
- Click the Scan option.
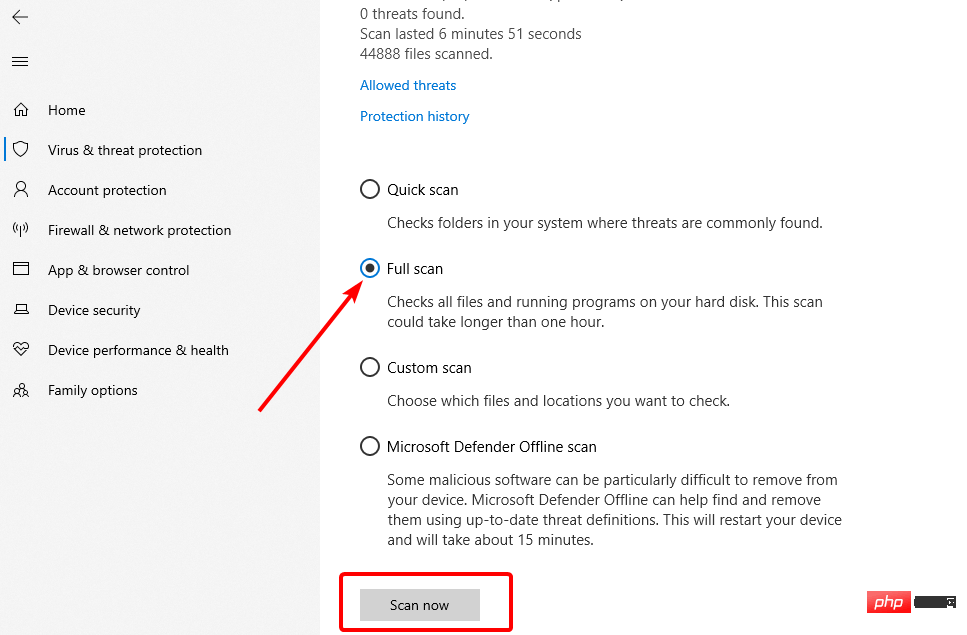
- Now, select the FullScan option and click on the Scan Now button.
- Finally, restart your computer.
Malware can cause unpredictable damage to your computer. This error may be caused by the presence of a virus. A simple scan can help unearth viruses and restore normal service on your system.
Instead of following the above steps, you can easily use reliable ESET antivirus for complete security. The software performs deep scans and removes even the most hidden and stubborn malware.
More importantly, it can detect viruses before they appear. Finally, it not only protects your PC but also your online activities and provides data encryption. It's just everything you need to keep your data and PC safe.
⇒Get ESET Internet Security
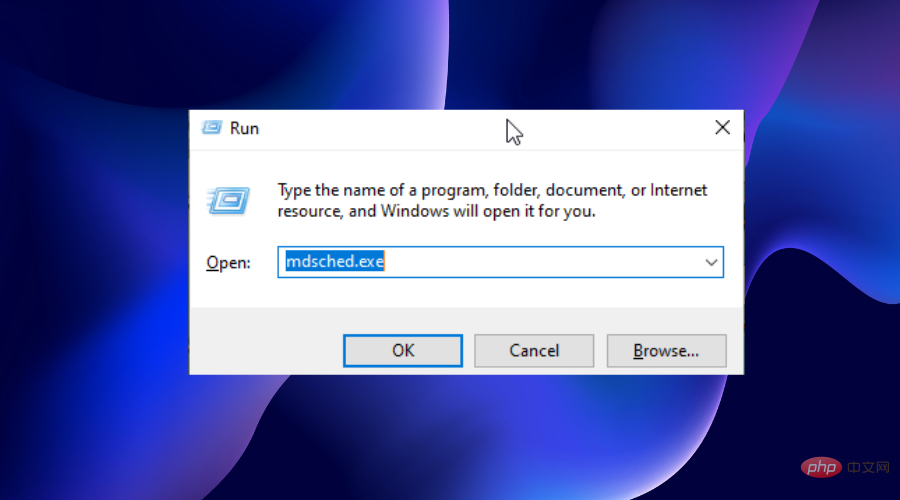
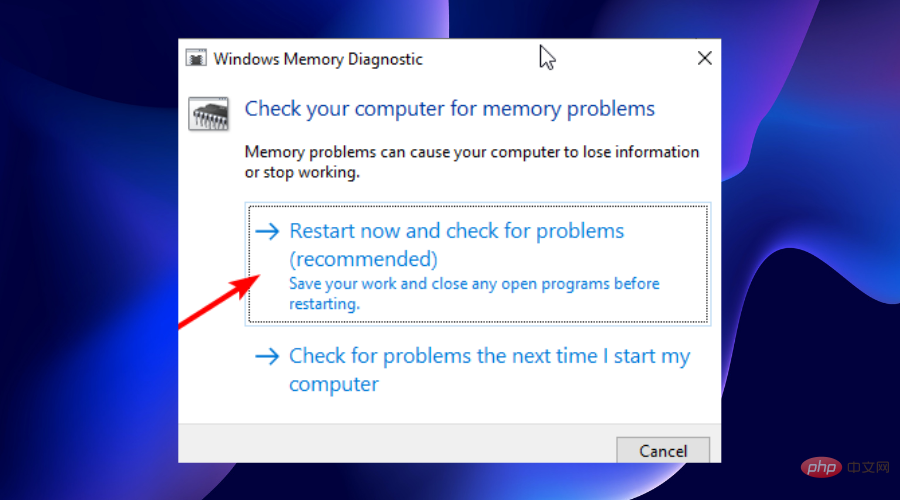
8. Run Windows Memory Diagnostic Tool
- Keystroke , type mdsched.exe, and click. WindowsREnter
- Select"Restart now and check for problems (recommended)".
- This will take over access to the system until it completes testing. After the test is completed, the program will automatically restart your PC and display the test results.
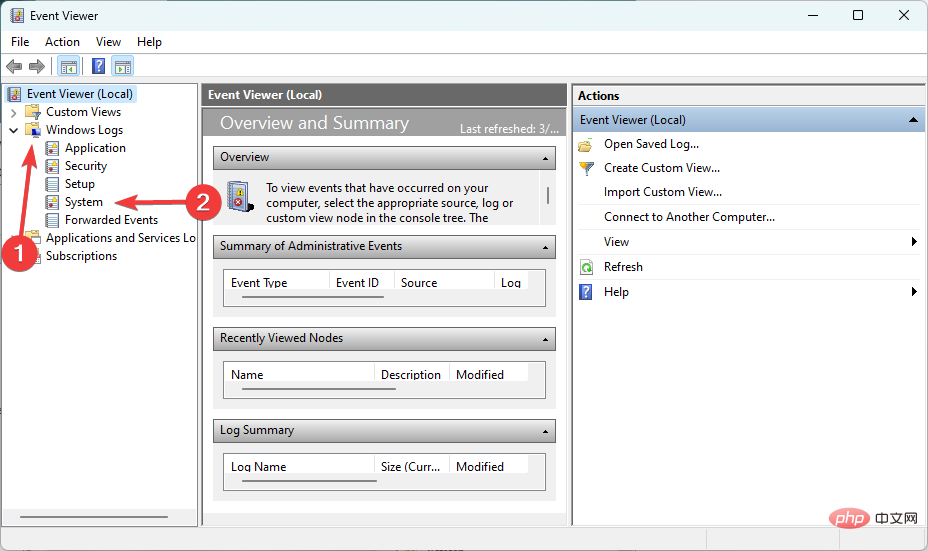
However, if it does not show the test results, you can view it by following these steps:
- Press key and select the Event Viewer option. WindowsX
- Expand "Windows Log" and select "System" in the Event Viewer window options.
- Now, select the Find option in the right pane and type "Memory Diagnostics - Results" in the Find box.
- This will display the test results in the "General" section of the middle pane.


A breakpoint reached error may occur on Windows 11 due to a memory leak. In this case, RAM does not free up unallocated space for new programs, leading to many errors. If the tool shows that your RAM is faulty after scanning, you must replace it for optimal performance.
9. Disable overclocking
- Restart the computer and press the or key when the manufacturer logo appears. F2Delete
- Go to the Advanced tab, select the Overclocking option, and disable it.
- From here, save your changes and exit the BIOS window.
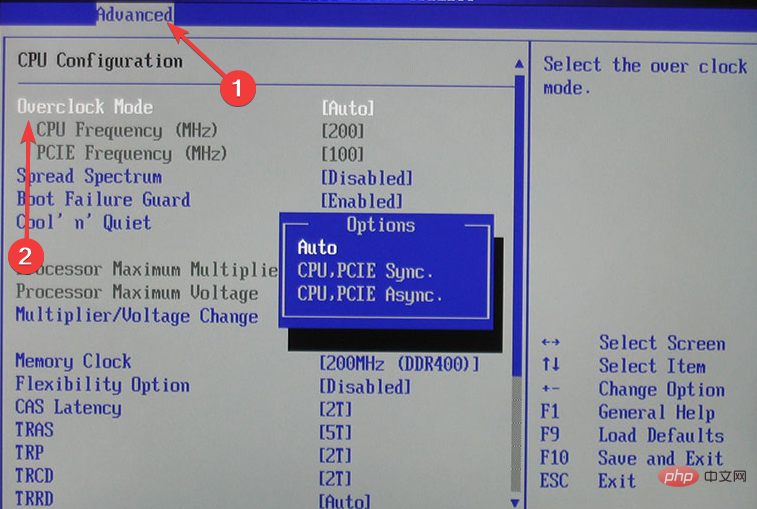
If you have overclocking enabled on your graphics card to improve performance, you may need to disable it to resolve this issue.
While overclocking can indeed really improve the performance of your CPU and GPU for a better gaming experience, it can sometimes lead to breaking point reaching errors.
10. Uninstall newly installed third-party applications
If you notice this error message only after installing some recent applications, you should try to uninstall those applications.
For best results, we recommend using an effective uninstaller software for the process.
Reaching breakpoints immediately on Windows 11 usually happens when you try to run third-party software.
While the causes are sometimes unpredictable, we've collected many solutions that span all causes. This is to ensure that you are never bothered by this issue again.
The above is the detailed content of Fix breakpoint errors on Windows 11: 10 effective methods. For more information, please follow other related articles on the PHP Chinese website!

Hot AI Tools

Undresser.AI Undress
AI-powered app for creating realistic nude photos

AI Clothes Remover
Online AI tool for removing clothes from photos.

Undress AI Tool
Undress images for free

Clothoff.io
AI clothes remover

Video Face Swap
Swap faces in any video effortlessly with our completely free AI face swap tool!

Hot Article
Hot Tools

Notepad++7.3.1
Easy-to-use and free code editor

SublimeText3 Chinese version
Chinese version, very easy to use

Zend Studio 13.0.1
Powerful PHP integrated development environment

Dreamweaver CS6
Visual web development tools

SublimeText3 Mac version
God-level code editing software (SublimeText3)
Hot Topics


 What is the reason why PS keeps showing loading?
Apr 06, 2025 pm 06:39 PM
What is the reason why PS keeps showing loading?
Apr 06, 2025 pm 06:39 PM
PS "Loading" problems are caused by resource access or processing problems: hard disk reading speed is slow or bad: Use CrystalDiskInfo to check the hard disk health and replace the problematic hard disk. Insufficient memory: Upgrade memory to meet PS's needs for high-resolution images and complex layer processing. Graphics card drivers are outdated or corrupted: Update the drivers to optimize communication between the PS and the graphics card. File paths are too long or file names have special characters: use short paths and avoid special characters. PS's own problem: Reinstall or repair the PS installer.
 How to solve the problem of loading when PS is always showing that it is loading?
Apr 06, 2025 pm 06:30 PM
How to solve the problem of loading when PS is always showing that it is loading?
Apr 06, 2025 pm 06:30 PM
PS card is "Loading"? Solutions include: checking the computer configuration (memory, hard disk, processor), cleaning hard disk fragmentation, updating the graphics card driver, adjusting PS settings, reinstalling PS, and developing good programming habits.
 How to speed up the loading speed of PS?
Apr 06, 2025 pm 06:27 PM
How to speed up the loading speed of PS?
Apr 06, 2025 pm 06:27 PM
Solving the problem of slow Photoshop startup requires a multi-pronged approach, including: upgrading hardware (memory, solid-state drive, CPU); uninstalling outdated or incompatible plug-ins; cleaning up system garbage and excessive background programs regularly; closing irrelevant programs with caution; avoiding opening a large number of files during startup.
 Is slow PS loading related to computer configuration?
Apr 06, 2025 pm 06:24 PM
Is slow PS loading related to computer configuration?
Apr 06, 2025 pm 06:24 PM
The reason for slow PS loading is the combined impact of hardware (CPU, memory, hard disk, graphics card) and software (system, background program). Solutions include: upgrading hardware (especially replacing solid-state drives), optimizing software (cleaning up system garbage, updating drivers, checking PS settings), and processing PS files. Regular computer maintenance can also help improve PS running speed.
 Does mysql need the internet
Apr 08, 2025 pm 02:18 PM
Does mysql need the internet
Apr 08, 2025 pm 02:18 PM
MySQL can run without network connections for basic data storage and management. However, network connection is required for interaction with other systems, remote access, or using advanced features such as replication and clustering. Additionally, security measures (such as firewalls), performance optimization (choose the right network connection), and data backup are critical to connecting to the Internet.
 Is PS slow loading related to other programs that are running?
Apr 06, 2025 pm 06:03 PM
Is PS slow loading related to other programs that are running?
Apr 06, 2025 pm 06:03 PM
The secrets to mastering Office software include: understanding different versions and platforms, correctly installing and configuring, proficient in using the software interface, in-depth understanding of feature operations, application collaboration and sharing functions, utilizing templates and styles, mastering advanced skills, and solving common problems. In addition, you need to choose a version that suits your needs, make good use of templates and styles, develop backup habits, and learn shortcut keys and advanced techniques to improve efficiency.
 How to set color mode for export PDF on PS
Apr 06, 2025 pm 05:09 PM
How to set color mode for export PDF on PS
Apr 06, 2025 pm 05:09 PM
The secret to export PDFs with accurate colors: choose color mode according to the purpose: RGB for network display, CMYK for professional printing. Check Embed Profiles when exporting to maintain color consistency. Adjust compression settings to balance image quality and file size. For PDFs for networks, use RGB mode; for PDFs for printing, use CMYK mode.
 How to solve the problem of loading when the PS opens the file?
Apr 06, 2025 pm 06:33 PM
How to solve the problem of loading when the PS opens the file?
Apr 06, 2025 pm 06:33 PM
"Loading" stuttering occurs when opening a file on PS. The reasons may include: too large or corrupted file, insufficient memory, slow hard disk speed, graphics card driver problems, PS version or plug-in conflicts. The solutions are: check file size and integrity, increase memory, upgrade hard disk, update graphics card driver, uninstall or disable suspicious plug-ins, and reinstall PS. This problem can be effectively solved by gradually checking and making good use of PS performance settings and developing good file management habits.