

How to use the Apache Shiro security framework in Java

1. Introduction to Shiro:
Apache Shiro is a Java security (permission) framework.
Shiro can easily develop good enough applications, which can be used not only in the JavaSE environment, but also in the JavaEE environment. Shiro can do it all, authentication, authorization, encryption, session management, web integration, caching and more.
shiro functions:
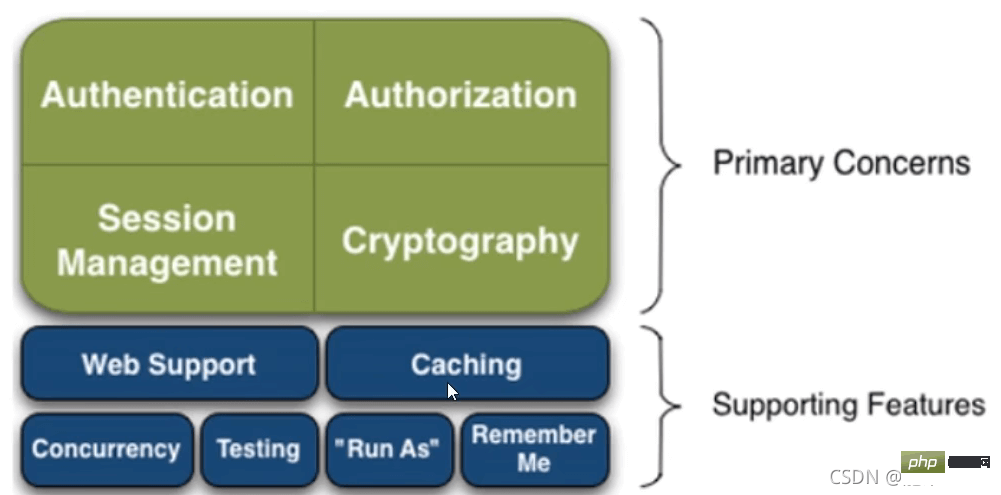
Authentication: identity authentication, login, verify whether the user has the corresponding Identity;
Authorization: authorization, that is, permission verification, verifying whether an authenticated user has a certain permission, that is, determining whether the user can perform any operations, such as: verifying whether a user has a certain role, or fine-grained Verify whether a user has a certain permission on a certain resource!
Session Manager: Session management, that is, the first session after the user logs in. Before exiting, all its information is in the session; the session can It is an ordinary JavaSE environment, or it can be a Web environment;
Cryptography: Encryption to protect the security of data, such as password encryption and storage in the database instead of plain text storage; Web Support: Web support, which can be easily integrated into Web environment;
Caching: Caching, for example, after a user logs in, his user information, roles, and permissions do not need to be checked every time, which can improve efficiency
Concurrency: Shiro supports concurrent verification of multi-threaded applications, that is, If you open another thread in one thread, the permissions can be automatically propagated.
Testing: Provide testing support;
Run As: Allow one user to pretend to be another user (if they allow it) to access;
Remember Me: Remember me, this is a very common function, that is, after logging in once, you don’t need to log in next time
Shiro architecture (external)
From the outside Shiro, that is, observe how to use shiro to complete the work from the perspective of the application:
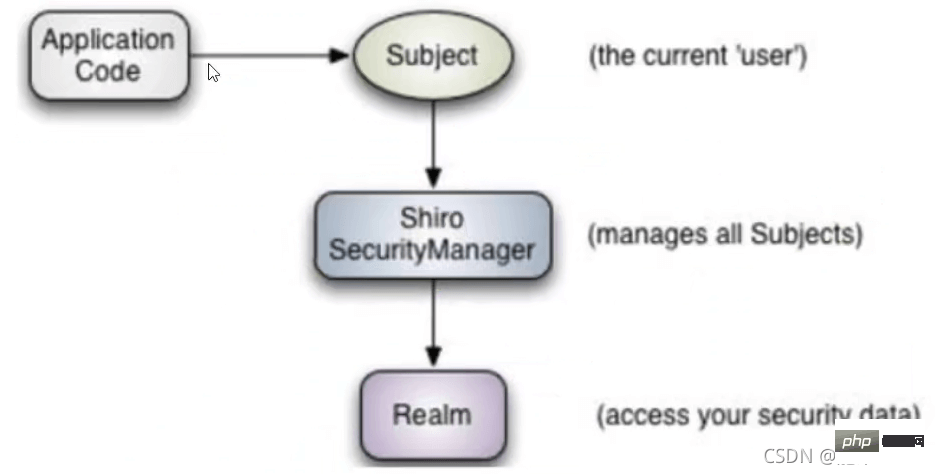
subject: The object that the application code directly interacts with is Subject, which means that the core of Shiro's external API is Subject, Subject represents the current user. This user is not necessarily a specific person. Anything that interacts with the current application is Subject, such as web crawlers, robots, etc. All interactions with Subject will be delegated to SecurityManager; Subject is actually A facade, SecurityManageer is the actual executor
SecurityManager: Security Manager, that is, all security-related operations will interact with SecurityManager, and it manages all Subjects. It can be seen that it is the core of Shiro and is responsible for Interact with other components of Shiro, which is equivalent to the role of SpringMVC's
DispatcherServlet
Realm: Shiro obtains security data (such as users, roles, permissions) from Realm, that is to say, the SecurityManager wants to verify the user's identity, then it It is necessary to obtain the corresponding user from Realm for comparison to determine whether the user's identity is legal; it is also necessary to obtain the user's corresponding role and permissions from Realm to verify whether the user's operation can be carried out. Realm can be regarded as a DataSource;
Shiro Architecture (internal)
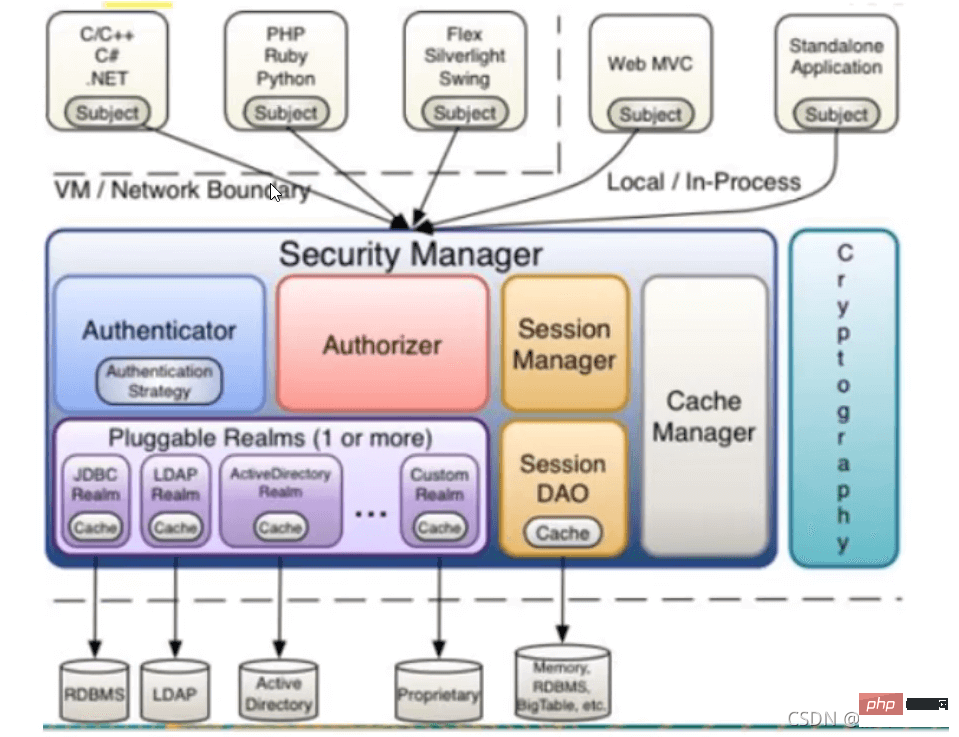
subject: Any 'user' who can interact with the application;
Security Manager: Equivalent to the DispatcherServlet in SpringMVC; is Shiro's At the heart, all specific interactions are controlled through the Security Manager, which manages all Subjects and is responsible for authentication, authorization, session, and cache management.
Authenticator: Responsible for Subject authentication and is an extension point , you can customize the implementation; you can use the authentication strategy (AuthenticationStrategy), that is, under what circumstances is the user authentication passed;
Authorizer: Authorizer, that is, the access controller, is used to determine whether the subject has the authority to perform the corresponding operation; that is, Controls the functions that users can access in the application;
Realm: There can be one or more realms, which can be considered as security entity data sources, that is, used to obtain security entities, which can be implemented using DBC or memory. Implementation, etc., are provided by users; so generally in applications, you need to implement your own realm
SessionManager: a component that manages the Session life cycle, and Shiro can not only be used in the Web environment, but also in the ordinary JavaSE environment.
CacheManager: Cache controller to manage caches such as users, roles, permissions, etc.; because these data are rarely accessed, access performance can be improved after being cached;
Cryptography: Cryptozoology module , Shiro has improved some common encryption components for password encryption, decryption, etc.
2. Quick Start
1. Copy the case
1. Follow the official website prompts to find the Quick Start Case GitHub address: shiro/samples/quickstart/

#2. Create a new Maven project, delete its src directory, and use it as the parent project
3. Create a new Maven module in the parent project
4. Copy the dependencies in the quick start case POM.xml file
<dependencies>
        <dependency>
            <groupId>org.apache.shiro</groupId>
            <artifactId>shiro-core</artifactId>
            <version>1.4.1</version>
        </dependency>

        <!-- configure logging -->
        <dependency>
            <groupId>org.slf4j</groupId>
            <artifactId>jcl-over-slf4j</artifactId>
            <version>1.7.29</version>
        </dependency>
        <dependency>
            <groupId>org.slf4j</groupId>
            <artifactId>slf4j-log4j12</artifactId>
            <version>1.7.29</version>
        </dependency>
        <dependency>
            <groupId>log4j</groupId>
            <artifactId>log4j</artifactId>
            <version>1.2.17</version>
        </dependency>
</dependencies>5. Copy the log4j.properties under the resource in the quick start case
6. Copy the shiro.ini file
7. Copy the Quickstart.java file
8. Run and start Quickstart.java

2. Analyze the code
public class Quickstart {
private static final transient Logger log = LoggerFactory.getLogger(Quickstart.class);
public static void main(String[] args) {
//工厂模式,通过shiro.ini配置文件中的信息,生成一个工厂实例
Factory<SecurityManager> factory = new IniSecurityManagerFactory("classpath:shiro.ini");
SecurityManager securityManager = factory.getInstance();
SecurityUtils.setSecurityManager(securityManager);
//获取当前的用户对象Subject
Subject currentUser = SecurityUtils.getSubject();
//通过当前用户拿到session
Session session = currentUser.getSession();
session.setAttribute("someKey", "aValue");
String value = (String) session.getAttribute("someKey");
if (value.equals("aValue")) {
log.info("Subject=>session[" + value + "]");
}
//判断当前的用户是否被认证
if (!currentUser.isAuthenticated()) {
//Token :令牌,没有获取,随机
UsernamePasswordToken token = new UsernamePasswordToken("lonestarr", "vespa");
token.setRememberMe(true); //设置记住我
try {
currentUser.login(token); //执行了登录操作
} catch (UnknownAccountException uae) {
//如果 用户名不存在
log.info("There is no user with username of " + token.getPrincipal());
} catch (IncorrectCredentialsException ice) {
//如果 密码不正确
log.info("Password for account " + token.getPrincipal() + " was incorrect!");
} catch (LockedAccountException lae) {
//用户被锁定,如密码输出过多,则被锁定
log.info("The account for username " + token.getPrincipal() + " is locked. " +
"Please contact your administrator to unlock it.");
}
//...在此处捕获更多异常
catch (AuthenticationException ae) {
//意外情况 ? 错误 ?
}
}
//打印其标识主体(在这种情况下,为用户名)
log.info("User [" + currentUser.getPrincipal() + "] logged in successfully.");
//测试角色是否存在
if (currentUser.hasRole("schwartz")) {
log.info("May the Schwartz be with you!");
} else {
log.info("Hello, mere mortal.");
}
//粗粒度,极限范围小
//测试类型化的极限(不是实例级别)
if (currentUser.isPermitted("lightsaber:wield")) {
log.info("You may use a lightsaber ring. Use it wisely.");
} else {
log.info("Sorry, lightsaber rings are for schwartz masters only.");
}
//细粒度,极限范围广
//实例级别的权限(非常强大)
if (currentUser.isPermitted("winnebago:drive:eagle5")) {
log.info("You are permitted to 'drive' the winnebago with license plate (id) 'eagle5'. " +
"Here are the keys - have fun!");
} else {
log.info("Sorry, you aren't allowed to drive the 'eagle5' winnebago!");
}
//注销
currentUser.logout();
//退出
System.exit(0);
}
}3. SpringBoot integrates Shiro
1. Write a test environment
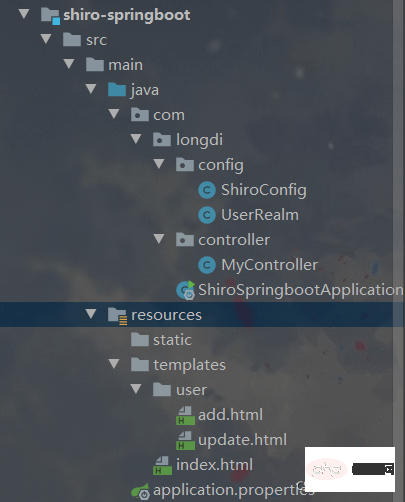
1. Create a new springboot module in the parent project
2. Import the dependencies of SpringBoot and Shiro integration package
 <!--SpringBoot 和 Shiro 整合包-->
        <dependency>
            <groupId>org.apache.shiro</groupId>
            <artifactId>shiro-spring</artifactId>
            <version>1.4.1</version>
</dependency>The following is the three major elements for writing configuration files
Shiro
Subject user-> ShiroFilterFactoryBean
SecurityManager manages all users-> DefaultWebSecurityManager
Realm connection data
The order of object creation in actual operation: realm -> securityManager -> subject
3. Write a custom realm, which needs to inherit AuthorizingRealm
//自定义的 UserRealm        extends AuthorizingRealm
public class UserRealm extends AuthorizingRealm {
    //授权
    @Override
    protected AuthorizationInfo doGetAuthorizationInfo(PrincipalCollection principalCollection) {
        //打印一个提示
        System.out.println("执行了授权方法");
        return null;
    }

    //认证
    @Override
    protected AuthenticationInfo doGetAuthenticationInfo(AuthenticationToken authenticationToken) throws AuthenticationException {
        //打印一个提示
        System.out.println("执行了认证方法");
        return null;
    }
}4. Create a new A ShiroConfig configuration file
@Configuration
public class ShiroConfig {

    //ShiroFilterFactoryBean:3
    @Bean
    public ShiroFilterFactoryBean getShiroFilterFactoryBean(@Qualifier("securityManager") DefaultWebSecurityManager defaultWebsecurityManager){
        ShiroFilterFactoryBean bean = new ShiroFilterFactoryBean();
        //设置安全管理器
        bean.setSecurityManager(defaultWebsecurityManager);
        return bean;
    }
    //DefaultWebSecurityManager:2
    @Bean(name="securityManager")
    public DefaultWebSecurityManager getDefaultWebSecurityManager(@Qualifier("userRealm") UserRealm userRealm){
        DefaultWebSecurityManager securityManager=new DefaultWebSecurityManager();
        //关闭UserRealm
        securityManager.setRealm(userRealm);
        return securityManager;
    }
    //创建realm 对象,需要自定义类:1
    @Bean(name="userRealm")
    public UserRealm userRealm(){
        return new UserRealm();
    }
}5. Test successful!
2. Use
1. Login interception
Add the login request that needs to be intercepted in the getShiroFilterFactoryBean method
@Configuration
public class ShiroConfig {
//ShiroFilterFactoryBean:3
@Bean
public ShiroFilterFactoryBean getShiroFilterFactoryBean(@Qualifier("securityManager") DefaultWebSecurityManager defaultWebsecurityManager){
ShiroFilterFactoryBean bean = new ShiroFilterFactoryBean();
//设置安全管理器
bean.setSecurityManager(defaultWebsecurityManager);
//添加shiro的内置过滤器
/*
anon : 无需认证,就可以访问
authc : 必须认证了才能访问
user : 必须拥有 “记住我” 功能才能用
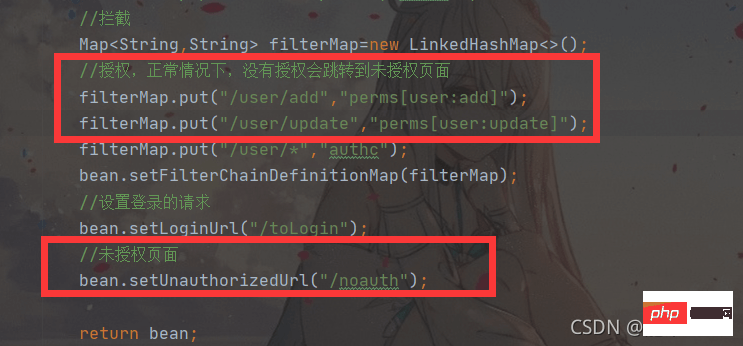
perms : 拥有对某个资源的权限才能访问
role : 拥有某个角色权限才能访问
*/
filterMap.put("/user/add","authc");
filterMap.put("/user/update","authc");
//拦截
Map<String,String> filterMap=new LinkedHashMap<>();
filterMap.put("/user/*","authc");
bean.setFilterChainDefinitionMap(filterMap);
// //设置登录的请求
// bean.setLoginUrl("/toLogin");
return bean;
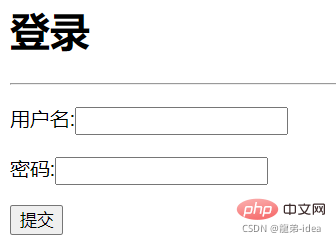
}Test: Clicking the add link will not jump to the add page, but to the login page. The interception is successful
2. User authentication
1. Write a login method in the Controller layer
//登录的方法
@RequestMapping("/login")
public String login(String username, String password, Model model) {
//获取当前用户
Subject subject = SecurityUtils.getSubject();
//封装用户的登录数据,获得令牌
UsernamePasswordToken token = new UsernamePasswordToken(username, password);
//登录 及 异常处理
try {
//执行用户登录的方法,如果没有异常就说明OK了
subject.login(token);
return "index";
} catch (UnknownAccountException e) {
//如果用户名不存在
System.out.println("用户名不存在");
model.addAttribute("msg", "用户名错误");
return "login";
} catch (IncorrectCredentialsException ice) {
//如果密码错误
System.out.println("密码错误");
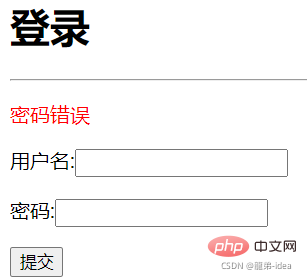
model.addAttribute("msg", "密码错误");
return "login";
}
}
}2. Test
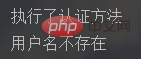
It can be seen that the AuthenticationInfo method in the custom UserRealm is first executed, and then Perform login-related operations
3. Modify the doGetAuthenticationInfo method in UserRealm
//认证
    @Override
    protected AuthenticationInfo doGetAuthenticationInfo(AuthenticationToken authenticationToken) throws AuthenticationException {
        //打印一个提示
        System.out.println("执行了认证方法");
        // 用户名密码
        String name = "root";
        String password = "123456";
        //通过参数获取登录的控制器中生成的 令牌
        UsernamePasswordToken token = (UsernamePasswordToken) authenticationToken;
        //用户名认证
        if (!token.getUsername().equals(name)){
            // return null UnKnownAccountException
            return null;
        }
        //密码认证, Shiro 自己做,为了避免和密码的接触
        //最后返回一个 AuthenticationInfo 接口的实现类,这里选择 SimpleAuthenticationInfo
        // 三个参数:获取当前用户的认证 ; 密码 ; 认证名
        return new SimpleAuthenticationInfo("", password, "");
    }
}4. Test and enter the wrong password

Enter the correct password to log in successfully
4. Shiro integrates Mybatis
1. Import dependencies
<dependency>
            <groupId>mysql</groupId>
            <artifactId>mysql-connector-java</artifactId>
            <version>8.0.19</version>
        </dependency>

        <dependency>
            <groupId>log4j</groupId>
            <artifactId>log4j</artifactId>
            <version>1.2.17</version>
        </dependency>

        <dependency>
            <groupId>com.alibaba</groupId>
            <artifactId>druid</artifactId>
            <version>1.1.12</version>
        </dependency>
       <dependency>
            <groupId>org.mybatis.spring.boot</groupId>
            <artifactId>mybatis-spring-boot-starter</artifactId>
            <version>2.1.1</version>
</dependency>2. Create a new application .yml
spring:
  datasource:
    username: root
    password: 123456
    url: jdbc:mysql://localhost:3306/mybatis?useUnicode=true&characterEncoding=UTF-8&useJDBCCompliantTimezoneShift=true&useLegacyDatetimeCode=false&serverTimezone=UTC
    driver-class-name: com.mysql.cj.jdbc.Driver
    type: com.alibaba.druid.pool.DruidDataSource

    #Spring Boot 默认是不注入这些属性值的,需要自己绑定
    #druid 数据源专有配置
    initialSize: 5
    minIdle: 5
    maxActive: 20
    maxWait: 60000
    timeBetweenEvictionRunsMillis: 60000
    minEvictableIdleTimeMillis: 300000
    validationQuery: SELECT 1 FROM DUAL
    testWhileIdle: true
    testOnBorrow: false
    testOnReturn: false
    poolPreparedStatements: true

    #配置监控统计拦截的filters,stat:监控统计、log4j:日志记录、wall:防御sql注入
    #如果允许时报错  java.lang.ClassNotFoundException: org.apache.log4j.Priority
    #则导入 log4j 依赖即可,Maven 地址:https://mvnrepository.com/artifact/log4j/log4j
    filters: stat,wall,log4j
    maxPoolPreparedStatementPerConnectionSize: 20
    useGlobalDataSourceStat: true
    connectionProperties: druid.stat.mergeSql=true;druid.stat.slowSqlMillis=500
mybatis:
  type-aliases-package: com.huang.pojo
mapper-locations: classpath:mybatis/mapper/*.xml3. In application.properties
mybatis.type-aliases-package=com.longdi.pojo
mybatis.mapper-locations=classpath:mapper/*.xml
4.Import dependencies
<dependency>
            <groupId>org.projectlombok</groupId>
            <artifactId>lombok</artifactId>
            <version>1.18.10</version>
            <scope>provided</scope>
</dependency>5.Write User class
@Data
@AllArgsConstructor
@NoArgsConstructor
public class User {
        private int id;
        private String name;
        private String pwd;
        private String perms;
}6.Write UserMapper
@Repository
@Mapper
public interface UserMapper {
    public User  queryUserByName(String name);

}7. Write UserMapper.xml
<?xml version="1.0" encoding="UTF-8" ?>
<!DOCTYPE mapper
        PUBLIC "-//mybatis.org//DTD Mapper 3.0//EN"
        "http://mybatis.org/dtd/mybatis-3-mapper.dtd">

<mapper namespace="com.longdi.mapper.UserMapper">

    <select id="queryUserByName" resultType="User" parameterType="String">
        select * from mybatis.user where name=#{name}
    </select>

</mapper>8. Service layer
UserService interface:
public interface UserService {
    public User queryUserByName(String name);
}9. Write the interface implementation class UserServiceImpl
@Service
public class UserServiceImpl implements UserService{

    @Autowired
    UserMapper userMapper;

    @Override
    public User queryUserByName(String name) {
        return userMapper.queryUserByName(name);
    }
}10. Test in ShiroSpringbootApplicationTests
@SpringBootTest
class ShiroSpringbootApplicationTests {
    @Autowired
    UserServiceImpl userService;
    @Test
    void contextLoads() {
        System.out.println(userService.queryUserByName("longdi"));
    }
}11. Successfully connect to the database
5. Implement request authorization
1. Modify in the ShiroConfig class
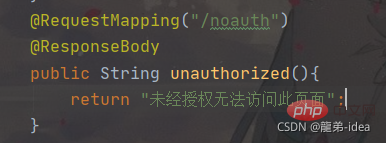
2. Controller jump
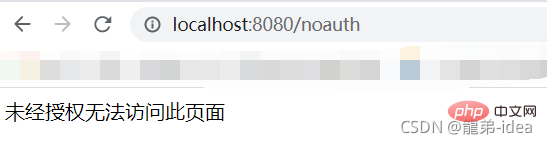
3. Login interception authorization, test successful

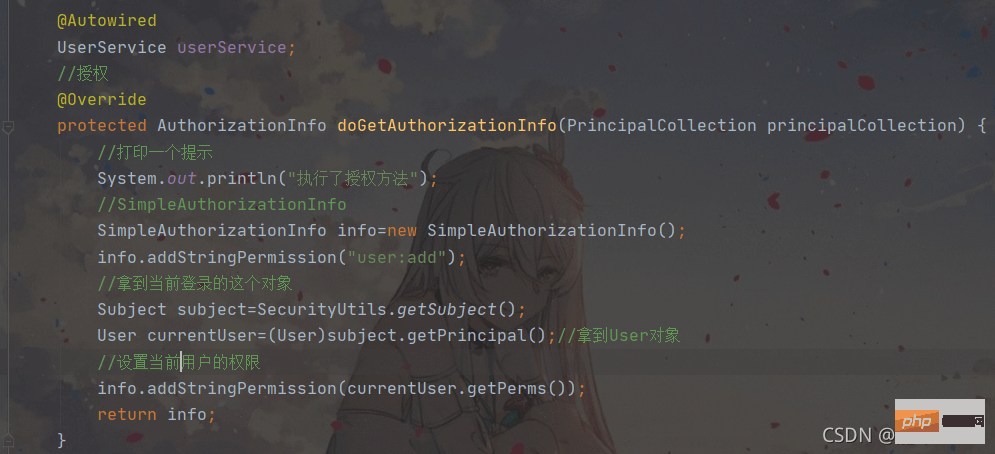
4. Write the authorization doGetAuthorizationInfo method
<!--shiro和thymeleaf整合-->
        <dependency>
            <groupId>com.github.theborakompanioni</groupId>
            <artifactId>thymeleaf-extras-shiro</artifactId>
            <version>2.0.0</version>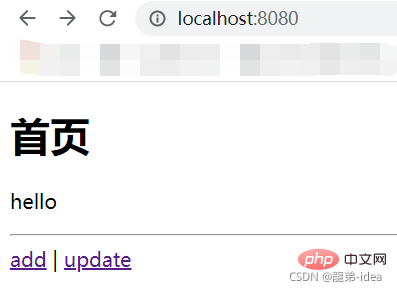
</dependency>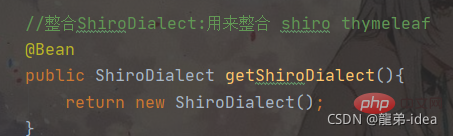 ##3.index.html
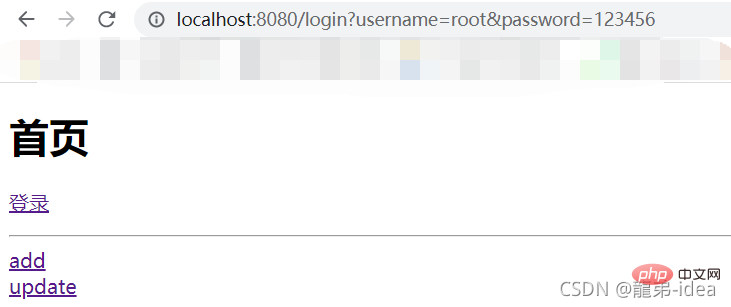
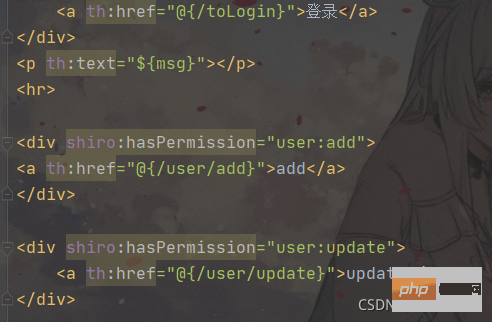 4. Test
 5. Put session
 in the authentication. 6. Modify index. html
The above is the detailed content of How to use the Apache Shiro security framework in Java. For more information, please follow other related articles on the PHP Chinese website!

Hot AI Tools

Undresser.AI Undress
AI-powered app for creating realistic nude photos

AI Clothes Remover
Online AI tool for removing clothes from photos.

Undress AI Tool
Undress images for free

Clothoff.io
AI clothes remover

Video Face Swap
Swap faces in any video effortlessly with our completely free AI face swap tool!

Hot Article
Hot Tools

Notepad++7.3.1
Easy-to-use and free code editor

SublimeText3 Chinese version
Chinese version, very easy to use

Zend Studio 13.0.1
Powerful PHP integrated development environment

Dreamweaver CS6
Visual web development tools

SublimeText3 Mac version
God-level code editing software (SublimeText3)
Hot Topics


 How to set the cgi directory in apache
Apr 13, 2025 pm 01:18 PM
How to set the cgi directory in apache
Apr 13, 2025 pm 01:18 PM
To set up a CGI directory in Apache, you need to perform the following steps: Create a CGI directory such as "cgi-bin", and grant Apache write permissions. Add the "ScriptAlias" directive block in the Apache configuration file to map the CGI directory to the "/cgi-bin" URL. Restart Apache.
 PHP vs. Other Languages: A Comparison
Apr 13, 2025 am 12:19 AM
PHP vs. Other Languages: A Comparison
Apr 13, 2025 am 12:19 AM
PHP is suitable for web development, especially in rapid development and processing dynamic content, but is not good at data science and enterprise-level applications. Compared with Python, PHP has more advantages in web development, but is not as good as Python in the field of data science; compared with Java, PHP performs worse in enterprise-level applications, but is more flexible in web development; compared with JavaScript, PHP is more concise in back-end development, but is not as good as JavaScript in front-end development.
 What to do if the apache80 port is occupied
Apr 13, 2025 pm 01:24 PM
What to do if the apache80 port is occupied
Apr 13, 2025 pm 01:24 PM
When the Apache 80 port is occupied, the solution is as follows: find out the process that occupies the port and close it. Check the firewall settings to make sure Apache is not blocked. If the above method does not work, please reconfigure Apache to use a different port. Restart the Apache service.
 PHP vs. Python: Core Features and Functionality
Apr 13, 2025 am 12:16 AM
PHP vs. Python: Core Features and Functionality
Apr 13, 2025 am 12:16 AM
PHP and Python each have their own advantages and are suitable for different scenarios. 1.PHP is suitable for web development and provides built-in web servers and rich function libraries. 2. Python is suitable for data science and machine learning, with concise syntax and a powerful standard library. When choosing, it should be decided based on project requirements.
 How to connect to the database of apache
Apr 13, 2025 pm 01:03 PM
How to connect to the database of apache
Apr 13, 2025 pm 01:03 PM
Apache connects to a database requires the following steps: Install the database driver. Configure the web.xml file to create a connection pool. Create a JDBC data source and specify the connection settings. Use the JDBC API to access the database from Java code, including getting connections, creating statements, binding parameters, executing queries or updates, and processing results.
 How to start apache
Apr 13, 2025 pm 01:06 PM
How to start apache
Apr 13, 2025 pm 01:06 PM
The steps to start Apache are as follows: Install Apache (command: sudo apt-get install apache2 or download it from the official website) Start Apache (Linux: sudo systemctl start apache2; Windows: Right-click the "Apache2.4" service and select "Start") Check whether it has been started (Linux: sudo systemctl status apache2; Windows: Check the status of the "Apache2.4" service in the service manager) Enable boot automatically (optional, Linux: sudo systemctl
 How to view your apache version
Apr 13, 2025 pm 01:15 PM
How to view your apache version
Apr 13, 2025 pm 01:15 PM
There are 3 ways to view the version on the Apache server: via the command line (apachectl -v or apache2ctl -v), check the server status page (http://<server IP or domain name>/server-status), or view the Apache configuration file (ServerVersion: Apache/<version number>).
 How to delete more than server names of apache
Apr 13, 2025 pm 01:09 PM
How to delete more than server names of apache
Apr 13, 2025 pm 01:09 PM
To delete an extra ServerName directive from Apache, you can take the following steps: Identify and delete the extra ServerName directive. Restart Apache to make the changes take effect. Check the configuration file to verify changes. Test the server to make sure the problem is resolved.
