

This is how to install Windows 11 on your hard drive

Installing Windows 11 on a solid-state drive (SSD) is no different than installing it on a hard disk drive (HDD).
First of all, we should mention that SSDs are better for installing operating systems than hard drives because they are faster.
But now that you've made up your mind, we'll walk you through the process of installing Windows 11 on your hard drive.
The process is simple: First, download the Windows 11 ISO file, then use the Rufus app to create a bootable file that can be installed using a flash drive.
Before we start installing Windows 11 on our hard drive, let’s see how long it takes to install it.
How long does it take to install Windows 11 on HDD?
To answer this question, it depends on several factors, such as hard drive model and computer performance.
Needless to say, if you are using an older HDD, it will take longer to install Windows 11 than a newer model with higher RPMs.
To give you an estimate of how long it will take to install Windows 11, it will take approximately 45 minutes.
You should also consider your internet speed when calculating how long it will take to download and then install Windows 11. Download and installation of Windows usually takes one hour and thirty minutes.
System Requirements for Windows 11 on HDD
- 4 GB RAM
- A Dual Processor (1 GHz or faster)
- 64 GB storage space
- Compatible graphics card with DirectX 12 or higher
- HD monitor (720p) or higher
After checking the system requirements, it’s time The operating system is installed on the hard disk. The first step is to download the Windows 11 ISO file.
How to install Windows 11 on a hard drive?
1. Download the Windows 11 ISO file
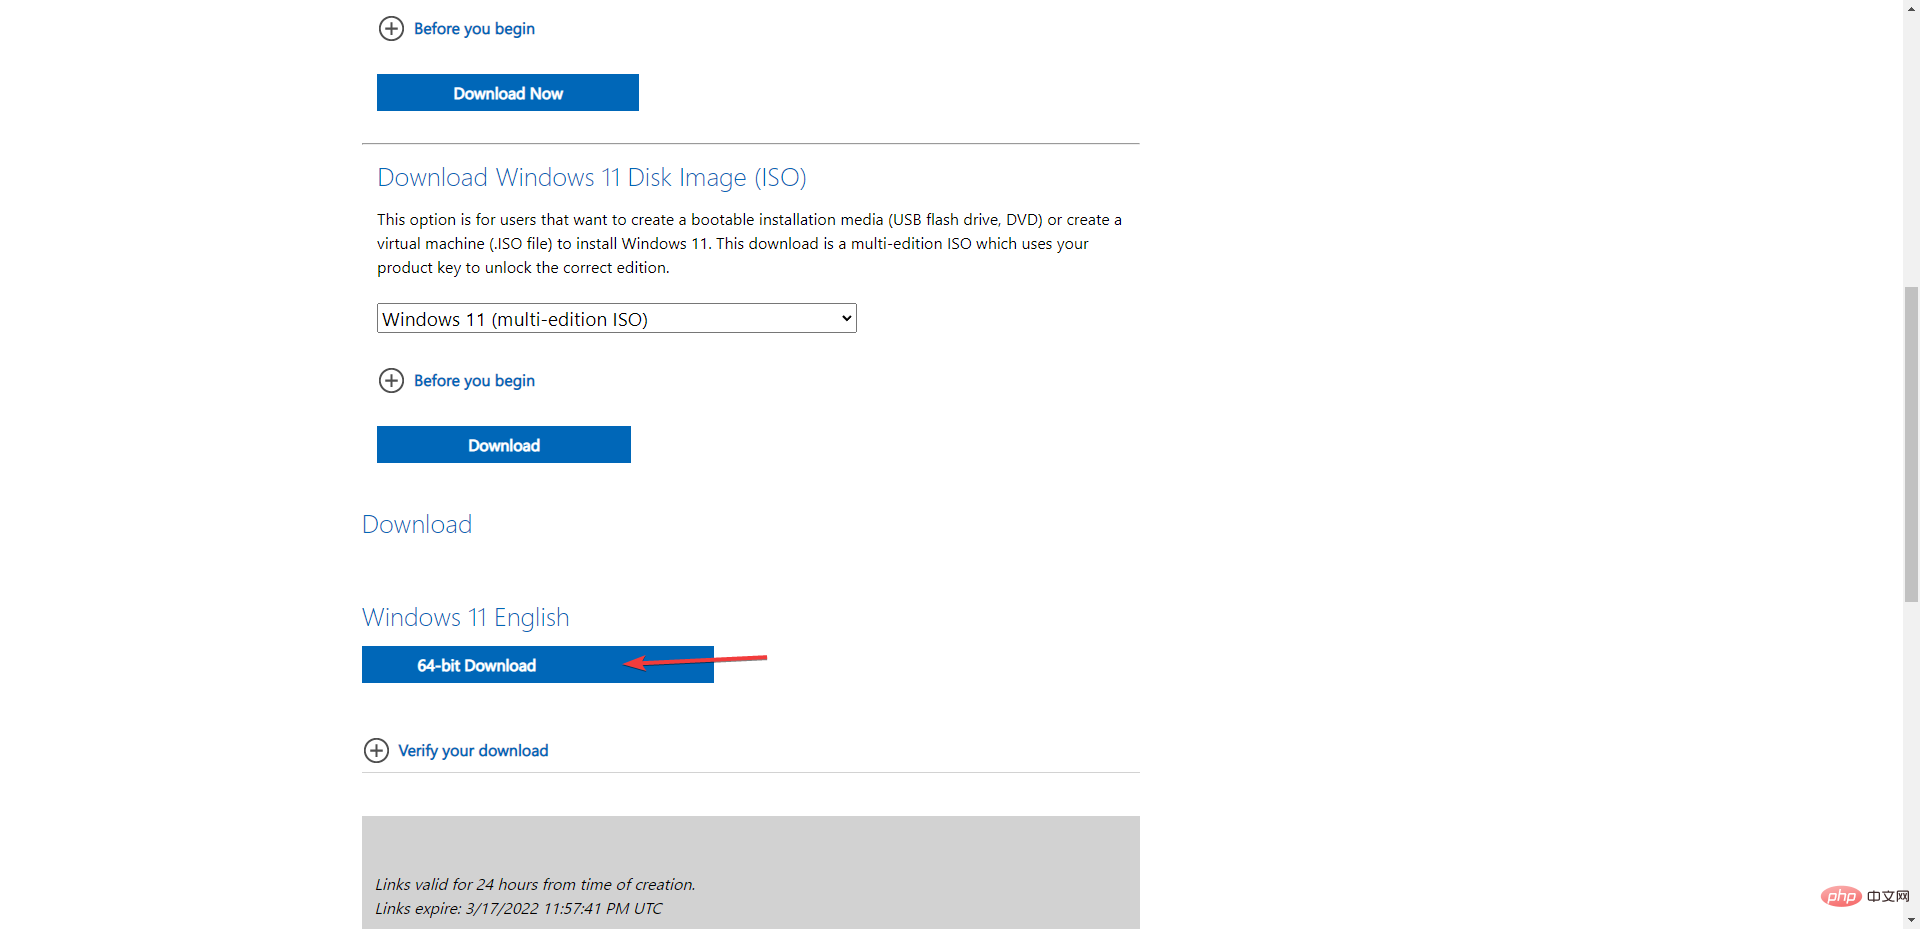
- Visit the official Windows 11 download page.
- Scroll down to Download Windows 11 Disk Image (ISO) and select Windows 11 (Multi-version ISO) from the drop-down menu and click the Download button. After

- , select language.
- To start the download, select the 64-bit download option.

2. Create a bootable Windows 11
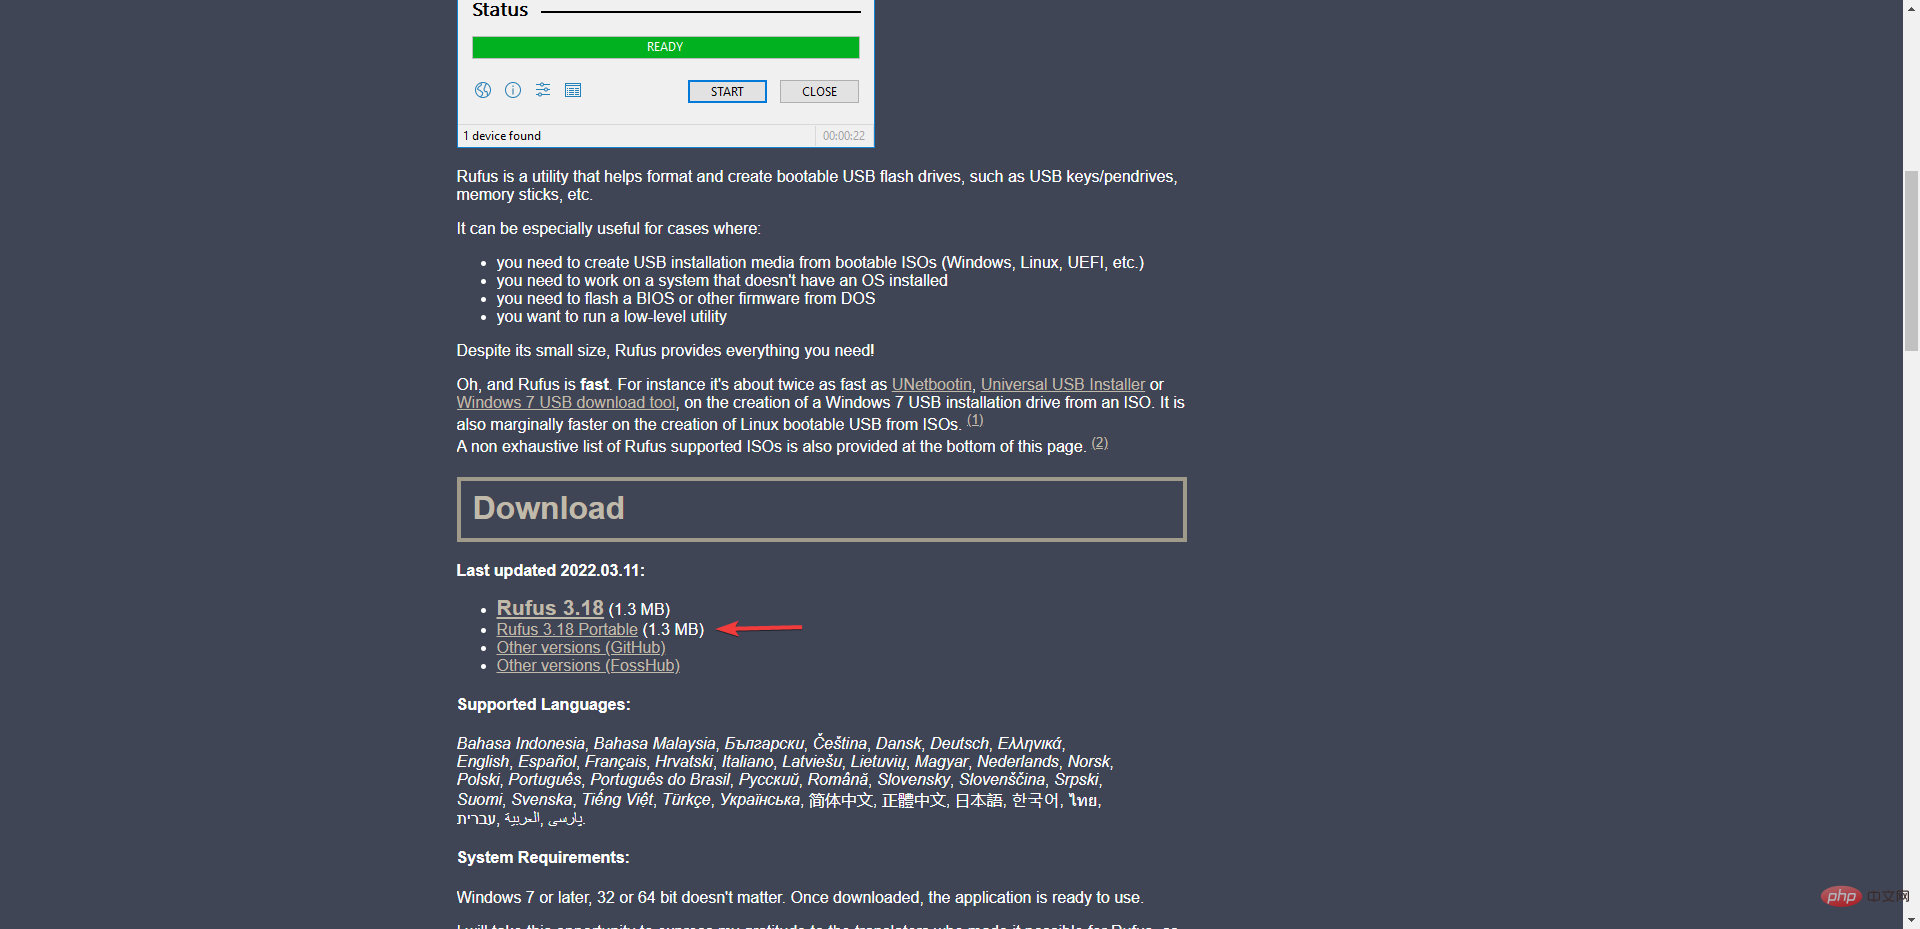
- Go to the Rufus website.
- Download Portable Rufus.
- Insert your flash drive.
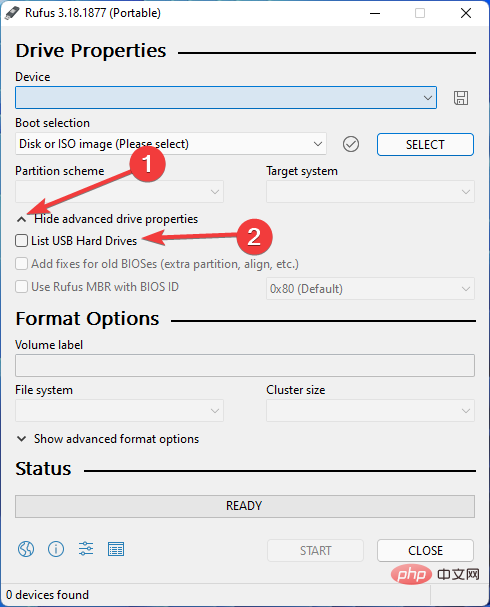
- Launch the Rufus application. Then, in the Device section, select your flash drive.
- Then, click on the SELECT option to select the ISO file.
- Expand Show Advanced Drive Properties, then select the List USB Hard Drive checkbox.
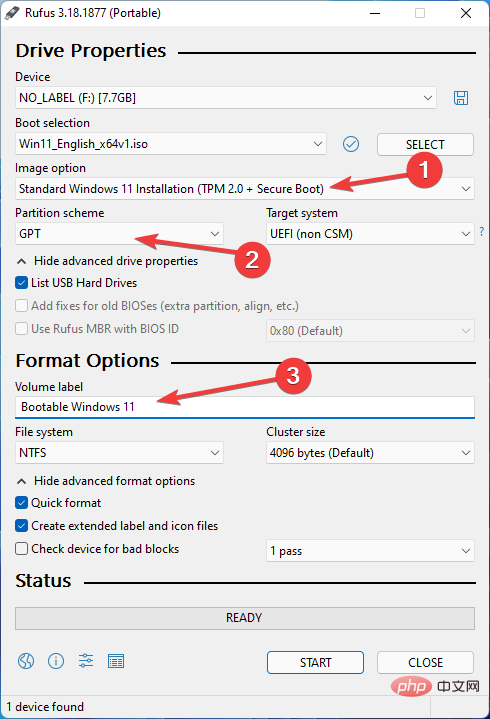
- Select Standard Windows 11 Installation (TPM 2.0 Secure Boot) from the image options.
- Select GPT as the partition scheme and type the name of the file in the Volume Label field.
- Click Start.
- Then, a warning message says that all data on the device will be deleted, so make sure to back up your flash drive before clicking OK.
- Close the window after the process is completed.
We have to make the Windows 11 ISO file bootable in order to install Windows 11 using a flash drive. Rufus can be used for this purpose.
3. Change the boot sequence
- Turn on the computer and press the BIOS key at startup. F10, F2, F12, F1, or DEL may be the BIOS key.
- Then, go to the Bootstrap tab.
- Change boot order to Removable devices.
- After that, save the changes and exit.
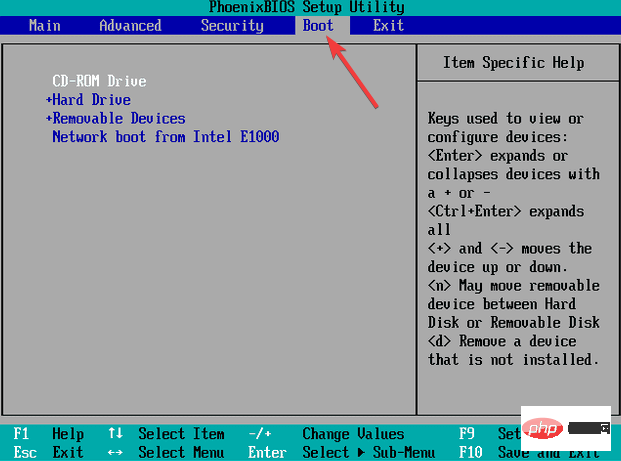
To install Windows 11 using a flash drive, you must first change the target computer's boot options to Removable Device.
4. Install Windows 11
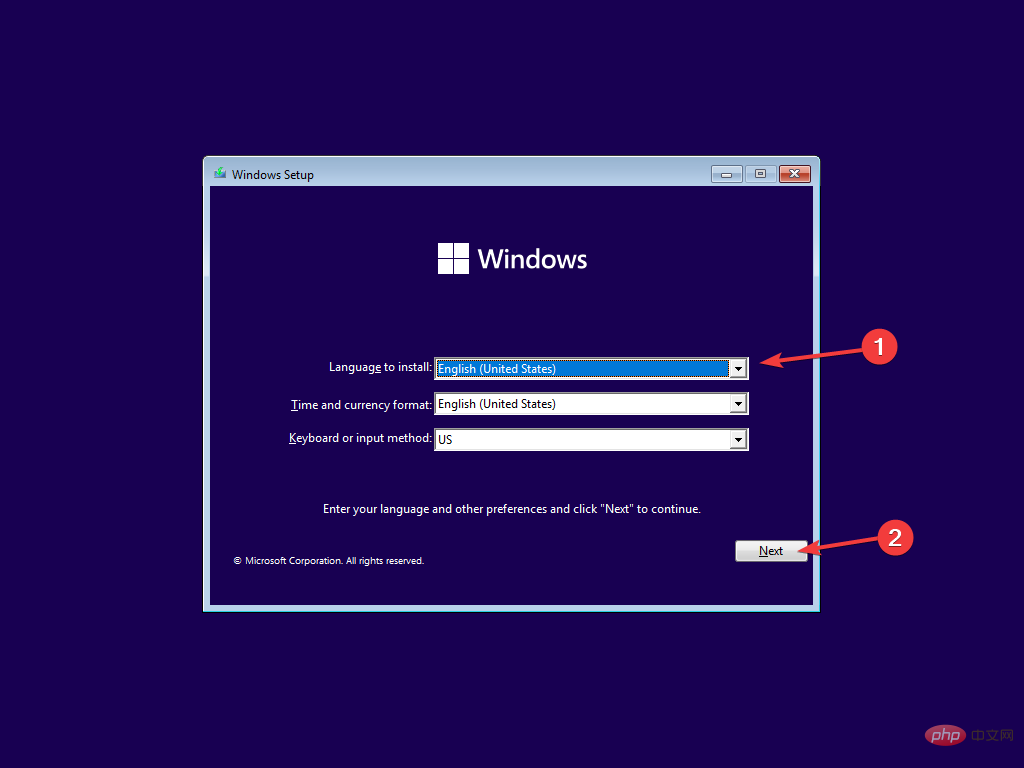
- When your computer starts, you will notice a message that says "Press any key to continue". You must press the keys on your keyboard as required in this step.
- Select a language and click the Next button to continue.
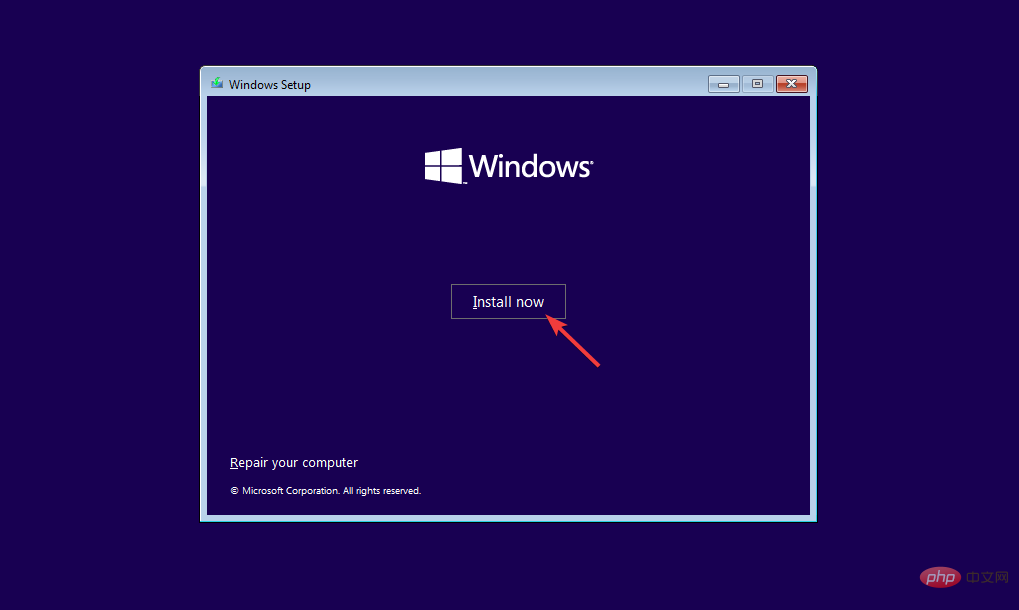
- Click Install now.
- Enter the product key or select the I don’t have a product key option in the next step.
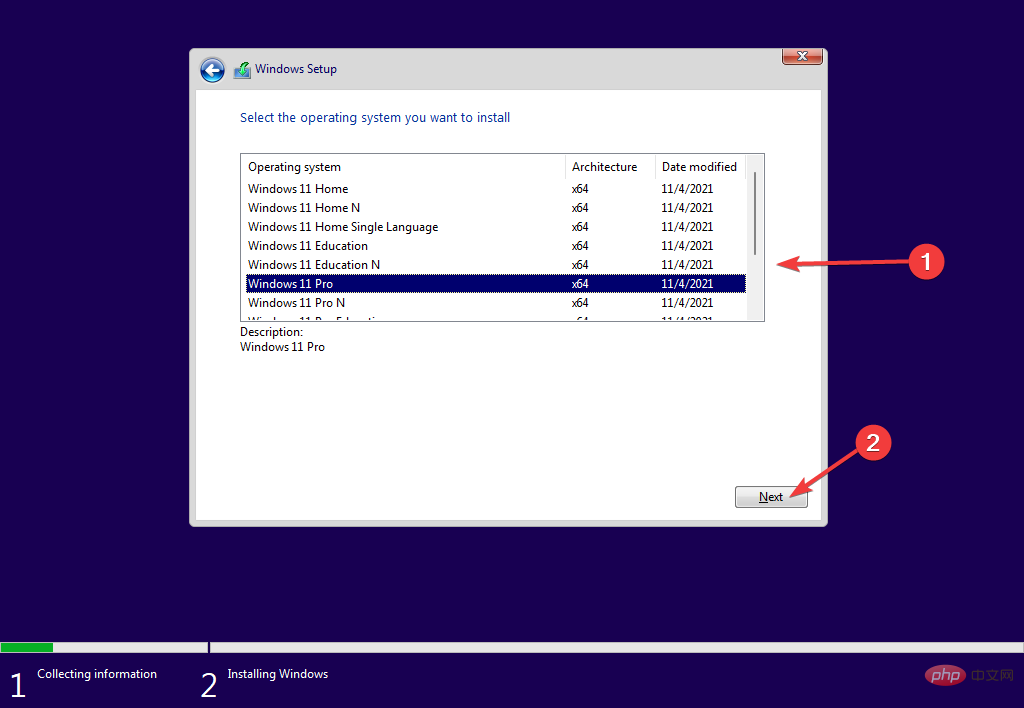
- Select the version of Windows you want to install and click Next.
- After that, to complete the installation, follow the on-screen instructions.
The process is the same whether you are installing Windows 11 on a hard disk drive (HDD) or solid-state drive (SSD). So, if you're wondering what the difference is, it's really their overall performance.
Therefore, we recommend that you always install the operating system on an SSD if possible.
Before installing Windows 11, make sure your computer meets the system requirements. If not, you will not be able to install the operating system.
The above is the detailed content of This is how to install Windows 11 on your hard drive. For more information, please follow other related articles on the PHP Chinese website!

Hot AI Tools

Undresser.AI Undress
AI-powered app for creating realistic nude photos

AI Clothes Remover
Online AI tool for removing clothes from photos.

Undress AI Tool
Undress images for free

Clothoff.io
AI clothes remover

Video Face Swap
Swap faces in any video effortlessly with our completely free AI face swap tool!

Hot Article
Hot Tools

Notepad++7.3.1
Easy-to-use and free code editor

SublimeText3 Chinese version
Chinese version, very easy to use

Zend Studio 13.0.1
Powerful PHP integrated development environment

Dreamweaver CS6
Visual web development tools

SublimeText3 Mac version
God-level code editing software (SublimeText3)
Hot Topics


 What is the reason why PS keeps showing loading?
Apr 06, 2025 pm 06:39 PM
What is the reason why PS keeps showing loading?
Apr 06, 2025 pm 06:39 PM
PS "Loading" problems are caused by resource access or processing problems: hard disk reading speed is slow or bad: Use CrystalDiskInfo to check the hard disk health and replace the problematic hard disk. Insufficient memory: Upgrade memory to meet PS's needs for high-resolution images and complex layer processing. Graphics card drivers are outdated or corrupted: Update the drivers to optimize communication between the PS and the graphics card. File paths are too long or file names have special characters: use short paths and avoid special characters. PS's own problem: Reinstall or repair the PS installer.
 How to speed up the loading speed of PS?
Apr 06, 2025 pm 06:27 PM
How to speed up the loading speed of PS?
Apr 06, 2025 pm 06:27 PM
Solving the problem of slow Photoshop startup requires a multi-pronged approach, including: upgrading hardware (memory, solid-state drive, CPU); uninstalling outdated or incompatible plug-ins; cleaning up system garbage and excessive background programs regularly; closing irrelevant programs with caution; avoiding opening a large number of files during startup.
 How to solve the problem of loading when PS is always showing that it is loading?
Apr 06, 2025 pm 06:30 PM
How to solve the problem of loading when PS is always showing that it is loading?
Apr 06, 2025 pm 06:30 PM
PS card is "Loading"? Solutions include: checking the computer configuration (memory, hard disk, processor), cleaning hard disk fragmentation, updating the graphics card driver, adjusting PS settings, reinstalling PS, and developing good programming habits.
 Is slow PS loading related to computer configuration?
Apr 06, 2025 pm 06:24 PM
Is slow PS loading related to computer configuration?
Apr 06, 2025 pm 06:24 PM
The reason for slow PS loading is the combined impact of hardware (CPU, memory, hard disk, graphics card) and software (system, background program). Solutions include: upgrading hardware (especially replacing solid-state drives), optimizing software (cleaning up system garbage, updating drivers, checking PS settings), and processing PS files. Regular computer maintenance can also help improve PS running speed.
 Does mysql need the internet
Apr 08, 2025 pm 02:18 PM
Does mysql need the internet
Apr 08, 2025 pm 02:18 PM
MySQL can run without network connections for basic data storage and management. However, network connection is required for interaction with other systems, remote access, or using advanced features such as replication and clustering. Additionally, security measures (such as firewalls), performance optimization (choose the right network connection), and data backup are critical to connecting to the Internet.
 Is PS slow loading related to other programs that are running?
Apr 06, 2025 pm 06:03 PM
Is PS slow loading related to other programs that are running?
Apr 06, 2025 pm 06:03 PM
The secrets to mastering Office software include: understanding different versions and platforms, correctly installing and configuring, proficient in using the software interface, in-depth understanding of feature operations, application collaboration and sharing functions, utilizing templates and styles, mastering advanced skills, and solving common problems. In addition, you need to choose a version that suits your needs, make good use of templates and styles, develop backup habits, and learn shortcut keys and advanced techniques to improve efficiency.
 How to solve the problem of loading when the PS opens the file?
Apr 06, 2025 pm 06:33 PM
How to solve the problem of loading when the PS opens the file?
Apr 06, 2025 pm 06:33 PM
"Loading" stuttering occurs when opening a file on PS. The reasons may include: too large or corrupted file, insufficient memory, slow hard disk speed, graphics card driver problems, PS version or plug-in conflicts. The solutions are: check file size and integrity, increase memory, upgrade hard disk, update graphics card driver, uninstall or disable suspicious plug-ins, and reinstall PS. This problem can be effectively solved by gradually checking and making good use of PS performance settings and developing good file management habits.
 How to set color mode for export PDF on PS
Apr 06, 2025 pm 05:09 PM
How to set color mode for export PDF on PS
Apr 06, 2025 pm 05:09 PM
The secret to export PDFs with accurate colors: choose color mode according to the purpose: RGB for network display, CMYK for professional printing. Check Embed Profiles when exporting to maintain color consistency. Adjust compression settings to balance image quality and file size. For PDFs for networks, use RGB mode; for PDFs for printing, use CMYK mode.