

How to improve sound quality on Windows 11: 6 must-try tips

Some of our readers have complained about some Windows 11 audio issues recently, with how to improve the sound quality on Windows 11 PCs being one of the main issues.
If you are facing a similar problem, there is no need to worry as this article will provide you with simplified steps on how to improve the sound quality in Windows 11.
In this article
What are the best audio formats for sound quality on Windows 11?
If you are looking for the best digital audio format for audio listening, it is the WAVE or WAV format.
It is an uncompressed format that captures all sound frequencies and allows for high bitrates, but a song can take up tens to hundreds of megabytes.
In contrast, MP3, for example, is a highly compressed format designed for portability and low space allocation, and does not preserve all frequencies.
If you need sound technology, currently, two popular sound formats also allow spatiality of sound: Dolby Access and DTS Sound Unbound.
We have highlighted these two apps so that you can download them from the Microsoft Store. However, you should keep in mind that the quality of the sound depends on the output quality of the sound card and the performance of the onboard or connected speakers.
How to improve sound quality on Windows 11?
Before making any troubleshooting or setting adjustments, users should ensure that they do the following:
- Check to make sure your sound device is connected properly. Make sure its cable connections are not loose.
- Try plugging the USB sound device into a spare USB port on your desktop or laptop computer.
- You can also run the Windows Audio Troubleshooter to scan and repair audio devices.
- You should also check and test your microphone to make sure it is working properly.
After confirming the above checks, if the problem still persists, you can explore the advanced solutions provided in this article if necessary:
1. Enable Audio Enhancement
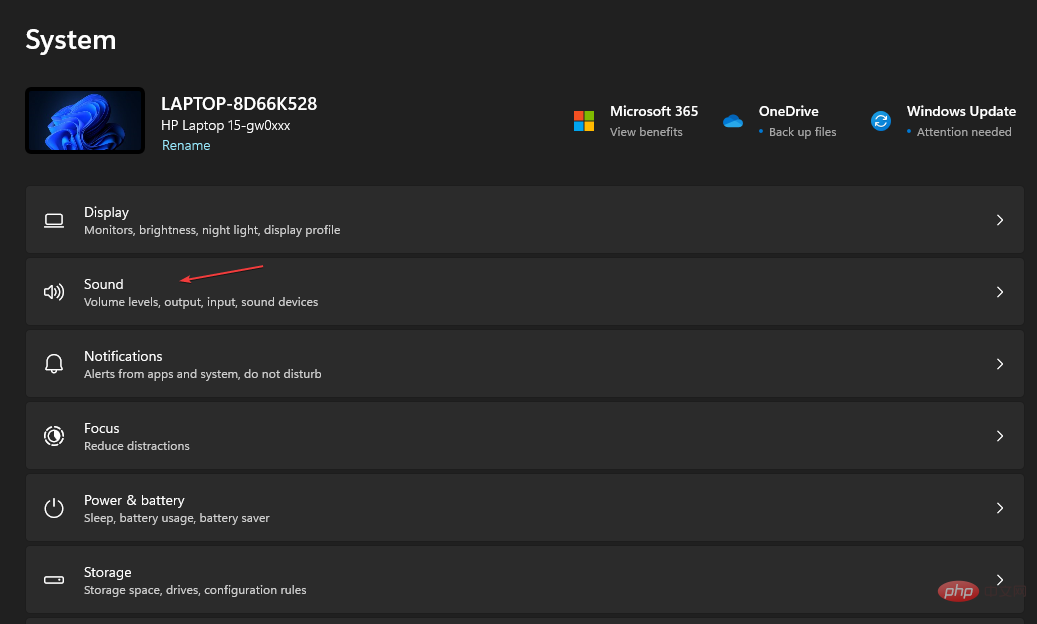
- Press the key to open Settings. WindowsI
- Go to Sound from the System tab.

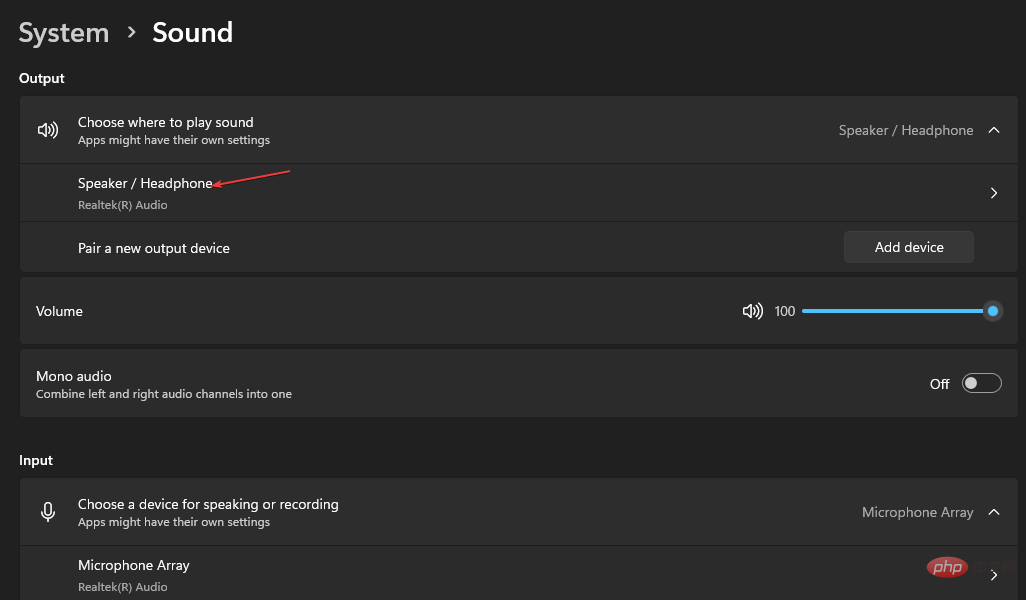
- In the Output section, click your audio device (speakers or headphones).
- In the drop-down menu, scroll down to the Output Settings section, then toggle the switch Enhanced Audio and set it to On.
If you are currently playing audio, you should be able to notice some immediate changes in audio quality.
2. Configure the audio quality of the input device (microphone)
- Button to open Settings. WindowsI
- Go to Sound under the System tab.
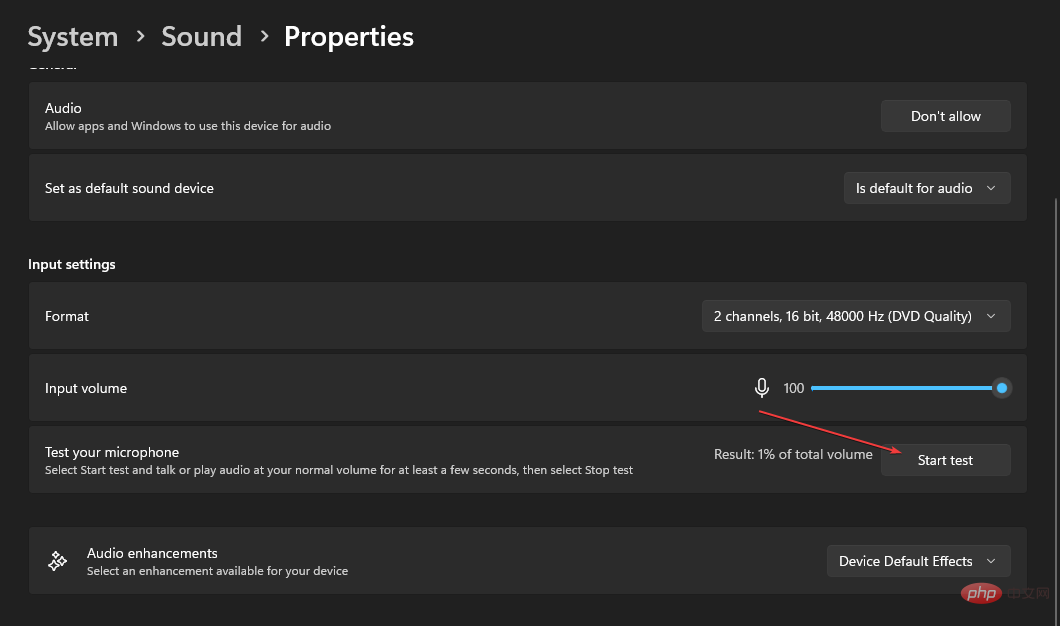
- Scroll down to the Input section and click on your input device (here you can adjust the input volume, change the format quality, and test the microphone).
- Click "Start Test" and speak at a normal volume for a few seconds.
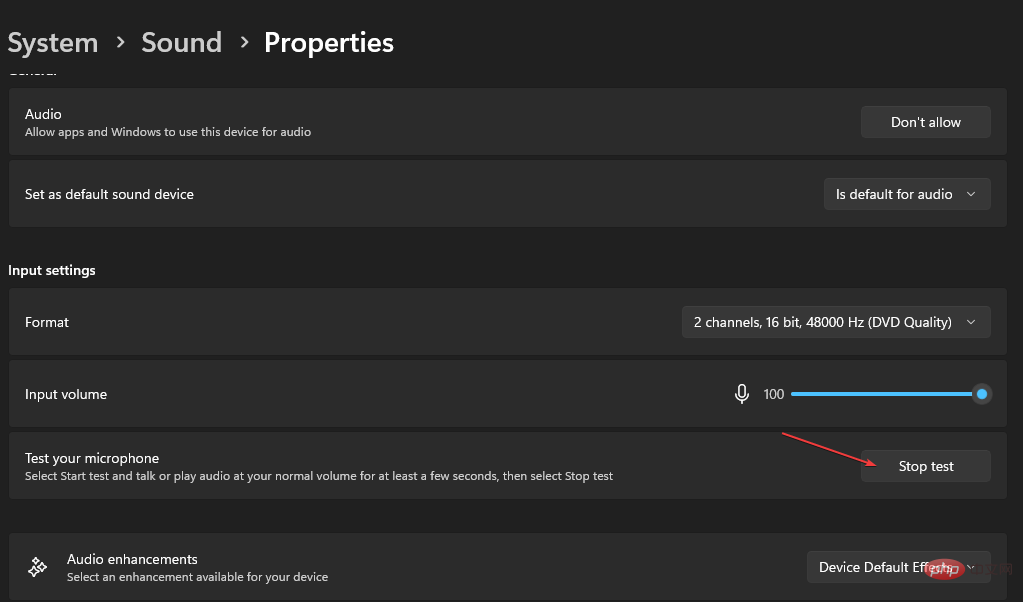
- Click "Stop Test" to see the results.
- Next, click on your Microphone to open its properties.
- Scroll down and toggle the switch for Enhanced Audio and set it to On.
Now you can hear the playback through your headphones and you can chat normally. Uncheck Listen to this device if you're ok with the results and click Apply to save changes.
3. Use a third-party audio enhancer
As we mentioned at the beginning of this article, sound quality is limited by the sound equipment you use.
However, we have a list of sound enhancement software that can improve the sound quality on your device. You can check out our selection and test the app.
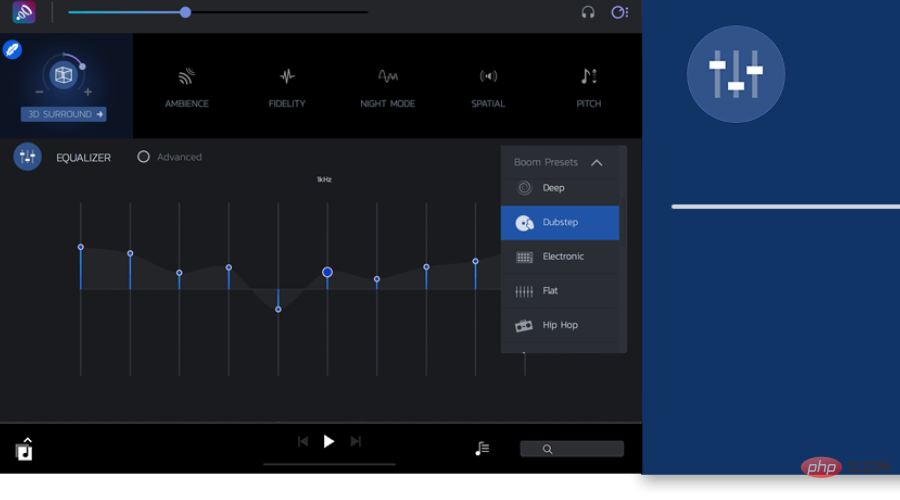
On the other hand, there is a stylish program that you can try to get soaring sound improvements and change the sound quality on your Windows 11 device.
Boom3D is audio 3D surround sound software for professionals or regular users, no matter what device you are using, headphones or any device that needs to enhance the sound.
It comes with 31-band equalizer presets, volume booster or full cinematic sound effects to immerse you in your favorite movie or song.
4. Restart the Windows Audio Service
- Right-click the "Start" button in the lower left corner of the screen and select "Run". Type services.msc and then hit the keyboard. Enter
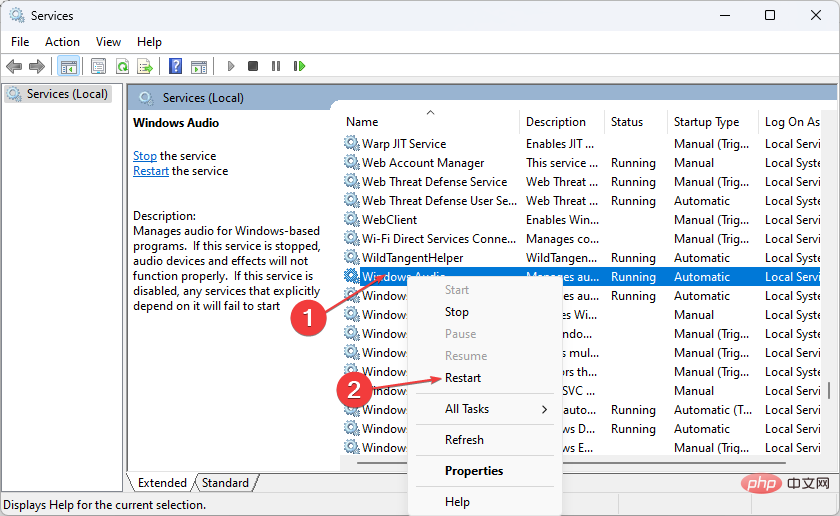
- Scroll down to find the Windows Audio entry. Then, right-click on it and select Restart.
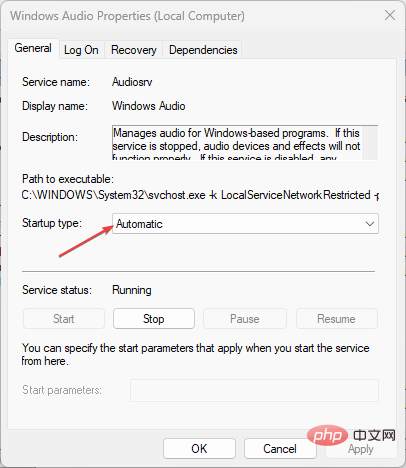
- Right-click it again and select Properties from the drop-down menu.
- Next, click the "Startup Type" menu and change the entry to "Automatic."
- To finish, click Apply and then OK.
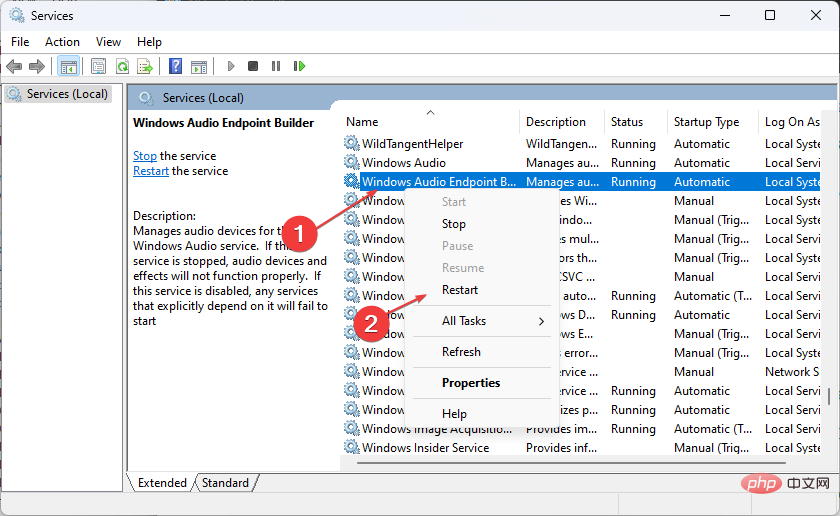
- Now, go to Windows Audio Endpoint Generator and repeat the process.
Restarting the Windows Audio service should help improve audio quality. However, if the problem persists, try the next fix.
5. Adjust the audio settings in the Control Panel
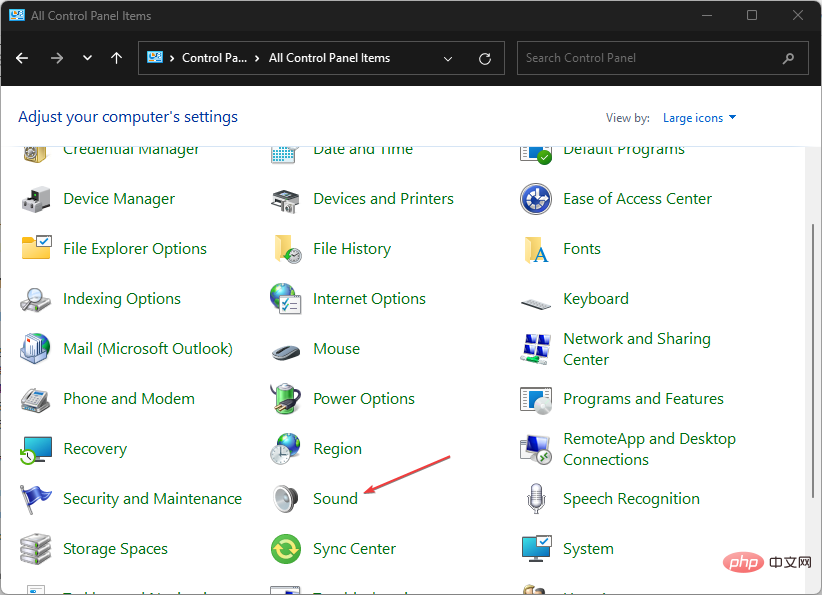
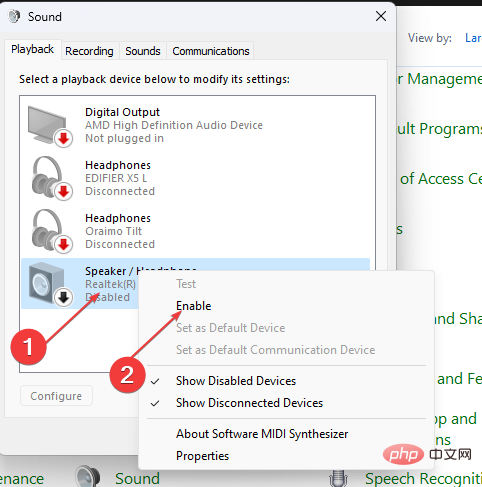
- Open the Windows Control Panel and click Sound. (Make sure Large icons are selected as the View by option. Right-click the Speakers option in the Playback tab and click Click "Enable".
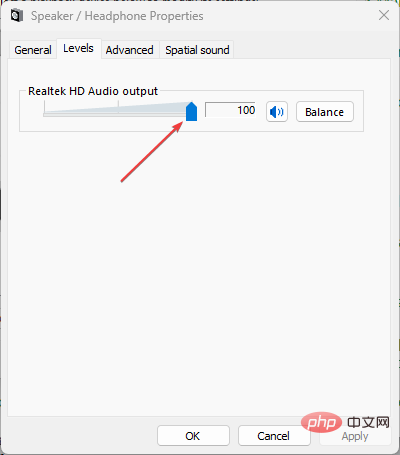
- Right-click it again and select Set as communication device. Select by right-clicking the speaker again Properties.Drag the slider to the maximum value on the Levels tab.
- Next, go to "Advanced" and check the box next to "Allow applications to have exclusive control of this device."
- You can now restart your computer and check if the audio is working properly.
- After performing the above steps, your Your PC's sound quality should improve on Windows 11. However, you can browse our detailed guide on how to fix your PC's volume if it's too low for more information on how to improve your Windows 11 sound quality. 6. Reinstall the audio driver
- Press the shortcut menu and select
from the menu.
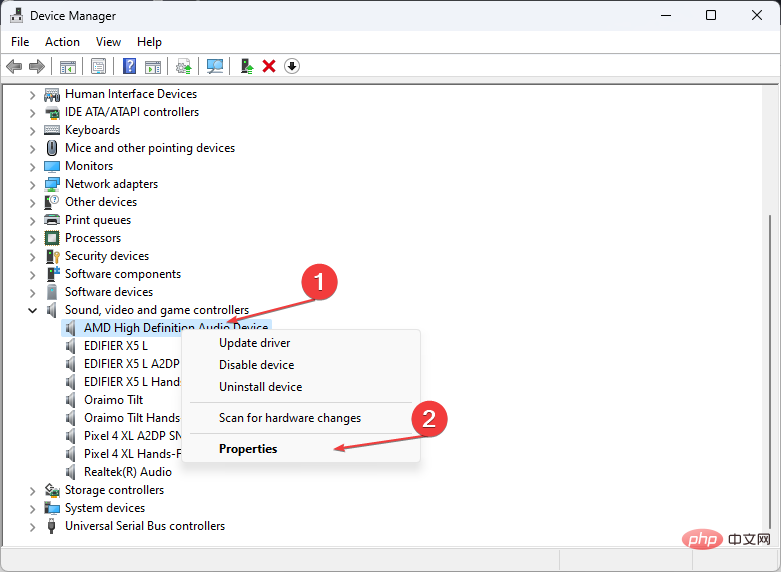
WindowsX- Expand Controllers for Sound, Video, and Games. Right-click the PC's audio driver and click Properties.In the new window, select driver, and then click Uninstall Device to uninstall the
- driver. Restart your computer and Windows 11 will automatically reinstall the driver.
-
Outdated sound drivers may be the cause of poor sound quality in Windows 11. After enabling Windows Driver Updater to find drivers, you should install any recommended updates and then restart your computer.If you want a For an easier and more efficient method, you can try specialized software to do this automatically.
- Various errors are the result of driver failure. In this case, you may need to completely update or reinstall This particular component. Since the process is not straightforward, we recommend using an automated tool to do the job. Here's how:
 Restart your computer and Windows 11 will automatically reinstall the driver.
 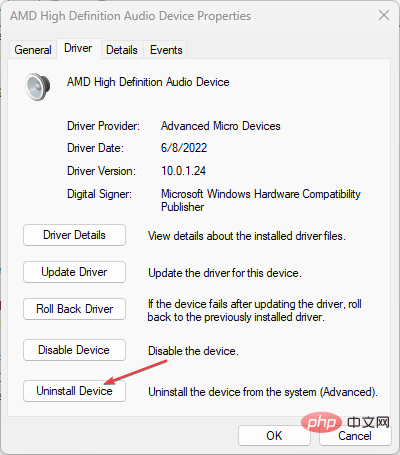 If you want a For an easier and more efficient method, you can try specialized software to do this automatically.
 .
Launch the application.
- Wait until the software detects all faulty drivers.
- Now you will see a list of all problematic drivers, you just need to Just select the driver you want to fix. Wait for DriverFix to download and install the latest driver.
- Restart the computer for the changes to take effect.
- That’s how to improve the sound quality on your Windows 11 PC. You can also explore our detailed solutions on how to improve the sound quality on your Windows 10 PC and hopefully you’ll find additional information that might be useful to you.
The above is the detailed content of How to improve sound quality on Windows 11: 6 must-try tips. For more information, please follow other related articles on the PHP Chinese website!

Hot AI Tools

Undresser.AI Undress
AI-powered app for creating realistic nude photos

AI Clothes Remover
Online AI tool for removing clothes from photos.

Undress AI Tool
Undress images for free

Clothoff.io
AI clothes remover

Video Face Swap
Swap faces in any video effortlessly with our completely free AI face swap tool!

Hot Article
Hot Tools

Notepad++7.3.1
Easy-to-use and free code editor

SublimeText3 Chinese version
Chinese version, very easy to use

Zend Studio 13.0.1
Powerful PHP integrated development environment

Dreamweaver CS6
Visual web development tools

SublimeText3 Mac version
God-level code editing software (SublimeText3)
Hot Topics


 What is the reason why PS keeps showing loading?
Apr 06, 2025 pm 06:39 PM
What is the reason why PS keeps showing loading?
Apr 06, 2025 pm 06:39 PM
PS "Loading" problems are caused by resource access or processing problems: hard disk reading speed is slow or bad: Use CrystalDiskInfo to check the hard disk health and replace the problematic hard disk. Insufficient memory: Upgrade memory to meet PS's needs for high-resolution images and complex layer processing. Graphics card drivers are outdated or corrupted: Update the drivers to optimize communication between the PS and the graphics card. File paths are too long or file names have special characters: use short paths and avoid special characters. PS's own problem: Reinstall or repair the PS installer.
 How to solve the problem of loading when PS is always showing that it is loading?
Apr 06, 2025 pm 06:30 PM
How to solve the problem of loading when PS is always showing that it is loading?
Apr 06, 2025 pm 06:30 PM
PS card is "Loading"? Solutions include: checking the computer configuration (memory, hard disk, processor), cleaning hard disk fragmentation, updating the graphics card driver, adjusting PS settings, reinstalling PS, and developing good programming habits.
 How to speed up the loading speed of PS?
Apr 06, 2025 pm 06:27 PM
How to speed up the loading speed of PS?
Apr 06, 2025 pm 06:27 PM
Solving the problem of slow Photoshop startup requires a multi-pronged approach, including: upgrading hardware (memory, solid-state drive, CPU); uninstalling outdated or incompatible plug-ins; cleaning up system garbage and excessive background programs regularly; closing irrelevant programs with caution; avoiding opening a large number of files during startup.
 Is slow PS loading related to computer configuration?
Apr 06, 2025 pm 06:24 PM
Is slow PS loading related to computer configuration?
Apr 06, 2025 pm 06:24 PM
The reason for slow PS loading is the combined impact of hardware (CPU, memory, hard disk, graphics card) and software (system, background program). Solutions include: upgrading hardware (especially replacing solid-state drives), optimizing software (cleaning up system garbage, updating drivers, checking PS settings), and processing PS files. Regular computer maintenance can also help improve PS running speed.
 Does mysql need the internet
Apr 08, 2025 pm 02:18 PM
Does mysql need the internet
Apr 08, 2025 pm 02:18 PM
MySQL can run without network connections for basic data storage and management. However, network connection is required for interaction with other systems, remote access, or using advanced features such as replication and clustering. Additionally, security measures (such as firewalls), performance optimization (choose the right network connection), and data backup are critical to connecting to the Internet.
 Is PS slow loading related to other programs that are running?
Apr 06, 2025 pm 06:03 PM
Is PS slow loading related to other programs that are running?
Apr 06, 2025 pm 06:03 PM
The secrets to mastering Office software include: understanding different versions and platforms, correctly installing and configuring, proficient in using the software interface, in-depth understanding of feature operations, application collaboration and sharing functions, utilizing templates and styles, mastering advanced skills, and solving common problems. In addition, you need to choose a version that suits your needs, make good use of templates and styles, develop backup habits, and learn shortcut keys and advanced techniques to improve efficiency.
 How to set color mode for export PDF on PS
Apr 06, 2025 pm 05:09 PM
How to set color mode for export PDF on PS
Apr 06, 2025 pm 05:09 PM
The secret to export PDFs with accurate colors: choose color mode according to the purpose: RGB for network display, CMYK for professional printing. Check Embed Profiles when exporting to maintain color consistency. Adjust compression settings to balance image quality and file size. For PDFs for networks, use RGB mode; for PDFs for printing, use CMYK mode.
 How to solve the problem of loading when the PS opens the file?
Apr 06, 2025 pm 06:33 PM
How to solve the problem of loading when the PS opens the file?
Apr 06, 2025 pm 06:33 PM
"Loading" stuttering occurs when opening a file on PS. The reasons may include: too large or corrupted file, insufficient memory, slow hard disk speed, graphics card driver problems, PS version or plug-in conflicts. The solutions are: check file size and integrity, increase memory, upgrade hard disk, update graphics card driver, uninstall or disable suspicious plug-ins, and reinstall PS. This problem can be effectively solved by gradually checking and making good use of PS performance settings and developing good file management habits.