
 Backend Development
Python Tutorial
PyTorch code implementation and step-by-step explanation of DDPG reinforcement learning
Backend Development
Python Tutorial
PyTorch code implementation and step-by-step explanation of DDPG reinforcement learning
PyTorch code implementation and step-by-step explanation of DDPG reinforcement learning

Deep Deterministic Policy Gradient (DDPG) is a model-free, non-policy deep reinforcement algorithm inspired by Deep Q-Network. It is based on Actor-Critic using policy gradient. This article will use pytorch to perform it. Complete implementation and explanation

The key component of DDPG is
- Replay Buffer
- Actor -Critic neural network
- Exploration Noise
- Target network
- Soft Target Updates for Target Network
Let’s implement it step by step:
Replay Buffer
DDPG uses Replay Buffer to store the process and rewards (Sₜ, aₜ, Rₜ, Sₜ ₁) sampled by exploring the environment. Replay Buffer plays a vital role in helping the agent accelerate learning and the stability of DDPG:
- Minimize the correlation between samples: store past experience in the Replay Buffer, thereby Allows agents to learn from a variety of experiences.
- Enable offline policy learning: Allows the agent to sample transitions from the replay buffer instead of sampling transitions from the current policy.
- Efficient Sampling: Store past experience in a buffer, allowing the agent to learn from different experiences multiple times.
class Replay_buffer():
 '''
Code based on:
https://github.com/openai/baselines/blob/master/baselines/deepq/replay_buffer.py
Expects tuples of (state, next_state, action, reward, done)
'''
 def __init__(self, max_size=capacity):
 """Create Replay buffer.
Parameters
----------
size: int
Max number of transitions to store in the buffer. When the buffer
overflows the old memories are dropped.
"""
 self.storage = []
 self.max_size = max_size
 self.ptr = 0

 def push(self, data):
 if len(self.storage) == self.max_size:
 self.storage[int(self.ptr)] = data
 self.ptr = (self.ptr + 1) % self.max_size
 else:
 self.storage.append(data)

 def sample(self, batch_size):
 """Sample a batch of experiences.
Parameters
----------
batch_size: int
How many transitions to sample.
Returns
-------
state: np.array
batch of state or observations
action: np.array
batch of actions executed given a state
reward: np.array
rewards received as results of executing action
next_state: np.array
next state next state or observations seen after executing action
done: np.array
done[i] = 1 if executing ation[i] resulted in
the end of an episode and 0 otherwise.
"""
 ind = np.random.randint(0, len(self.storage), size=batch_size)
 state, next_state, action, reward, done = [], [], [], [], []

 for i in ind:
 st, n_st, act, rew, dn = self.storage[i]
 state.append(np.array(st, copy=False))
 next_state.append(np.array(n_st, copy=False))
 action.append(np.array(act, copy=False))
 reward.append(np.array(rew, copy=False))
 done.append(np.array(dn, copy=False))

 return np.array(state), np.array(next_state), np.array(action), np.array(reward).reshape(-1, 1), np.array(done).reshape(-1, 1)
Actor-Critic Neural Network
This is the PyTorch implementation of the Actor-Critic reinforcement learning algorithm. This code defines two neural network models, an Actor and a Critic.
The input of the Actor model: environment state; the output of the Actor model: actions with continuous values.
The input of the Critic model: environmental state and action; the output of the Critic model: Q value, which is the expected total reward of the current state-action pair.
class Actor(nn.Module):
 """
The Actor model takes in a state observation as input and
outputs an action, which is a continuous value.

It consists of four fully connected linear layers with ReLU activation functions and
a final output layer selects one single optimized action for the state
"""
 def __init__(self, n_states, action_dim, hidden1):
 super(Actor, self).__init__()
 self.net = nn.Sequential(
 nn.Linear(n_states, hidden1),
 nn.ReLU(),
 nn.Linear(hidden1, hidden1),
 nn.ReLU(),
 nn.Linear(hidden1, hidden1),
 nn.ReLU(),
 nn.Linear(hidden1, 1)
)

 def forward(self, state):
 return self.net(state)

 class Critic(nn.Module):
 """
The Critic model takes in both a state observation and an action as input and
outputs a Q-value, which estimates the expected total reward for the current state-action pair.

It consists of four linear layers with ReLU activation functions,
State and action inputs are concatenated before being fed into the first linear layer.

The output layer has a single output, representing the Q-value
"""
 def __init__(self, n_states, action_dim, hidden2):
 super(Critic, self).__init__()
 self.net = nn.Sequential(
 nn.Linear(n_states + action_dim, hidden2),
 nn.ReLU(),
 nn.Linear(hidden2, hidden2),
 nn.ReLU(),
 nn.Linear(hidden2, hidden2),
 nn.ReLU(),
 nn.Linear(hidden2, action_dim)
)

 def forward(self, state, action):
 return self.net(torch.cat((state, action), 1))
Exploration Noise
Adding noise to the actions selected by an Actor is a technique used in DDPG to encourage exploration and improve the learning process.
Gaussian noise or Ornstein-Uhlenbeck noise can be used. Gaussian noise is simple and easy to implement, and Ornstein-Uhlenbeck noise generates time-correlated noise that can help agents explore action space more efficiently. But the Ornstein-Uhlenbeck noise fluctuations are smoother and less random than the Gaussian noise method.
import numpy as np
 import random
 import copy

 class OU_Noise(object):
 """Ornstein-Uhlenbeck process.
code from :
https://math.stackexchange.com/questions/1287634/implementing-ornstein-uhlenbeck-in-matlab
The OU_Noise class has four attributes

size: the size of the noise vector to be generated
mu: the mean of the noise, set to 0 by default
theta: the rate of mean reversion, controlling how quickly the noise returns to the mean
sigma: the volatility of the noise, controlling the magnitude of fluctuations
"""
 def __init__(self, size, seed, mu=0., theta=0.15, sigma=0.2):
 self.mu = mu * np.ones(size)
 self.theta = theta
 self.sigma = sigma
 self.seed = random.seed(seed)
 self.reset()

 def reset(self):
 """Reset the internal state (= noise) to mean (mu)."""
 self.state = copy.copy(self.mu)

 def sample(self):
 """Update internal state and return it as a noise sample.
This method uses the current state of the noise and generates the next sample
"""
 dx = self.theta * (self.mu - self.state) + self.sigma * np.array([np.random.normal() for _ in range(len(self.state))])
 self.state += dx
 return self.state
To use Gaussian noise in DDPG, you can add Gaussian noise directly to the agent's action selection process.
DDPG
DDPG (Deep Deterministic Policy Gradient) uses two sets of Actor-Critic neural networks for function approximation. In DDPG, the target network is Actor-Critic, which has the same structure and parameterization as the Actor-Critic network.
During the training period, the agent uses its Actor-Critic network to interact with the environment and stores experience tuples (Sₜ, Aₜ, Rₜ, Sₜ ₁) in the Replay Buffer. The agent then samples from the Replay Buffer and updates the Actor-Critic network with the data. Rather than updating the target network weights by copying directly from the Actor-Critic network, the DDPG algorithm slowly updates the target network weights through a process called soft target updating.

Soft targets are updated as a fraction of the weights transferred from the Actor-Critic network to the target network called the target update rate (τ) .
The update formula of the soft target is as follows:

By using soft target technology, the stability of learning can be greatly improved.
#Set Hyperparameters
 # Hyperparameters adapted for performance from
 capacity=1000000
 batch_size=64
 update_iteration=200
 tau=0.001 # tau for soft updating
 gamma=0.99 # discount factor
 directory = './'
 hidden1=20 # hidden layer for actor
 hidden2=64. #hiiden laye for critic

 class DDPG(object):
 def __init__(self, state_dim, action_dim):
 """
Initializes the DDPG agent.
Takes three arguments:
state_dim which is the dimensionality of the state space,
action_dim which is the dimensionality of the action space, and
max_action which is the maximum value an action can take.

Creates a replay buffer, an actor-critic networks and their corresponding target networks.
It also initializes the optimizer for both actor and critic networks alog with
counters to track the number of training iterations.
"""
 self.replay_buffer = Replay_buffer()

 self.actor = Actor(state_dim, action_dim, hidden1).to(device)
 self.actor_target = Actor(state_dim, action_dim,hidden1).to(device)
 self.actor_target.load_state_dict(self.actor.state_dict())
 self.actor_optimizer = optim.Adam(self.actor.parameters(), lr=3e-3)

 self.critic = Critic(state_dim, action_dim,hidden2).to(device)
 self.critic_target = Critic(state_dim, action_dim,hidden2).to(device)
 self.critic_target.load_state_dict(self.critic.state_dict())
 self.critic_optimizer = optim.Adam(self.critic.parameters(), lr=2e-2)
 # learning rate


 self.num_critic_update_iteration = 0
 self.num_actor_update_iteration = 0
 self.num_training = 0

 def select_action(self, state):
 """
takes the current state as input and returns an action to take in that state.
It uses the actor network to map the state to an action.
"""
 state = torch.FloatTensor(state.reshape(1, -1)).to(device)
 return self.actor(state).cpu().data.numpy().flatten()


 def update(self):
 """
updates the actor and critic networks using a batch of samples from the replay buffer.
For each sample in the batch, it computes the target Q value using the target critic network and the target actor network.
It then computes the current Q value
using the critic network and the action taken by the actor network.

It computes the critic loss as the mean squared error between the target Q value and the current Q value, and
updates the critic network using gradient descent.

It then computes the actor loss as the negative mean Q value using the critic network and the actor network, and
updates the actor network using gradient ascent.

Finally, it updates the target networks using
soft updates, where a small fraction of the actor and critic network weights are transferred to their target counterparts.
This process is repeated for a fixed number of iterations.
"""

 for it in range(update_iteration):
 # For each Sample in replay buffer batch
 state, next_state, action, reward, done = self.replay_buffer.sample(batch_size)
 state = torch.FloatTensor(state).to(device)
 action = torch.FloatTensor(action).to(device)
 next_state = torch.FloatTensor(next_state).to(device)
 done = torch.FloatTensor(1-done).to(device)
 reward = torch.FloatTensor(reward).to(device)

 # Compute the target Q value
 target_Q = self.critic_target(next_state, self.actor_target(next_state))
 target_Q = reward + (done * gamma * target_Q).detach()

 # Get current Q estimate
 current_Q = self.critic(state, action)

 # Compute critic loss
 critic_loss = F.mse_loss(current_Q, target_Q)

 # Optimize the critic
 self.critic_optimizer.zero_grad()
 critic_loss.backward()
 self.critic_optimizer.step()

 # Compute actor loss as the negative mean Q value using the critic network and the actor network
 actor_loss = -self.critic(state, self.actor(state)).mean()

 # Optimize the actor
 self.actor_optimizer.zero_grad()
 actor_loss.backward()
 self.actor_optimizer.step()


 """
Update the frozen target models using
soft updates, where
tau,a small fraction of the actor and critic network weights are transferred to their target counterparts.
"""
 for param, target_param in zip(self.critic.parameters(), self.critic_target.parameters()):
 target_param.data.copy_(tau * param.data + (1 - tau) * target_param.data)

 for param, target_param in zip(self.actor.parameters(), self.actor_target.parameters()):
 target_param.data.copy_(tau * param.data + (1 - tau) * target_param.data)


 self.num_actor_update_iteration += 1
 self.num_critic_update_iteration += 1
 def save(self):
 """
Saves the state dictionaries of the actor and critic networks to files
"""
 torch.save(self.actor.state_dict(), directory + 'actor.pth')
 torch.save(self.critic.state_dict(), directory + 'critic.pth')

 def load(self):
 """
Loads the state dictionaries of the actor and critic networks to files
"""
 self.actor.load_state_dict(torch.load(directory + 'actor.pth'))
 self.critic.load_state_dict(torch.load(directory + 'critic.pth'))
Training DDPG
Here we use OpenAI Gym’s “MountainCarContinuous-v0” to train our DDPG RL model. The environment here provides a continuous action and observation space. The goal is to make the car as soon as possible Reach the top of the mountain.

The various parameters of the algorithm are defined below, such as the maximum number of training times, exploration noise, recording interval, etc. Using a fixed random seed allows the process to be backtracked.
import gym

 # create the environment
 env_name='MountainCarContinuous-v0'
 env = gym.make(env_name)
 device = 'cuda' if torch.cuda.is_available() else 'cpu'

 # Define different parameters for training the agent
 max_episode=100
 max_time_steps=5000
 ep_r = 0
 total_step = 0
 score_hist=[]
 # for rensering the environmnet
 render=True
 render_interval=10
 # for reproducibility
 env.seed(0)
 torch.manual_seed(0)
 np.random.seed(0)
 #Environment action ans states
 state_dim = env.observation_space.shape[0]
 action_dim = env.action_space.shape[0]
 max_action = float(env.action_space.high[0])
 min_Val = torch.tensor(1e-7).float().to(device)

 # Exploration Noise
 exploration_noise=0.1
 exploration_noise=0.1 * max_action
Create an instance of the DDPG agent class to train the agent for the specified number of times. The agent's update() method is called at the end of each round to update the parameters, and the save() method is used after every ten rounds to save the agent's parameters to a file.
# Create a DDPG instance
 agent = DDPG(state_dim, action_dim)

 # Train the agent for max_episodes
 for i in range(max_episode):
 total_reward = 0
 step =0
 state = env.reset()
 fort in range(max_time_steps):
 action = agent.select_action(state)
 # Add Gaussian noise to actions for exploration
 action = (action + np.random.normal(0, 1, size=action_dim)).clip(-max_action, max_action)
 #action += ou_noise.sample()
 next_state, reward, done, info = env.step(action)
 total_reward += reward
 if render and i >= render_interval : env.render()
 agent.replay_buffer.push((state, next_state, action, reward, np.float(done)))
 state = next_state
 if done:
 break
 step += 1

 score_hist.append(total_reward)
 total_step += step+1
 print("Episode: t{} Total Reward: t{:0.2f}".format( i, total_reward))
 agent.update()
 if i % 10 == 0:
 agent.save()
env.close()Testing DDPG
test_iteration=100

 for i in range(test_iteration):
 state = env.reset()
 for t in count():
 action = agent.select_action(state)
 next_state, reward, done, info = env.step(np.float32(action))
 ep_r += reward
 print(reward)
 env.render()
 if done:
 print("reward{}".format(reward))
 print("Episode t{}, the episode reward is t{:0.2f}".format(i, ep_r))
 ep_r = 0
 env.render()
 break
state = next_stateWe use the following parameters to make the model converge:
- Sample noise from a standard normal distribution instead of random sampling.
- Change the polyak constant (tau) from 0.99 to 0.001
- Modify the hidden layer size of the Critic network to [64,64]. ReLU activation is removed after the second layer of the Critic network. Change to (Linear, ReLU, Linear, Linear).
- Change the maximum buffer size to 1000000
- Change the batch_size size from 128 to 64
The effect after training for 75 rounds is as follows:

Summary
The DDPG algorithm is a model-free off-policy Actor-Critic algorithm inspired by the deep Q-Network (DQN) algorithm. It combines the advantages of policy gradient methods and Q-learning to learn deterministic policies in continuous action spaces.
Similar to DQN, it uses a replay buffer to store past experience and target networks for training the network, thereby improving the stability of the training process.
The DDPG algorithm requires careful hyperparameter tuning for optimal performance. Hyperparameters include learning rate, batch size, target network update rate, and detection noise parameters. Small changes in hyperparameters can have a significant impact on the performance of the algorithm.
The above is the detailed content of PyTorch code implementation and step-by-step explanation of DDPG reinforcement learning. For more information, please follow other related articles on the PHP Chinese website!

Hot AI Tools

Undresser.AI Undress
AI-powered app for creating realistic nude photos

AI Clothes Remover
Online AI tool for removing clothes from photos.

Undress AI Tool
Undress images for free

Clothoff.io
AI clothes remover

Video Face Swap
Swap faces in any video effortlessly with our completely free AI face swap tool!

Hot Article
Hot Tools

Notepad++7.3.1
Easy-to-use and free code editor

SublimeText3 Chinese version
Chinese version, very easy to use

Zend Studio 13.0.1
Powerful PHP integrated development environment

Dreamweaver CS6
Visual web development tools

SublimeText3 Mac version
God-level code editing software (SublimeText3)
Hot Topics


 The perfect combination of PyCharm and PyTorch: detailed installation and configuration steps
Feb 21, 2024 pm 12:00 PM
The perfect combination of PyCharm and PyTorch: detailed installation and configuration steps
Feb 21, 2024 pm 12:00 PM
PyCharm is a powerful integrated development environment (IDE), and PyTorch is a popular open source framework in the field of deep learning. In the field of machine learning and deep learning, using PyCharm and PyTorch for development can greatly improve development efficiency and code quality. This article will introduce in detail how to install and configure PyTorch in PyCharm, and attach specific code examples to help readers better utilize the powerful functions of these two. Step 1: Install PyCharm and Python
 Introduction to five sampling methods in natural language generation tasks and Pytorch code implementation
Feb 20, 2024 am 08:50 AM
Introduction to five sampling methods in natural language generation tasks and Pytorch code implementation
Feb 20, 2024 am 08:50 AM
In natural language generation tasks, sampling method is a technique to obtain text output from a generative model. This article will discuss 5 common methods and implement them using PyTorch. 1. GreedyDecoding In greedy decoding, the generative model predicts the words of the output sequence based on the input sequence time step by time. At each time step, the model calculates the conditional probability distribution of each word, and then selects the word with the highest conditional probability as the output of the current time step. This word becomes the input to the next time step, and the generation process continues until some termination condition is met, such as a sequence of a specified length or a special end marker. The characteristic of GreedyDecoding is that each time the current conditional probability is the best
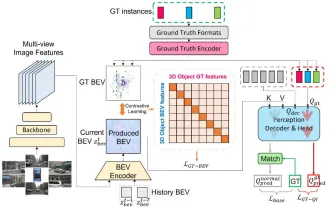 CLIP-BEVFormer: Explicitly supervise the BEVFormer structure to improve long-tail detection performance
Mar 26, 2024 pm 12:41 PM
CLIP-BEVFormer: Explicitly supervise the BEVFormer structure to improve long-tail detection performance
Mar 26, 2024 pm 12:41 PM
Written above & the author’s personal understanding: At present, in the entire autonomous driving system, the perception module plays a vital role. The autonomous vehicle driving on the road can only obtain accurate perception results through the perception module. The downstream regulation and control module in the autonomous driving system makes timely and correct judgments and behavioral decisions. Currently, cars with autonomous driving functions are usually equipped with a variety of data information sensors including surround-view camera sensors, lidar sensors, and millimeter-wave radar sensors to collect information in different modalities to achieve accurate perception tasks. The BEV perception algorithm based on pure vision is favored by the industry because of its low hardware cost and easy deployment, and its output results can be easily applied to various downstream tasks.
 Implementing noise removal diffusion model using PyTorch
Jan 14, 2024 pm 10:33 PM
Implementing noise removal diffusion model using PyTorch
Jan 14, 2024 pm 10:33 PM
Before we understand the working principle of the Denoising Diffusion Probabilistic Model (DDPM) in detail, let us first understand some of the development of generative artificial intelligence, which is also one of the basic research of DDPM. VAEVAE uses an encoder, a probabilistic latent space, and a decoder. During training, the encoder predicts the mean and variance of each image and samples these values from a Gaussian distribution. The result of the sampling is passed to the decoder, which converts the input image into a form similar to the output image. KL divergence is used to calculate the loss. A significant advantage of VAE is its ability to generate diverse images. In the sampling stage, one can directly sample from the Gaussian distribution and generate new images through the decoder. GAN has made great progress in variational autoencoders (VAEs) in just one year.
 Implementing Machine Learning Algorithms in C++: Common Challenges and Solutions
Jun 03, 2024 pm 01:25 PM
Implementing Machine Learning Algorithms in C++: Common Challenges and Solutions
Jun 03, 2024 pm 01:25 PM
Common challenges faced by machine learning algorithms in C++ include memory management, multi-threading, performance optimization, and maintainability. Solutions include using smart pointers, modern threading libraries, SIMD instructions and third-party libraries, as well as following coding style guidelines and using automation tools. Practical cases show how to use the Eigen library to implement linear regression algorithms, effectively manage memory and use high-performance matrix operations.
 Tutorial on installing PyCharm with PyTorch
Feb 24, 2024 am 10:09 AM
Tutorial on installing PyCharm with PyTorch
Feb 24, 2024 am 10:09 AM
As a powerful deep learning framework, PyTorch is widely used in various machine learning projects. As a powerful Python integrated development environment, PyCharm can also provide good support when implementing deep learning tasks. This article will introduce in detail how to install PyTorch in PyCharm and provide specific code examples to help readers quickly get started using PyTorch for deep learning tasks. Step 1: Install PyCharm First, we need to make sure we have
 Explore the underlying principles and algorithm selection of the C++sort function
Apr 02, 2024 pm 05:36 PM
Explore the underlying principles and algorithm selection of the C++sort function
Apr 02, 2024 pm 05:36 PM
The bottom layer of the C++sort function uses merge sort, its complexity is O(nlogn), and provides different sorting algorithm choices, including quick sort, heap sort and stable sort.
 so fast! Recognize video speech into text in just a few minutes with less than 10 lines of code
Feb 27, 2024 pm 01:55 PM
so fast! Recognize video speech into text in just a few minutes with less than 10 lines of code
Feb 27, 2024 pm 01:55 PM
Hello everyone, I am Kite. Two years ago, the need to convert audio and video files into text content was difficult to achieve, but now it can be easily solved in just a few minutes. It is said that in order to obtain training data, some companies have fully crawled videos on short video platforms such as Douyin and Kuaishou, and then extracted the audio from the videos and converted them into text form to be used as training corpus for big data models. If you need to convert a video or audio file to text, you can try this open source solution available today. For example, you can search for the specific time points when dialogues in film and television programs appear. Without further ado, let’s get to the point. Whisper is OpenAI’s open source Whisper. Of course it is written in Python. It only requires a few simple installation packages.
