Eight little-known handy tips for PS

Eight little-known convenient PS tips
The following are all practical tips in PS The tips are mainly written for newcomers who have just started playing PS. The big guys can crawl through them silently hahaha.
1. You can also make text bold and italic by yourself, which will produce better results.
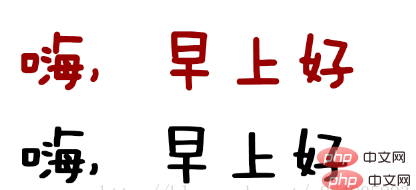
The words above are the bold ones that come with PS, and the words below are copied from the text layer and then moved 2 to the lower right. About pixels, this can not only control the bold width, but also create more styles. The same goes for italics. After converting the text into a smart object, Ctrl T click on the bevel, and you can control the font inclination yourself ( ̄▽ ̄)ブ.

2. Several common values about web interface text
a. Paragraph text line height is 1.5- 2 times the visual effect will be the best (the paragraph spacing is generally smaller than the line height).
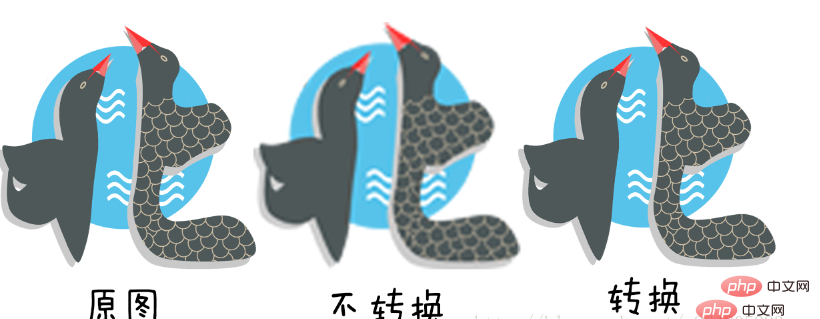
#b. The mainstream small fonts are size 12 (small text) - size 14 (main text) Song Dynasty without any anti-aliasing effect.
The mainstream for large fonts is Microsoft YaHei with anti-aliasing effect.
c. The number of words in one line of text is generally 40-80 words.
#d. Generally speaking, Arail fonts in English will be very harmonious regardless of their size.
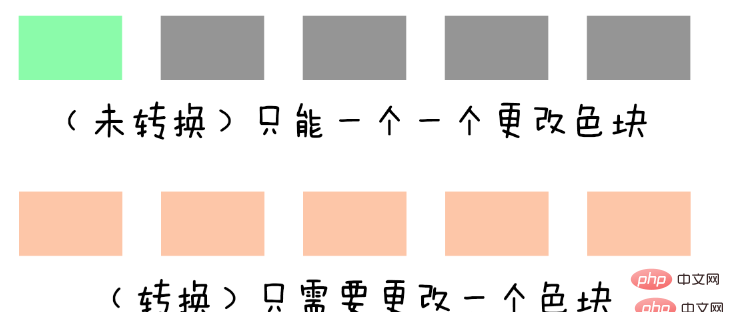
3. Regarding the function of converting to "smart objects", it is really a designer's little cotton jacket! ! !
Summarize some of its advantages. Don’t be timid (′д` ), you must use smart objects appropriately:
a. Zooming in and then enlarging the picture will not affect the picture quality. (If you reduce the picture without converting it to a smart object, you will lose a certain amount of picture information, and it will be blurred if you enlarge it again)
b. After adding a filter to the picture, if you are not satisfied with it later, you don’t need to delete it and redo it. You can directly and intelligently change the filter (generally speaking, once a filter is added, it cannot be changed). I won’t show the picture here. You can try it yourself.
c. It has a linkage effect. Emmm...m This is really very convenient for changing repeated modules on web pages. Basically, you only need to change one smart object, and all the objects copied from the smart object will be changed. Change(●'◡'●). (This is a great help when making large-scale changes to the renderings of e-commerce webpages later on)
d. Also, after making various changes, you don’t have to worry about whether the original image information is lost ( Non-destructibility is a big principle in PS), you can enter the smart object to make changes anyway. Just use it more often.
4. "Copy CSS" does not take the blame (lll¬ω¬)
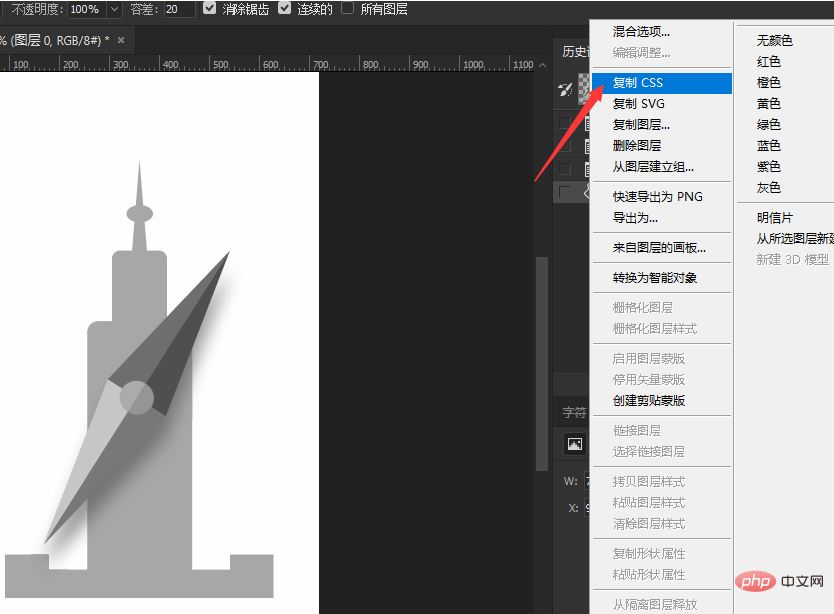
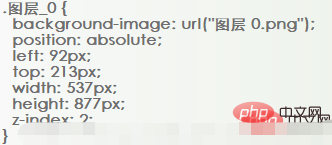
Many just Students who play PS may accidentally click the "Copy CSS" button when they right-click on a layer. After clicking it, they tremble and wait for a long time, but nothing magical changes. In fact, if you right-click and paste in the text box, you will find that a paragraph appears. Very magical code o( ̄▽ ̄)ブ.
Code classmates’ welfare roar
5. About the feathering sequence
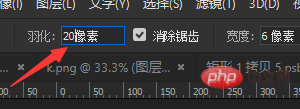
By the way, there are two kinds of feathering In order, everyone should know that setting the feather value before obtaining the selection is done directly in the upper window.
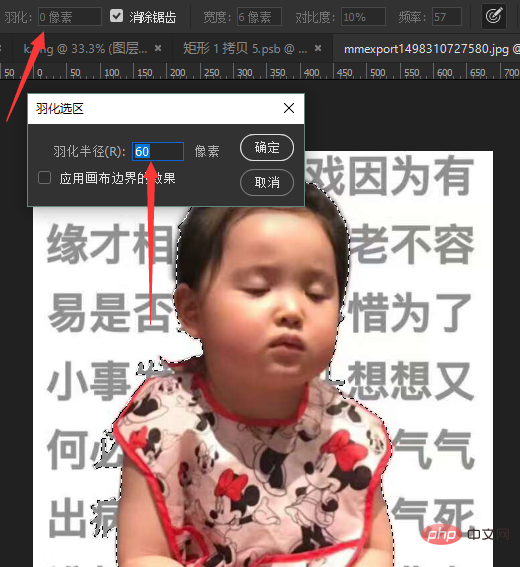
However, many newbies find that the feather value has not been set after being selected, or the feather value is not satisfied with the setting, but cannot be changed. At this time, press the shortcut key Shift F6 , you can set the feathering value after obtaining the selection.
#6. Don’t use useless inner and outer margins in the icon.
Margins and other things can be implemented with CSS. The code implementation is very precise, which facilitates unified management. When making changes, there is no need to move them repeatedly in PS, which is prone to errors.
7. Conversion between selection and path
If you don’t know how to use the pen tool, there is a faster operation to generate a path.
First use various tools to generate a selection, such as quick selection, magnetic lasso, rectangular marquee, anything that can generate a selection. After selecting the area, right-click to create a working path. The smaller the tolerance value, the denser the automatically generated anchor points.
As for the benefits of paths, everyone should know that because they are calculated through anchor points, they are accurate and the resulting vector graphics take up little space. And the clipping mask made with the path is used for cutout, which is one of the necessary skills for doing various cutouts in the future.
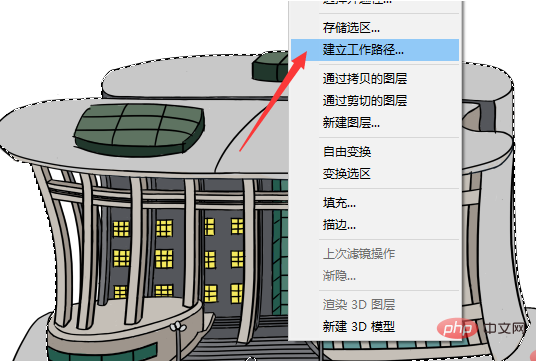
As for converting a path into a selection, I usually use it to cut out images. You are welcome to add other functions o( ̄▽ ̄)ブ
8. Finally, summarize the advantages and uses of the three types of masks
a. Layer mask (for a single object)
is similar to covering a layer on the original image (group) When you operate the mask, you will find that pure white means display and pure black means no display (the transparency of the display is changed according to the gray value). After using it for a long time, you will find that this is much more convenient than an eraser, because this is not a real If you are not satisfied with the original image, you can directly use a white paintbrush to restore it.
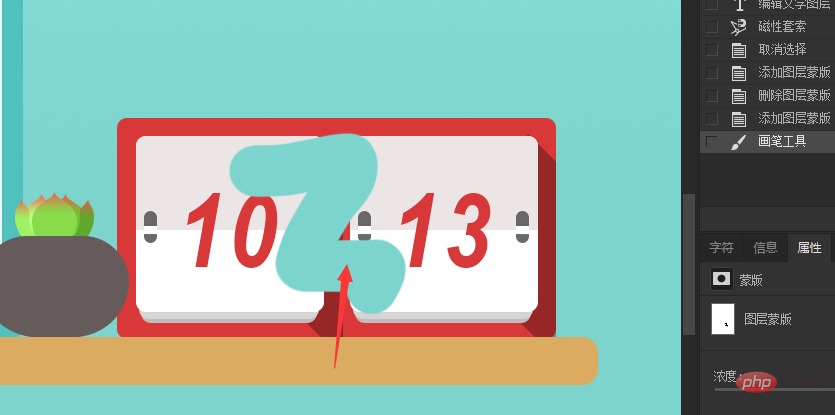
b. Vector mask (for a single object)
It is roughly covered with a coat, but the vector mask is based on the path and must be in A vector mask can only be generated if there is a path. Corresponding to the layer mask, it has no grayscale (transparency cannot be expressed), but it is quite accurate, and it only needs to operate on the anchor point when modifying. achieve the desired effect.


c. Clipping mask (for two objects)
The last clipping mask should be the easiest to understand , the lower layer is regarded as the container, and the upper layer is regarded as the filler. When the clipping mask is made, the filler can only be displayed within the container.

You can press the Alt key at the junction of the two layers and click to generate a clipping mask.
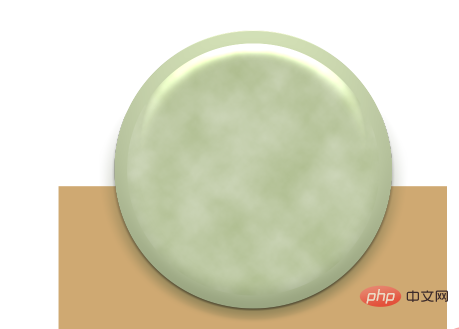
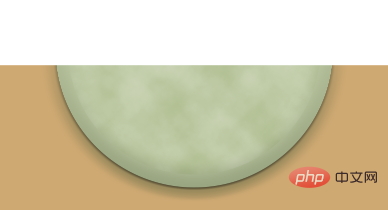
Finally, the combination of the first two masks is generally invincible for cutout. Vector mask cutout Draw precise boundaries, and layer masks control transparency. There are also many other applications, so you can experiment more.
Emmm...m, today’s fishing is over. Next time, I can make a special topic about cutout and introduce the channel! ! ! (。・∀・)ノ゙
This article is reproduced from: https://blog.csdn.net/a864805893/article/details/78223432
Recommended tutorial: "ps tutorial》
The above is the detailed content of Eight little-known handy tips for PS. For more information, please follow other related articles on the PHP Chinese website!

Hot AI Tools

Undresser.AI Undress
AI-powered app for creating realistic nude photos

AI Clothes Remover
Online AI tool for removing clothes from photos.

Undress AI Tool
Undress images for free

Clothoff.io
AI clothes remover

Video Face Swap
Swap faces in any video effortlessly with our completely free AI face swap tool!

Hot Article

Hot Tools

Notepad++7.3.1
Easy-to-use and free code editor

SublimeText3 Chinese version
Chinese version, very easy to use

Zend Studio 13.0.1
Powerful PHP integrated development environment

Dreamweaver CS6
Visual web development tools

SublimeText3 Mac version
God-level code editing software (SublimeText3)

Hot Topics
 How to set password protection for export PDF on PS
Apr 06, 2025 pm 04:45 PM
Export password-protected PDF in Photoshop: Open the image file. Click "File"> "Export"> "Export as PDF". Set the "Security" option and enter the same password twice. Click "Export" to generate a PDF file.
 What are the common questions about exporting PDF on PS
Apr 06, 2025 pm 04:51 PM
Frequently Asked Questions and Solutions when Exporting PS as PDF: Font Embedding Problems: Check the "Font" option, select "Embed" or convert the font into a curve (path). Color deviation problem: convert the file into CMYK mode and adjust the color; directly exporting it with RGB requires psychological preparation for preview and color deviation. Resolution and file size issues: Choose resolution according to actual conditions, or use the compression option to optimize file size. Special effects issue: Merge (flatten) layers before exporting, or weigh the pros and cons.
 How to use PS Pen Tool
Apr 06, 2025 pm 10:15 PM
The Pen Tool is a tool that creates precise paths and shapes, and is used by: Select the Pen Tool (P). Sets Path, Fill, Stroke, and Shape options. Click Create anchor point, drag the curve to release the Create anchor point. Press Ctrl/Cmd Alt/Opt to delete the anchor point, drag and move the anchor point, and click Adjust curve. Click the first anchor to close the path to create a shape, and double-click the last anchor to create an open path.
 What is the reason why PS keeps showing loading?
Apr 06, 2025 pm 06:39 PM
PS "Loading" problems are caused by resource access or processing problems: hard disk reading speed is slow or bad: Use CrystalDiskInfo to check the hard disk health and replace the problematic hard disk. Insufficient memory: Upgrade memory to meet PS's needs for high-resolution images and complex layer processing. Graphics card drivers are outdated or corrupted: Update the drivers to optimize communication between the PS and the graphics card. File paths are too long or file names have special characters: use short paths and avoid special characters. PS's own problem: Reinstall or repair the PS installer.
 Photoshop's Value: Weighing the Cost Against Its Features
Apr 11, 2025 am 12:02 AM
Photoshop is worth the investment because it provides powerful features and a wide range of application scenarios. 1) Core functions include image editing, layer management, special effects production and color adjustment. 2) Suitable for professional designers and photographers, but amateurs may consider alternatives such as GIMP. 3) Subscribe to AdobeCreativeCloud can be used as needed to avoid high one-time spending.
 Photoshop for Professionals: Advanced Editing & Workflow Techniques
Apr 05, 2025 am 12:15 AM
Photoshop's advanced editing skills include frequency separation and HDR synthesis, and optimized workflows can be automated. 1) Frequency separation technology separates the texture and color details of images. 2) HDR synthesis enhances the dynamic range of images. 3) Automate workflows to improve efficiency and ensure consistency.
 How to solve the problem of loading when PS is always showing that it is loading?
Apr 06, 2025 pm 06:30 PM
PS card is "Loading"? Solutions include: checking the computer configuration (memory, hard disk, processor), cleaning hard disk fragmentation, updating the graphics card driver, adjusting PS settings, reinstalling PS, and developing good programming habits.
 How to speed up the loading speed of PS?
Apr 06, 2025 pm 06:27 PM
Solving the problem of slow Photoshop startup requires a multi-pronged approach, including: upgrading hardware (memory, solid-state drive, CPU); uninstalling outdated or incompatible plug-ins; cleaning up system garbage and excessive background programs regularly; closing irrelevant programs with caution; avoiding opening a large number of files during startup.


