

Introduction to particlesJS usage related content
particles.js
A lightweight JavaScript library for creating particles.
A lightweight JavaScript library for creating particle backgrounds
Let’s take a look at the renderings first:
Standard version:

Starry sky version: 
Bubble version: 
Snow version: 
We can use this What to do?
I think this is more suitable for pages without background, or if you can’t find a suitable picture to use as the background, then we can all use this.
For example: 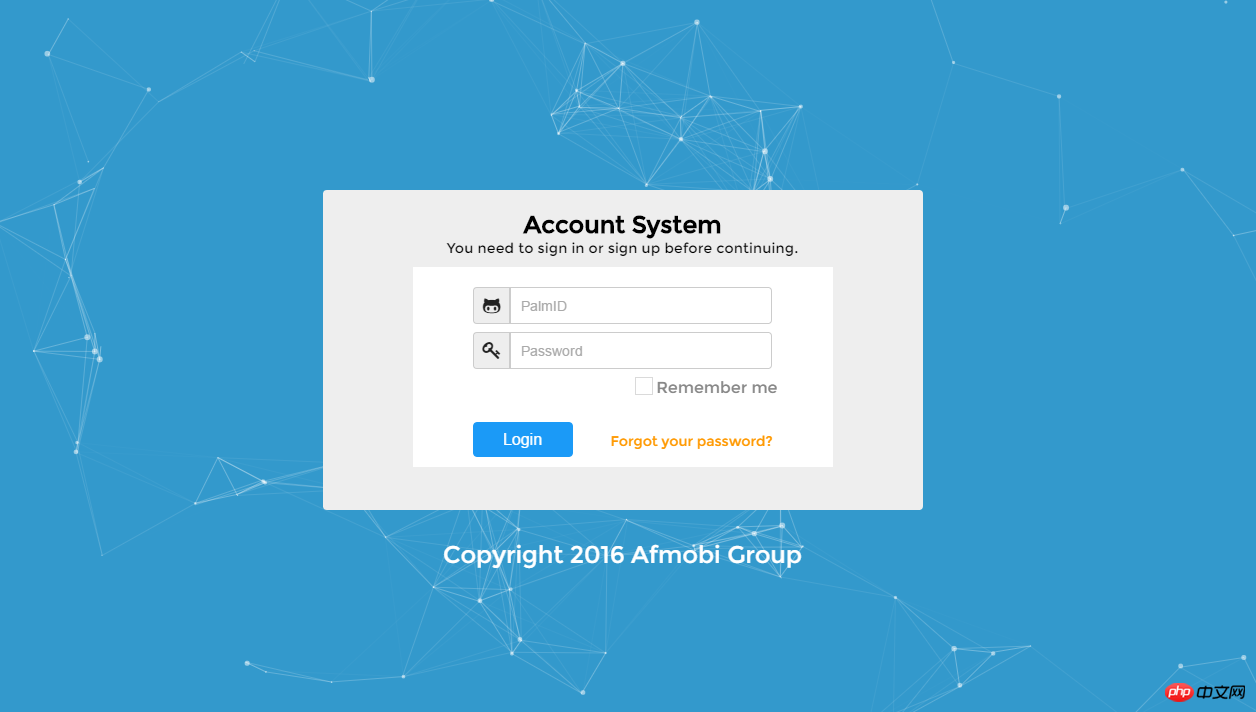
or
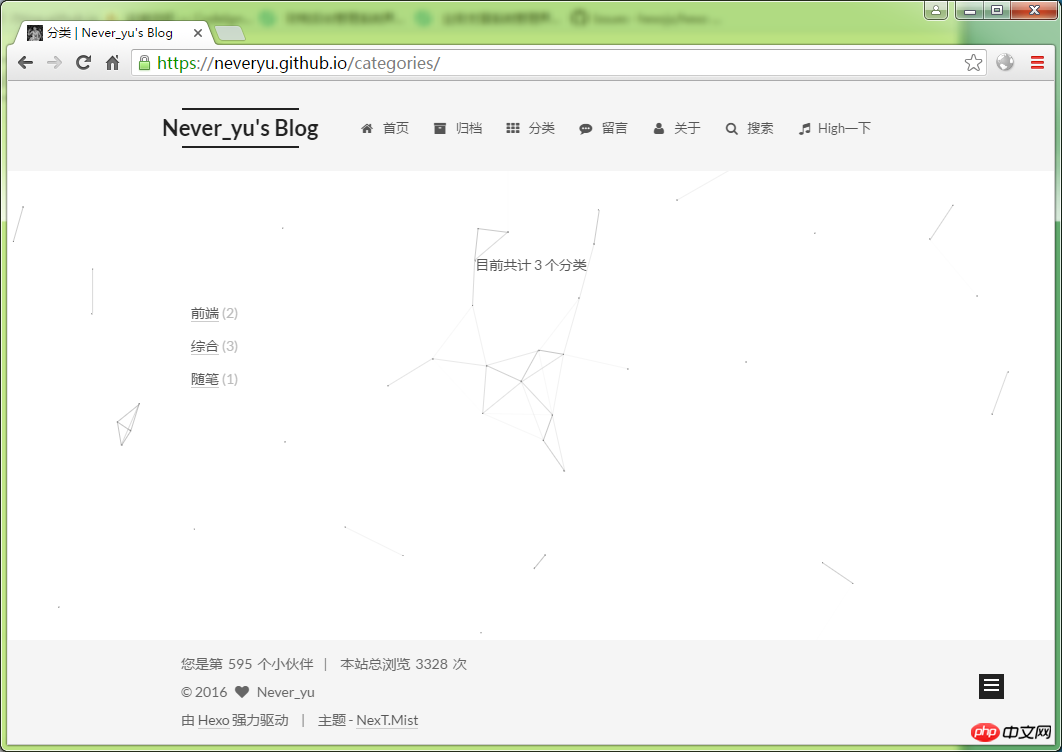
Well, the effect is quite good.
So, here’s how to use particles.js.
particlesJS Open source on Github: https://github.com/VincentGarreau/particles.js
This project provides a demo, you can download this project directly. Open the index.html file in the demo to see the effect.
So, if we want to build our own project, how do we introduce files?
The suggestions are as follows:
<!DOCTYPE html><html lang="en"><head>
  <meta charset="utf-8">
  <title>particles.js</title>
  <meta name="description" content="particles.js is a lightweight JavaScript library for creating particles.">
  <meta name="author" content="Vincent Garreau" />
  <meta name="viewport" content="width=device-width, initial-scale=1.0, minimum-scale=1.0, maximum-scale=1.0, user-scalable=no">
  <link rel="stylesheet" media="screen" href="css/style.css"></head><body><p id="particles-js"></p><!-- scripts --><script src="js/particles.js"></script><script src="js/app.js"></script></body></html>
particles.js is its library, we must introduce it, app.js is the parameter configuration file, we also It needs to be introduced, but there is no need to introduce stats.js in the demo. style.css We can also introduce that the background color is set in css.
Based on this template, we can add the functions we want to implement, such as the registration and login function. What needs to be noted is:
Use p to encapsulate the functional code block we want to implement. , and set absolute positioning for this p in css.
The following introduces the use of parameter configuration file app.js file:
particles.number.value : The number of particles
particles.number.density : The density of particles
particles.number.density.enable : Enable the density of particles Density (true or false)
particles.number.density.value_area: The space occupied by each particle (available only when particle density is enabled)
particles.color.value: The color of particles (supports hexadecimal "#b61924", rgb "{r:182, g:25, b:36}", hsl, and random)
particles.shape.type: The shape of the particles ("circle" "edge" "triangle" "polygon" "star" "image")
particles.opacity.value : Transparency of particles
particles.size.anim.enable: Whether to enable particle speed (true/false)
particles.size.anim .speed: Particle animation frequency
particles.size.anim.sync: Whether the particle running speed and animation are synchronized
particles.move.speed : Particle movement speed
You can configure your favorite background based on these configuration files. Two complete configuration files are provided belowapp.js.
Configuration file one (classic background):
{  "particles": {    "number": {      "value": 80,      "density": {        "enable": true,        "value_area": 800
      }
    },    "color": {      "value": "#ffffff"
    },    "shape": {      "type": "polygon",      "stroke": {        "width": 0,        "color": "#000000"
      },      "polygon": {        "nb_sides": 5
      },      "image": {        "src": "img/github.svg",        "width": 100,        "height": 100
      }
    },    "opacity": {      "value": 0.5,      "random": false,      "anim": {        "enable": false,        "speed": 1,        "opacity_min": 0.1,        "sync": false
      }
    },    "size": {      "value": 3,      "random": true,      "anim": {        "enable": false,        "speed": 40,        "size_min": 0.1,        "sync": false
      }
    },    "line_linked": {      "enable": true,      "distance": 150,      "color": "#ffffff",      "opacity": 0.4,      "width": 1
    },    "move": {      "enable": true,      "speed": 6,      "direction": "none",      "random": false,      "straight": false,      "out_mode": "out",      "bounce": false,      "attract": {        "enable": false,        "rotateX": 600,        "rotateY": 1200
      }
    }
  },  "interactivity": {    "detect_on": "canvas",    "events": {      "onhover": {        "enable": true,        "mode": "repulse"
      },      "onclick": {        "enable": true,        "mode": "push"
      },      "resize": true
    },    "modes": {      "grab": {        "distance": 400,        "line_linked": {          "opacity": 1
        }
      },      "bubble": {        "distance": 400,        "size": 40,        "duration": 2,        "opacity": 8,        "speed": 3
      },      "repulse": {        "distance": 200,        "duration": 0.4
      },      "push": {        "particles_nb": 4
      },      "remove": {        "particles_nb": 2
      }
    }
}, "retina_detect": false}Configuration file two (starry sky background):
{  "particles": {    "number": {      "value": 160,      "density": {        "enable": true,        "value_area": 800
      }
    },    "color": {      "value": "#ffffff"
    },    "shape": {      "type": "circle",      "stroke": {        "width": 0,        "color": "#000000"
      },      "polygon": {        "nb_sides": 5
      },      "image": {        "src": "img/github.svg",        "width": 100,        "height": 100
      }
    },    "opacity": {      "value": 1,      "random": true,      "anim": {        "enable": true,        "speed": 1,        "opacity_min": 0,        "sync": false
      }
    },    "size": {      "value": 3,      "random": true,      "anim": {        "enable": false,        "speed": 4,        "size_min": 0.3,        "sync": false
      }
    },    "line_linked": {      "enable": false,      "distance": 150,      "color": "#ffffff",      "opacity": 0.4,      "width": 1
    },    "move": {      "enable": true,      "speed": 1,      "direction": "none",      "random": true,      "straight": false,      "out_mode": "out",      "bounce": false,      "attract": {        "enable": false,        "rotateX": 600,        "rotateY": 600
      }
    }
  },  "interactivity": {    "detect_on": "canvas",    "events": {      "onhover": {        "enable": true,        "mode": "bubble"
      },      "onclick": {        "enable": true,        "mode": "repulse"
      },      "resize": true
    },    "modes": {      "grab": {        "distance": 400,        "line_linked": {          "opacity": 1
        }
      },      "bubble": {        "distance": 250,        "size": 0,        "duration": 2,        "opacity": 0,        "speed": 3
      },      "repulse": {        "distance": 400,        "duration": 0.4
      },      "push": {        "particles_nb": 4
      },      "remove": {        "particles_nb": 2
      }
    }
}, "retina_detect": true}This article explains the use of particlesJS Introduction related content, please pay attention to php Chinese website for more related content.
Related recommendations:
Detailed analysis of operators i and i in JS
Bootstrap jq jqajax php database addition, deletion and modification Check the source code
The above is the detailed content of Introduction to particlesJS usage related content. For more information, please follow other related articles on the PHP Chinese website!

Hot AI Tools

Undresser.AI Undress
AI-powered app for creating realistic nude photos

AI Clothes Remover
Online AI tool for removing clothes from photos.

Undress AI Tool
Undress images for free

Clothoff.io
AI clothes remover

Video Face Swap
Swap faces in any video effortlessly with our completely free AI face swap tool!

Hot Article
Hot Tools

Notepad++7.3.1
Easy-to-use and free code editor

SublimeText3 Chinese version
Chinese version, very easy to use

Zend Studio 13.0.1
Powerful PHP integrated development environment

Dreamweaver CS6
Visual web development tools

SublimeText3 Mac version
God-level code editing software (SublimeText3)
Hot Topics


 How to implement an online speech recognition system using WebSocket and JavaScript
Dec 17, 2023 pm 02:54 PM
How to implement an online speech recognition system using WebSocket and JavaScript
Dec 17, 2023 pm 02:54 PM
How to use WebSocket and JavaScript to implement an online speech recognition system Introduction: With the continuous development of technology, speech recognition technology has become an important part of the field of artificial intelligence. The online speech recognition system based on WebSocket and JavaScript has the characteristics of low latency, real-time and cross-platform, and has become a widely used solution. This article will introduce how to use WebSocket and JavaScript to implement an online speech recognition system.
 WebSocket and JavaScript: key technologies for implementing real-time monitoring systems
Dec 17, 2023 pm 05:30 PM
WebSocket and JavaScript: key technologies for implementing real-time monitoring systems
Dec 17, 2023 pm 05:30 PM
WebSocket and JavaScript: Key technologies for realizing real-time monitoring systems Introduction: With the rapid development of Internet technology, real-time monitoring systems have been widely used in various fields. One of the key technologies to achieve real-time monitoring is the combination of WebSocket and JavaScript. This article will introduce the application of WebSocket and JavaScript in real-time monitoring systems, give code examples, and explain their implementation principles in detail. 1. WebSocket technology
 How to use JavaScript and WebSocket to implement a real-time online ordering system
Dec 17, 2023 pm 12:09 PM
How to use JavaScript and WebSocket to implement a real-time online ordering system
Dec 17, 2023 pm 12:09 PM
Introduction to how to use JavaScript and WebSocket to implement a real-time online ordering system: With the popularity of the Internet and the advancement of technology, more and more restaurants have begun to provide online ordering services. In order to implement a real-time online ordering system, we can use JavaScript and WebSocket technology. WebSocket is a full-duplex communication protocol based on the TCP protocol, which can realize real-time two-way communication between the client and the server. In the real-time online ordering system, when the user selects dishes and places an order
 How to implement an online reservation system using WebSocket and JavaScript
Dec 17, 2023 am 09:39 AM
How to implement an online reservation system using WebSocket and JavaScript
Dec 17, 2023 am 09:39 AM
How to use WebSocket and JavaScript to implement an online reservation system. In today's digital era, more and more businesses and services need to provide online reservation functions. It is crucial to implement an efficient and real-time online reservation system. This article will introduce how to use WebSocket and JavaScript to implement an online reservation system, and provide specific code examples. 1. What is WebSocket? WebSocket is a full-duplex method on a single TCP connection.
 JavaScript and WebSocket: Building an efficient real-time weather forecasting system
Dec 17, 2023 pm 05:13 PM
JavaScript and WebSocket: Building an efficient real-time weather forecasting system
Dec 17, 2023 pm 05:13 PM
JavaScript and WebSocket: Building an efficient real-time weather forecast system Introduction: Today, the accuracy of weather forecasts is of great significance to daily life and decision-making. As technology develops, we can provide more accurate and reliable weather forecasts by obtaining weather data in real time. In this article, we will learn how to use JavaScript and WebSocket technology to build an efficient real-time weather forecast system. This article will demonstrate the implementation process through specific code examples. We
 Simple JavaScript Tutorial: How to Get HTTP Status Code
Jan 05, 2024 pm 06:08 PM
Simple JavaScript Tutorial: How to Get HTTP Status Code
Jan 05, 2024 pm 06:08 PM
JavaScript tutorial: How to get HTTP status code, specific code examples are required. Preface: In web development, data interaction with the server is often involved. When communicating with the server, we often need to obtain the returned HTTP status code to determine whether the operation is successful, and perform corresponding processing based on different status codes. This article will teach you how to use JavaScript to obtain HTTP status codes and provide some practical code examples. Using XMLHttpRequest
 How to use insertBefore in javascript
Nov 24, 2023 am 11:56 AM
How to use insertBefore in javascript
Nov 24, 2023 am 11:56 AM
Usage: In JavaScript, the insertBefore() method is used to insert a new node in the DOM tree. This method requires two parameters: the new node to be inserted and the reference node (that is, the node where the new node will be inserted).
 How to export Ld_Library_Path in Linux
Mar 20, 2024 am 10:19 AM
How to export Ld_Library_Path in Linux
Mar 20, 2024 am 10:19 AM
In Linux systems, quickly viewing environment variables can help users better understand how the system operates. These variables allow you to configure and optimize your system efficiently. Certain variables such as "LD_LIBRARY_PATH" store information about the location of shared libraries in the system, which is crucial for the correct operation of the program. By understanding these environment variables, users can better manage system resources and ensure smooth execution of programs. Therefore, understanding and mastering the role of environment variables will not only help improve the performance and stability of the system, but also help users better perform system maintenance and troubleshooting. This means that "ld_library_path" contains a list of paths where these libraries are stored so that the executable
