

How to implement mask layer in HTML How to use mask layer in HTML

This article mainly introduces in detail the method of implementing a mask layer in HTML. Using a mask layer in a Web page can prevent repeated operations. So how to use a mask layer in HTML? Interested friends can refer to the use of mask layers in
Web pages to prevent repeated operations and prompt loading; you can also simulate pop-up modal windows.
Implementation idea: One p serves as the mask layer, and one p displays the loading dynamic GIF image. In the following sample code, it also shows how to call the display and hiding mask layer in the iframe subpage.
Sample code:
index.html
XML/HTML CodeCopy content to clipboard
<!DOCTYPE html>
<html lang="zh-CN">
<head>
<meta charset="utf-8">
<meta http-equiv="X-UA-Commpatible" content="IE=edge">
<title>HTML遮罩层</title>
<link rel="stylesheet" href="css/index.css">
</head>
<body>
<p class="header" id="header">
<p class="title-outer">
<span class="title">
HTML遮罩层使用
</span>
</p>
</p>
<p class="body" id="body">
<iframe id="iframeRight" name="iframeRight" width="100%" height="100%"
scrolling="no" frameborder="0"
style="border: 0px;margin: 0px; padding: 0px; width: 100%; height: 100%;overflow: hidden;"
onload="rightIFrameLoad(this)" src="body.html"></iframe>
</p>
<!-- 遮罩层p -->
<p id="overlay" class="overlay"></p>
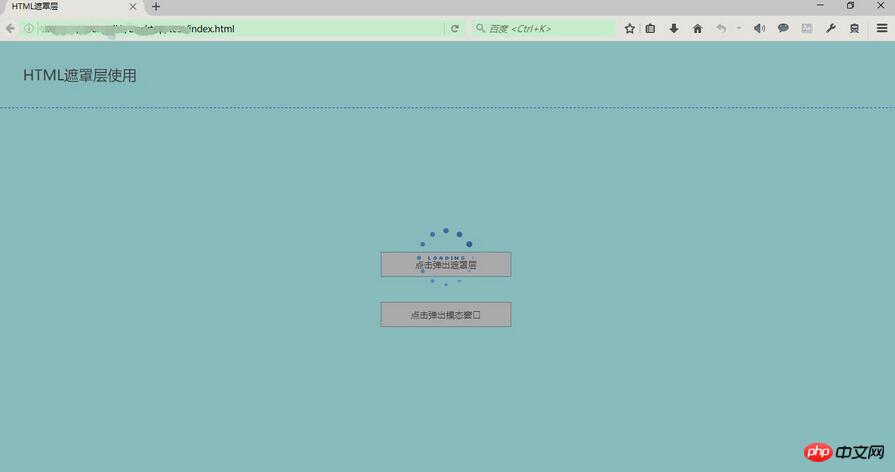
<!-- Loading提示 p -->
<p id="loadingTip" class="loading-tip">
<img src="images/loading.gif" />
</p>
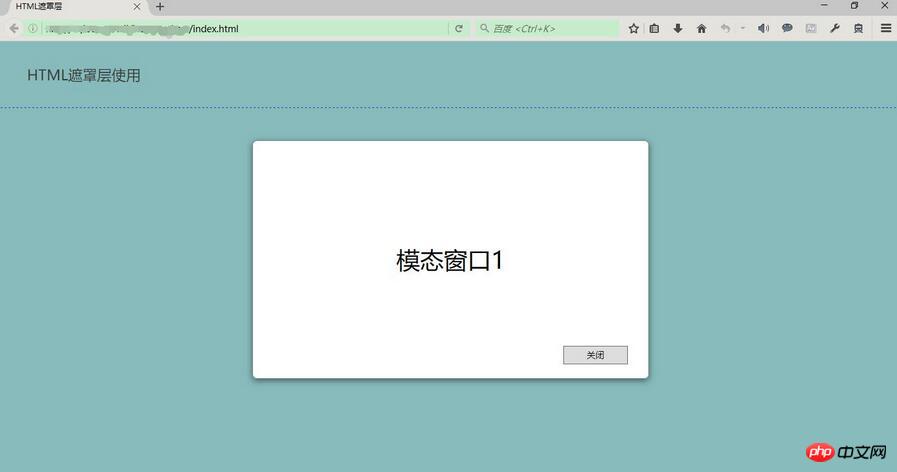
<!-- 模拟模态窗口p -->
<p class="modal" id="modalp"></p>
<script type='text/javascript' src="js/jquery-1.10.2.js"></script>
<script type="text/javascript" src="js/index.js"></script>
</body>
</html>index.css
##CSS CodeCopy content to clipboard
* {
    margin: 0;
    padding: 0;
}

html, body {
    width: 100%;
    height: 100%;
    font-size: 14px;
}

p.header {
    width: 100%;
    height: 100px;
    border-bottom: 1px dashed blue;
}

p.title-outer {
    position: relative;
    top: 50%;
    height: 30px;
}
span.title {
    text-align: left;
    position: relative;
    left: 3%;
    top: -50%;
    font-size: 22px;
}

p.body {
    width: 100%;
}
.overlay {
    position: absolute;
    top: 0px;
    left: 0px;
    z-index: 10001;
    display:none;
    filter:alpha(opacity=60);
    background-color: #777;
    opacity: 0.5;
    -moz-opacity: 0.5;
}
.loading-tip {
    z-index: 10002;
    position: fixed;
    display:none;
}
.loading-tip img {
    width:100px;
    height:100px;
}

.modal {
    position:absolute;
    width: 600px;
    height: 360px;
    border: 1px solid rgba(0, 0, 0, 0.2);
    box-shadow: 0px 3px 9px rgba(0, 0, 0, 0.5);
    display: none;
    z-index: 10003;
    border-radius: 6px;
}JavaScript CodeCopy content to clipboard
function rightIFrameLoad(iframe) {
    var pHeight = getWindowInnerHeight() - $('#header').height() - 5;

    $('p.body').height(pHeight);
    console.log(pHeight);

}

// 浏览器兼容 取得浏览器可视区高度
function getWindowInnerHeight() {
    var winHeight = window.innerHeight
            || (document.documentElement && document.documentElement.clientHeight)
            || (document.body && document.body.clientHeight);
    return winHeight;

}

// 浏览器兼容 取得浏览器可视区宽度
function getWindowInnerWidth() {
    var winWidth = window.innerWidth
            || (document.documentElement && document.documentElement.clientWidth)
            || (document.body && document.body.clientWidth);
    return winWidth;

}

/**
 * 显示遮罩层
 */
function showOverlay() {
    // 遮罩层宽高分别为页面内容的宽高
    $('.overlay').css({'height':$(document).height(),'width':$(document).width()});
    $('.overlay').show();
}

/**
 * 显示Loading提示
 */
function showLoading() {
    // 先显示遮罩层
    showOverlay();
    // Loading提示窗口居中
    $("#loadingTip").css('top',
            (getWindowInnerHeight() - $("#loadingTip").height()) / 2 + 'px');
    $("#loadingTip").css('left',
            (getWindowInnerWidth() - $("#loadingTip").width()) / 2 + 'px');

    $("#loadingTip").show();
    $(document).scroll(function() {
        return false;
    });
}

/**
 * 隐藏Loading提示
 */
function hideLoading() {
    $('.overlay').hide();
    $("#loadingTip").hide();
    $(document).scroll(function() {
        return true;
    });
}

/**
 * 模拟弹出模态窗口p
 * @param innerHtml 模态窗口HTML内容
 */
function showModal(innerHtml) {
    // 取得显示模拟模态窗口用p
    var dialog = $('#modalp');

    // 设置内容
    dialog.html(innerHtml);

    // 模态窗口p窗口居中
    dialog.css({
        'top' : (getWindowInnerHeight() - dialog.height()) / 2 + 'px',
        'left' : (getWindowInnerWidth() - dialog.width()) / 2 + 'px'
    });

    // 窗口p圆角
    dialog.find('.modal-container').css('border-radius','6px');

    // 模态窗口关闭按钮事件
    dialog.find('.btn-close').click(function(){
        closeModal();
    });

    // 显示遮罩层
    showOverlay();

    // 显示遮罩层
    dialog.show();
}

/**
 * 模拟关闭模态窗口p
 */
function closeModal() {
    $('.overlay').hide();
    $('#modalp').hide();
    $('#modalp').html('');
}XML/HTML Code Copy content to clipboard
<!DOCTYPE html>
<html lang="zh-CN">
<head>
<meta charset="utf-8">
<meta http-equiv="X-UA-Commpatible" content="IE=edge">
<title>body 页面</title>
<style type="text/css">
* {
margin: 0;
padding: 0;
}
html, body {
width: 100%;
height: 100%;
}
.outer {
width: 200px;
height: 120px;
position: relative;
top: 50%;
left: 50%;
}
.inner {
width: 200px;
height: 120px;
position: relative;
top: -50%;
left: -50%;
}
.button {
width: 200px;
height: 40px;
position: relative;
}
.button#btnShowLoading {
top: 0;
}
.button#btnShowModal {
top: 30%;
}
</style>
<script type="text/javascript">
function showOverlay() {
// 调用父窗口显示遮罩层和Loading提示
window.top.window.showLoading();
// 使用定时器模拟关闭Loading提示
setTimeout(function() {
window.top.window.hideLoading();
}, 3000);
}
function showModal() {
// 调用父窗口方法模拟弹出模态窗口
window.top.showModal($('#modalContent').html());
}
</script>
</head>
<body>
<p class='outer'>
<p class='inner'>
<button id='btnShowLoading' class='button' onclick='showOverlay();'>点击弹出遮罩层</button>
<button id='btnShowModal' class='button' onclick='showModal();'>点击弹出模态窗口</button>
</p>
</p>
<!-- 模态窗口内容p,将本页面p内容设置到父窗口p上并模态显示 -->
<p id='modalContent' style='display: none;'>
<p class='modal-container' style='width: 100%;height: 100%;background-color: white;'>
<p style='width: 100%;height: 49px;position: relative;left: 50%;top: 50%;'>
<span style='font-size: 36px; width: 100%; text-align:center; display: inline-block; position:inherit; left: -50%;top: -50%;'>模态窗口1</span>
</p>
<button class='btn-close' style='width: 100px; height: 30px; position: absolute; right: 30px; bottom: 20px;'>关闭</button>
</p>
</p>
<script type='text/javascript' src="js/jquery-1.10.2.js"></script>
</body>
</html>Run result:
Initialization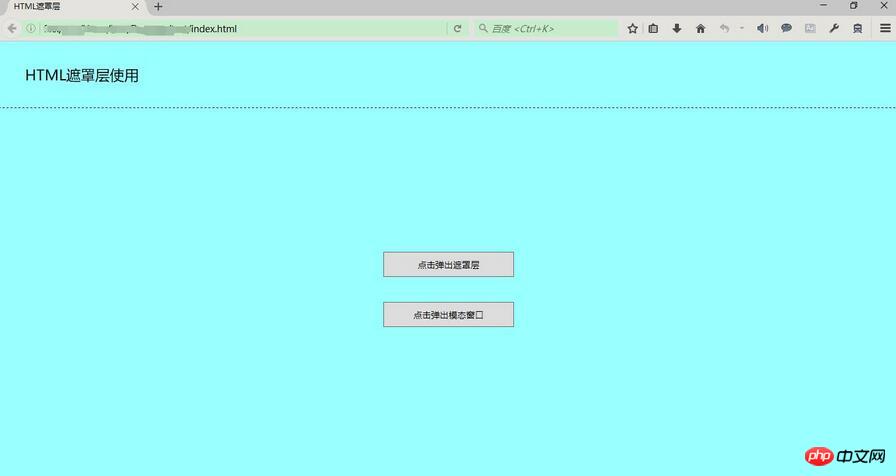
Make the background image adaptive to the browser size in HTML
The above is the detailed content of How to implement mask layer in HTML How to use mask layer in HTML. For more information, please follow other related articles on the PHP Chinese website!

Hot AI Tools

Undresser.AI Undress
AI-powered app for creating realistic nude photos

AI Clothes Remover
Online AI tool for removing clothes from photos.

Undress AI Tool
Undress images for free

Clothoff.io
AI clothes remover

Video Face Swap
Swap faces in any video effortlessly with our completely free AI face swap tool!

Hot Article
Hot Tools

Notepad++7.3.1
Easy-to-use and free code editor

SublimeText3 Chinese version
Chinese version, very easy to use

Zend Studio 13.0.1
Powerful PHP integrated development environment

Dreamweaver CS6
Visual web development tools

SublimeText3 Mac version
God-level code editing software (SublimeText3)
Hot Topics


 Is HTML easy to learn for beginners?
Apr 07, 2025 am 12:11 AM
Is HTML easy to learn for beginners?
Apr 07, 2025 am 12:11 AM
HTML is suitable for beginners because it is simple and easy to learn and can quickly see results. 1) The learning curve of HTML is smooth and easy to get started. 2) Just master the basic tags to start creating web pages. 3) High flexibility and can be used in combination with CSS and JavaScript. 4) Rich learning resources and modern tools support the learning process.
 The Roles of HTML, CSS, and JavaScript: Core Responsibilities
Apr 08, 2025 pm 07:05 PM
The Roles of HTML, CSS, and JavaScript: Core Responsibilities
Apr 08, 2025 pm 07:05 PM
HTML defines the web structure, CSS is responsible for style and layout, and JavaScript gives dynamic interaction. The three perform their duties in web development and jointly build a colorful website.
 Understanding HTML, CSS, and JavaScript: A Beginner's Guide
Apr 12, 2025 am 12:02 AM
Understanding HTML, CSS, and JavaScript: A Beginner's Guide
Apr 12, 2025 am 12:02 AM
WebdevelopmentreliesonHTML,CSS,andJavaScript:1)HTMLstructurescontent,2)CSSstylesit,and3)JavaScriptaddsinteractivity,formingthebasisofmodernwebexperiences.
 What is an example of a starting tag in HTML?
Apr 06, 2025 am 12:04 AM
What is an example of a starting tag in HTML?
Apr 06, 2025 am 12:04 AM
AnexampleofastartingtaginHTMLis,whichbeginsaparagraph.StartingtagsareessentialinHTMLastheyinitiateelements,definetheirtypes,andarecrucialforstructuringwebpagesandconstructingtheDOM.
 Gitee Pages static website deployment failed: How to troubleshoot and resolve single file 404 errors?
Apr 04, 2025 pm 11:54 PM
Gitee Pages static website deployment failed: How to troubleshoot and resolve single file 404 errors?
Apr 04, 2025 pm 11:54 PM
GiteePages static website deployment failed: 404 error troubleshooting and resolution when using Gitee...
 How to use CSS3 and JavaScript to achieve the effect of scattering and enlarging the surrounding pictures after clicking?
Apr 05, 2025 am 06:15 AM
How to use CSS3 and JavaScript to achieve the effect of scattering and enlarging the surrounding pictures after clicking?
Apr 05, 2025 am 06:15 AM
To achieve the effect of scattering and enlarging the surrounding images after clicking on the image, many web designs need to achieve an interactive effect: click on a certain image to make the surrounding...
 How to implement adaptive layout of Y-axis position in web annotation?
Apr 04, 2025 pm 11:30 PM
How to implement adaptive layout of Y-axis position in web annotation?
Apr 04, 2025 pm 11:30 PM
The Y-axis position adaptive algorithm for web annotation function This article will explore how to implement annotation functions similar to Word documents, especially how to deal with the interval between annotations...
 HTML, CSS, and JavaScript: Essential Tools for Web Developers
Apr 09, 2025 am 12:12 AM
HTML, CSS, and JavaScript: Essential Tools for Web Developers
Apr 09, 2025 am 12:12 AM
HTML, CSS and JavaScript are the three pillars of web development. 1. HTML defines the web page structure and uses tags such as, etc. 2. CSS controls the web page style, using selectors and attributes such as color, font-size, etc. 3. JavaScript realizes dynamic effects and interaction, through event monitoring and DOM operations.
