

Picture and text sharing of WAMP environment under windows

This article mainly brings you a graphic tutorial on setting up a WAMP environment under Windows (recommended). The editor thinks it is quite good, so I will share it with you now and give it as a reference for everyone. Let’s follow the editor to take a look, I hope it can help everyone.
PHPRunning environment: Three installation methods under
Linux: source code package installation, rpm package installation, Integrated environment installation (lnmp)
Two ways of windows installation: single download installation, integrated environment installation (AppServ,phpstudy,wamp)
In Windows Install the PHP development environment on the system:
The required software is installed independently:
Preparation before installation
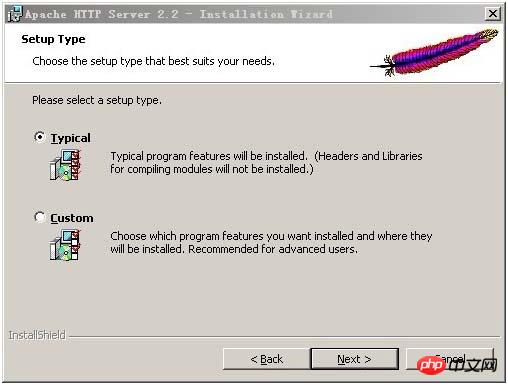
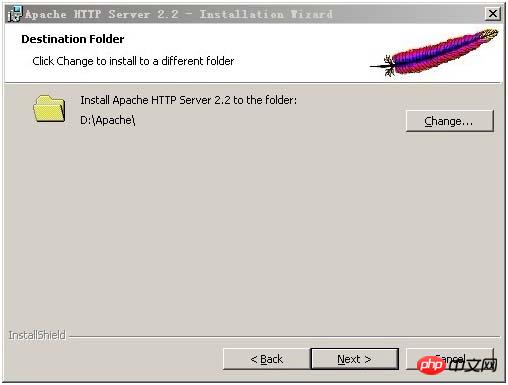
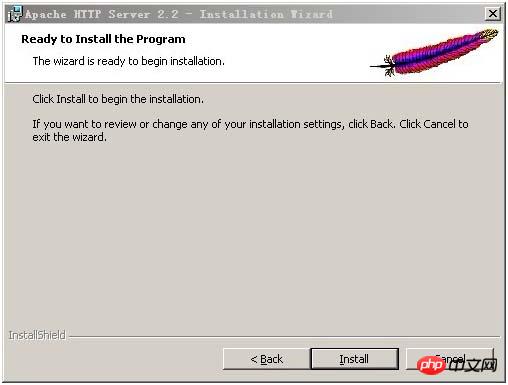
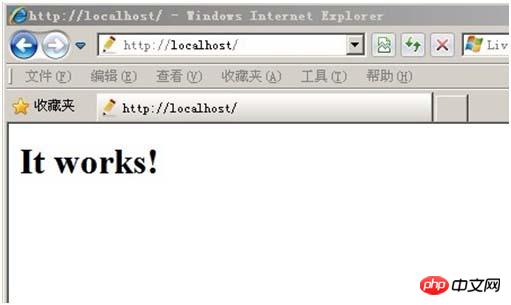
Install Apache
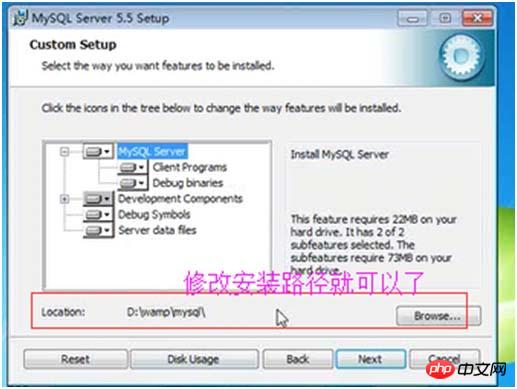
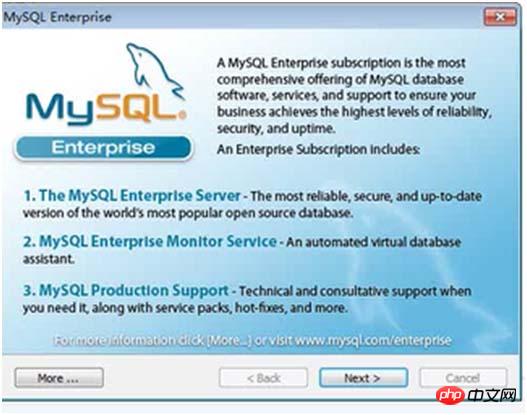
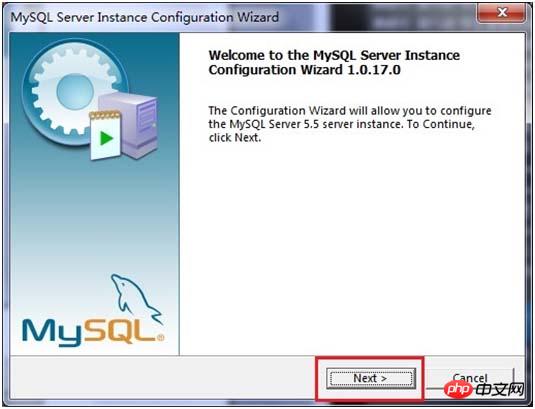
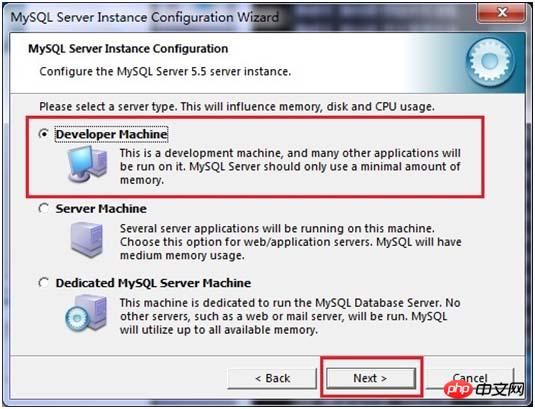
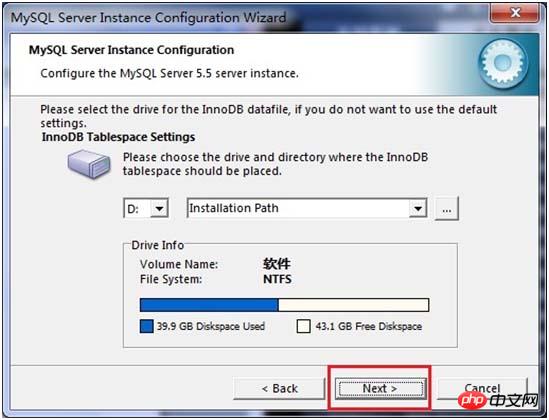
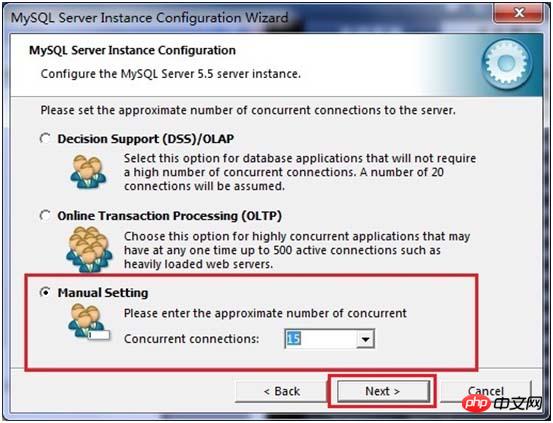
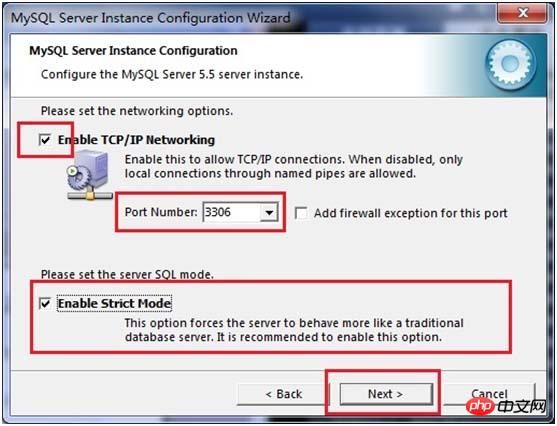
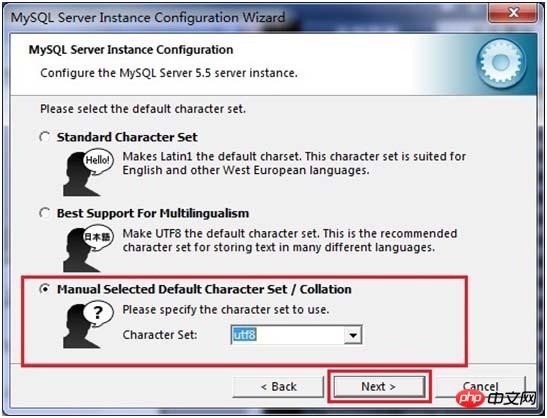
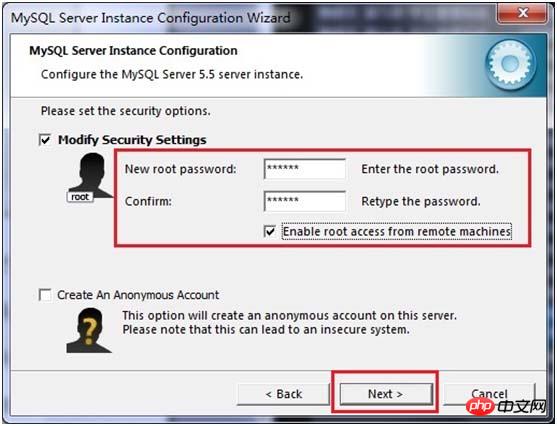
Install MySQL
Install PHP
Install phpMyA


The above is the detailed content of Picture and text sharing of WAMP environment under windows. For more information, please follow other related articles on the PHP Chinese website!

Hot AI Tools

Undresser.AI Undress
AI-powered app for creating realistic nude photos

AI Clothes Remover
Online AI tool for removing clothes from photos.

Undress AI Tool
Undress images for free

Clothoff.io
AI clothes remover

Video Face Swap
Swap faces in any video effortlessly with our completely free AI face swap tool!

Hot Article
Hot Tools

Notepad++7.3.1
Easy-to-use and free code editor

SublimeText3 Chinese version
Chinese version, very easy to use

Zend Studio 13.0.1
Powerful PHP integrated development environment

Dreamweaver CS6
Visual web development tools

SublimeText3 Mac version
God-level code editing software (SublimeText3)
Hot Topics


 Can I install mysql on Windows 7
Apr 08, 2025 pm 03:21 PM
Can I install mysql on Windows 7
Apr 08, 2025 pm 03:21 PM
Yes, MySQL can be installed on Windows 7, and although Microsoft has stopped supporting Windows 7, MySQL is still compatible with it. However, the following points should be noted during the installation process: Download the MySQL installer for Windows. Select the appropriate version of MySQL (community or enterprise). Select the appropriate installation directory and character set during the installation process. Set the root user password and keep it properly. Connect to the database for testing. Note the compatibility and security issues on Windows 7, and it is recommended to upgrade to a supported operating system.
 How to solve mysql cannot connect to local host
Apr 08, 2025 pm 02:24 PM
How to solve mysql cannot connect to local host
Apr 08, 2025 pm 02:24 PM
The MySQL connection may be due to the following reasons: MySQL service is not started, the firewall intercepts the connection, the port number is incorrect, the user name or password is incorrect, the listening address in my.cnf is improperly configured, etc. The troubleshooting steps include: 1. Check whether the MySQL service is running; 2. Adjust the firewall settings to allow MySQL to listen to port 3306; 3. Confirm that the port number is consistent with the actual port number; 4. Check whether the user name and password are correct; 5. Make sure the bind-address settings in my.cnf are correct.
 MySQL can't be installed after downloading
Apr 08, 2025 am 11:24 AM
MySQL can't be installed after downloading
Apr 08, 2025 am 11:24 AM
The main reasons for MySQL installation failure are: 1. Permission issues, you need to run as an administrator or use the sudo command; 2. Dependencies are missing, and you need to install relevant development packages; 3. Port conflicts, you need to close the program that occupies port 3306 or modify the configuration file; 4. The installation package is corrupt, you need to download and verify the integrity; 5. The environment variable is incorrectly configured, and the environment variables must be correctly configured according to the operating system. Solve these problems and carefully check each step to successfully install MySQL.
 Solutions to the errors reported by MySQL on a specific system version
Apr 08, 2025 am 11:54 AM
Solutions to the errors reported by MySQL on a specific system version
Apr 08, 2025 am 11:54 AM
The solution to MySQL installation error is: 1. Carefully check the system environment to ensure that the MySQL dependency library requirements are met. Different operating systems and version requirements are different; 2. Carefully read the error message and take corresponding measures according to prompts (such as missing library files or insufficient permissions), such as installing dependencies or using sudo commands; 3. If necessary, try to install the source code and carefully check the compilation log, but this requires a certain amount of Linux knowledge and experience. The key to ultimately solving the problem is to carefully check the system environment and error information, and refer to the official documents.
 Unable to access mysql from terminal
Apr 08, 2025 pm 04:57 PM
Unable to access mysql from terminal
Apr 08, 2025 pm 04:57 PM
Unable to access MySQL from the terminal may be due to: MySQL service not running; connection command error; insufficient permissions; firewall blocks connection; MySQL configuration file error.
 How to copy and paste mysql
Apr 08, 2025 pm 07:18 PM
How to copy and paste mysql
Apr 08, 2025 pm 07:18 PM
Copy and paste in MySQL includes the following steps: select the data, copy with Ctrl C (Windows) or Cmd C (Mac); right-click at the target location, select Paste or use Ctrl V (Windows) or Cmd V (Mac); the copied data is inserted into the target location, or replace existing data (depending on whether the data already exists at the target location).
 Can vs code run in Windows 8
Apr 15, 2025 pm 07:24 PM
Can vs code run in Windows 8
Apr 15, 2025 pm 07:24 PM
VS Code can run on Windows 8, but the experience may not be great. First make sure the system has been updated to the latest patch, then download the VS Code installation package that matches the system architecture and install it as prompted. After installation, be aware that some extensions may be incompatible with Windows 8 and need to look for alternative extensions or use newer Windows systems in a virtual machine. Install the necessary extensions to check whether they work properly. Although VS Code is feasible on Windows 8, it is recommended to upgrade to a newer Windows system for a better development experience and security.
 Can mysql run on Windows
Apr 08, 2025 pm 01:54 PM
Can mysql run on Windows
Apr 08, 2025 pm 01:54 PM
Running MySQL on Windows is feasible, but challenges such as port conflicts, permission issues, and environment variable settings need to be considered. Installation issues can be solved by customizing configuration files, adjusting user permissions, and setting environment variables correctly. Additionally, the appropriate storage engine should be selected, tweaked configuration files, and SSDs should be used to optimize performance.
