
 Backend Development
PHP Tutorial
PHP+MySQL+jQuery to create your own Weibo program_PHP tutorial
Backend Development
PHP Tutorial
PHP+MySQL+jQuery to create your own Weibo program_PHP tutorial
PHP+MySQL+jQuery to create your own Weibo program_PHP tutorial

We can see an application for posting topics on websites such as QQ personal center or Sina Weibo. The application realizes real-time statistics of the number of input words, and interacts with the background through Ajax to insert the input content into the topic list. This article explains the first part of jQuery to implement front-end interactive operations.

XHTML code
<ol class="dp-xml">
<li class="alt"><span><span class="tag"><span class="tag-name">form</span><span> </span><span class="attribute">id</span><span>=</span><span class="attribute-value"> "myform"</span><span> </span><span class="attribute">action</span><span>=</span><span class="attribute-value">"say.php"</span><span> </span><span class="attribute">method</span> <span>=</span><span class="attribute-value">"post"</span><span class="tag">></span><span> </span></span>h3</span></li>
<li>><span></span>span<span class="tag-name"></span> <span class="tag"></span>class<span class="tag"></span>= <span class="tag-name"></span>"counter"<span></span>><span class="attribute"></span>140<span></span><span class="attribute-value"></span>span<span class="tag"></span>><span></span>Tell me what you are doing...<span class="tag"></span><span class="tag-name"></span>h3<span class="tag"></span>><span></span> <span class="tag"></span><span class="tag-name"></span> <span class="tag"></span>textarea</li>
<li class="alt"> <span></span>name<span class="tag"></span>=<span class="tag-name"></span>"saytxt"<span></span> <span class="attribute"></span>id<span></span>=<span class="attribute-value"></span>"saytxt"<span></span> <span class="attribute"></span>class<span></span>=<span class="attribute-value"></span>"input"<span></span> <span class="attribute"></span>rows<span></span>=<span class="attribute-value"></span>"2"<span></span> <span class="attribute"></span>cols<span></span>=<span class="attribute-value"></span>"40"<span></span>><span class="attribute"></span><span></span>textarea<span class="attribute-value"></span>><span class="tag"> </span>                                                                              <span class="tag"></span> <span class="tag-name"></span>input<span></span> </li>
<li>type<span></span>=<span class="tag"></span>"image" <span class="tag-name"></span> <span class="tag"></span>src<span></span>=</li>
<li class="alt">"images/btn.gif"<span></span> <span class="tag"></span>class<span class="tag-name"></span>=<span></span>"sub_btn"<span class="attribute"></span> <span></span>alt<span class="attribute-value"></span>=<span></span>"publish"<span class="attribute"></span> <span> </span>/><span class="attribute-value"></span>   <span></span><span class="attribute"></span>                        >id<span></span>=<span class="attribute-value"></span>"msg"<span></span>><span class="attribute"></span><span></span>span<span class="attribute-value"></span>> <span></span> <span class="tag"></span><span></span> </li>
<li>
<span></span>p<span class="tag"></span>><span class="tag-name"></span> ><span></span><span class="attribute"></span><span>form</span><span class="attribute-value">></span><span class="tag"> </span><span class="tag"></span><span class="tag-name"><span class="tag">div</span><span> </span></span>
</li>class<li class="alt">
<span>=</span><span class="tag">"clear"</span><span class="tag-name">></span><span class="tag"><span>div</span></span>
</li>><li>
<span class="tag"> </span><span class="tag-name"></span><span class="tag"><span>div</span></span>
</li> <li class="alt">
<span class="tag">id</span><span class="tag-name">=</span><span>"saywrap"</span><span class="attribute">></span><span> </span><span class="attribute-value"><li class="alt">
<span>     </span><span class="tag"><span class="tag-name">div</span><span> </span><span class="attribute">class</span><span>=</span><span class="attribute-value">"saylist"</span><span class="tag">></span><span>            </span></span>
</li>
<li>
<span>        </span><span class="tag"><span class="tag-name">a</span><span> </span><span class="attribute">href</span><span>=</span><span class="attribute-value">"#"</span><span class="tag">></span><span class="tag"><span class="tag-name">img</span><span> </span><span class="attribute">src</span><span>=</span><span class="attribute-value">"images/user.gif"</span><span> </span><span class="attribute">alt</span><span>=</span><span class="attribute-value">""</span><span> </span><span class="tag">/></span><span class="tag"></span><span class="tag-name">a</span><span class="tag">></span><span>            </span></span></span>
</li>
<li class="alt">
<span>        </span><span class="tag"><span class="tag-name">div</span><span> </span><span class="attribute">class</span><span>=</span><span class="attribute-value">"saytxt"</span><span class="tag">></span><span>               </span></span>
</li>
<li>
<span>            </span><span class="tag"><span class="tag-name">p</span><span class="tag">></span><span class="tag"><span class="tag-name">strong</span><span class="tag">></span><span class="tag"><span class="tag-name">a</span><span> </span><span class="attribute">href</span><span>=</span><span class="attribute-value">"#"</span><span class="tag">></span><span>Demo</span><span class="tag"></span><span class="tag-name">a</span><span class="tag">></span><span class="tag"></span><span class="tag-name">strong</span><span class="tag">></span><span>发布的内容...</span><span class="tag"></span><span class="tag-name">p</span><span class="tag">></span><span>                </span></span></span></span>
</li>
<li class="alt">
<span>            </span><span class="tag"><span class="tag-name">div</span><span> </span><span class="attribute">class</span><span>=</span><span class="attribute-value">"date"</span><span class="tag">></span><span class="tag"></span><span class="tag-name">div</span><span class="tag">></span><span>            </span></span>
</li>
<li>
<span>        </span><span class="tag"></span><span class="tag-name">div</span><span class="tag">>
<p align="left"></p>
<div style="display:none;">
<span id="url" itemprop="url">http://www.bkjia.com/PHPjc/486081.html</span><span id="indexUrl" itemprop="indexUrl">www.bkjia.com</span><span id="isOriginal" itemprop="isOriginal">true</span><span id="isBasedOnUrl" itemprop="isBasedOnUrl">http://www.bkjia.com/PHPjc/486081.html</span><span id="genre" itemprop="genre">TechArticle</span><span id="description" itemprop="description">我们在QQ个人中心或者新浪微博等网站上可以看到一个发表话题的应用。该应用实现了即时统计输入字数,并且通过Ajax与后台交互,将输入...</span>
</div>
<div class="art_confoot"></div></span>
</li></span>
</li>
</ol>

Hot AI Tools

Undresser.AI Undress
AI-powered app for creating realistic nude photos

AI Clothes Remover
Online AI tool for removing clothes from photos.

Undress AI Tool
Undress images for free

Clothoff.io
AI clothes remover

Video Face Swap
Swap faces in any video effortlessly with our completely free AI face swap tool!

Hot Article
Hot Tools

Notepad++7.3.1
Easy-to-use and free code editor

SublimeText3 Chinese version
Chinese version, very easy to use

Zend Studio 13.0.1
Powerful PHP integrated development environment

Dreamweaver CS6
Visual web development tools

SublimeText3 Mac version
God-level code editing software (SublimeText3)
Hot Topics


 How to make Google Maps the default map in iPhone
Apr 17, 2024 pm 07:34 PM
How to make Google Maps the default map in iPhone
Apr 17, 2024 pm 07:34 PM
The default map on the iPhone is Maps, Apple's proprietary geolocation provider. Although the map is getting better, it doesn't work well outside the United States. It has nothing to offer compared to Google Maps. In this article, we discuss the feasible steps to use Google Maps to become the default map on your iPhone. How to Make Google Maps the Default Map in iPhone Setting Google Maps as the default map app on your phone is easier than you think. Follow the steps below – Prerequisite steps – You must have Gmail installed on your phone. Step 1 – Open the AppStore. Step 2 – Search for “Gmail”. Step 3 – Click next to Gmail app
 How to search previous Weibo by date on Weibo_How to search previous Weibo by date on Weibo
Mar 30, 2024 pm 07:26 PM
How to search previous Weibo by date on Weibo_How to search previous Weibo by date on Weibo
Mar 30, 2024 pm 07:26 PM
1. First open the mobile web browser, search for the Weibo web version, and click the avatar button in the upper left corner after entering. 2. Then click Settings in the upper right corner. 3. Click the version switching option in settings. 4. Then select the color version option in the version switch. 5. Click Search to enter the search page. 6. After entering the keywords, click Find People. 7. When the search completion interface appears, click Filter. 8. Finally, enter the specific date in the release time column and click Filter.
 How to set up real-time notifications for Weibo's special attention_How to set up real-time notifications for Weibo's special attention
Mar 29, 2024 pm 10:01 PM
How to set up real-time notifications for Weibo's special attention_How to set up real-time notifications for Weibo's special attention
Mar 29, 2024 pm 10:01 PM
1. Open Weibo, click My, and then click the Settings option in the upper right corner. 2. After opening the settings, find and click on the push notification settings inside. 3. After entering the push notification settings, find Special Interest and click Real-time Notification.
 How to release someone blocked on Weibo_How to unblock Weibo
Mar 30, 2024 am 09:51 AM
How to release someone blocked on Weibo_How to unblock Weibo
Mar 30, 2024 am 09:51 AM
1. Click [My] in the lower right corner of the Weibo app to enter your personal homepage. 2. Then, click the gear icon in the upper right corner. 3. At this time, we enter the settings page, select [Block Settings] here to enter. 4. In the blocking settings, we can see the friends we have blocked, tap it, and click [Unblock] in the pop-up options. 5. Or users can directly search Weibo users to enter the blocked user homepage, and click [...] on the upper right to remove the blacklist.
 Clock app missing in iPhone: How to fix it
May 03, 2024 pm 09:19 PM
Clock app missing in iPhone: How to fix it
May 03, 2024 pm 09:19 PM
Is the clock app missing from your phone? The date and time will still appear on your iPhone's status bar. However, without the Clock app, you won’t be able to use world clock, stopwatch, alarm clock, and many other features. Therefore, fixing missing clock app should be at the top of your to-do list. These solutions can help you resolve this issue. Fix 1 – Place the Clock App If you mistakenly removed the Clock app from your home screen, you can put the Clock app back in its place. Step 1 – Unlock your iPhone and start swiping to the left until you reach the App Library page. Step 2 – Next, search for “clock” in the search box. Step 3 – When you see “Clock” below in the search results, press and hold it and
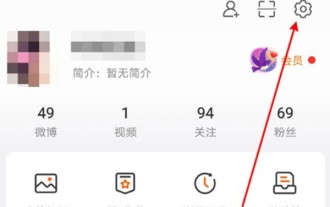
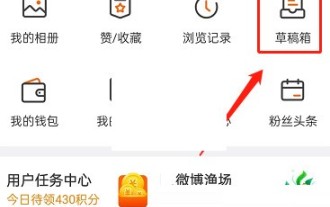 How to delete the draft box of 'Weibo'_Tutorial on deleting the draft box of 'Weibo'
Mar 30, 2024 pm 12:46 PM
How to delete the draft box of 'Weibo'_Tutorial on deleting the draft box of 'Weibo'
Mar 30, 2024 pm 12:46 PM
1. First open Weibo, click on My, and click on the draft box. 2. Then long press any draft and click to clear the draft box or delete the draft. 3. Finally click OK.
 How to post videos on Weibo without compressing the image quality_How to post videos on Weibo without compressing the image quality
Mar 30, 2024 pm 12:26 PM
How to post videos on Weibo without compressing the image quality_How to post videos on Weibo without compressing the image quality
Mar 30, 2024 pm 12:26 PM
1. First open Weibo on your mobile phone and click [Me] in the lower right corner (as shown in the picture). 2. Then click [Gear] in the upper right corner to open settings (as shown in the picture). 3. Then find and open [General Settings] (as shown in the picture). 4. Then enter the [Video Follow] option (as shown in the picture). 5. Then open the [Video Upload Resolution] setting (as shown in the picture). 6. Finally, select [Original Image Quality] to avoid compression (as shown in the picture).
 Can't allow access to camera and microphone in iPhone
Apr 23, 2024 am 11:13 AM
Can't allow access to camera and microphone in iPhone
Apr 23, 2024 am 11:13 AM
Are you getting "Unable to allow access to camera and microphone" when trying to use the app? Typically, you grant camera and microphone permissions to specific people on a need-to-provide basis. However, if you deny permission, the camera and microphone will not work and will display this error message instead. Solving this problem is very basic and you can do it in a minute or two. Fix 1 – Provide Camera, Microphone Permissions You can provide the necessary camera and microphone permissions directly in settings. Step 1 – Go to the Settings tab. Step 2 – Open the Privacy & Security panel. Step 3 – Turn on the “Camera” permission there. Step 4 – Inside, you will find a list of apps that have requested permission for your phone’s camera. Step 5 – Open the “Camera” of the specified app
