 Backend Development
 PHP Tutorial
 ApiGen4.1 windows installation tutorial, apigen4.1 tutorial_PHP tutorial
ApiGen4.1 windows installation tutorial, apigen4.1 tutorial_PHP tutorial
ApiGen4.1 windows安装教程,apigen4.1教程
一. ApiGen4.1版本介绍
1.ApiGen介绍

ApiGen是自动生成PHP项目的阅读文档工具。 用于从PHP源代码创建专业的API文档,类似于phpDocumentor/phpDoc。
ApiGen4.1需要PHP 5.4+的版本支持
2.ApiGen官网地址
(1).OSCHINA地址www.oschina.net/p/apigen
(2).官网地址www.apigen.org
(3).github地址https://github.com/apigen/apigen#options
3.知名案例:
4.ApiGen风格样式
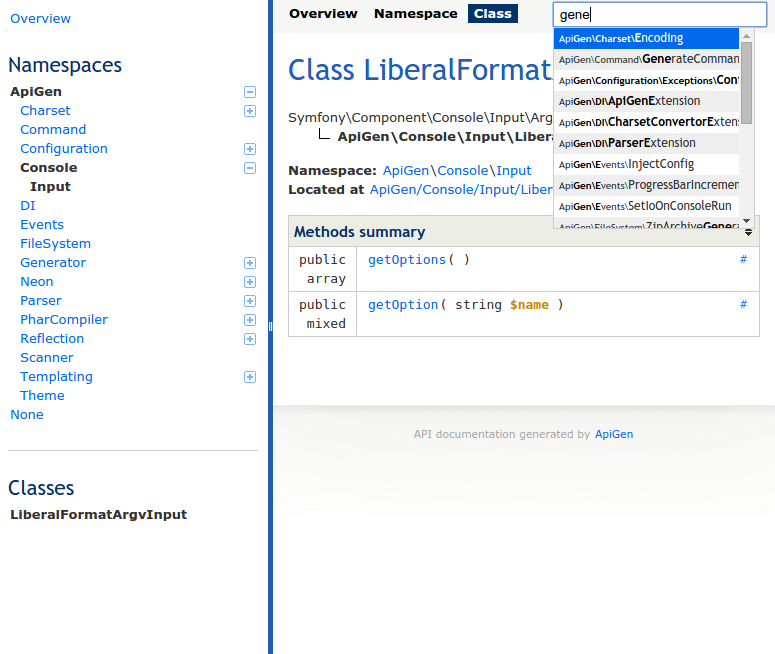
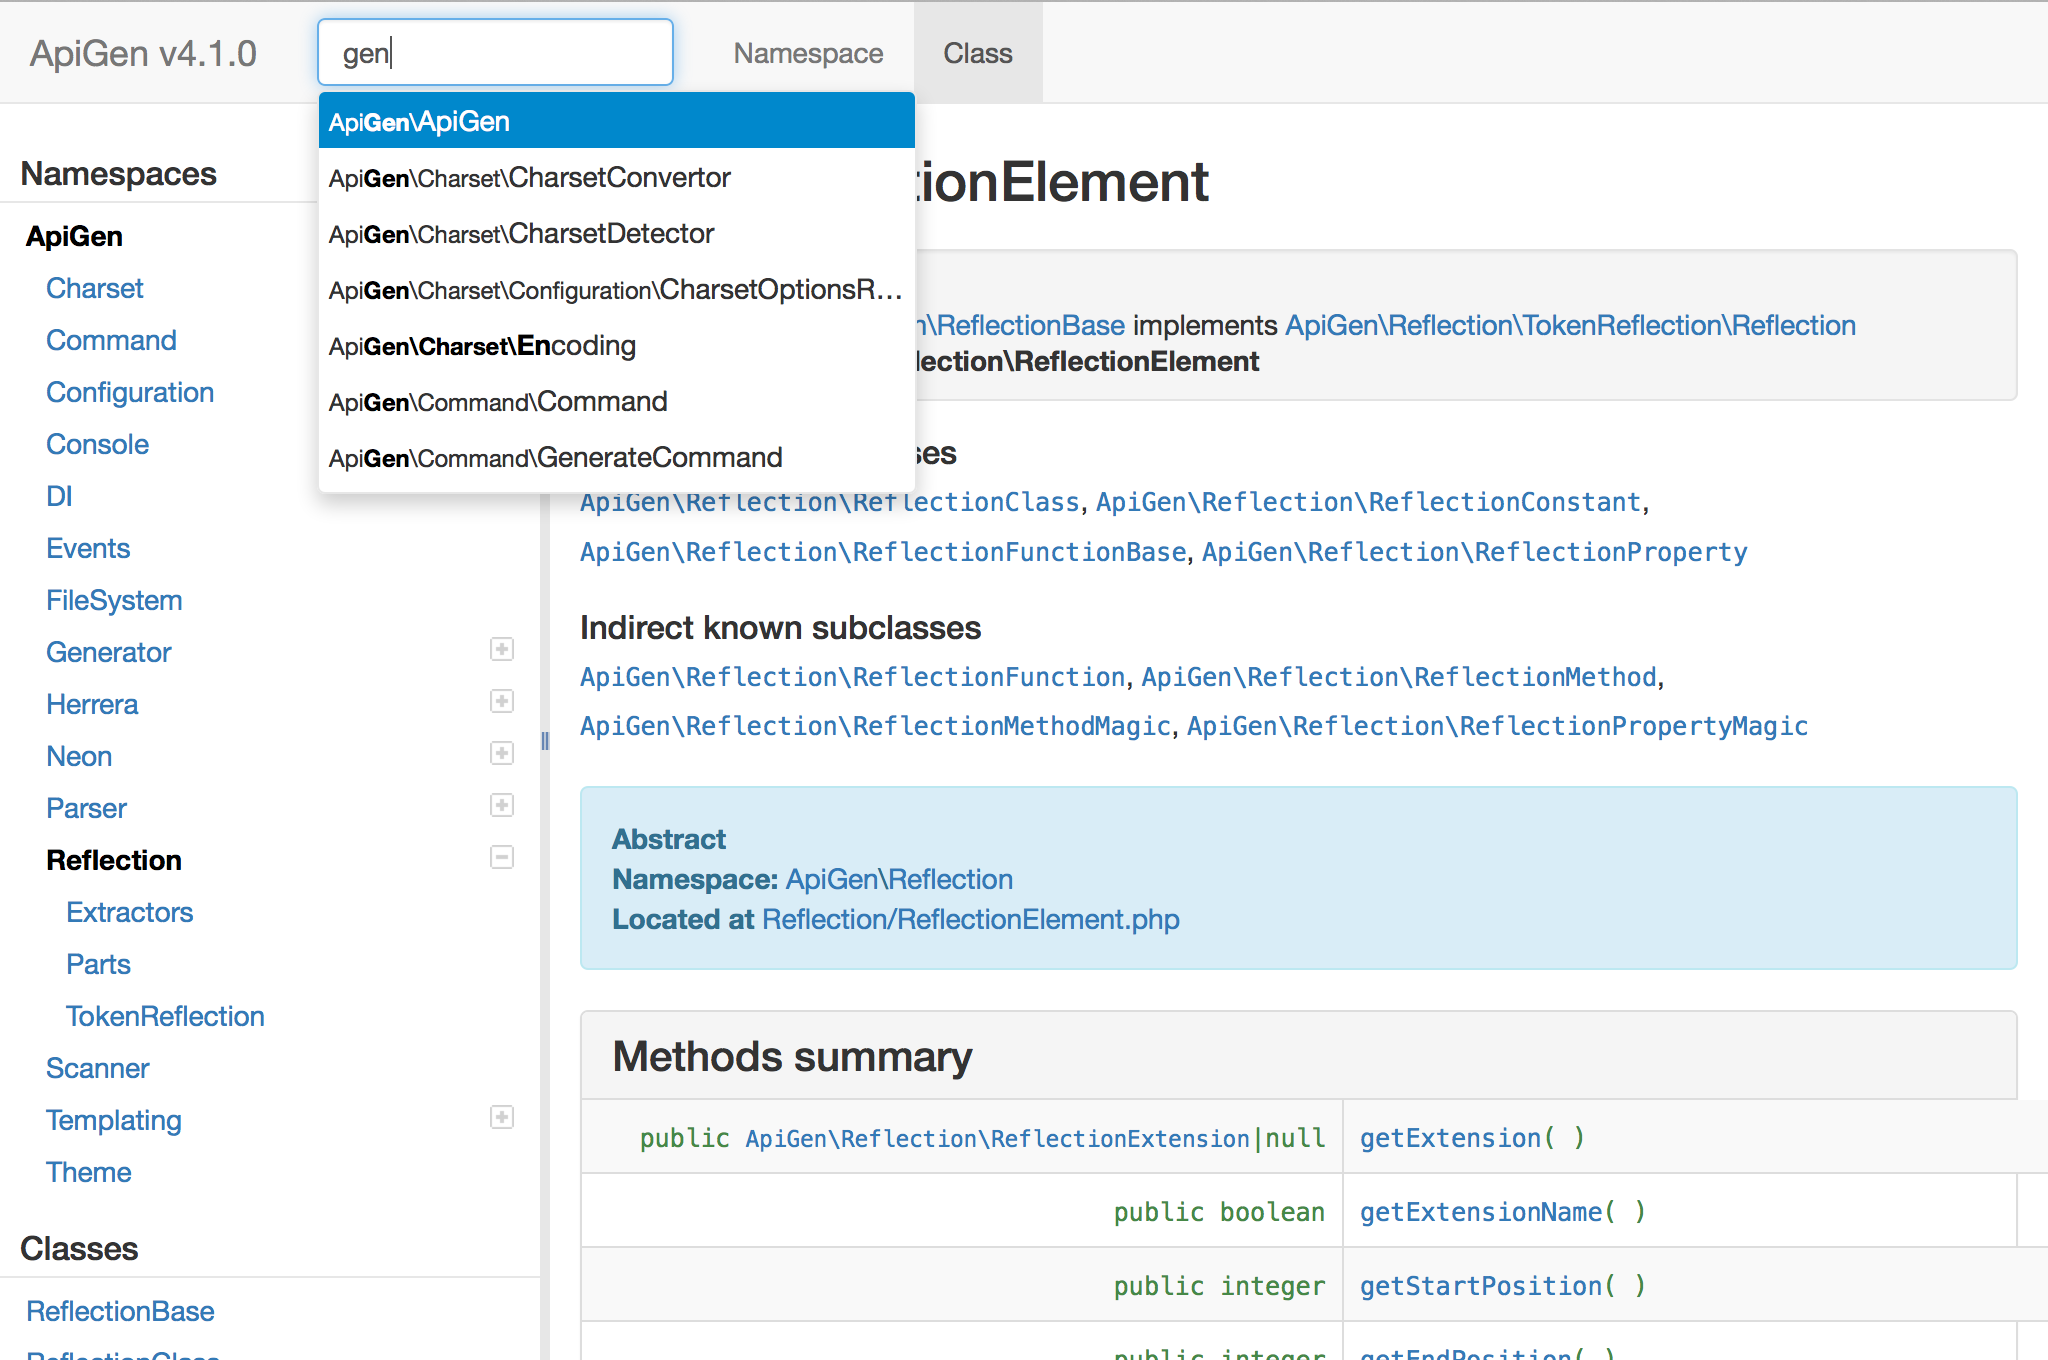
官方推荐有默认和Twitter ApiGen4.1 windows installation tutorial, apigen4.1 tutorial_PHP tutorial两套风格样式。
- ApiGen4.1 windows installation tutorial, apigen4.1 tutorial_PHP tutorial
-

- ApiGen官方ApiGen4.1 windows installation tutorial, apigen4.1 tutorial_PHP tutorial风格
-

二.ApiGen windows安装步骤
1. 下载ApiGen。
官网地址http://www.apigen.org/
官网下载地址http://apigen.org/apigen.phar
2.编写windows可执行bat文件
打开记事本写入以下相关信息,并另存为apigen.bat文件。
> @(PHP.exe执行文件地址) <span>"</span><span>%~dp0apigen.phar</span><span>"</span> %*
例如
@D:\xampp\php\php.exe <span>"</span><span>%~dp0apigen.phar</span><span>"</span> %*
另存为apigen.bat
3.将apigen.phar及apigen.bat文件复制或移动到环境变量PATH任一目录中。
windows7 对应目录为 C:\Windows\System32
4.在命令行中执行apigen出现版本及相关命令信息则证明安装成功。
c:\><span>apigen
ApiGen version </span><span>4.1</span>.<span>0</span><span>

Usage:
 command [options] [arguments]

Options:
 </span>--help (-<span>h)    Display this help message.
 </span>--quiet (-<span>q)   Do not output any message.
 </span>--version (-<span>V) Display this application version.

Available commands:
 generate      Generate API documentation
 help          Displays help </span><span>for</span><span> a command
 list          Lists commands
 self</span>-<span>update   Updates apigen.phar to the latest available version
 selfupdate    Updates apigen.phar to the latest available version</span>
5.执行生成apigen文档命令。
apigen generate --source <span>"</span><span>php项目地址</span><span>"</span> --destination <span>"</span><span>文档导出地址</span><span>"</span>
完整示例
apigen generate --source <span>"</span><span>D:\web\ruionline</span><span>"</span> --destination <span>"</span><span>D:\web\ruionline\doc</span><span>"</span>
<p>导出生成过程</p>

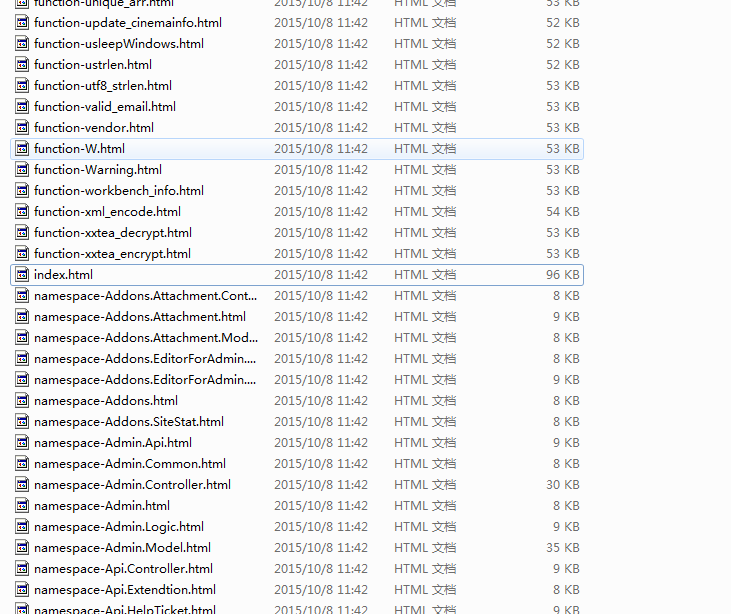
<p>最终生成目录结构 </p>

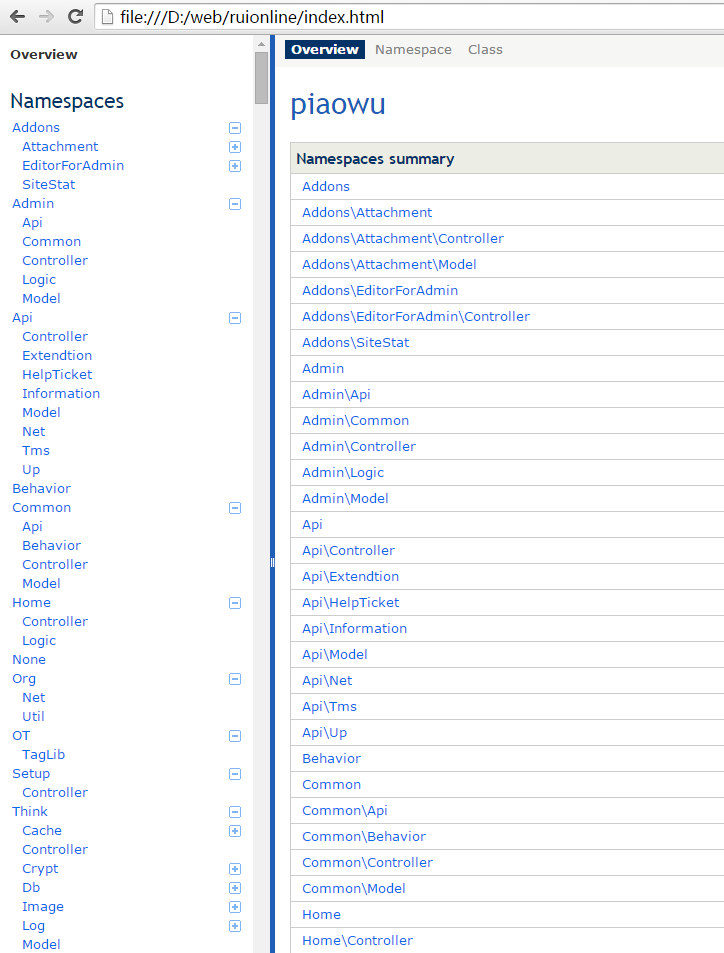
<p>web展示效果</p>

三.apigen命令参数详细说明
--source <path>需要编译成文档的 Project 目录, --source <path><span> 同时可以指定多个
</span>--destination <path><span>  编译后存放的目录路径
</span>--title <Name><span>  文档首页的标题
</span>--exclude <path> 排除的目录(如 <span>'</span><span>views/*</span><span>'</span><span> 表示视图目录下的不生成文档)

Options:
 </span>--source (-s)        Dirs or files documentation is generated <span>for</span><span>. (multiple va
lues allowed)
 </span>--destination (-d)   Target <span>dir</span> <span>for</span><span> documentation.
 </span>--access-<span>levels      Access levels of included method and properties. (default:
 [</span><span>"</span><span>public</span><span>"</span>,<span>"</span><span>protected</span><span>"</span><span>]) (multiple values allowed)
 </span>--annotation-<span>groups</span><span>  Generate page with elements with specific annotation.
 </span>--base-url           Base url used <span>for</span> sitemap (useful <span>for</span><span> public doc).
 </span>--config             Custom path to apigen.neon config <span>file</span>. (default: <span>"</span><span>E:\\ide</span>
/apigen.neon<span>"</span><span>)</span>
 --google-cse-<span>id</span>      Custom google search engine <span>id</span> (<span>for</span><span> search box).
 </span>--google-<span>analytics   Google Analytics tracking code.
 </span>--<span>debug              Turn on debug mode.
 </span>--deprecated         Generate documentation <span>for</span><span> elements marked as @deprecated
 </span>--<span>download           Add link to ZIP archive of documentation.
 </span>--extensions         Scanned <span>file</span> extensions. (default: [<span>"</span><span>php</span><span>"</span><span>]) (multiple valu
es allowed)
 </span>--<span>exclude            Directories and files matching this mask will not be parse
d (e.g. </span>*/tests<span>/*</span><span>). (multiple values allowed)
 --groups             The way elements are grouped in menu. (default: "auto")
 --charset            Charset of scanned files. (multiple values allowed)
 --main               Elements with this name prefix will be first in tree.
 --internal           Include elements marked as @internal.
 --php                Generate documentation for PHP internal classes.
 --skip-doc-path      Files matching this mask will be included in class tree, b
ut will not create a link to their documentation. (multiple values allowed)
 --no-source-code     Do not generate highlighted source code for elements.
 --template-theme     ApiGen template theme name. (default: "default")
 --template-config    Your own template config, has higher priority templateThem
e.
 --title              Title of generated documentation.
 --todo               Generate documentation for elements marked as @todo.
 --tree               Generate tree view of classes, interfaces, traits and exce
ptions.
 --help (-h)          Display this help message.
 --quiet (-q)         Do not output any message.
 --version (-V)       Display this application version.</span>
Copy after login
--source <path>需要编译成文档的 Project 目录, --source <path><span> 同时可以指定多个 </span>--destination <path><span> 编译后存放的目录路径 </span>--title <Name><span> 文档首页的标题 </span>--exclude <path> 排除的目录(如 <span>'</span><span>views/*</span><span>'</span><span> 表示视图目录下的不生成文档) Options: </span>--source (-s) Dirs or files documentation is generated <span>for</span><span>. (multiple va lues allowed) </span>--destination (-d) Target <span>dir</span> <span>for</span><span> documentation. </span>--access-<span>levels Access levels of included method and properties. (default: [</span><span>"</span><span>public</span><span>"</span>,<span>"</span><span>protected</span><span>"</span><span>]) (multiple values allowed) </span>--annotation-<span>groups</span><span> Generate page with elements with specific annotation. </span>--base-url Base url used <span>for</span> sitemap (useful <span>for</span><span> public doc). </span>--config Custom path to apigen.neon config <span>file</span>. (default: <span>"</span><span>E:\\ide</span> /apigen.neon<span>"</span><span>)</span> --google-cse-<span>id</span> Custom google search engine <span>id</span> (<span>for</span><span> search box). </span>--google-<span>analytics Google Analytics tracking code. </span>--<span>debug Turn on debug mode. </span>--deprecated Generate documentation <span>for</span><span> elements marked as @deprecated </span>--<span>download Add link to ZIP archive of documentation. </span>--extensions Scanned <span>file</span> extensions. (default: [<span>"</span><span>php</span><span>"</span><span>]) (multiple valu es allowed) </span>--<span>exclude Directories and files matching this mask will not be parse d (e.g. </span>*/tests<span>/*</span><span>). (multiple values allowed) --groups The way elements are grouped in menu. (default: "auto") --charset Charset of scanned files. (multiple values allowed) --main Elements with this name prefix will be first in tree. --internal Include elements marked as @internal. --php Generate documentation for PHP internal classes. --skip-doc-path Files matching this mask will be included in class tree, b ut will not create a link to their documentation. (multiple values allowed) --no-source-code Do not generate highlighted source code for elements. --template-theme ApiGen template theme name. (default: "default") --template-config Your own template config, has higher priority templateThem e. --title Title of generated documentation. --todo Generate documentation for elements marked as @todo. --tree Generate tree view of classes, interfaces, traits and exce ptions. --help (-h) Display this help message. --quiet (-q) Do not output any message. --version (-V) Display this application version.</span>
四.apigen支持php注释详解
<p>支持官方PSR-5标准</p>
Copy after login
1.Custom
<span>@deprecated
package
subpackage
copyright
license
author
version
since
see
uses
internal
todo
Standard</span>
Copy after login
<p>支持官方PSR-5标准</p>
<span>@deprecated package subpackage copyright license author version since see uses internal todo Standard</span>
2.param
<span>return</span><span>
throws
{@inheritdoc}
Magic methods and properties</span>
3.property
property-<span>read
property</span>-<span>write
method</span>

Hot AI Tools

Undresser.AI Undress
AI-powered app for creating realistic nude photos

AI Clothes Remover
Online AI tool for removing clothes from photos.

Undress AI Tool
Undress images for free

Clothoff.io
AI clothes remover

Video Face Swap
Swap faces in any video effortlessly with our completely free AI face swap tool!

Hot Article

Hot Tools

Notepad++7.3.1
Easy-to-use and free code editor

SublimeText3 Chinese version
Chinese version, very easy to use

Zend Studio 13.0.1
Powerful PHP integrated development environment

Dreamweaver CS6
Visual web development tools

SublimeText3 Mac version
God-level code editing software (SublimeText3)

Hot Topics
 Can I install mysql on Windows 7
Apr 08, 2025 pm 03:21 PM
Yes, MySQL can be installed on Windows 7, and although Microsoft has stopped supporting Windows 7, MySQL is still compatible with it. However, the following points should be noted during the installation process: Download the MySQL installer for Windows. Select the appropriate version of MySQL (community or enterprise). Select the appropriate installation directory and character set during the installation process. Set the root user password and keep it properly. Connect to the database for testing. Note the compatibility and security issues on Windows 7, and it is recommended to upgrade to a supported operating system.
 How to solve mysql cannot connect to local host
Apr 08, 2025 pm 02:24 PM
The MySQL connection may be due to the following reasons: MySQL service is not started, the firewall intercepts the connection, the port number is incorrect, the user name or password is incorrect, the listening address in my.cnf is improperly configured, etc. The troubleshooting steps include: 1. Check whether the MySQL service is running; 2. Adjust the firewall settings to allow MySQL to listen to port 3306; 3. Confirm that the port number is consistent with the actual port number; 4. Check whether the user name and password are correct; 5. Make sure the bind-address settings in my.cnf are correct.
 MySQL can't be installed after downloading
Apr 08, 2025 am 11:24 AM
The main reasons for MySQL installation failure are: 1. Permission issues, you need to run as an administrator or use the sudo command; 2. Dependencies are missing, and you need to install relevant development packages; 3. Port conflicts, you need to close the program that occupies port 3306 or modify the configuration file; 4. The installation package is corrupt, you need to download and verify the integrity; 5. The environment variable is incorrectly configured, and the environment variables must be correctly configured according to the operating system. Solve these problems and carefully check each step to successfully install MySQL.
 Solutions to the errors reported by MySQL on a specific system version
Apr 08, 2025 am 11:54 AM
The solution to MySQL installation error is: 1. Carefully check the system environment to ensure that the MySQL dependency library requirements are met. Different operating systems and version requirements are different; 2. Carefully read the error message and take corresponding measures according to prompts (such as missing library files or insufficient permissions), such as installing dependencies or using sudo commands; 3. If necessary, try to install the source code and carefully check the compilation log, but this requires a certain amount of Linux knowledge and experience. The key to ultimately solving the problem is to carefully check the system environment and error information, and refer to the official documents.
 How to copy and paste mysql
Apr 08, 2025 pm 07:18 PM
Copy and paste in MySQL includes the following steps: select the data, copy with Ctrl C (Windows) or Cmd C (Mac); right-click at the target location, select Paste or use Ctrl V (Windows) or Cmd V (Mac); the copied data is inserted into the target location, or replace existing data (depending on whether the data already exists at the target location).
 Unable to access mysql from terminal
Apr 08, 2025 pm 04:57 PM
Unable to access MySQL from the terminal may be due to: MySQL service not running; connection command error; insufficient permissions; firewall blocks connection; MySQL configuration file error.
 Can mysql run on Windows
Apr 08, 2025 pm 01:54 PM
Running MySQL on Windows is feasible, but challenges such as port conflicts, permission issues, and environment variable settings need to be considered. Installation issues can be solved by customizing configuration files, adjusting user permissions, and setting environment variables correctly. Additionally, the appropriate storage engine should be selected, tweaked configuration files, and SSDs should be used to optimize performance.
 Can vs code run in Windows 8
Apr 15, 2025 pm 07:24 PM
VS Code can run on Windows 8, but the experience may not be great. First make sure the system has been updated to the latest patch, then download the VS Code installation package that matches the system architecture and install it as prompted. After installation, be aware that some extensions may be incompatible with Windows 8 and need to look for alternative extensions or use newer Windows systems in a virtual machine. Install the necessary extensions to check whether they work properly. Although VS Code is feasible on Windows 8, it is recommended to upgrade to a newer Windows system for a better development experience and security.


