


 天蓬老师
天蓬老师批改状态:合格
老师批语:做为经典的异步请求方式,Ajax即将完成它的历史使命, 建议有空关注一下fetch api


以前端请求,后端响应为例
异步最常用的处理形式就是回调函数
XMLHttpRequest是浏览器提供的,处理异步请求的宿主对象,而非 JS 内置对象new XMLHttpRequest()onreadystatechangeopen(请求类型,请求地址,是否异步)send()JSONJSON.parse()解析 JSON 字符串new XMLHttpRequest()onreadystatechange()open(请求类型,请求地址,是否异步)setRequestHeader()send(data)post 与 get 相比, 多了一步: 设置请求头
- 前端: 发送
JSON- 后端:
- json 数据以表单数据类型发送,可
$_POST接收- json 数组就是以 JSON 发送,
php://input流文件方式接收
除了表单数据外,也可用于普通数据
代码如下
<html lang=""><head><meta charset="UTF-8" /><meta name="viewport" content="width=device-width, initial-scale=1.0" /><title>Document</title><style>form {display: inline-grid;grid-template-columns: 5em 15em;gap: 1em;padding: 1em;border: 1px solid #000;background-color: lightcyan;}form button {grid-area: auto / 2 / auto / span 1;}</style></head><body><form action="" onsubmit="return false;"><label for="username">用户名:</label><input type="text" id="username" name="username" /><label for="email">邮箱:</label><input type="email" id="email" name="email" /><button>保存</button><script>// 1. 创建请求对象: `new XMLHttpRequest()`const aaa = new XMLHttpRequest();// 2. 监听请求回调: `onreadystatechange`aaa.addEventListener("readystatechange", hanshu, false);// 3. 初始化请求参数: `open(请求类型,请求地址,是否异步)`aaa.open("GET", "hhhh/text.php", true);// 4. 发送请求: `send()`aaa.send(null);/////function hanshu() {if (aaa.readyState === 4) {console.log(aaa.responseText);const user = JSON.parse(aaa.responseText);console.log(user);// alue=user.后面aa和ccc对应的是php文档里的数据名称document.querySelector("#username").value=user.aadocument.querySelector("#email").value=user.ccc}}</script></body></html>
php代码
echo json_encode(['aa'=>'bbb', 'ccc'=>'ssss']);
页面效果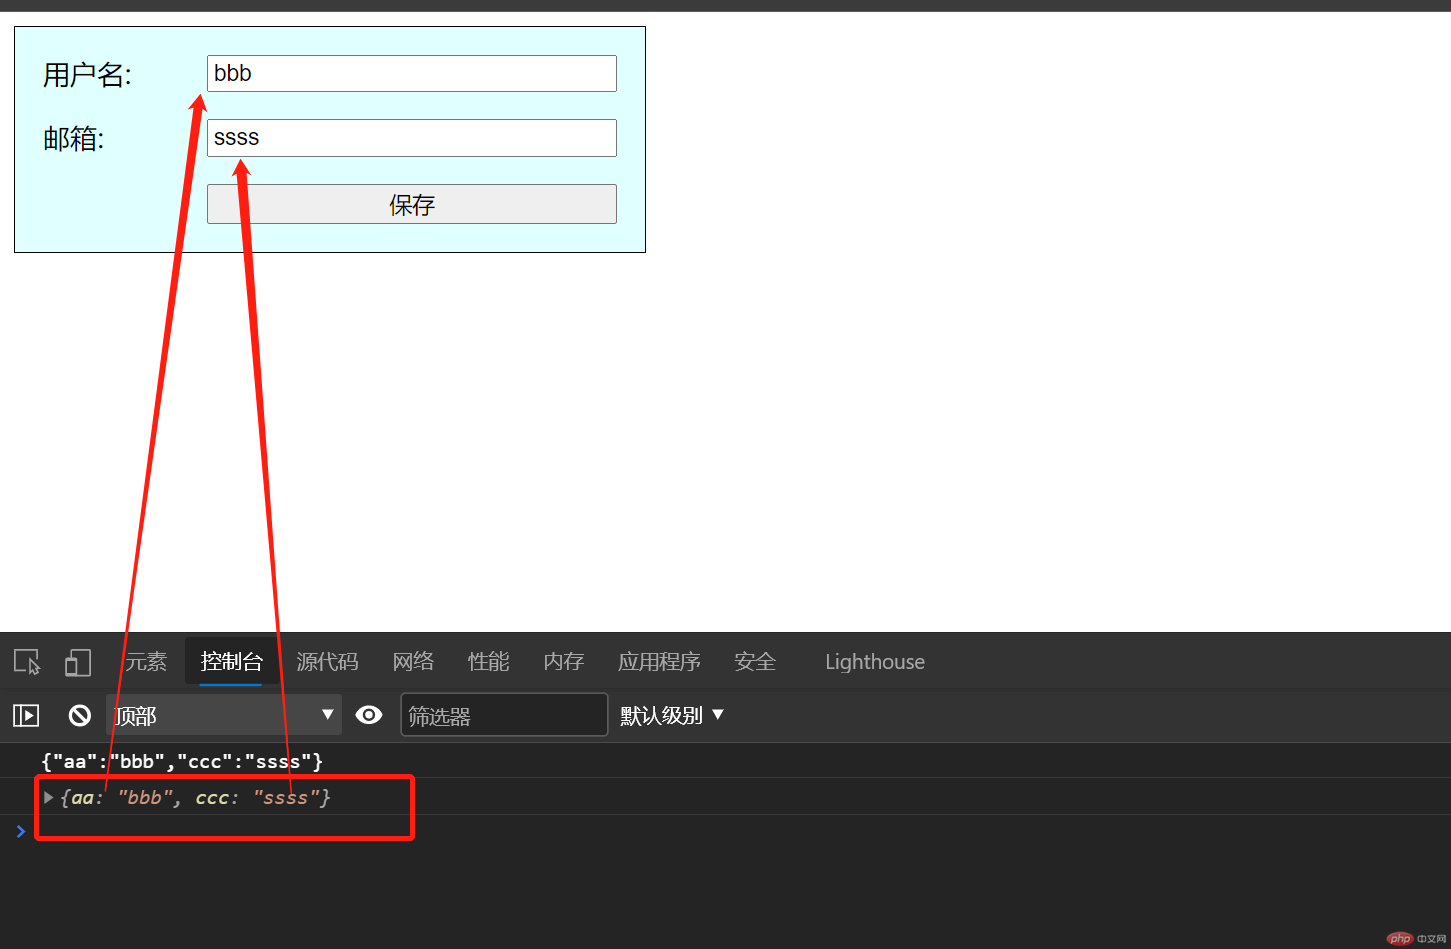
<html lang=""><head><meta charset="UTF-8" /><meta name="viewport" content="width=device-width, initial-scale=1.0" /><title>Document</title></head><body><script>// 1. 创建请求对象: `new XMLHttpRequest()`const aaa = new XMLHttpRequest();// 2. 监听请求回调: `onreadystatechange`aaa.addEventListener("readystatechange", hanshu, false);// 3. 初始化请求参数: `open(请求类型,请求地址,是否异步)`aaa.open("POST", "hhhh/text2.php", true);// 4. 设置请求头: `setRequestHeader()`// 以表单键值对的方式aaa.setRequestHeader("content-type", "application/x-www-form-urlencoded");const user = {email: "admin@php.cn",password: "123456",};// js转jsonconst bbbb = JSON.stringify(user);// 5. 发送请求: `send()`aaa.send(bbbb);/////function hanshu() {if (aaa.readyState === 4) {console.log(aaa.responseText);}}</script></body></html>
php代码
<?php// print_r($_POST);$date=key($_POST);echo $date;// echo "aaaa";
效果图
FormData代码:
<html lang=""><head><meta charset="UTF-8" /><meta name="viewport" content="width=device-width, initial-scale=1.0" /><title>Document</title><style>form {display: inline-grid;grid-template-columns: 5em 15em;gap: 1em;padding: 1em;border: 1px solid #000;background-color: lightcyan;}form button {grid-area: auto / 2 / auto / span 1;}</style></head><body><form action="" onsubmit="return false;"><label for="username">用户名:</label><input type="text" id="username" name="username" /><label for="email">邮箱:</label><input type="email" id="email" name="email" /><button>保存</button><script>const form=document.querySelector("form");const but=document.querySelector("button")// 1. 创建请求对象: `new XMLHttpRequest()`const aaa = new XMLHttpRequest();but.addEventListener("click",zzz,false)function zzz(aa) {// 2. 监听请求回调: `onreadystatechange`aaa.addEventListener("readystatechange", hanshu, false);// 3. 初始化请求参数: `open(请求类型,请求地址,是否异步)`aaa.open("POST", "hhhh/text3.php", true);// 4. 发送请求: `send()`// new FormData(form): 当前表单数据的封装aaa.send(new FormData(form));}/////function hanshu(ev) {if (aaa.readyState === 4) {console.log(aaa.responseText);}}</script></body></html>
PHP代码:
print_r($_POST);
效果图

Copyright 2014-2025 https://www.php.cn/ All Rights Reserved | php.cn | 湘ICP备2023035733号


