

How to build a forum with mysql+bootstrap

This time I will show you how to build a forum with mysql bootstrap. What are the precautions for building a forum with mysql bootstrap? Here are practical cases, let’s take a look.
Related recommendations: "Bootstrap Tutorial"
Preface
After learning koa2 and express After writing some demos, I plan to write a project myself to practice my skills. Since I am a student in school, I don’t have any good projects to do. I aim to develop a front-end forum. The functional requirements are formulated with reference to some communities. The main ones are:
Login and register
Personal information maintenance, avatar and other basic information
Publish articles, the rich text editor uses the wangEditor plug-in, edit, delete articles, article classification, etc.
Article comments, article collections, likes, etc.
Supports article paging and comment paging loading
Follow and unfollow users
Upload and share resources (files), Download and view
Recommended learning resources...
Author's personal diary
but. . . . Due to various reasons, only some functions have been implemented so far, and resource sharing has not yet been written.
Project operation effect: http://120.77.211.212/home
Project technology stack application: node-koa2- ejs-bootstrap3—jquery, github address: https://github.com/Jay214/myblog-koa2. If you find it helpful or you can still read it, please star~~ encourage me as a front-end scumbag.
Development environment
node: v8.3.0
koa: ^2.4.1
mysql: 5.7.1
npm: 5.3.0 and above
How to run the project
Clone the project to local git clone git@github.com:Jay214/myblog-koa2 .git
Install module middleware npm install
Install mysql
Mysql version is recommended to be below 5.7, 5.7 has a bug, graphical The interface recommends using navicat for MySQL
You can install supervisor (npm install supervisor project running tool, it will be in monitoring mode after opening it, just save it after modifying the file, no need to start the project again) node index or npm supervisor index
localhost:8080/home The port number can be modified by yourself
If you find any bugs in the project or have better suggestions, please feel free to make suggestions, qq: 2752402930.
Preparation
Since koa2 is based on es6's promise and es7's await/async syntax, if you don't understand es6/es7, please read the document first. Building the database in the background is the key, so please install mysql first. It is recommended to install mysql version below 5.7, because version 5.7.0 has a bug and the configuration file needs to be changed. You will know the details when you install it.
Install the node environment and use node -v to check the node version. Node needs a newer version to support the promise of es6 and the await/async syntax of es7. Now the node version will come with npm, so there is no need to go there. Install npm.
Project structure
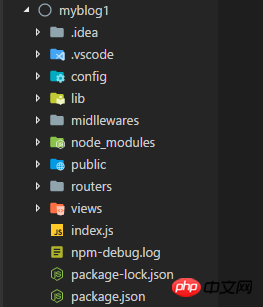
1.config stores the default file (database connection configuration)
2.lib stores Database file
3.middlewares stores the middleware that determines whether to log in and register or not
4.public stores static files, js, references to bootstrap framework and other files
5.routers stores routes File
6.views stores template files
7.index is the main file of the program, defining interfaces, database interfaces, reference modules, etc.
8.package.json project configuration Files, including project name, author, dependencies, modules, etc.
The project was developed with vscode. It is very comfortable to use. If you haven’t tried it yet, please go and try it.
Project initialization: cd myblog1 -> npm init The package.json file has been created at this time.
Since koa2 is a lightweight framework, small and compact, in order to promote our development efficiency and convenience, we need to install some koa2 module middleware:
npm install i koa koa-bodyparser koa-mysql-session koa-router koa-session-minimal koa-static koa-views md5 moment mysql ejs koa-static-cache --save-dev
Purpose of each module
koa node framework
koa-bodyparser 表单解析中间件
koa-mysql-session、koa-session-minimal 处理数据库的中间件
koa-router 路由中间件
koa-static 静态资源加载中间件
ejs 模板引擎
md5 密码加密
moment 时间中间件
mysql 数据库
koa-views 模板呈现中间件
koa-static-cache 文件缓存
项目基本框架搭建
配置数据库连接
在config文件夹新建default.js :
const config = {
 //启动端口
port: 8080,
 //数据库配置
 database: {
 DATABASE: 'nodesql',
 USERNAME: 'root',
 PASSWORD: '123456',
 PORT: '3306',
HOST: 'localhost'
 }
}
module.exports = config;然后在lib文件夹新建mysql.js:
var mysql = require('mysql');
var config = require('../config/default.js')
//建立数据库连接池
var pool = mysql.createPool({
 host: config.database.HOST,
 user: config.database.USERNAME,
 password: config.database.PASSWORD,
 database: config.database.DATABASE
});
let query = function(sql, values) {
return new Promise((resolve, reject)=>{
 pool.getConnection(function (err,connection) {
  if(err){ reject(err);
  }else{
connection.query(sql,values,(err,rows)=>{
   if(err){
   reject(err);
   }else{
   resolve(rows);
   }
 connection.release(); //为每一个请求都建立一个connection使用完后调用connection.release(); 直接释放资源。
      //query用来操作数据库表
  })
  }
  })
})}这里建立了一个数据库连接池和封装了一个操作数据库表的函数,如果对于数据库连接有不懂的话请自行百度。
建立入口文件
在主目录新建index.js,即项目入口文件:
const koa = require("koa"); //node框架
const path = require("path");
const bodyParser = require("koa-bodyparser"); //表单解析中间件
const ejs = require("ejs"); //模板引擎
const session = require("koa-session-minimal"); //处理数据库的中间件
const MysqlStore = require("koa-mysql-session"); //处理数据库的中间件
const router = require("koa-router"); //路由中间件
const config = require('./config/default.js'); //引入默认文件
const views = require("koa-views"); //模板呈现中间件
const koaStatic = require("koa-static"); //静态资源加载中间件
const staticCache = require('koa-static-cache')
const app = new koa();
//session存储配置,将session存储至数据库
const sessionMysqlConfig = {
 user: config.database.USERNAME,
 password: config.database.PASSWORD,
 database: config.database.DATABASE,
 host: config.database.HOST,
}
//配置session中间件
app.use(session({
 key: 'USER_SID',
 store: new MysqlStore(sessionMysqlConfig)
}))
//配置静态资源加载中间件
app.use(koaStatic(
 path.join(dirname , './public')
))
//配置服务端模板渲染引擎中间件
app.use(views(path.join(dirname, './views'),{
 extension: 'ejs'
}))
//使用表单解析中间件
app.use(bodyParser({
 "formLimit":"5mb",
 "jsonLimit":"5mb",
 "textLimit":"5mb"
}));
//使用新建的路由文件
//登录
app.use(require('./routers/signin.js').routes())
//注册
app.use(require('./routers/signup.js').routes())
//退出登录
app.use(require('./routers/signout.js').routes())
//首页
app.use(require('./routers/home.js').routes())
//个人主页
app.use(require('./routers/personal').routes())
//文章页
app.use(require('./routers/articles').routes())
//资源分享
app.use(require('./routers/share').routes())
//个人日记
app.use(require('./routers/selfNote').routes())
//监听在8080端口
app.listen(8080)
console.log(`listening on port ${config.port}`)上面代码都有注释,我就不一一说明了,由于资源分享和个人日记还没写,所以暂时统一share...替代。
接下来向mysql.js添加数据库操作语句,建表、增删改查。
var users = `create table if not exists users(
 id INT(200) NOT NULL AUTO_INCREMENT,
 name VARCHAR(100) NOT NULL,
 pass VARCHAR(40) NOT NULL,
 avator VARCHAR(100) DEFAULT 'default.jpg',
 job VARCHAR(40),
 company VARCHAR(40),
 introdu VARCHAR(255),
 userhome VARCHAR(100),
 github VARCHAR(100),
 PRIMARY KEY (id)
);`
var posts = `create table if not exists posts(
 id INT(200) NOT NULL AUTO_INCREMENT,
 name VARCHAR(100) NOT NULL,
 title VARCHAR(100) NOT NULL,
 content TEXT NOT NULL,
 uid INT(200) NOT NULL,
 moment VARCHAR(40) NOT NULL,
 comments VARCHAR(255) NOT NULL DEFAULT '0',
 pv VARCHAR(40) NOT NULL DEFAULT '0',
 likes INT(200) NOT NULL DEFAULT '0',
 type VARCHAR(20) NOT NULL,
 avator VARCHAR(100),
 collection INT(200) NOT NULL DEFAULT '0',
 PRIMARY KEY (id) ,
 FOREIGN KEY (uid) REFERENCES users(id)
 ON DELETE CASCADE
);`
var comment= `create table if not exists comment(
 id INT(200) NOT NULL AUTO_INCREMENT,
 name VARCHAR(100) NOT NULL,
 content TEXT NOT NULL,
 moment VARCHAR(40) NOT NULL,
 postid INT(200) NOT NULL,
 avator VARCHAR(100),
 PRIMARY KEY ( id ),
 FOREIGN KEY (postid) REFERENCES posts(id)
 ON DELETE CASCADE
);`
var likes = `create table if not exists likes(
 id INT(200) NOT NULL AUTO_INCREMENT,
 name VARCHAR(100) NOT NULL,
 postid INT(200) NOT NULL,
 PRIMARY KEY (id),
 FOREIGN KEY (postid) REFERENCES posts(id)
 ON DELETE CASCADE
);`
 var collection = `create table if not exists collection(
 id INT(200) NOT NULL AUTO_INCREMENT,
 uid VARCHAR(100) NOT NULL,
 postid INT(200) NOT NULL,
 PRIMARY KEY (id),
 FOREIGN KEY (postid) REFERENCES posts(id)
 ON DELETE CASCADE
 );`
 var follow = `create table if not exists follow(
  id INT(200) NOT NULL AUTO_INCREMENT,
  uid INT(200) NOT NULL,
  fwid INT(200) NOT NULL DEFAULT '0',
  PRIMARY KEY (id),
  FOREIGN KEY (uid) REFERENCES users(id)
  ON DELETE CASCADE
 )
 `
let createTable = function(sql){
 return query(sql, []);
}
//建表
createTable(users);
createTable(posts);
createTable(comment);
createTable(likes);
createTable(collection);
createTable(follow);
//createTable(follower);
//注册用户
let insertData = function(value){
 let _sql = "insert into users(name,pass) values(?,?);"
 return query(_sql,value);
}
//更新头像
let updateUserImg = function(value){
 let _sql = "update users set avator=? where id=?"
 return query(_sql,value);
}
//更新用户信息
let updateUser = function(value){
 let _sql = "update users set name=?,job=?,company=?,introdu=?,userhome=?,github=? where id=?"
 return query(_sql,value);
}
//发表文章
let insertPost = function(value){
 let _sql = "insert into posts(name,title,content,uid,moment,type,avator) values(?,?,?,?,?,?,?);"
 return query(_sql,value);
}
//更新文章评论数
let updatePostComment = function(value){
 let _sql = "update posts set comments=? where id=?"
 return query(_sql,value);
}
.......总共六张表:用户表、文章表、文章评论表、文章收藏表、文章点赞表、用户关注表。
这里引用了外键,但是现在的开发不推荐使用外键了,所以你们可以自行修改,这里在项目第一次启动时会出现数据库创建失败(由于外键原因),只要重新启动就ok了,如果对mysql还不了解的,这里附送大家一个传送门:mysql入门视频教程 密码:c2q7 。
前端页面开发
项目基本结构搭建好后,就可以进行前端页面的编写了。用node开发web时我们一般会配合模板引擎,这个项目我采用的是ejs,除了ejs之外较为常用的还有jade,但是jade相对ejs来说的话代码结构不够清晰。关于ejs语法,这里做个简单的介绍:
header.ejs
<!DOCTYPE html>
<html lang="en">
 <head>
 <meta charset="utf-8">
 <title>Myblog</title>
 <link rel="stylesheet" href="/css/bootstrap.min.css" rel="external nofollow" >
 <link rel="stylesheet" href="/css/index.css" rel="external nofollow" >
 <script src="/js/jquery-3.2.1.min.js" type="text/javascript"></script>
 <script src="/js/bootstrap.min.js" type="text/javascript"></script>
nav.ejs
 </head>
 <body>
 <header class="nav-head">
 <p class="nav container">
  <ul>
  <li><a href="/home" rel="external nofollow" >首页</a></li>
  <li> <a href="/share" rel="external nofollow" rel="external nofollow" rel="external nofollow" >资源分享</a></li>
  <li> <a href="/share" rel="external nofollow" rel="external nofollow" rel="external nofollow" >推荐</a></li>
  <li> <a href="/share" rel="external nofollow" rel="external nofollow" rel="external nofollow" >个人日记</a></li>
  <li><a href="/about" rel="external nofollow" >关于作者</a></li>
  <li><input type="text" placeholder="搜索" class="input-sm search"></li>

  <% if(session.user){ %>
   <li>
   <img src="/images/<%= session.avator %>" alt="" class="img-circle img-title">

   <ul class="menu">
    <li class="personal menulist"><a href="/personal/<%= session.user %>" rel="external nofollow" >主页</a></li>
   <!-- <li class="collection menulist"><a href="#" rel="external nofollow" >收藏集</a></li>
   -->
    <li class="menulist"><a href="/articles" rel="external nofollow" >写文章</a></li>
    <li class="out"><a href="/signout" rel="external nofollow" >登出</a></li>
   </ul>
   </li>
   <script>
    var imgTitle = document.getElementsByClassName('img-title')[0],

    menu = document.getElementsByClassName('menu')[0];
    imgTitle.onclick = function (event) {
    showTap();
    event.stopPropagation();
    }

    document.body.addEventListener('click',function (event) {
    menu.style.display = 'none';
    // event.stopPropagation();
    },true)

    function showTap(){
    if(menu.style.display == 'block'){
     menu.style.display = 'none';
    }else {
     menu.style.display = 'block';
    }
    }
    //退出登录
    var signOut = document.getElementsByClassName('out')[0];
   /* signOut.onclick = function(){
    ajax('get','/signout',null);
    xhr.onreadystatechange = function () {
    if(xhr.readyState==4&&xhr.status>=200&&xhr.status<300){
    let text = xhr.responseText; //服务器返回的对象
    if(text){
    window.location.reload = 'localhost:8080/home';
    }

    }
   }
    }*/
   </script>
   <% }else{ %>
   <li class="login">
    <a class="loginup" href="javascript:;" rel="external nofollow" rel="external nofollow" rel="external nofollow" ><span class="glyphicon glyphicon-user"></span> 注册 | 登录</a>

    </li>
    <% } %>

  </ul>
 </p>
 </header>
 <script>


 var searchInput = document.getElementsByClassName('search')[0];
 searchInput.onfocus = function () {
  this.style.width = "300px";
 }
 searchInput.onblur = function () {
  this.style.width = "180px";
 }

</script>login.ejs
<p class="sign">
<a href="javascript:;" rel="external nofollow" rel="external nofollow" rel="external nofollow" title="关闭" class="login-close close">×</a>
<p class="sign-title">
<h1>用户注册</h1>
<h3>来吧骚年们!</h3>
</p>
<form class="form signup" role="form">
<p class="form-group">
<input type="text" name="username" placeholder="账号不少于两个字符" class="form-control">
</p>
<p class="form-group">
<input type="password" name="pass" class="pass form-control" placeholder="密码">
</p>
<p class="form-group">
<input type="password" name="repeatpass" id="repeat" placeholder="重复密码" class="form-control">
</p>
<p class="form-group">
<input type="button" value="注册" class="btn btn-primary login-up">
</p>
</form>
<form class="form signin" role="form">
<p class="form-group">
<input type="text" name="username" placeholder="请输入用户名" class="form-control">
</p>
<p class="form-group">
<input type="password" name="pass" class="pass form-control" placeholder="请输入密码">
</p>
<p class="form-group">
<input type="button" value="登录" class="btn btn-primary login-in">
</p>
</form>
<p class="form-tips">
<span>已有账号?</span>
<a href="javascript:;" rel="external nofollow" rel="external nofollow" rel="external nofollow" class="register">登录</a>
</p>
</p>
<p class="login-form-mask"></p>
<script>
// $(document).ready(function () {
var $close = $('.login-close');
var $sign = $('.sign');
$close.click(function () {
$sign.css("display","none");
})
var $register = $('.register'), //login/loginup切换
$span = $('.form-tips span'),
$signup = $('.signup'),
$signTitle = $('.sign-title h1'),
$signin = $('.signin');
$register.click(function () {
if($span.html() == "已有账号?"){
$signin.css('display','block');
$signup.css('display','none');
$(this).html('注册');
$span.html("没有账号?");
$signTitle.html("欢迎登录");
}else{
$signin.css('display','none');
$signup.css('display','block');
$(this).html('登录');
$span.html("已有账号?");
$signTitle.html("欢迎注册");
}
})
var $loginup = $('.loginup'); //点击登录/注册,阻止事件冒泡
$loginup.click(function () {
$mask.fadeIn(100);
$sign.slideDown(200);
return false;
})
var $close = $('.login-close'),
$mask = $('.login-form-mask'),
$sign = $('.sign');
$sign.click(function () {
return false;
})
$close.click(function (e) {
// e.stopPropagation();
fadeOut();
})
$(document).click(function (e) { //点击任意位置取消登录框
//e.stopPropagation();
fadeOut();
})
function fadeOut(){
$mask.fadeOut(100);
$sign.slideUp(200);
}
var loginUp = document.getElementsByClassName('login-up')[0],
loginIn = document.getElementsByClassName('login-in')[0],
signUp = document.getElementsByClassName('signup')[0],
signIn = document.getElementsByClassName('signin')[0];
loginUp.onclick = function () { //注册
var data1 = 'username=' + signUp["username"].value + '&' + 'pass='+ signUp["pass"].value + '&' + 'repeatpass=' + signUp["repeatpass"].value;
var reg = /^[\u4E00-\u9FA5]{2,5}$/;
/* if(!reg.test(signUp["username"].value)){
signUp["username"].classList.add("tips");
signUp['username'].value()
} */
ajax('post','/signup',data1,"application/x-www-form-urlencoded");
xhr.onreadystatechange = function () {
if(xhr.readyState==4&&xhr.status>=200&&xhr.status<300){
let text = JSON.parse(xhr.responseText).code;
console.log(text) //服务器返回的对象
if(text == 3){
fadeOut();
alert("注册成功")
setTimeout(()=>{
window.location.reload();
},1000)
// document.getElementsByClassName('login')[0].outerHTML = "<li class='users'><a href='/'>"+signUp["username"].value+ "(=^ ^=)" +"</a></li>"
}else{
fadeOut();
alert("用户已存在")
}
}
}
}
loginIn.onclick = function () { //登录
var data2 = 'username=' + signIn["username"].value + '&' + 'pass=' + signIn["pass"].value;
ajax('post','/signin',data2,"application/x-www-form-urlencoded");
xhr.onreadystatechange = function () {
if(xhr.readyState==4&&xhr.status>=200&&xhr.status<300){
let text = JSON.parse(xhr.responseText).code; //服务器返回的对象
console.log(text);
// document.getElementsByClassName('login')[0].outerHTML = "<li class='users'><a href='/'>"+signUp["username"].value+ "(=^ ^=)" +"</a></li>"
if(text===1){
fadeOut();
// let imgTitle = document.getElementsByClassName('img-title')[0];
// imgTitle.setAttribute('src','/images/' + JSON.parse(xhr.responseText).avator)
setTimeout(()=>{
window.location.reload();
},1000)
}else if(text === 2){
alert('密码错误')
}else{
alert('账号不存在')
}
}
}
}
</script>footer.ejs
 </body>
 </html>
header为页面头部结构,nav为页面导航条,login为登录、注册内容、footer为页面顶部结构。可以看到我在ejs文件里有很多的if else 判断语句,这是根据session来判断用户是否登录渲染不同的内容。现在我们需要我们的页面编写样式:分别是home.css和index.css
为了增强对原生js的理解,在项目里我用了大量的原生ajax(显然jquery封装的ajax比较好哈哈),因此这里先编写一个原生ajax请求:
ajax.js
var xhr = null;
 function ajax(method,url,data,types) { //封装一个ajax方法
 // var text;
 if(window.XMLHttpRequest){
  xhr = new XMLHttpRequest();
 }else if(window.ActiveXObject){
  xhr = new ActiveXObject("Microsoft.XMLHTTP");
 }else {
  alert('你的浏览器不支持ajax');
  return false;
 }

 xhr.onerror = function (err) {
  alert("some err have hapened:",err);
 }
 xhr.open(method,url,true);
 if(method=="post"){
  xhr.setRequestHeader("Content-type",types);
  // xhr.setRequestHeader("Conent-Type",'application/json'"application/x-www-form-urlencoded")
 }
 try{
  setTimeout(()=>{
  xhr.send(data);
 },0);
 }catch(err) {
  alert("some error have hapened in font:",err);
 }
 return xhr;
}实现登录注册
前端基本页面开发好后,我们就可以写后台登录接口了:
注册:signup.js
var router = require('koa-router')();
var userModel = require('../lib/mysql.js');
var md5 = require('md5')
 // 注册页面

 // post 注册
router.post('/signup', async(ctx, next) => {
 console.log(ctx.request.body)
 var user = {
 name: ctx.request.body.username,
 pass: ctx.request.body.pass,
 repeatpass: ctx.request.body.repeatpass
 }
 let flag = 0;
 await userModel.findDataByName(user.name)
 .then(result => {
  console.log(result)
  if (result.length) {

   //处理err
   console.log('用户已存在')
   ctx.body = {
   code: 1
   };

  } else if (user.pass !== user.repeatpass || user.pass == '') {
  ctx.body = { //应把这个逻辑放到前端
   code: 2
  };
  } else {
  flag = 1;

  }
 })
 if(flag==1){
 let res = await userModel.insertData([user.name, md5(user.pass + 'asd&$BH&*') ])
 console.log(res.insertId)
 await userModel.findDataByName(user.name)
 .then((result)=>{

  // var res = JSON.parse(JSON.stringify(result))
  console.log(result[0]['avator'])
  ctx.session.id = res.insertId;
  ctx.session.user=user.name;
  ctx.session.avator = 'default.jpg';
  ctx.body = {
  code: 3
  };
  console.log('注册成功')
  })
 }
})
module.exports = router密码采用md5加密,注册后为用户创建session并将其添加到数据库,写完别忘了在最后加上module.exports = router将接口暴露出来。
登录:signin.js
var router = require('koa-router')();
var userModel = require('../lib/mysql.js')
var md5 = require('md5')
router.post('/signin', async(ctx, next) => {
 console.log(ctx.request.body)
 var name = ctx.request.body.username;
 var pass = ctx.request.body.pass;
 await userModel.findDataByName(name)
 .then(result => {
  var res = JSON.parse(JSON.stringify(result))
  if (name === res[0]['name']&&(md5(pass + 'asd&$BH&*') === res[0]['pass'])) {
   console.log('登录成功')
   ctx.body = {
   code: 1,
   }

   ctx.session.user = res[0]['name']
   ctx.session.id = res[0]['id']
   ctx.session.avator = res[0]['avator']
  }else if(md5(pass + 'asd&$BH&*') != res[0]['pass']){
  ctx.body = {
   code: 2 //密码错误
  }
  }
 }).catch(err => {
  ctx.body = {
  code: 3 //账号不存在+
  }
  console.log('用户名或密码错误!')
 })
})
module.exports = router退出登录:signout.js
//使用新建的路由文件
//登录
app.use(require('./routers/signin.js').routes())
//注册
app.use(require('./routers/signup.js').routes())
//退出登录
app.use(require('./routers/signout.js').routes())登录注册完成,由于学习繁忙,内容只能一点一点写了,后续内容持续更新。
相信看了本文案例你已经掌握了方法,更多精彩请关注php中文网其它相关文章!
推荐阅读:
The above is the detailed content of How to build a forum with mysql+bootstrap. For more information, please follow other related articles on the PHP Chinese website!

Hot AI Tools

Undresser.AI Undress
AI-powered app for creating realistic nude photos

AI Clothes Remover
Online AI tool for removing clothes from photos.

Undress AI Tool
Undress images for free

Clothoff.io
AI clothes remover

Video Face Swap
Swap faces in any video effortlessly with our completely free AI face swap tool!

Hot Article
Hot Tools

Notepad++7.3.1
Easy-to-use and free code editor

SublimeText3 Chinese version
Chinese version, very easy to use

Zend Studio 13.0.1
Powerful PHP integrated development environment

Dreamweaver CS6
Visual web development tools

SublimeText3 Mac version
God-level code editing software (SublimeText3)
Hot Topics


 How to quickly build a statistical chart system under the Vue framework
Aug 21, 2023 pm 05:48 PM
How to quickly build a statistical chart system under the Vue framework
Aug 21, 2023 pm 05:48 PM
How to quickly build a statistical chart system under the Vue framework. In modern web applications, statistical charts are an essential component. As a popular front-end framework, Vue.js provides many convenient tools and components that can help us quickly build a statistical chart system. This article will introduce how to use the Vue framework and some plug-ins to build a simple statistical chart system. First, we need to prepare a Vue.js development environment, including installing Vue scaffolding and some related plug-ins. Execute the following command in the command line
 Can buildings be built in the wild in Mistlock Kingdom?
Mar 07, 2024 pm 08:28 PM
Can buildings be built in the wild in Mistlock Kingdom?
Mar 07, 2024 pm 08:28 PM
Players can collect different materials to build buildings when playing in the Mistlock Kingdom. Many players want to know whether to build buildings in the wild. Buildings cannot be built in the wild in the Mistlock Kingdom. They must be within the scope of the altar. . Can buildings be built in the wild in Mistlock Kingdom? Answer: No. 1. Buildings cannot be built in the wild areas of the Mist Lock Kingdom. 2. The building must be built within the scope of the altar. 3. Players can place the Spirit Fire Altar by themselves, but once they leave the range, they will not be able to construct buildings. 4. We can also directly dig a hole in the mountain as our home, so we don’t need to consume building materials. 5. There is a comfort mechanism in the buildings built by players themselves, that is to say, the better the interior, the higher the comfort. 6. High comfort will bring attribute bonuses to players, such as
 Best practices and precautions for building a web server under CentOS 7
Aug 25, 2023 pm 11:33 PM
Best practices and precautions for building a web server under CentOS 7
Aug 25, 2023 pm 11:33 PM
Best practices and precautions for building web servers under CentOS7 Introduction: In today's Internet era, web servers are one of the core components for building and hosting websites. CentOS7 is a powerful Linux distribution widely used in server environments. This article will explore the best practices and considerations for building a web server on CentOS7, and provide some code examples to help you better understand. 1. Install Apache HTTP server Apache is the most widely used w
 Quickly install PyTorch in PyCharm: an easy guide
Feb 24, 2024 pm 09:54 PM
Quickly install PyTorch in PyCharm: an easy guide
Feb 24, 2024 pm 09:54 PM
PyTorch Installation Guide: Quickly set up a development environment in PyCharm PyTorch is one of the most popular frameworks in the current field of deep learning. It has the characteristics of ease of use and flexibility, and is favored by developers. This article will introduce how to quickly set up the PyTorch development environment in PyCharm, so that you can start the development of deep learning projects. Step 1: Install PyTorch First, we need to install PyTorch. The installation of PyTorch usually needs to take into account the system environment
 How to build an account matrix? What are the functions of matrix construction?
Mar 23, 2024 pm 06:46 PM
How to build an account matrix? What are the functions of matrix construction?
Mar 23, 2024 pm 06:46 PM
In today's information-rich era, social media platforms have become the main way for people to obtain and share information. For individuals and enterprises, establishing an effective account network to achieve maximum dissemination of information and enhance influence has become an urgent challenge that needs to be solved. 1. How to build an account matrix? 1. Clarify the target audience. Before building an account matrix, the key is to clearly define the target audience and gain an in-depth understanding of their needs, interests, and consumption habits, so that a more targeted content strategy can be developed. 2. Choose the appropriate platform. According to the characteristics of the target group, choose the appropriate social media platform for layout. Currently, the mainstream social media platforms include Weibo, WeChat, Douyin, Kuaishou, etc. Each platform has its own unique user groups and communication characteristics, and the selection needs to be based on the actual situation.
 What's the best way to set up a Douyin account? What is the five-piece account creation kit?
Apr 02, 2024 am 09:52 AM
What's the best way to set up a Douyin account? What is the five-piece account creation kit?
Apr 02, 2024 am 09:52 AM
With the rapid development of mobile Internet, the short video application Douyin has become an indispensable part of people's daily lives. Having a popular Douyin account can not only attract the attention of fans, but also bring commercial value. So, how to set up the best Douyin account? 1. What is the best way to set up a Douyin account? 1. Clear positioning When creating a Douyin account, you must first clarify your positioning. Do you want to be a funny joker or a professional knowledge sharer? Clear positioning can help attract precise fans, thereby increasing the value of your account. 2. Account naming: A good account name can make fans remember you at a glance. The account name should be concise and clear, related to your positioning, and have a certain degree of creativity. Avoid using names that are too common to avoid confusion with others
 Network security reinforcement techniques for building web servers under CentOS 7
Aug 05, 2023 pm 01:12 PM
Network security reinforcement techniques for building web servers under CentOS 7
Aug 05, 2023 pm 01:12 PM
Network security reinforcement techniques for building web servers under CentOS7 The web server is an important part of the modern Internet, so it is very important to protect the security of the web server. By hardening network security, you can reduce risks and avoid potential attacks. This article will introduce network security reinforcement techniques commonly used when building web servers on CentOS7, and provide corresponding code examples. Update your system and software First, make sure your system and software are up to date. You can use the following command to update
 Is there a future for employment in clinical pharmacy at Harbin Medical University? (What are the employment prospects for clinical pharmacy at Harbin Medical University?)
Jan 02, 2024 pm 08:54 PM
Is there a future for employment in clinical pharmacy at Harbin Medical University? (What are the employment prospects for clinical pharmacy at Harbin Medical University?)
Jan 02, 2024 pm 08:54 PM
What are the employment prospects of clinical pharmacy at Harbin Medical University? Although the national employment situation is not optimistic, pharmaceutical graduates still have good employment prospects. Overall, the supply of pharmaceutical graduates is less than the demand. Pharmaceutical companies and pharmaceutical factories are the main channels for absorbing such graduates. The demand for talents in the pharmaceutical industry is also growing steadily. According to reports, in recent years, the supply-demand ratio for graduate students in majors such as pharmaceutical preparations and natural medicinal chemistry has even reached 1:10. Employment direction of clinical pharmacy major: After graduation, students majoring in clinical medicine can engage in medical treatment, prevention, medical research, etc. in medical and health units, medical research and other departments. Employment positions: Medical representative, pharmaceutical sales representative, sales representative, sales manager, regional sales manager, investment manager, product manager, product specialist, nurse
