
 Backend Development
PHP Tutorial
How to make the background image stretch and fill using css to avoid repeated display
Backend Development
PHP Tutorial
How to make the background image stretch and fill using css to avoid repeated display
How to make the background image stretch and fill using css to avoid repeated display

This article mainly introduces how to use css to stretch and fill the background image to avoid repeated display. It has a certain reference value. Now I share it with you. Friends in need can refer to it.
But css3 appears In the future, this duplicate display situation will be improved. The background-size attribute can make our previous hope of stretching and filling the background image come true. The specific usage method is as follows. Interested friends can refer to it. I hope it will be helpful to everyone.
How to make the background image stretch and fill, this question sounds simple. But I'm sorry to tell you. It's not as simple as we think.
For example, set a background in a container (body, p, span). The length and width of this background cannot be modified before CSS2.1.
So the actual result can only be displayed repeatedly, so the attributes repeat, repeat-x, repeat-y, and no-repeat appear. It is used to control the display of background images. So there are two types of background pictures:
1. A whole large picture, the size of which exactly matches the size of the area
2. A very small bar picture, After repeating, a very regular large picture background is formed.
But after the emergence of CSS3, this situation has been improved. The background-size property can make our previous wishes come true.
And this property can be used on firefox, chrome, and ie9.
The specific usage method is as follows:
Background image size (numeric representation):
#background-size{
background-size:200px 100px;
}Background image size (percentage representation):
#background-size2{
background-size:30% 60%;
}Background image size (expand the image proportionally to fill the element, that is, the cover value):
#background-size3{
background-size:cover;
}Background image size (expand the image proportionally to fit the size of the element, that is, the contain value):
#background-size4{
background-size:contain;
}Background image size (fill the element with the size of the image itself, that is, auto value):
#background-size5{
background-size:auto;
}The above is the entire content of this article, I hope it will be helpful to everyone's learning, please pay attention to PHP for more related content Chinese website!
Related recommendations:
About the ellipses that appear when CSS multi-line text overflows
About the use of the greater than symbol in CSS styles and Processing inheritance methods in Css
The above is the detailed content of How to make the background image stretch and fill using css to avoid repeated display. For more information, please follow other related articles on the PHP Chinese website!

Hot AI Tools

Undresser.AI Undress
AI-powered app for creating realistic nude photos

AI Clothes Remover
Online AI tool for removing clothes from photos.

Undress AI Tool
Undress images for free

Clothoff.io
AI clothes remover

Video Face Swap
Swap faces in any video effortlessly with our completely free AI face swap tool!

Hot Article
Hot Tools

Notepad++7.3.1
Easy-to-use and free code editor

SublimeText3 Chinese version
Chinese version, very easy to use

Zend Studio 13.0.1
Powerful PHP integrated development environment

Dreamweaver CS6
Visual web development tools

SublimeText3 Mac version
God-level code editing software (SublimeText3)
Hot Topics


 How to delete background image in win10 personalization settings
Dec 21, 2023 pm 02:31 PM
How to delete background image in win10 personalization settings
Dec 21, 2023 pm 02:31 PM
Every time the desktop background used in Win10 system will be displayed in the personalized background image in the settings, some users want to delete it, but don’t know how to do it. This article is about how to delete the personalized background image in Win10 shared by this site. View used desktop background images: 1. Click [right-click] on a blank space on the desktop, and select [Personalize] in the menu item that opens; 2. In the selection image in the background, you can view the desktop backgrounds you have used. Picture; delete the used desktop background picture: Note: This operation involves modifying the registry. Modifying the registry is risky. Please back up the data in advance. 1. Press the [Win+R] key combination at the same time to open the run window and enter [regedit] ] command, and then click [OK]; 2
 How to customize background image in Win11
Jun 30, 2023 pm 08:45 PM
How to customize background image in Win11
Jun 30, 2023 pm 08:45 PM
How to customize background image in Win11? In the newly released win11 system, there are many custom functions, but many friends do not know how to use these functions. Some friends think that the background image is relatively monotonous and want to customize the background image, but don’t know how to customize the background image. If you don’t know how to define the background image, the editor has compiled the steps to customize the background image in Win11 below. If you are interested If so, take a look below! Steps for customizing background images in Win11: 1. Click the win button on the desktop and click Settings in the pop-up menu, as shown in the figure. 2. Enter the settings menu and click Personalization, as shown in the figure. 3. Enter Personalization and click on Background, as shown in the picture. 4. Enter background settings and click to browse pictures
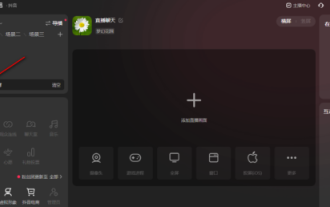 How to add a background image to Douyin Live Companion - How to add a background image to Douyin Live Companion
Mar 05, 2024 am 09:16 AM
How to add a background image to Douyin Live Companion - How to add a background image to Douyin Live Companion
Mar 05, 2024 am 09:16 AM
Many users who live broadcast on Douyin will use the Douyin Live Companion software, but do you know how to add a background image to the Douyin Live Companion? The following is the method of adding a background image to the Douyin Live Companion brought to you by the editor. If you are interested Users, please come and take a look below. First log in to Douyin Live Companion on your computer, and then enter the homepage. On the left, we select [Add Material] under [Scene 1]. Next, there will be a window to add materials on the page. We can directly select the [Picture] function and click to enter. We will then open a window where the image material is stored locally. We need to select the picture materials we want to add and then click the Open button in the lower right corner to add them. After adding the picture, we need to use the left mouse button to drag the picture to the appropriate
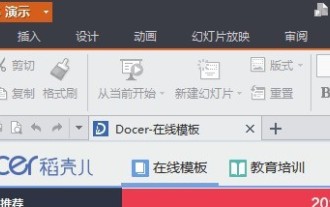
 How to uniformly replace ppt background images
Mar 25, 2024 pm 04:16 PM
How to uniformly replace ppt background images
Mar 25, 2024 pm 04:16 PM
The unified replacement of PPT background images is an important operation to improve the visual style of presentations, and can be achieved through two main methods: slide master replacement and batch replacement. Slide master replacement involves deleting the original image and inserting a new image in the master, thereby applying to all slides. The batch replacement function directly replaces the background images of all slides in the presentation. A unified background image not only enhances your presentation but also enhances your audience's focus. It is important to choose high-quality images that are consistent with the theme, and you should pay attention to adjusting details such as transparency and size. In addition, PPT also provides rich background setting options, such as gradients, textures and patterns, which can be customized according to needs.
 Introduction to setting background images in WPS Office 2016
Mar 29, 2024 pm 10:21 PM
Introduction to setting background images in WPS Office 2016
Mar 29, 2024 pm 10:21 PM
1. Start the WPS demonstration, as shown in the figure. 2. Click the [+] button to create a new slide, as shown in the figure. 3. Right-click and select [Background], as shown in the figure. 4. In the fill options on the [Object Properties] page, select [Picture or Texture Fill], as shown in the figure. 5. In the image source, click Local File[, as shown in the figure. 6. In the dialog box, select the picture you want to insert, and click the ] to open the [ button, as shown in the example. 7. This completes the background image setting for the WPS demonstration. The effect is as shown in the picture.
 How to set ppt background picture
Mar 25, 2024 pm 04:12 PM
How to set ppt background picture
Mar 25, 2024 pm 04:12 PM
Setting a PPT background image can add visual effect and appeal to your presentation. This tutorial details how to choose the right image, set up a background image, and adjust it to match the content of your presentation. By following this guide, you can easily create impressive background images for PPT and enhance the overall effect of your presentation.
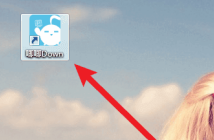 How to change the background image in Chi Chi Down? How to change the background image in Chi Chi Down
Mar 04, 2024 pm 03:30 PM
How to change the background image in Chi Chi Down? How to change the background image in Chi Chi Down
Mar 04, 2024 pm 03:30 PM
Presumably all the users here are familiar with Chirp Down software, but do you know how to change the background image of Chirp Down? The article brought to you in this chapter is how to change the background image of Chirp Down. For those who are interested, please read the following article Take a look. Click the "Chirp Down" icon on the computer desktop to open the software. Enter the main interface of Chi Chi Down and click Settings. In settings, pull the progress bar all the way down. (As shown below) Under Advanced Functions, click Customize Background Image. Find the background image you like in the computer file and click to open it.
 How to set all applications for ppt background image
Jan 07, 2021 pm 04:58 PM
How to set all applications for ppt background image
Jan 07, 2021 pm 04:58 PM
Setting method: 1. Open the PPT file that needs to be edited; 2. Click the "Object Properties" button to open the "Object Properties" menu, set "Fill" to "Picture or Texture Fill", and then click "Please select a picture" ” and select “Local Upload”; 3. Select the background image and click the “Open” button; 4. Click the “Apply to All” button.
