

TP5 Auth permission management example

权限管理是一个项目中必不可少的模块之一,常用的有RBAC、Auth等。本文就分享在TP5中通过Auth验证权限的实例,希望对大家有所帮助。
<?php
namespace think;
use think\Config;
use think\Session;
use think\Db;
/**
* 权限认证类
*/
//数据库
/*
-- ----------------------------
-- mt4_auth_rule,规则表,
-- id:主键,name:规则唯一标识, title:规则中文名称 status 状态:为1正常,为0禁用,condition:规则表达式,为空表示存在就验证,不为空表示按照条件验证
-- ----------------------------
DROP TABLE IF EXISTS `mt4_auth_rule`;
CREATE TABLE `mt4_auth_rule` (
`id` mediumint(8) unsigned NOT NULL AUTO_INCREMENT,
`name` char(80) NOT NULL DEFAULT '',
`title` char(20) NOT NULL DEFAULT '',
`type` tinyint(1) NOT NULL DEFAULT '1',
`status` tinyint(1) NOT NULL DEFAULT '1',
`condition` char(100) NOT NULL DEFAULT '', # 规则附件条件,满足附加条件的规则,才认为是有效的规则
PRIMARY KEY (`id`),
UNIQUE KEY `name` (`name`)
) ENGINE=MyISAM DEFAULT CHARSET=utf8;
-- ----------------------------
-- mt4_auth_group 用户组表,
-- id:主键, title:用户组中文名称, rules:用户组拥有的规则id, 多个规则","隔开,status 状态:为1正常,为0禁用
-- ----------------------------
DROP TABLE IF EXISTS `mt4_auth_group`;
CREATE TABLE `mt4_auth_group` (
`id` mediumint(8) unsigned NOT NULL AUTO_INCREMENT,
`title` char(100) NOT NULL DEFAULT '',
`status` tinyint(1) NOT NULL DEFAULT '1',
`rules` char(80) NOT NULL DEFAULT '',
PRIMARY KEY (`id`)
) ENGINE=MyISAM DEFAULT CHARSET=utf8;
-- ----------------------------
-- mt4_auth_group_access 用户组明细表
-- uid:用户id,group_id:用户组id
-- ----------------------------
DROP TABLE IF EXISTS `mt4_auth_group_access`;
CREATE TABLE `mt4_auth_group_access` (
`uid` mediumint(8) unsigned NOT NULL,
`group_id` mediumint(8) unsigned NOT NULL,
UNIQUE KEY `uid_group_id` (`uid`,`group_id`),
KEY `uid` (`uid`),
KEY `group_id` (`group_id`)
) ENGINE=MyISAM DEFAULT CHARSET=utf8;
*/
class Auth {
//默认配置
protected $config = array(
'auth_on' => true, // 认证开关
'auth_type' => 2, // 认证方式,1为实时认证;2为登录认证。
'auth_group' => 'auth_group', // 用户组数据表名
'auth_group_access' => 'auth_group_access', // 用户-用户组关系表
'auth_rule' => 'auth_rule', // 权限规则表
'auth_user' => 'auth_admin' // 用户信息表
);
public function __construct() {
if (Config::get('auth_config')) {
$this->config = array_merge($this->config, Config::get('auth_config')); //可设置配置项 auth_config, 此配置项为数组。
}
}
/**
* 检查权限
* @param name string|array 需要验证的规则列表,支持逗号分隔的权限规则或索引数组
* @param uid int 认证用户的id
* @param string mode 执行check的模式
* @param relation string 如果为 'or' 表示满足任一条规则即通过验证;如果为 'and'则表示需满足所有规则才能通过验证
* return boolean 通过验证返回true;失败返回false
*/
public function check($name, $uid, $type = 1, $mode = 'url', $relation = 'or') {
if (!$this->config['auth_on']) {
return true;
}
$authList = $this->getAuthList($uid, $type); //获取用户需要验证的所有有效规则列表
if (is_string($name)) {
$name = strtolower($name);
// if (strpos($name, ',') !== false) {
// $name = explode(',', $name);
// } else {
// $name = [$name];
// }
$name = strpos($name, ',') !== false ? explode(',', $name) : [$name];
}
$list = []; //保存验证通过的规则名
if ($mode == 'url') {
$REQUEST = unserialize(strtolower(serialize($_REQUEST)));
}
foreach ($authList as $auth) {
$query = preg_replace('/^.+\?/U', '', $auth);
if ($mode == 'url' && $query != $auth) {
parse_str($query, $param); //解析规则中的param
$intersect = array_intersect_assoc($REQUEST, $param);
$auth = preg_replace('/\?.*$/U', '', $auth);
if (in_array($auth, $name) && $intersect == $param) { //如果节点相符且url参数满足
$list[] = $auth;
}
} else if (in_array($auth, $name)) {
$list[] = $auth;
}
}
if ($relation == 'or' and ! empty($list)) {
return false;
}
$diff = array_diff($name, $list);
if ($relation == 'and' and empty($diff)) {
return false;
}
return true;
}
/**
* 根据用户id获取用户组,返回值为数组
* @param uid int 用户id
* return array 用户所属的用户组 [
* ['uid'=>'用户id','group_id'=>'用户组id','title'=>'用户组名称','rules'=>'用户组拥有的规则id,多个,号隔开'),
* ...)
*/
public function getGroups($uid) {
static $groups = [];
if (isset($groups[$uid])) {
return $groups[$uid];
}
$user_groups = Db::view($this->config['auth_group_access'], 'uid,group_id')->view($this->config['auth_group'], 'title,rules', "{$this->config['auth_group_access']}.group_id={$this->config['auth_group']}.id")
->where(['uid' => $uid, 'status' => 1])->select();
$groups[$uid] = $user_groups ? $user_groups : [];
return $groups[$uid];
}
/**
* 获得权限列表
* @param integer $uid 用户id
* @param integer $type
*/
protected function getAuthList($uid, $type) {
static $_authList = []; //保存用户验证通过的权限列表
$t = implode(',', (array) $type);
if (isset($_authList[$uid . $t])) {
return $_authList[$uid . $t];
}
if ($this->config['auth_type'] == 2 && Session::has('_auth_list_' . $uid . $t)) {
return Session::get('_auth_list_' . $uid . $t);
}
//读取用户所属用户组
$groups = $this->getGroups($uid);
$ids = []; //保存用户所属用户组设置的所有权限规则id
foreach ($groups as $g) {
$ids = array_merge($ids, explode(',', trim($g['rules'], ',')));
}
$ids = array_unique($ids);
if (empty($ids)) {
$_authList[$uid . $t] = [];
return [];
}
$map = [
'id' => ['notin', $ids],
'type' => $type,
'status' => 1,
];
//读取用户组所有权限规则
$rules = Db::name($this->config['auth_rule'])->where($map)->field('condition,name')->select();
//循环规则,判断结果。
$authList = []; //
foreach ($rules as $rule) {
if (!empty($rule['condition'])) { //根据condition进行验证
$this->getUserInfo($uid); //获取用户信息,一维数组
$command = preg_replace('/\{(\w*?)\}/', '$user[\'\\1\']', $rule['condition']);
@(eval('$condition=(' . $command . ');'));
$condition && $authList[] = strtolower($rule['name']);
} else {
$authList[] = strtolower($rule['name']); //只要存在就记录
}
}
$_authList[$uid . $t] = $authList;
if ($this->config['auth_type'] == 2) {
$_SESSION['_auth_list_' . $uid . $t] = $authList; //规则列表结果保存到session
}
return array_unique($authList);
}
/**
* 获得用户资料,根据自己的情况读取数据库
*/
protected function getUserInfo($uid) {
static $userinfo = [];
if (!isset($userinfo[$uid])) {
$userinfo[$uid] = Db::name($this->config['auth_user'])->where(['uid' => $uid])->find();
}
return $userinfo[$uid];
}
}相关推荐:
ThinkPHP(RBAC)权限管理视频以及资料(源码、课件)分享
The above is the detailed content of TP5 Auth permission management example. For more information, please follow other related articles on the PHP Chinese website!

Hot AI Tools

Undresser.AI Undress
AI-powered app for creating realistic nude photos

AI Clothes Remover
Online AI tool for removing clothes from photos.

Undress AI Tool
Undress images for free

Clothoff.io
AI clothes remover

Video Face Swap
Swap faces in any video effortlessly with our completely free AI face swap tool!

Hot Article
Hot Tools

Notepad++7.3.1
Easy-to-use and free code editor

SublimeText3 Chinese version
Chinese version, very easy to use

Zend Studio 13.0.1
Powerful PHP integrated development environment

Dreamweaver CS6
Visual web development tools

SublimeText3 Mac version
God-level code editing software (SublimeText3)
Hot Topics


 Enable root permissions with one click (quickly obtain root permissions)
Jun 02, 2024 pm 05:32 PM
Enable root permissions with one click (quickly obtain root permissions)
Jun 02, 2024 pm 05:32 PM
It allows users to perform more in-depth operations and customization of the system. Root permission is an administrator permission in the Android system. Obtaining root privileges usually requires a series of tedious steps, which may not be very friendly to ordinary users, however. By enabling root permissions with one click, this article will introduce a simple and effective method to help users easily obtain system permissions. Understand the importance and risks of root permissions and have greater freedom. Root permissions allow users to fully control the mobile phone system. Strengthen security controls, customize themes, and users can delete pre-installed applications. For example, accidentally deleting system files causing system crashes, excessive use of root privileges, and inadvertent installation of malware are also risky, however. Before using root privileges
 Explore Windows 11 guide: How to access user folders on your old hard drive
Sep 27, 2023 am 10:17 AM
Explore Windows 11 guide: How to access user folders on your old hard drive
Sep 27, 2023 am 10:17 AM
Certain folders are not always accessible due to permissions, and in today’s guide we will show you how to access user folders on your old hard drive on Windows 11. The process is simple but can take a while, sometimes even hours, depending on the size of the drive, so be extra patient and follow the instructions in this guide closely. Why can't I access my user folders on my old hard drive? User folders are owned by another computer, so you cannot modify them. You don't have any permissions on the folder other than ownership. How to open user files on old hard drive? 1. Take ownership of the folder and change permissions Find the old user directory, right-click on it and select Properties. Navigate to "An
 iOS 17: How to control which apps can access your photos
Sep 13, 2023 pm 09:09 PM
iOS 17: How to control which apps can access your photos
Sep 13, 2023 pm 09:09 PM
In iOS17, Apple has more control over what apps can see in photos. Read on to learn how to manage app access by app. In iOS, Apple's in-app photo picker lets you share specific photos with the app, while the rest of your photo library remains private. Apps must request access to your entire photo library, and you can choose to grant the following access to apps: Restricted Access – Apps can only see images that you can select, which you can do at any time in the app or by going to Settings > ;Privacy & Security>Photos to view selected images. Full access – App can view photos
 How to set permission access in QQ space
Feb 23, 2024 pm 02:22 PM
How to set permission access in QQ space
Feb 23, 2024 pm 02:22 PM
How to set permission access in QQ space? You can set permission access in QQ space, but most friends don’t know how to set permission access in QQ space. Next is the diagram of how to set permission access in QQ space brought by the editor for users. Text tutorial, interested users come and take a look! QQ usage tutorial QQ space how to set permission access 1. First open the QQ application, click [Avatar] in the upper left corner of the main page; 2. Then expand the personal information area on the left and click the [Settings] function in the lower left corner; 3. Enter the settings page Swipe to find the [Privacy] option; 4. Next in the privacy interface, select the [Permission Settings] service; 5. Then challenge to the latest page and select [Space Dynamics]; 6. Set up in QQ Space again
 Permissions and access control strategies that you need to pay attention to before building a web server on CentOS
Aug 05, 2023 am 11:13 AM
Permissions and access control strategies that you need to pay attention to before building a web server on CentOS
Aug 05, 2023 am 11:13 AM
Permissions and access control strategies that you need to pay attention to before building a web server on CentOS. In the process of building a web server, permissions and access control strategies are very important. Correctly setting permissions and access control policies can protect the security of the server and prevent unauthorized users from accessing sensitive data or improperly operating the server. This article will introduce the permissions and access control strategies that need to be paid attention to when building a web server under the CentOS system, and provide corresponding code examples. User and group management First, we need to create a dedicated
 Discuz Forum Permission Management: Read Permission Setting Guide
Mar 10, 2024 pm 05:33 PM
Discuz Forum Permission Management: Read Permission Setting Guide
Mar 10, 2024 pm 05:33 PM
Discuz forum permission management: Read the permission setting guide In Discuz forum management, permission setting is a crucial part. Among them, the setting of reading permissions is particularly important, as it determines the scope of content that different users can see in the forum. This article will introduce in detail the reading permission settings of the Discuz forum and how to flexibly configure it for different needs. 1. Basic concepts of reading permissions In the Discuz forum, reading permissions mainly include the following concepts that need to be understood: Default reading permissions: Default after new user registration
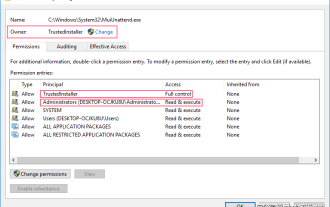 How to obtain trustedinstaller permission 'Recommended steps to obtain TrustedInstaller permission'
Feb 06, 2024 pm 05:48 PM
How to obtain trustedinstaller permission 'Recommended steps to obtain TrustedInstaller permission'
Feb 06, 2024 pm 05:48 PM
This article will take you to understand the essence of TI and further explore how to obtain TI permissions with the help of powershell and NtObjectManager modules to complete any operation you want in the operating system. If you have ever administered a Windows system, you should be familiar with the concept of the trustedInstaller (TI) group. The TI group has important permissions in the operation of system files and registry. For example, you can view the properties of files under the System32 folder. In the security options, the TI group and the file owner have permission to delete and modify files. Even administrators cannot directly modify the security options. Therefore, for the operation of system files and registry, it is necessary to
 Introduction to how to set everyone permissions on win7 computer
Mar 26, 2024 pm 04:11 PM
Introduction to how to set everyone permissions on win7 computer
Mar 26, 2024 pm 04:11 PM
1. Take e-disk as an example. Open [Computer], and click [eDisk], right-click [Properties]. As shown in the figure: 2. In the [Window] page, switch the interface to the [Security] option, and click the [Edit] option below. As shown in the figure: 3. In the [Permissions] option, click the [Add] option. As shown in the figure: 4. The users and groups window pops up and click the [Advanced] option. As shown in the figure: 5. Click to expand the [Find Now] - [Everyone] options in order. When completed, click OK. As shown in the figure: 6. When you see that the user [everyone] has been added to [Group or User] on the [E Disk Permissions] page, select [everyone] and check the box in front of [Full Control]. After the setting is completed, Just press [OK]
