
 Backend Development
PHP Tutorial
Practical tutorial on developing WeChat mini programs using WordPress
Backend Development
PHP Tutorial
Practical tutorial on developing WeChat mini programs using WordPress
Practical tutorial on developing WeChat mini programs using WordPress
Abstract: This article is the second article in the series of "WordPress Developing WeChat Mini Programs". This article records the process of developing the v1.1 version of the "DeveWork+" mini program. As always, the target audience is front-end students who know WordPress. It is recommended to read the first article before reading this article. If you haven't read this mini program...
This article is the second in the series of "WordPress Developing WeChat Mini Programs". This article records the development of the "DeveWork+" mini program v1. 1 version of the process. As always, the target audience is front-end students who know WordPress. It is recommended to read the first article before reading this article.
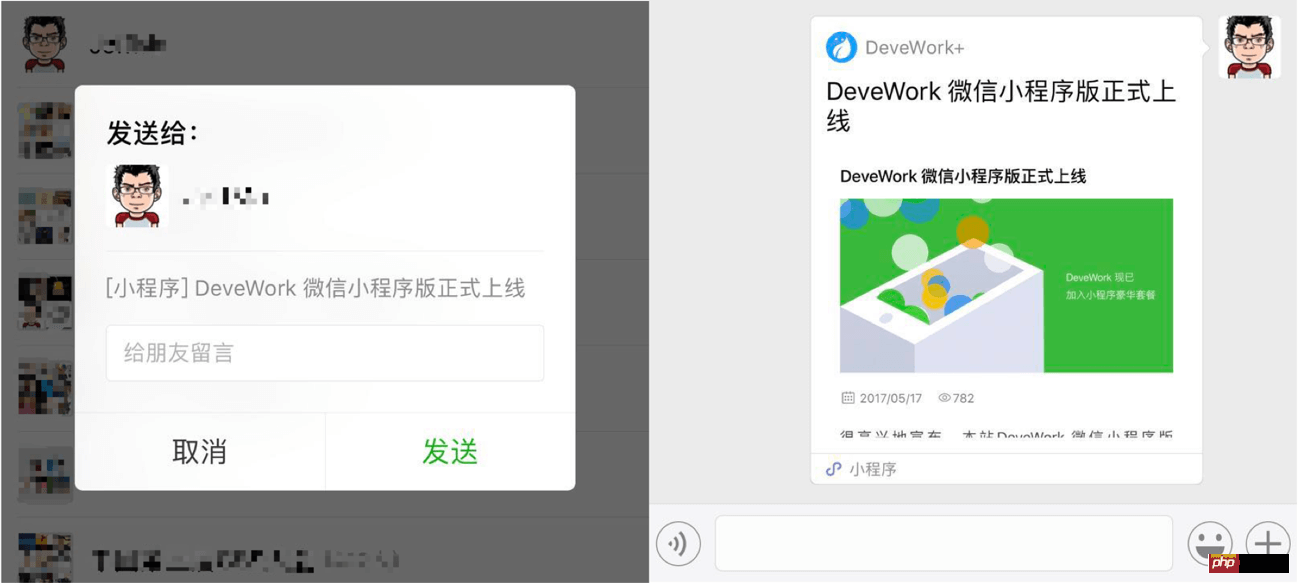
If you have not seen this mini program, you can enter the experience through the following mini program code. Note that when reading the article, the version you scanned may not be v1.1.

"DeveWork+" applet v1.1 version has a lot of updates, here are some meaningful records Down. Please note that the content of this article is unfolded slightly differently from the previous article. Each chapter is a change point, and refer to the developer tool update history of the WeChat applet and use A (Add), F (Fix), and U (Update) as the beginning of the subtitle.

A: New "Topic" section
1.1 version adds a "Topic" Tab and related pages (as shown above). "Topics" are equivalent to WordPress catalog articles. The entrance page is three rounded-corner cards with graphics and text, and the layout is very simple. Pass relevant information to the click event function through data-xx and id.
<view class="featured-item" data-title="WordPress" id="2" catchtap="redictCatArchive">      "{{featuredImg.one}}" mode="widthFix" class="featured-img">
      <view class="featured-content">
        <view class="featured-title">WordPressview>class="featured-desc">有关WordPress 的高级使用技巧view>
view> After configuring tabBar in app.json, when the page to be jumped is located in the tabBar configuration, wx.navigateTo, wx.redirectTo cannot be used - that is, wx.navigateTo, wx.redirectTo cannot jump to the tab page.
 A : Join MTA (Tencent Mobile Analytics) mini program data statistics
When the 1.0 version was developed, the data statistics that came with the mini program were not very powerful, so we decided to use a third-party data statistics service. In addition to being a bonus for Tencent, MTA attracts me because of its “custom event” function, which allows me to obtain relevant data analysis based on my personal needs. For example, the following events configured by Jeff let me know which articles are popular, which users operate more frequently, etc.
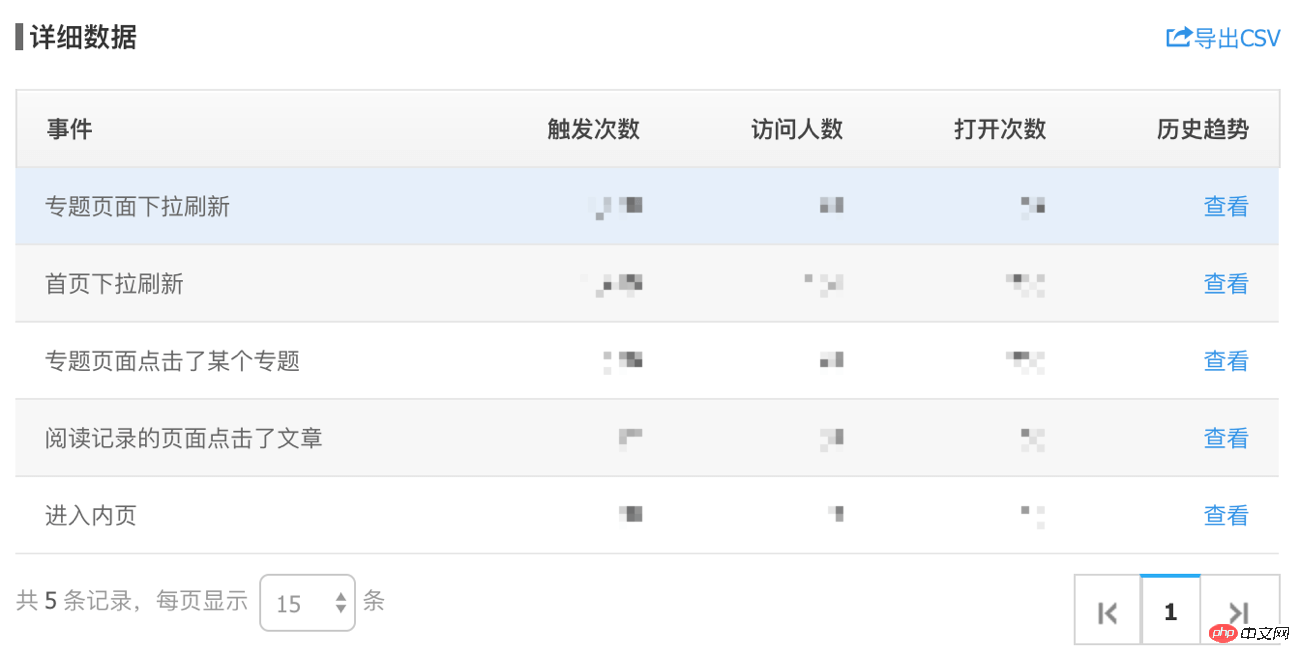 #The steps for using MTA will not be repeated here. After all, the official has more detailed documents.
A: Increase the number of article views and add the Font Icon
Same as the website, add the number of article views information, and add the Font to the article publishing time and browser information icon.
The article views information is displayed in the REST API by default, so the WordPress REST API needs to be customized; the Font Icon directly uses the same Icon as the website. Because the mini program does not support local font files, gulp-inline-base64 is used. This type of plug-in converts the ttf font file into a base64 address, and then uses it like normal web development.
U: Encapsulate Promise to facilitate writing code
Although the WeChat applet officially supports ES6, Jeff felt a little bit stuck after using Promise. So I used a third-party encapsulated Promise to avoid the disgusting code "callback hell".
This library also encapsulates the Request function of the mini program. After loading the relevant files, rewrite the original function to obtain the article list. The relevant code modifications are as follows:
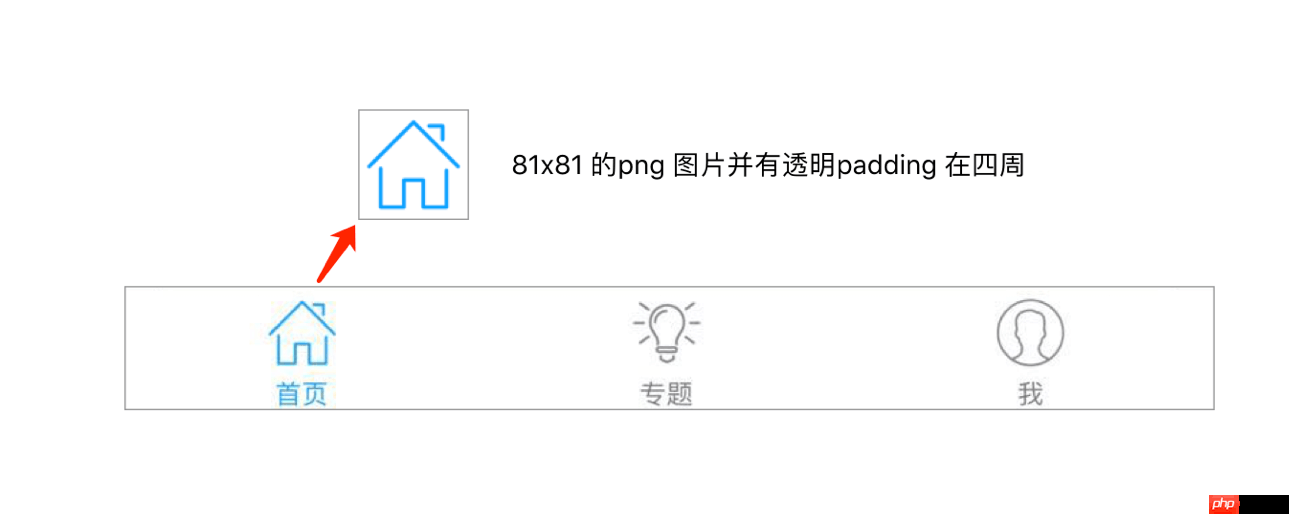
上一篇的“踩坑篇”中有提及 TabBar Icon 的坑点,这次伴随着更新将图标全部都换了,配合整体风格采用了更加细的线型图标。推荐一个下载这类图标的站点:http://www.flaticon.com/。 下载的图标还是做了些处理:根据官方推荐处理为81x81 大小,并增加占位透明 padding 为了让icon 在真机上看起来没那么大。 之前第一版是没有做加载完毕的处理的,因为那时候感觉300多篇文章应该没人去下拉完(事实上我也从来没有拉到底过)。但现在加上了“专题”板块后就有可能了所以需要兼容下文章列表已经加载完毕的情况。 Jeff 的处理方式是添加一个 然后在WXML 文件中加入一个提示://https://devework.com/wordpress-weapp-2.htmlvar postsRequest = wxRequest.getRequest(api.getPosts(data));
postsRequest.then(res => {
self.setData({ noMore: res.data.length == 0, postsList:
// 细节代码略 })
.finally(function (res) { console.log('Index:finally~') // 细节代码略})U:更换TabBar Icon,增加空白占位
F:下拉加载,文章已经完全load 完的处理
noMore 参数,然后默认为false。当请求API 后检测数据长度,为0 就表示文章列表已经加载完全,noMore变为true。<view class="entry-empty" hidden="{{!noMore}}">·· 无更多文章 ··view>
这种处理方式其实不怎么好,待后续优化。
F:考虑用户体验,授权失败的优雅处理
这里我单独写了一篇文章,请参考《提升用户体验,小程序“授权失败”场景优雅处理方案》。
结尾
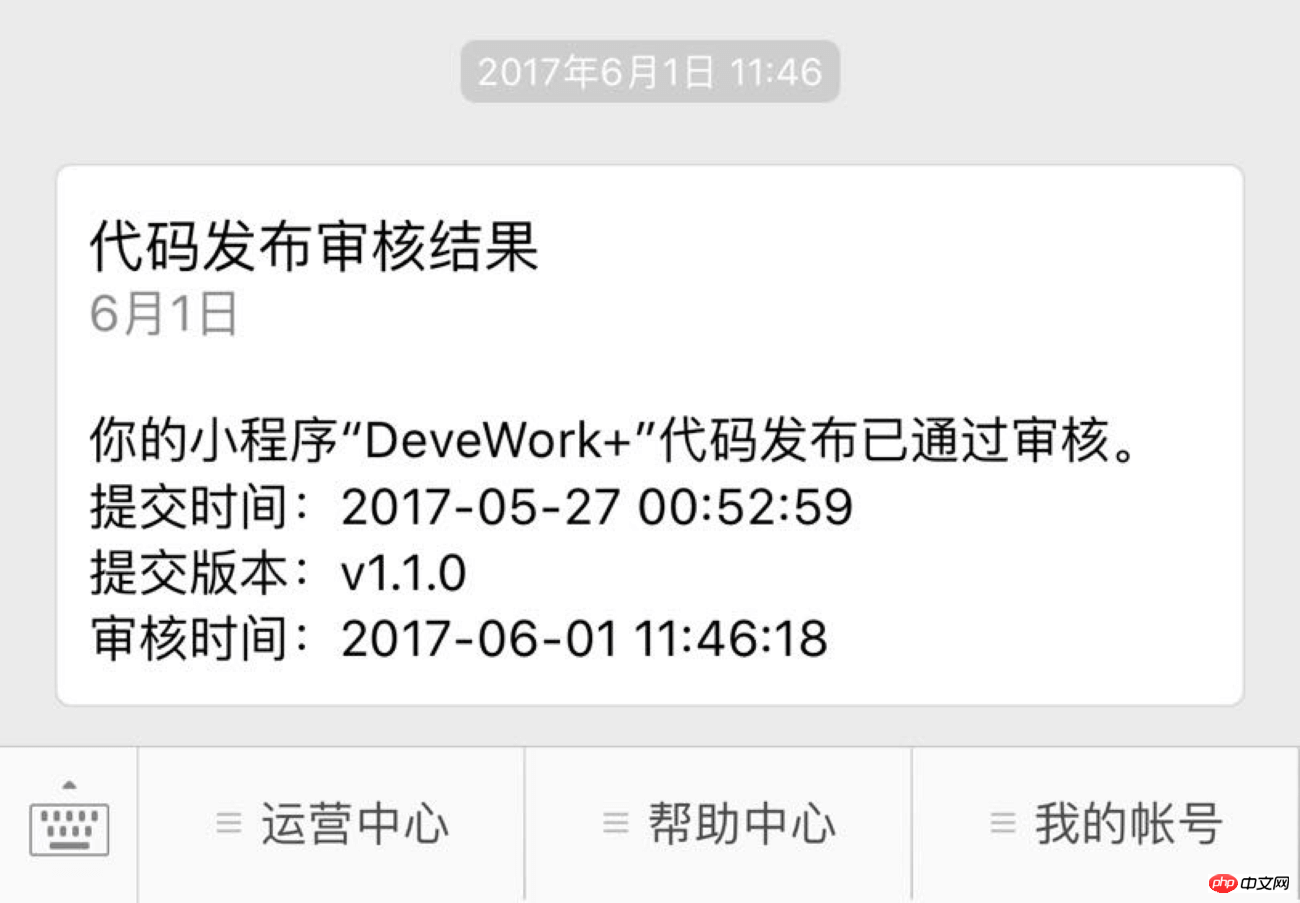
以上就是1.1 版本的主要更新内容。1.1 版本的审核刚好在端午节前后,所以实质花了不少时间。
The above is the detailed content of Practical tutorial on developing WeChat mini programs using WordPress. For more information, please follow other related articles on the PHP Chinese website!

Hot AI Tools

Undresser.AI Undress
AI-powered app for creating realistic nude photos

AI Clothes Remover
Online AI tool for removing clothes from photos.

Undress AI Tool
Undress images for free

Clothoff.io
AI clothes remover

Video Face Swap
Swap faces in any video effortlessly with our completely free AI face swap tool!

Hot Article
Hot Tools

Notepad++7.3.1
Easy-to-use and free code editor

SublimeText3 Chinese version
Chinese version, very easy to use

Zend Studio 13.0.1
Powerful PHP integrated development environment

Dreamweaver CS6
Visual web development tools

SublimeText3 Mac version
God-level code editing software (SublimeText3)
Hot Topics


 How to adjust the wordpress article list
Apr 20, 2025 am 10:48 AM
How to adjust the wordpress article list
Apr 20, 2025 am 10:48 AM
There are four ways to adjust the WordPress article list: use theme options, use plugins (such as Post Types Order, WP Post List, Boxy Stuff), use code (add settings in the functions.php file), or modify the WordPress database directly.
 What are the plugins for wordpress blocking ip
Apr 20, 2025 am 08:27 AM
What are the plugins for wordpress blocking ip
Apr 20, 2025 am 08:27 AM
WordPress IP blocking plugin selection is crucial. The following types can be considered: based on .htaccess: efficient, but complex operation; database operation: flexible, but low efficiency; firewall: high security performance, but complex configuration; self-written: highest control, but requires more technical level.
 How to write a header of a wordpress
Apr 20, 2025 pm 12:09 PM
How to write a header of a wordpress
Apr 20, 2025 pm 12:09 PM
The steps to create a custom header in WordPress are as follows: Edit the theme file "header.php". Add your website name and description. Create a navigation menu. Add a search bar. Save changes and view your custom header.
 How to cancel the editing date of wordpress
Apr 20, 2025 am 10:54 AM
How to cancel the editing date of wordpress
Apr 20, 2025 am 10:54 AM
WordPress editing dates can be canceled in three ways: 1. Install the Enable Post Date Disable plug-in; 2. Add code in the functions.php file; 3. Manually edit the post_modified column in the wp_posts table.
 How to change the head image of the wordpress theme
Apr 20, 2025 am 10:00 AM
How to change the head image of the wordpress theme
Apr 20, 2025 am 10:00 AM
A step-by-step guide to replacing a header image of WordPress: Log in to the WordPress dashboard and navigate to Appearance >Theme. Select the topic you want to edit and click Customize. Open the Theme Options panel and look for the Site Header or Header Image options. Click the Select Image button and upload a new head image. Crop the image and click Save and Crop. Click the Save and Publish button to update the changes.
 What to do if there is an error in wordpress
Apr 20, 2025 am 11:57 AM
What to do if there is an error in wordpress
Apr 20, 2025 am 11:57 AM
WordPress Error Resolution Guide: 500 Internal Server Error: Disable the plug-in or check the server error log. 404 Page not found: Check permalink and make sure the page link is correct. White Screen of Death: Increase the server PHP memory limit. Database connection error: Check the database server status and WordPress configuration. Other tips: enable debug mode, check error logs, and seek support. Prevent errors: regularly update WordPress, install only necessary plugins, regularly back up your website, and optimize website performance.
 WordPress website account login
Apr 20, 2025 am 09:06 AM
WordPress website account login
Apr 20, 2025 am 09:06 AM
To log in to a WordPress website account: Visit the login page: Enter the website URL plus "/wp-login.php". Enter your username and password. Click "Login". Verification Two-step Verification (optional). After successfully logging in, you will see the website dashboard.
 How to display wordpress comments
Apr 20, 2025 pm 12:06 PM
How to display wordpress comments
Apr 20, 2025 pm 12:06 PM
Enable comments in WordPress website: 1. Log in to the admin panel, go to "Settings" - "Discussions", and check "Allow comments"; 2. Select a location to display comments; 3. Customize comments; 4. Manage comments, approve, reject or delete; 5. Use <?php comments_template(); ?> tags to display comments; 6. Enable nested comments; 7. Adjust comment shape; 8. Use plugins and verification codes to prevent spam comments; 9. Encourage users to use Gravatar avatar; 10. Create comments to refer to
