
 Database
Mysql Tutorial
Example of Mycat read-write separation based on MySQL master-slave replication
Database
Mysql Tutorial
Example of Mycat read-write separation based on MySQL master-slave replication
Example of Mycat read-write separation based on MySQL master-slave replication

Today, I bring you an article about Mycat achieving read-write separation based on MySQL master-slave replication. What you need to note here is that MySQL’s master-slave replication relies on MySQL’s own master-slave replication mechanism, and Mycat is not responsible. MySQL's master-slave replication. For information about MySQL's master-slave replication configuration, you can refer to the blog post "MySQL - Master-Slave Replication Configuration". Okay, let's get into today's topic.
1. Environment
Operating system: CentOS-6.5-x86_64-bin-DVD1.iso
JDK version: jdk1.7.0_80
MyCat version: Mycat- server-1.5.1-RELEASE-20170717215510-linux.tar.gz (Download the source code and compile it yourself)
MyCat node IP: 192.168.209.133 Host name: liuyazhuang133 Host configuration: 4-core CPU, 4G memory
MySQL version :mysql-5.6.32.tar.gz
Master node IP: 192.168.209.131 Host name: liuyazhuang131 Host configuration: 4-core CPU, 4G memory
Slave node IP: 192.168.209.132 Host name: liuyazhuang132 Host configuration: 4-core CPU, 4G memory
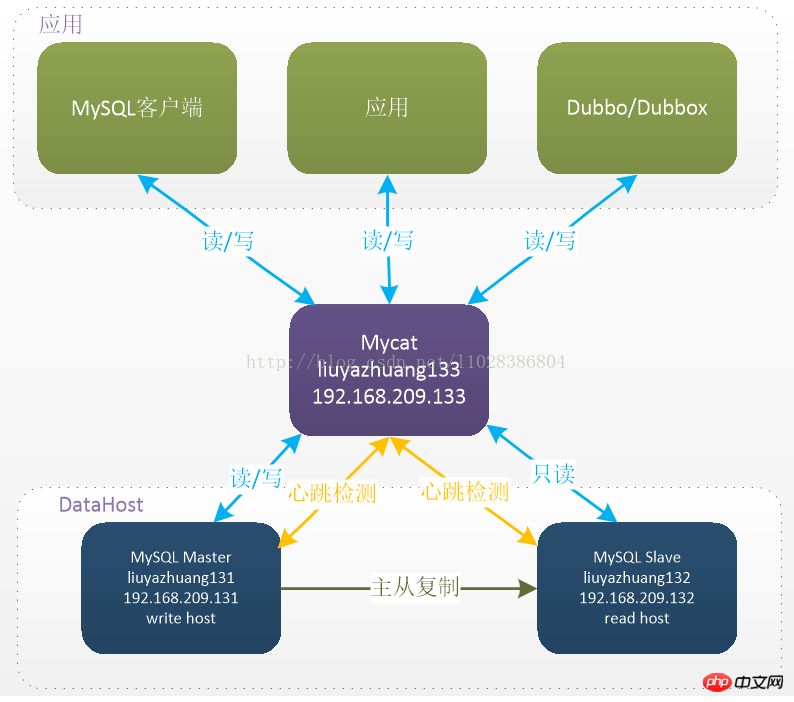
2. Introduction to MyCat (MyCat official website: http://mycat.io/)
MyCat’s read-write separation is based on the back-end MySQL cluster It is implemented through master-slave synchronization, and MyCat provides statement distribution function. MyCat 1.4 begins to support the read-write separation mechanism of MySQL master-slave replication state binding, making reading more secure and reliable.
3. Installation of MyCat
1. Set the host name of MyCat and the mapping between IP and host name
# vi /etc/sysconfig/network
NETWORKING=yes
HOSTNAME=liuyazhuang133
# vi /etc/hosts
127.0.0.1 liuyazhuang133
192.168.209.131 liuyazhuang131
192.168.209.132 liuyazhuang132
192.168.209.133 liuyazhuang133
2. Configure Java environment variables
Because MyCat is developed in Java, JDK needs to be installed to run MyCat (JRE is enough to be precise), and JDK1.7 or above is required
# vi /etc/profile
## java env
export JAVA_HOME=/usr/local/java/jdk1.7.0_80
export JRE_HOME=$JAVA_HOME/jre
export CLASSPATH=.:$JAVA_HOME/lib/dt.jar:$JAVA_HOME/lib/tools.jar:$JRE_HOME/lib/rt.jar
export PATH=$PATH:$JAVA_HOME/bin:$JRE_HOME/bin
# source /etc/profile
# java -version
3. Upload the installation package
Upload Mycat-server-1.5.1-RELEASE-20170717215510-linux.tar.gz to the /home/mycat directory in the MyCat server, unzip and Move to the /usr/local/mycat directory
$ tar -zxvf Mycat-server-1.5.1-RELEASE-20170717215510-linux.tar.gz
# mv /home/mycat/mycat  /usr/local/
# cd /usr/local/mycat/
# ll

# vi /etc/profile
## mycat env
export MYCAT_HOME=/usr/local/mycat
export PATH=$PATH:$MYCAT_HOME/bin
# source /etc/profile
Copy after login
4. Configure MyCat1. Confirm that MySQL master-slave replication is normal Before configuring MyCat, please confirm that the MySQL master-slave replication installation configuration has been completed and is running normally. The synchronization of MySQL master-slave data is configured in MySQL, and MyCat is not responsible for data synchronization issues. # vi /etc/profile ## mycat env export MYCAT_HOME=/usr/local/mycat export PATH=$PATH:$MYCAT_HOME/bin # source /etc/profile
Supplement:
(1) In the MySQL master-slave replication configuration, if it involves synchronous replication of functions or stored procedures, you need to add the configuration log_bin_trust_function_creators=true or in the [mysqld] section in /etc/my.cnf Set set global log_bin_trust_function_creators = 1 in the client;
(2) If you want to do a master-slave switch under read-write separation, the slave node may also become a write node, so the slave node cannot be set to read_only. =1.
(3) The Linux version of MySQL needs to be set to MySQL case insensitivity, otherwise the problem of table not being found may occur. You can add lower_case_table_names=1 in the [mysqld] section of /etc/my.cnf.
[root@liuyazhuang133 conf]$ cd /usr/local/root/conf/
[root@liuyazhuang133 conf]$ vi schema.xml
<?xml version="1.0"?>

<!DOCTYPE mycat:schema SYSTEM "schema.dtd">

<mycat:schema xmlns:mycat="http://org.opencloudb/">

      <!-- 定义MyCat的逻辑库,逻辑库的概念与MySQL中的 database 概念相同 -->

      <!-- schema name="rc_schema1" checkSQLschema="false" sqlMaxLimit="100" dataNode="rc_dn1"></schema -->

		<!--schema name="pay_schema1" checkSQLschema="false" sqlMaxLimit="100" dataNode="pay_dn1"></schema-->

      <schema name="lyz_schema1" checkSQLschema="false" sqlMaxLimit="100" dataNode="lyz_dn1"></schema>

      <schema name="lyz_schema2" checkSQLschema="false" sqlMaxLimit="100" dataNode="lyz_dn2"></schema>

		<!-- 其中checkSQLschema表明是否检查并过滤SQL中包含schema的情况,如逻辑库为 TESTDB,则可能写为select * from TESTDB.edu_user,此时会自动过滤TESTDB,SQL变为select * from edu_user,若不会出现上述写法,则可以关闭属性为false -->

		<!--sqlMaxLimit默认返回的最大记录数限制,MyCat1.4版本里面,用户的Limit参数会覆盖掉MyCat的sqlMaxLimit默认设置-->

      <!-- 定义MyCat的数据节点 -->

      <dataNode name="lyz_dn1" dataHost="dtHost2" database="lyzdb1" />

      <dataNode name="lyz_dn2" dataHost="dtHost2" database="lyzdb2" />

	<!-- dataNode 中的 name 数据表示节点名称, dataHost表示数据主机名称, database表示该节点要路由的数据库的名称 -->


      <!-- dataHost配置的是实际的后端数据库集群(当然,也可以是非集群) -->

      <!-- 注意:schema中的每一个dataHost中的host属性值必须唯一,否则会出现主从在所有dataHost中全部切换的现象 -->

      <!-- 定义数据主机dtHost1,只连接到MySQL读写分离集群中的Master节点,不使用MyCat托管MySQL主从切换 -->

      <!--

      <dataHost name="dtHost1" maxCon="500" minCon="20" balance="0"

           writeType="0" dbType="mysql" dbDriver="native" switchType="1" slaveThreshold="100">

           <heartbeat>select user()</heartbeat>

           <writeHost host="hostM1" url="192.168.1.205:3306" user="root" password="lyz" />

      </dataHost>

      -->

      <!-- 使用MyCat托管MySQL主从切换 -->

      <!-- 定义数据主机dtHost2,连接到MySQL读写分离集群,并配置了读写分离和主从切换 -->

      <dataHost name="dtHost2" maxCon="500" minCon="20" balance="1"

           writeType="0" dbType="mysql" dbDriver="native" switchType="2" slaveThreshold="100">

           <!-- 通过show slave status检测主从状态,当主宕机以后,发生切换,从变为主,原来的主变为从,这时候show slave status就会发生错误,因为原来的主没有开启slave,不建议直接使用switch操作,而是在DB中做主从对调。 -->

           <heartbeat>show slave status</heartbeat>

           <!-- can have multi write hosts -->

           <writeHost host="hostM2" url="192.168.209.131:3306" user="root" password="root" />

           <writeHost host="hostS2" url="192.168.209.132:3306" user="root" password="root" />

      </dataHost>

      <!-- 参数balance决定了哪些MySQL服务器参与到读SQL的负载均衡中 -->

		<!-- balance="0",为不开启读写分离,所有读操作都发送到当前可用的writeHost上-->

      <!-- balance="1",全部的readHost与stand by writeHost参与select语句的负载均衡-->

      <!-- balance="2",所有读操作都随机的在writeHost、readHost上分发-->

      <!-- MyCat1.4版本中,若想支持MySQL一主一从的标准配置,并且在主节点宕机的情况下,从节点还能读取数据,则需要在MyCat里配置为两个writeHost并设置balance="1" -->

      <!-- writeType="0",所有写操作都发送到可用的writeHost上 -->

      <!-- writeType="1",仅仅对于galera for mysql集群这种多主多节点都能写入的集群起效,此时Mycat会随机选择一个writeHost并写入数据,对于非galera for mysql集群,请不要配置writeType=1,会导致数据库不一致的严重问题 -->

</mycat:schema>MyCat heartbeat check statement is configured as show slave status, Two new attributes are defined on dataHost: switchType="2" and slaveThreshold="100". This means that the read-write separation and switching mechanism of MySQL master-slave replication status binding is enabled. The MyCat heartbeat mechanism detects the slave status in show slave
"Seconds_Behind_Master", "Slave_IO_Running", "Slave_SQL_Running" three fields to determine the current master-slave synchronization status and Seconds_Behind_Master master-slave replication delay. When Seconds_Behind_Master is greater than slaveThreshold, the read-write separation filter will filter out this Slave machine , to prevent reading old data from a long time ago. When the master node goes down, the switching logic will check whether Seconds_Behind_Master on the Slave is 0. If it is 0, it means that the master and slave are synchronized and can be switched safely. Otherwise, the switch will not happen.
[root@liuyazhuang133 conf]$ vi server.xml
<?xml version="1.0" encoding="UTF-8"?>

<!DOCTYPE mycat:server SYSTEM "server.dtd">

<mycat:server xmlns:mycat="http://org.opencloudb/">

      <system>

		<property name="defaultSqlParser">druidparser</property>

		<property name="charset">utf8mb4</property>

		  <!-- <property name="useCompression">1</property>-->

		  <!--1为开启mysql压缩协议-->

		  <!-- <property name="processorBufferChunk">40960</property> -->

		  <!--

		  <property name="processors">1</property>

		  <property name="processorExecutor">32</property>

		   -->

			   <!--默认是65535 64K 用于sql解析时最大文本长度 -->

			   <!--<property name="maxStringLiteralLength">65535</property>-->

			   <!--<property name="sequnceHandlerType">0</property>-->

			   <!--<property name="backSocketNoDelay">1</property>-->

			   <!--<property name="frontSocketNoDelay">1</property>-->

			   <!--<property name="processorExecutor">16</property>-->

			   <!-- <property name="mutiNodeLimitType">1</property> 0:开启小数量级(默认) ;1:开启亿级数据排序

					  <property name="mutiNodePatchSize">100</property> 亿级数量排序批量

					 <property name="processors">32</property> <property name="processorExecutor">32</property>

					 <property name="serverPort">8066</property> <property name="managerPort">9066</property>

					 <property name="idleTimeout">300000</property> <property name="bindIp">0.0.0.0</property>

					 <property name="frontWriteQueueSize">4096</property>

				<property name="processors">32</property>

			   -->

		  </system>

		  <!-- 用户1,对应的MyCat逻辑库连接到的数据节点对应的主机为MySQL主从复制配置中的Master节点,没实现读写分离,读写都在该Master节点中进行  -->

		  <!--

		  <user name="user1">

			   <property name="password">roncoo.1</property>

			   <property name="schemas">rc_schema1,pay_schema1</property>

		  </user>

		  -->

		  <!-- 用户2,对应的MyCat逻辑库连接到的数据节点对应的主机为主从复制集群,并通过MyCat实现了读写分离 -->

		  <user name="lyz">

			   <property name="password">lyz.123</property>

			   <property name="schemas">lyz_schema1,lyz_schema2</property>

		  </user>

		  <!-- 用户3,只读权限-->

		  <user name="userlyz">

			   <property name="password">lyz.123</property>

			   <property name="schemas">lyz_schema1,lyz_schema2</property>

			   <property name="readOnly">true</property>

		  </user>

</mycat:server>The management port is 9066, which is used to receive mycat monitoring commands, query mycat running status, reload configuration files, etc.
[root@liuyazhuang133 mycat]# vi /etc/sysconfig/iptables
## MyCat
-A INPUT -m state --state NEW -m tcp -p tcp --dport 8066 -j ACCEPT
-A INPUT -m state --state NEW -m tcp -p tcp --dport 9066 -j ACCEPT
[root@liuyazhuang133 mycat]# service iptables restart
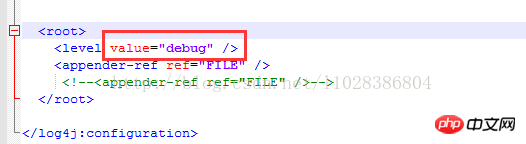
[root@liuyazhuang133 conf]$ vi /usr/local/mycat/conf/log4j.xml
6、启动root
[root@liuyazhuang133 bin]$ cd /usr/local/root/bin/
(1) 控制台启动,这种启动方式在控制台关闭后,root服务也将关闭,适合调试使用:
[root@liuyazhuang133 bin]$ ./root console
(2) 可以采用以下后台启动的方式:
[root@liuyazhuang133 bin]$ ./root start
Starting root-server...
(对应的,重启: root restart , 关闭: root stop )
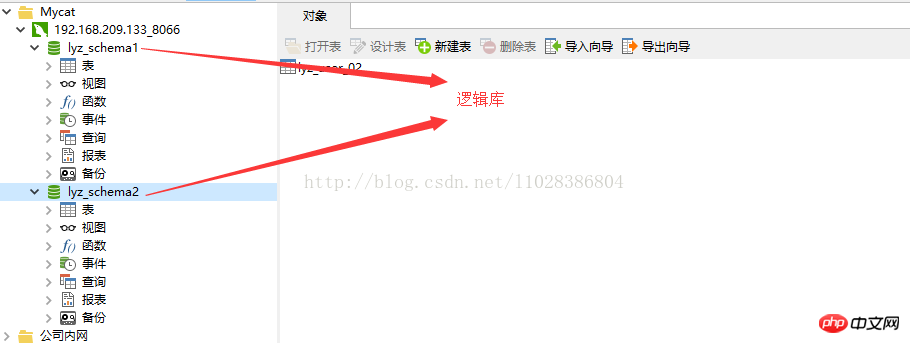
7、MyCat连接测试
(1) 如果本地Windows安装有MySQL,可以使用已有的mysql客户端远程操作Mycat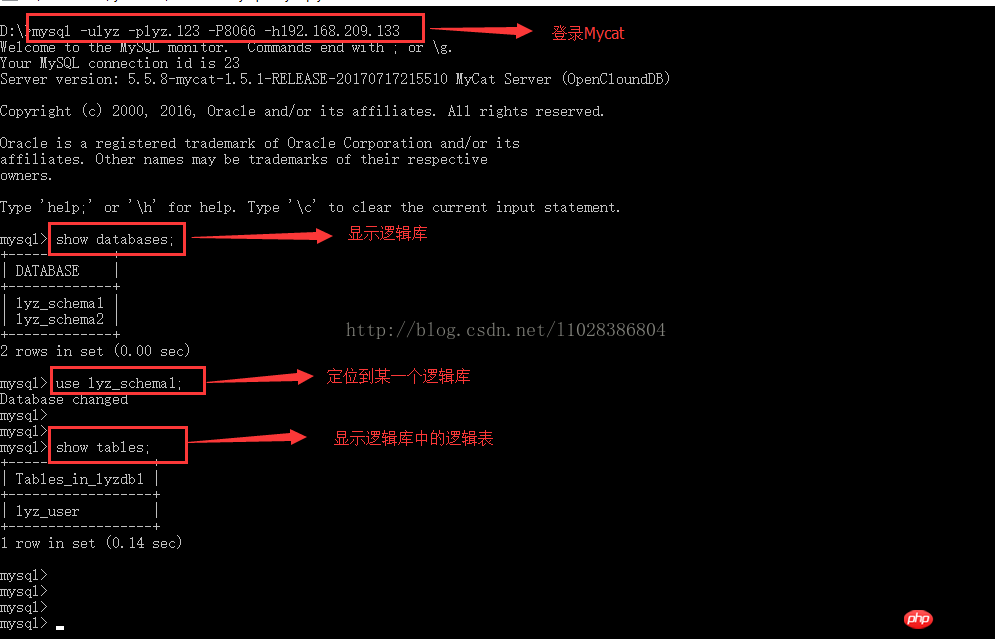
(2) Nativecat连接Mycat
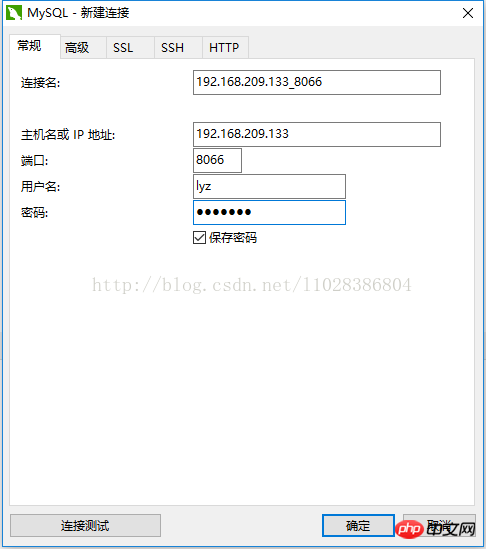
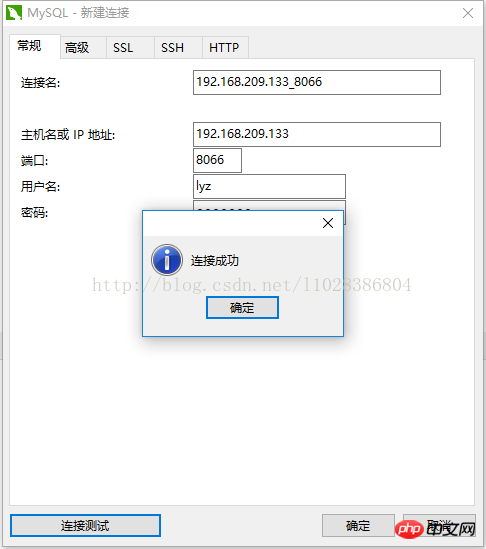
8、读写分离测试
(1) 监听MyCat日志
[root@liuyazhuang133 ~]$ cd /usr/local/mycat/logs/
[root@liuyazhuang133 logs]$ tail -f mycat.log
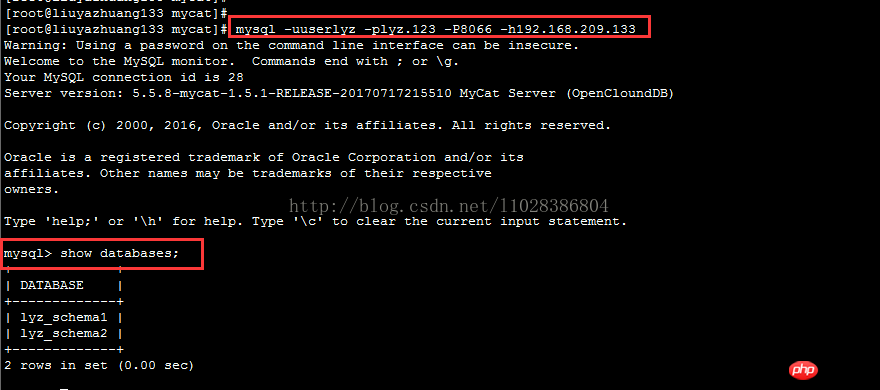
(2) 读测试
$ mysql -uuserlyz -plyz.123 -h192.168.209.233 -P8066
mysql> show databases;
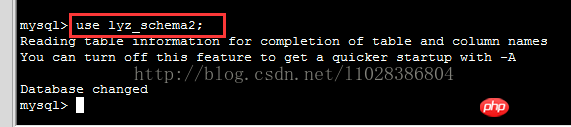
mysql> use lyz_schema2;
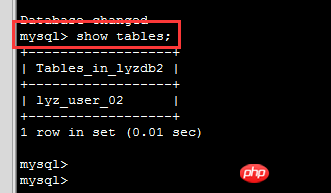
mysql> show tables;
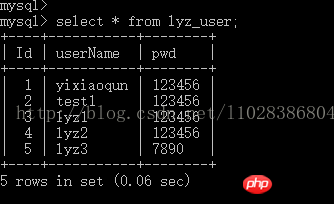
mysql> select * from lyz_user_02;
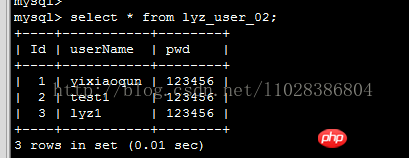
执行上面的查询语句,此时对应的MyCat日志信息如下:

多次执行 select * from lyz_user_02 语句,Mycat打印出来的日志信息显示读操作请求都是路由到Slave节点(192.168.209.132)
(2) 写测试
mysql> insert into lyz_user_02 (userName, pwd) values('liuyazhuang', 'lyz。123');

执行上面的新增插入语句后,此时对应的Mycat日志信息如下:

多次执行以上插入语句,发现新增数据都是从 Master节点(192.168.209.131)插进入的,并且Slave节点通过Binlog同步了Master节点中的数据。


综上,基于MyCat的读写分离集群配置成功。
The above is the detailed content of Example of Mycat read-write separation based on MySQL master-slave replication. For more information, please follow other related articles on the PHP Chinese website!

Hot AI Tools

Undresser.AI Undress
AI-powered app for creating realistic nude photos

AI Clothes Remover
Online AI tool for removing clothes from photos.

Undress AI Tool
Undress images for free

Clothoff.io
AI clothes remover

Video Face Swap
Swap faces in any video effortlessly with our completely free AI face swap tool!

Hot Article
Hot Tools

Notepad++7.3.1
Easy-to-use and free code editor

SublimeText3 Chinese version
Chinese version, very easy to use

Zend Studio 13.0.1
Powerful PHP integrated development environment

Dreamweaver CS6
Visual web development tools

SublimeText3 Mac version
God-level code editing software (SublimeText3)
Hot Topics


 MySQL: An Introduction to the World's Most Popular Database
Apr 12, 2025 am 12:18 AM
MySQL: An Introduction to the World's Most Popular Database
Apr 12, 2025 am 12:18 AM
MySQL is an open source relational database management system, mainly used to store and retrieve data quickly and reliably. Its working principle includes client requests, query resolution, execution of queries and return results. Examples of usage include creating tables, inserting and querying data, and advanced features such as JOIN operations. Common errors involve SQL syntax, data types, and permissions, and optimization suggestions include the use of indexes, optimized queries, and partitioning of tables.
 MySQL's Place: Databases and Programming
Apr 13, 2025 am 12:18 AM
MySQL's Place: Databases and Programming
Apr 13, 2025 am 12:18 AM
MySQL's position in databases and programming is very important. It is an open source relational database management system that is widely used in various application scenarios. 1) MySQL provides efficient data storage, organization and retrieval functions, supporting Web, mobile and enterprise-level systems. 2) It uses a client-server architecture, supports multiple storage engines and index optimization. 3) Basic usages include creating tables and inserting data, and advanced usages involve multi-table JOINs and complex queries. 4) Frequently asked questions such as SQL syntax errors and performance issues can be debugged through the EXPLAIN command and slow query log. 5) Performance optimization methods include rational use of indexes, optimized query and use of caches. Best practices include using transactions and PreparedStatemen
 How to connect to the database of apache
Apr 13, 2025 pm 01:03 PM
How to connect to the database of apache
Apr 13, 2025 pm 01:03 PM
Apache connects to a database requires the following steps: Install the database driver. Configure the web.xml file to create a connection pool. Create a JDBC data source and specify the connection settings. Use the JDBC API to access the database from Java code, including getting connections, creating statements, binding parameters, executing queries or updates, and processing results.
 Why Use MySQL? Benefits and Advantages
Apr 12, 2025 am 12:17 AM
Why Use MySQL? Benefits and Advantages
Apr 12, 2025 am 12:17 AM
MySQL is chosen for its performance, reliability, ease of use, and community support. 1.MySQL provides efficient data storage and retrieval functions, supporting multiple data types and advanced query operations. 2. Adopt client-server architecture and multiple storage engines to support transaction and query optimization. 3. Easy to use, supports a variety of operating systems and programming languages. 4. Have strong community support and provide rich resources and solutions.
 How to start mysql by docker
Apr 15, 2025 pm 12:09 PM
How to start mysql by docker
Apr 15, 2025 pm 12:09 PM
The process of starting MySQL in Docker consists of the following steps: Pull the MySQL image to create and start the container, set the root user password, and map the port verification connection Create the database and the user grants all permissions to the database
 MySQL's Role: Databases in Web Applications
Apr 17, 2025 am 12:23 AM
MySQL's Role: Databases in Web Applications
Apr 17, 2025 am 12:23 AM
The main role of MySQL in web applications is to store and manage data. 1.MySQL efficiently processes user information, product catalogs, transaction records and other data. 2. Through SQL query, developers can extract information from the database to generate dynamic content. 3.MySQL works based on the client-server model to ensure acceptable query speed.
 Laravel Introduction Example
Apr 18, 2025 pm 12:45 PM
Laravel Introduction Example
Apr 18, 2025 pm 12:45 PM
Laravel is a PHP framework for easy building of web applications. It provides a range of powerful features including: Installation: Install the Laravel CLI globally with Composer and create applications in the project directory. Routing: Define the relationship between the URL and the handler in routes/web.php. View: Create a view in resources/views to render the application's interface. Database Integration: Provides out-of-the-box integration with databases such as MySQL and uses migration to create and modify tables. Model and Controller: The model represents the database entity and the controller processes HTTP requests.
 How to install mysql in centos7
Apr 14, 2025 pm 08:30 PM
How to install mysql in centos7
Apr 14, 2025 pm 08:30 PM
The key to installing MySQL elegantly is to add the official MySQL repository. The specific steps are as follows: Download the MySQL official GPG key to prevent phishing attacks. Add MySQL repository file: rpm -Uvh https://dev.mysql.com/get/mysql80-community-release-el7-3.noarch.rpm Update yum repository cache: yum update installation MySQL: yum install mysql-server startup MySQL service: systemctl start mysqld set up booting
