

How to change background color on click state in AngularJs
Below I will share with you an example of changing the background color of AngularJs click status value. It has a good reference value and I hope it will be helpful to everyone.
The examples are as follows:
//更改边框颜色的代码 $("#shname").css({"border":"1px solid red"});
//排序有时候下标会错乱 不建议使用 建议使用讲师排序代码
<!DOCTYPE html>
<html>
<head>
<meta charset="UTF-8">
<title></title>
<script type="text/javascript" src="js/jquery-1.11.0.min.js" ></script>
<script type="text/javascript" src="js/angular.min.js" ></script>
<style>
*{
margin: 0 auto;
padding: 0;
}
.p{
margin-top: 50px;
width: 800px;
height: 1000px;
}
.tian{
width: 80px;
height: 24px;
background: #5CD6FF;
}
#sp{
width: 150px;
height: 24px;
margin-left: 130px;
border-radius: 10px;
}
#sj{
height: 24px;
margin-left: 20px;
border-radius: 10px;
}
#st{
height: 24px;
margin-left: 30px;
}
#t{
width: 14px;
height: 14px;
position: absolute;
margin-left: -24px;
padding-top: 6px;
}
#t1{
width: 14px;
height: 14px;
position: absolute;
margin-left: -24px;
padding-top: 6px;
}
#table{
margin-top: 50px;
}
.fh1{
background: #FCFC30;
}
.true {
background: greenyellow;
border: 0px;
border-radius: 3px;
}
.false {
background: yellow;
border: 0px;
border-radius: 3px;
}
</style>
</head>
<body ng-app="myapp" ng-controller="mycr">
<p class="p">
<input type="button" value="新增订单" ng-click="add()" class="tian"/>
<input type="button" value="批量删除" ng-click="px()" class="tian"/>
<input type="text" placeholder="按商品名称查询" id="sp" ng-model="msname"/>
<img src="img/q.png" id="t" ng-click="nameselect()"/>
<input type="text" placeholder="按手机号查询" id="sj" ng-model="mytel"/>
<img src="img/q.png" id="t1" ng-click="sjselect()"/>
<select id="st" ng-change="myfh()" ng-model="fh" ng-init="fh=cha[0]">
<option ng-repeat="c in cha">{{c}}</option>
</select>
<table border="1px" cellspacing="1" cellpadding=""0 width="800px" height="30px" id="table">
<tr align="center">
<td><input type="checkbox" ng-model="qx" ng-click="myqx()"/></td>
<td>id <input type="button" value="排序" ng-click="idp()"/></td>
<td>商品名</td>
<td>用户名</td>
<td>手机号</td>
<td>价格 <input type="button" value="排序" ng-click="jiap()"/></td>
<td>城市</td>
<td>下单时间 <input type="button" value="排序" ng-click="ship()"/></td>
<td>状态</td>
</tr>
<tr align="center" ng-repeat="x in user|filter:{sname:sn}|filter:{tel:sh}|filter:fahuo|orderBy:idpai">
<td><input type="checkbox" ng-model="x.flog" ng-click="dx($index)"/></td>
<td>{{x.id}}</td>
<td>{{x.sname}}</td>
<td>{{x.name}}</td>
<td>{{x.tel}}</td>
<td>{{x.price|currency:"¥:"}}</td>
<td>{{x.cheng}}</td>
<td>{{x.time|date:"MM-dd HH:mm:ss"}}</td>
<td><input type="button" value="{{x.zhuang|myFilter}}" class="{{x.zhuang}}" ng-click="fahuo1($index)" /></td>
</tr>
</table>
<fieldset ng-show="yc">
<legend>添加订单信息</legend>
<center>
商品名<input type="text" ng-model="shname" id="shname"/>
<span id="s1"></span><br /><br />
用户名<input type="text" ng-model="username" id="username"/>
<span id="s2"></span><br /><br />
手机号<input type="text" ng-model="mtel" id="mtel"/>
<span id="s3"></span><br /><br />
价格为<input type="text" ng-model="mprice" id="mprice" />
<span id="s4"></span><br /><br />
请选择城市<select ng-model="chengshi" ng-init="chengshi=cs[0]" ng-change="xuancs()" style="width: 140px;">
<option ng-repeat="xx in cs">{{xx}}</option>
</select>
<span id="s5" ></span><br /><br />
<input type="button" value="保存" ng-click="baocun()"/>
</center>
</fieldset>
</p>
</body>
<script>
var app=angular.module("myapp",[]);
app.controller("mycr",function($scope){
//select列表的值
$scope.cha=["按状态查询","已发货","未发货"];
$scope.cs=["请选择城市","北京","天津","河北","上海"];
$scope.user=[{
"flog":false,
"id":2001,
"sname":"IphoneX",
"name":"张三",
"tel":"13525654123",
"price":"8699",
"cheng":"北京",
"time":"14560161945000",
"zhuang":false,
},
{
"flog":false,
"id":3006,
"sname":"Iphone6",
"name":"王红",
"tel":"12564236541",
"price":"5635",
"cheng":"郑州",
"time":"1456016212945000",
"zhuang":false,
},
{
"flog":false,
"id":5312,
"sname":"Iphone7",
"name":"赵小龙",
"tel":"13402651245",
"price":"6180",
"cheng":"北京",
"time":"666016215645000",
"zhuang":false,
},
{
"flog":false,
"id":2314,
"sname":"Iphone8",
"name":"赵强",
"tel":"17695212525",
"price":"7190",
"cheng":"上海",
"time":"88888162545000",
"zhuang":false,
}
];
//按照商品名称查询
$scope.nameselect=function(){
$scope.sn=$scope.msname;
//手机号过滤器为空
$scope.sh="";
}
//按照手机号查询
$scope.sjselect=function(){
$scope.sh=$scope.mytel;
//商品过滤器为空
$scope.sn="";
}
//已发货和未发货的点击事件
$scope.myfh=function(){
if($scope.fh=="按状态查询"){
$scope.fahuo="";
}else if($scope.fh=="已发货"){
$scope.fahuo=true;
$scope.sn="";
$scope.sh="";
}else{
$scope.fahuo=false;
$scope.sn="";
$scope.sh="";
}
}
//全选
$scope.myqx=function(){
if($scope.qx){
for (var i=0;i<$scope.user.length;i++) {
$scope.user[i].flog=true;
}
}else{
for (var i=0;i<$scope.user.length;i++) {
$scope.user[i].flog=false;
}
}
}
//如果有一个没选全选取消
$scope.dx=function($index){
if($scope.user[$index].flog==false)
$scope.qx=false;
}
//批量删除
$scope.px=function(){
var j=0;
for (var i=0;i<$scope.user.length;i++) {
if($scope.user[i].flog){
j++;
}
}
if(j==0){
alert("请至少选择一个")
}
//判断所有选中的框 看其状态值为未发货 提示不能删除未发货的
var flog1=true;
for (var i=0;i<$scope.user.length;i++) {
if($scope.user[i].flog){
if($scope.user[i].zhuang==false)
flog1=false;
}
}
if(flog1){
for (var i=$scope.user.length-1;i>=0;i--) {
if($scope.user[i].flog){
$scope.user.splice(i,1);
//全部删除 全选为false
$scope.qx=false;
}
}
}else{
alert("不能删除未发货的")
}
}
//根据id排序的方法
var c=0;
$scope.idp=function(){
c++;
if(c%2==1){
$scope.idpai='id';
}else{
$scope.idpai='-id';
}
}
//根据价格排序的方法
$scope.jiap=function(){
c++;
if(c%2==1){
$scope.idpai='price';
}else{
$scope.idpai='-price';
}
}
//根据时间排序
$scope.ship=function(){
c++;
if(c%2==1){
$scope.idpai='time';
}else{
$scope.idpai='-time';
}
}
//点击新增的话显示添加
$scope.add=function(){
$scope.yc=true;
}
//保存的代码
$scope.baocun=function(){
flog= kong($("#shname").val(),"#s1")
&&kong($("#username").val(),"#s2")
&&kong($("#mtel").val(),"#s3")
&&kong($("#mprice").val(),"#s4")&&cheng();
if(flog){
var tian={
"flog":false,
"id":"23236",
"sname":$scope.shname,
"name":$scope.username,
"tel":$scope.mtel,
"price":$scope.mprice,
"cheng":$scope.chengshi,
"time":"14560201945000",
"zhuang":false,
}
//添加到表格中
$scope.user.push(tian);
//添加完毕后清空
$scope.shname="";
$scope.username="";
$scope.mtel="";
$scope.mprice="";
//清空后隐藏
$scope.yc=false;
}
}
//不为空的方法
function kong(k1,s){
var k=/^\s*$/;
if(k.test(k1)){
$(s).html("不能为空");
return false;
}else{
$(s).html("");
return true;
}
}
//城市选择
function cheng(){
if($scope.chengshi=="请选择城市"){
$("#s5").html("必选");
return false;
}else{
$("#s5").html("");
return true;
}
}
/*x.zhang为发货的状态值 默认为false不发货 通过过滤器设置值为已发货和未发货
<td><input type="button" value="{{x.zhuang|myFilter}}" class="{{x.zhuang}}" ng-click="fahuo1($index)" /></td>
//通过以下来设置背景颜色
.true {
background: greenyellow;
border: 0px;
border-radius: 3px;
}
.false {
background: yellow;
border: 0px;
border-radius: 3px;
}
*/
//发货改变值的方法
$scope.fahuo1 = function($index) {
if($scope.user[$index].zhuang ){
$scope.user[$index].zhuang = false;
}else{
$scope.user[$index].zhuang = true;
}
}
})
//自定义过滤器,根据zhuang的状态,返回不同的值
app.filter("myFilter", function() {
return function(input) {
if (input) {
return "已发货";
} else {
return "未发货";
}
return input;
}
})
</script>
</html>The above is what I compiled for everyone. I hope it will be helpful to everyone in the future.
Related articles:
How to implement pixel comparison using casperjs and resemble.js (detailed tutorial)
How to write using async-validator Form component (detailed tutorial)
What are the methods for passing parameters using WeChat applet?
The above is the detailed content of How to change background color on click state in AngularJs. For more information, please follow other related articles on the PHP Chinese website!

Hot AI Tools

Undresser.AI Undress
AI-powered app for creating realistic nude photos

AI Clothes Remover
Online AI tool for removing clothes from photos.

Undress AI Tool
Undress images for free

Clothoff.io
AI clothes remover

Video Face Swap
Swap faces in any video effortlessly with our completely free AI face swap tool!

Hot Article
Hot Tools

Notepad++7.3.1
Easy-to-use and free code editor

SublimeText3 Chinese version
Chinese version, very easy to use

Zend Studio 13.0.1
Powerful PHP integrated development environment

Dreamweaver CS6
Visual web development tools

SublimeText3 Mac version
God-level code editing software (SublimeText3)
Hot Topics


 How to change the background color of Google Chrome? How to set the background color of Google Chrome
Mar 13, 2024 pm 01:40 PM
How to change the background color of Google Chrome? How to set the background color of Google Chrome
Mar 13, 2024 pm 01:40 PM
The background of Google Chrome is the default, so how do we set it up if we want to change it? Google Chrome has the function of modifying the background color, but many novice friends don’t know how to modify it. It is actually very simple. Below is the step-by-step method of modifying the background color of Google Chrome. If you are interested, let’s take a look. Modification method: 1. First open Google Chrome and click on the three dots in the upper right corner. 2. Then a drop-down box appears, click Settings. 3. Then click Customize your Chrome profile. 4. Finally, select your favorite color, and the browser background will automatically change color.
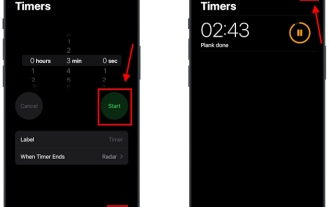 How to set multiple timers on iPhone iOS 17
Sep 18, 2023 am 09:01 AM
How to set multiple timers on iPhone iOS 17
Sep 18, 2023 am 09:01 AM
In iOS 17, you can set multiple timers on your iPhone using the Clock app, or use Siri to set it hands-free. We discuss both in this article. Let's take a look at them. Set Multiple Timers on iPhone Using the Clock App Open the Clock app on your iPhone and tap the Timers tab in the lower right corner. Now, set the hours, minutes, and seconds. You can use the "Label" and "When does the timer end" options to set a name for the timer and a preferred tone when the timer completes. This will help you differentiate between timers. Once done, click the "Start" button. Then, click the "+" icon in the upper right corner. Now, repeat the above steps to set multiple timers on iPhone. You can also browse
![How to set up my business card in Contacts on iPhone [2023]](https://img.php.cn/upload/article/000/465/014/169538863364905.jpg?x-oss-process=image/resize,m_fill,h_207,w_330) How to set up my business card in Contacts on iPhone [2023]
Sep 22, 2023 pm 09:17 PM
How to set up my business card in Contacts on iPhone [2023]
Sep 22, 2023 pm 09:17 PM
With My Business Cards in iOS, you can create a personalized contact card that Siri and other services recognize and associate with you and your phone number. With the introduction of contact posters in iOS17, My Cards becomes very important as it is now used to create your contact posters. If you're eager to get your contact poster up and running, you have to start by setting up My Business Card. We'll walk through how to create a My Business Card and how to make it work smoothly with Siri and your contact poster. How to Set Up My Business Cards in Contacts on iPhone [2023] If you are setting up My Business Cards on your iPhone for the first time, you must do it through the Contacts app only
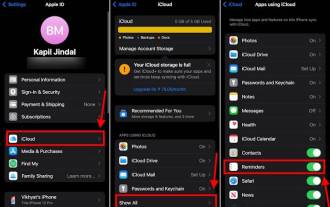 How to Make a Shopping List in the iOS 17 Reminders App on iPhone
Sep 21, 2023 pm 06:41 PM
How to Make a Shopping List in the iOS 17 Reminders App on iPhone
Sep 21, 2023 pm 06:41 PM
How to Make a GroceryList on iPhone in iOS17 Creating a GroceryList in the Reminders app is very simple. You just add a list and populate it with your items. The app automatically sorts your items into categories, and you can even work with your partner or flat partner to make a list of what you need to buy from the store. Here are the full steps to do this: Step 1: Turn on iCloud Reminders As strange as it sounds, Apple says you need to enable reminders from iCloud to create a GroceryList on iOS17. Here are the steps for it: Go to the Settings app on your iPhone and tap [your name]. Next, select i
 How to change the starting delivery price of Meituan Takeout merchant version
Mar 27, 2024 pm 07:20 PM
How to change the starting delivery price of Meituan Takeout merchant version
Mar 27, 2024 pm 07:20 PM
In the operation process of the Meituan Takeout Merchant Edition, the setting of the starting delivery price is a crucial link. A reasonable starting delivery price can not only help merchants control costs, but also increase order amounts to a certain extent, thus increasing overall revenue. However, many merchants don’t know much about how to modify the minimum delivery price. So in the following article, the editor of this website will bring you detailed starting price setting guide for merchants. If you want to know more, come to the following article to find out! In the Meituan Takeout Merchant Center, log in and enter the store settings, then select store management. In the switch navigation at the top of the store management page, select delivery information, and then click Add Delivery Area to complete the operation. Once you add a location, the corresponding shipping costs will automatically appear. After completing your order, you will receive
![How to turn off alarms on iPhone [2023]](https://img.php.cn/upload/article/000/465/014/169259550735100.png?x-oss-process=image/resize,m_fill,h_207,w_330) How to turn off alarms on iPhone [2023]
Aug 21, 2023 pm 01:25 PM
How to turn off alarms on iPhone [2023]
Aug 21, 2023 pm 01:25 PM
Since the advent of smartphones, they have undoubtedly replaced alarm clocks. If you own an iPhone, you can use the Clock app to easily set as many alarms for multiple occasions throughout the day. The app lets you configure the alarm time, the tone, how often it repeats, and whether you want to delay them using the Snooze option. If you want to turn off the alarm you have set, the following post should help you disable and delete regular alarms and wake-up alarms on your iPhone. How to Turn Off a Regular Alarm on iPhone By default, when you add an alarm on the Clock app or ask Siri to add an alarm for you, you're actually creating a regular alarm. You can create as many alarm clocks on your iPhone as you like and put them
 How to change contact photos on iPhone
Jun 08, 2023 pm 03:44 PM
How to change contact photos on iPhone
Jun 08, 2023 pm 03:44 PM
iOS17 is finally here, and it includes a lot of new features. Let's learn how to change contact photos on iPhone in today's tutorial. Apple's recent WWDC 2023 event unveiled a slew of exciting products and upcoming software updates. One of the notable features of iOS 17 is the option to customize your contact photos and posters, providing a unique way to greet others when they receive a call from you on their iPhone. This innovative feature for iOS is designed to make phone calls more personal and user-friendly, allowing you to choose how they appear on the recipient's screen. If you're eager to get your hands on this new feature and greet your loved ones in a personalized way when making calls, here's how to add it to your iPhone
 Master the art of using Apple Maps Guides on iPhone and iPad
Aug 30, 2023 am 09:25 AM
Master the art of using Apple Maps Guides on iPhone and iPad
Aug 30, 2023 am 09:25 AM
In an ever-evolving technological world, the ability to navigate digital maps has become an essential skill. This article provides a comprehensive guide on how to use Apple Maps Guides on iPhone and iPad, a feature that revolutionizes the way users explore their surroundings and plan their journeys. Apple Maps is a built-in application on all Apple devices, and it is constantly updated and improved to provide a seamless navigation experience. One of its most notable features is the Guide feature, which provides a curated list of interesting places to visit in various cities around the world. This feature is not only beneficial for travelers, but also a boon for locals looking to discover new attractions in their city. How to use Apple Maps on iOS guide First, visit the Apple Maps
