

How to deploy https using nginx + node
This article mainly introduces you to the steps of deploying https in Alibaba Cloud using nginx node. The article introduces it in great detail through pictures, texts and sample codes. It has certain reference learning value for everyone's study or work. It is needed Friends, come and study together.
Origin
Recently I am writing the node mongodb version of Lingxi Micro Mall, so I have to deploy my own https certificate to the Alibaba server. The following will give you a complete summary of the implementation process. Without further ado, let’s take a look at the detailed introduction.
The main differences between HTTPS and HTTP are as follows:
1. The https protocol requires applying for a certificate from ca. Generally, there are fewer free certificates, so a certain fee is required.
2. http is a hypertext transfer protocol, and information is transmitted in plain text, while https is a secure SSL encrypted transmission protocol.
3. http and https use completely different connection methods and use different ports. The former is 80 and the latter is 443.
4. The http connection is very simple and stateless; the HTTPS protocol is a network protocol built from the SSL HTTP protocol that can perform encrypted transmission and identity authentication, and is more secure than the http protocol.
Application
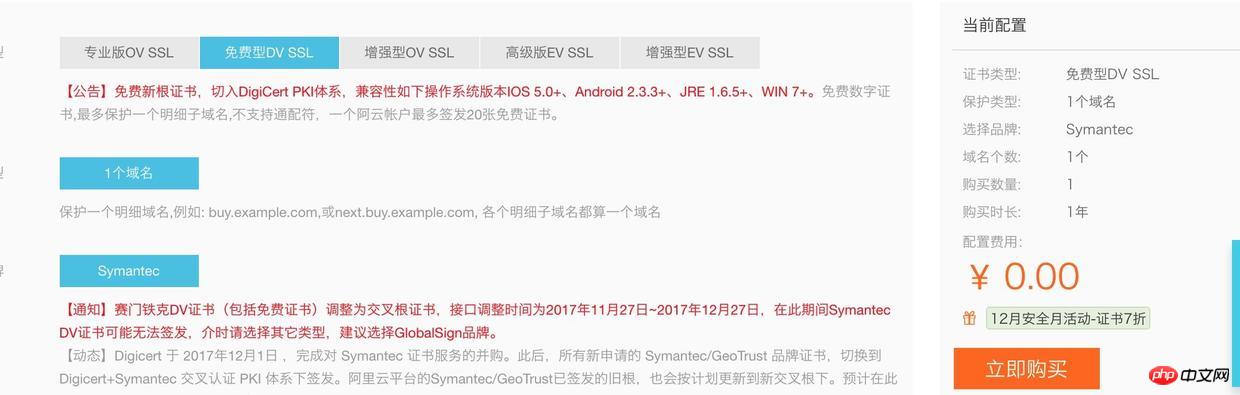
I waited for 2 days to get the free https certificate. It always shows that it is sold out on Ali. Is it because of the recent popularity of https? Demand exceeds supply.


deploy
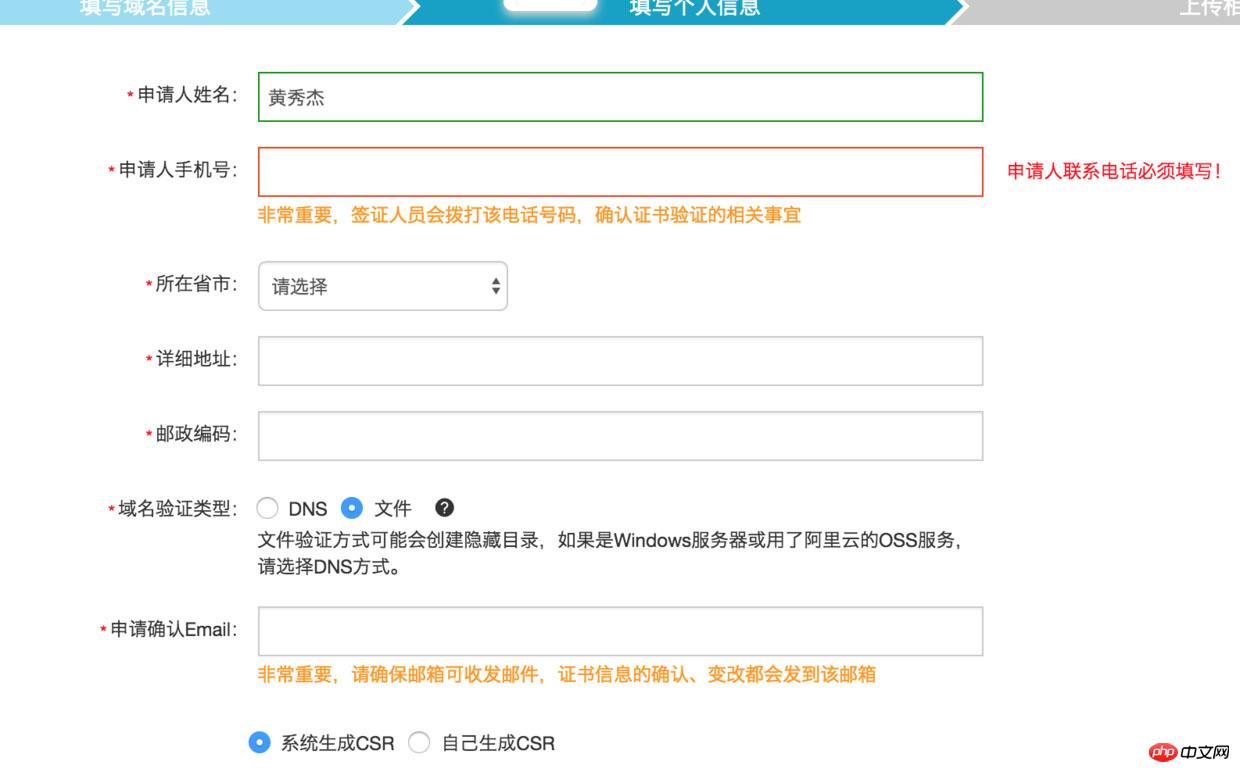
Uploaded fileauth.txt to the specified directory. After a few minutes, the review was passed. During this period, no review calls came in. The operation and deployment instructions provided by Alibaba are very detailed. You can just copy it, but be careful to put the cert folder under conf instead of the nginx root directory as mentioned in the instructions. When you operate it locally according to Alibaba, you will see this error, fopen:No such file or directory:fopen('/usr/local/nginx/conf/cert/214389510580391.pem','r') error: 2006D080:BIO routines:BIO_new_file:no such file), which means that there is a problem with the cert directory.
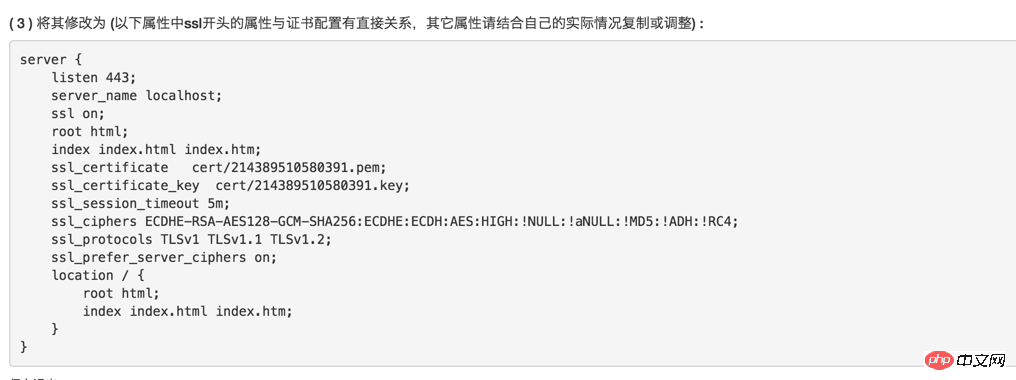
node reverse proxy
location / {
   proxy_pass http://127.0.0.1:4001;
   proxy_set_header Host $host;
   proxy_set_header X-Real-IP $remote_addr;
   proxy_set_header X-Forwarded-For $proxy_add_x_forwarded_for;
}node still runs as usual, it doesn’t matter https or http, it is completed by nginx. The first proxy_pass is a reverse proxy, and the next three proxy_set_headers take over the request completely from mall.it577.net. Although it can be requested by the front end without adding it, req.originUrl will still be resolved to http://127.0.0.1 :4001, this affects the decoupling of WeChat payment callback notify_url, so these 3 lines are added.
Result
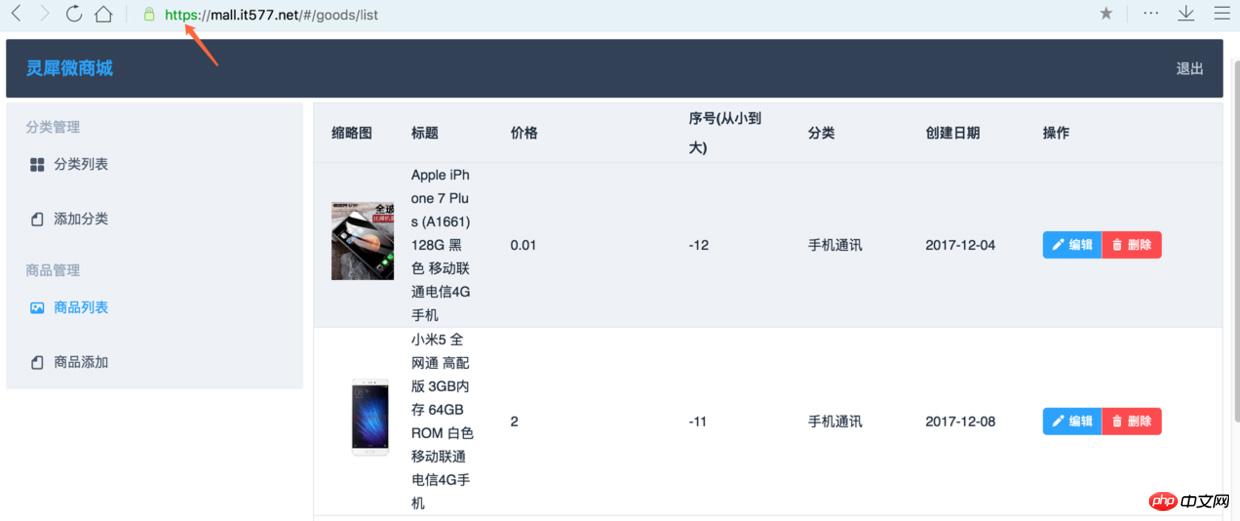
You can see from the address bar that https is supported.
pits
The above process is very simple and can basically be configured. Let me talk about the pitfalls I encountered. Because my Alibaba pre-installed nginx does not include the https module, I have to manually download the installation package and recompile it. Finally, copy the newly compiled nginx execution file, replace it and restart the service.
Error reporting, prompting that the ssl module cannot be found
nginx: [emerg] unknown directive "ssl" in /usr/local/nginx/conf/nginx.conf:123
Download the corresponding version of the ngix compressed package
wget http://nginx.org/download/nginx-1.12.1.tar.gz
Unzip
tar zxvf nginx-1.12.1.tar.gz
Compile with parameters to get the ssl module
./configure --with-http_ssl_module

make
Stop nginx
/usr/local/nginx/sbin/nginx -s stop
Of course you can kill the process, what I found online is let 3 ways to kill
Replace the old nginx
cp /usr/local/nginx/sbin/nginx /usr/local/nginx/sbin/nginx.bak
cp ./objs/nginx /usr/local/nginx/sbin/
Restart nginx and reload the conf configuration file
/usr/local/nginx/sbin/nginx -c /usr/local/nginx/conf/nginx.conf
/usr/local/nginx/sbin/nginx -s reload
The above is I compiled it for everyone, I hope it will be helpful to everyone in the future.
Related articles:
How to implement secondary linkage in js
##How should webpack handle styles?
How to generate word images in js
What are the reference methods for libraries in jQuery
The above is the detailed content of How to deploy https using nginx + node. For more information, please follow other related articles on the PHP Chinese website!

Hot AI Tools

Undresser.AI Undress
AI-powered app for creating realistic nude photos

AI Clothes Remover
Online AI tool for removing clothes from photos.

Undress AI Tool
Undress images for free

Clothoff.io
AI clothes remover

Video Face Swap
Swap faces in any video effortlessly with our completely free AI face swap tool!

Hot Article
Hot Tools

Notepad++7.3.1
Easy-to-use and free code editor

SublimeText3 Chinese version
Chinese version, very easy to use

Zend Studio 13.0.1
Powerful PHP integrated development environment

Dreamweaver CS6
Visual web development tools

SublimeText3 Mac version
God-level code editing software (SublimeText3)
Hot Topics


 How to check the name of the docker container
Apr 15, 2025 pm 12:21 PM
How to check the name of the docker container
Apr 15, 2025 pm 12:21 PM
You can query the Docker container name by following the steps: List all containers (docker ps). Filter the container list (using the grep command). Gets the container name (located in the "NAMES" column).
 How to configure nginx in Windows
Apr 14, 2025 pm 12:57 PM
How to configure nginx in Windows
Apr 14, 2025 pm 12:57 PM
How to configure Nginx in Windows? Install Nginx and create a virtual host configuration. Modify the main configuration file and include the virtual host configuration. Start or reload Nginx. Test the configuration and view the website. Selectively enable SSL and configure SSL certificates. Selectively set the firewall to allow port 80 and 443 traffic.
 How to configure cloud server domain name in nginx
Apr 14, 2025 pm 12:18 PM
How to configure cloud server domain name in nginx
Apr 14, 2025 pm 12:18 PM
How to configure an Nginx domain name on a cloud server: Create an A record pointing to the public IP address of the cloud server. Add virtual host blocks in the Nginx configuration file, specifying the listening port, domain name, and website root directory. Restart Nginx to apply the changes. Access the domain name test configuration. Other notes: Install the SSL certificate to enable HTTPS, ensure that the firewall allows port 80 traffic, and wait for DNS resolution to take effect.
 How to check whether nginx is started
Apr 14, 2025 pm 01:03 PM
How to check whether nginx is started
Apr 14, 2025 pm 01:03 PM
How to confirm whether Nginx is started: 1. Use the command line: systemctl status nginx (Linux/Unix), netstat -ano | findstr 80 (Windows); 2. Check whether port 80 is open; 3. Check the Nginx startup message in the system log; 4. Use third-party tools, such as Nagios, Zabbix, and Icinga.
 How to check nginx version
Apr 14, 2025 am 11:57 AM
How to check nginx version
Apr 14, 2025 am 11:57 AM
The methods that can query the Nginx version are: use the nginx -v command; view the version directive in the nginx.conf file; open the Nginx error page and view the page title.
 How to create containers for docker
Apr 15, 2025 pm 12:18 PM
How to create containers for docker
Apr 15, 2025 pm 12:18 PM
Create a container in Docker: 1. Pull the image: docker pull [mirror name] 2. Create a container: docker run [Options] [mirror name] [Command] 3. Start the container: docker start [Container name]
 How to start nginx server
Apr 14, 2025 pm 12:27 PM
How to start nginx server
Apr 14, 2025 pm 12:27 PM
Starting an Nginx server requires different steps according to different operating systems: Linux/Unix system: Install the Nginx package (for example, using apt-get or yum). Use systemctl to start an Nginx service (for example, sudo systemctl start nginx). Windows system: Download and install Windows binary files. Start Nginx using the nginx.exe executable (for example, nginx.exe -c conf\nginx.conf). No matter which operating system you use, you can access the server IP
 How to start containers by docker
Apr 15, 2025 pm 12:27 PM
How to start containers by docker
Apr 15, 2025 pm 12:27 PM
Docker container startup steps: Pull the container image: Run "docker pull [mirror name]". Create a container: Use "docker create [options] [mirror name] [commands and parameters]". Start the container: Execute "docker start [Container name or ID]". Check container status: Verify that the container is running with "docker ps".
