

Use elementUI to implement custom theme methods in Vue
Below I will share with you an article on how to implement a custom theme using Vue's elementUI. It has a good reference value and I hope it will be helpful to everyone.
Use vue to develop projects and elementUI. According to the writing method of the official website, we can customize the theme to adapt to our project requirements. Here are the specific steps to implement the two methods. (You can refer to the official documentation. Define the theme official document), let me first say that the project does not use scss to write, and uses the theme tool method (more commonly used)
The first method: use the command line theme tool
Use vue-cli to install the project and introduce element-ui (for details, please refer to the introduction in the second method)
1. Installation tools
1. Install the theme tool
npm i element-theme -g
2. Install the chalk theme. You can install it from npm or pull the latest code from GitHub
# 从 npm
npm i element-theme-chalk -D
# 从 GitHub
npm i https://github.com/ElementUI/theme-chalk -D
2. Initialize the variable file
et -i [可以自定义变量文件,默认为element-variables.scss]
> ✔ Generator variables file
At this time, element-variables.scss (or a customized file) will be generated in the root directory, roughly as follows:
$--color-primary: #409EFF !default;
$--color-primary-light-1: mix($--color-white, $--color-primary, 10%) !default; /* 53a8ff */
$--color-primary-light-2: mix($--color-white, $--color-primary, 20%) !default; /* 66b1ff */
$--color-primary-light-3: mix($--color-white, $--color-primary, 30%) !default; /* 79bbff */
$--color-primary-light-4: mix($--color-white, $--color-primary, 40%) !default; /* 8cc5ff */
$--color-primary-light-5: mix($--color-white, $--color-primary, 50%) !default; /* a0cfff */
$--color-primary-light-6: mix($--color-white, $--color-primary, 60%) !default; /* b3d8ff */
$--color-primary-light-7: mix($--color-white, $--color-primary, 70%) !default; /* c6e2ff */
$--color-primary-light-8: mix($--color-white, $--color-primary, 80%) !default; /* d9ecff */
$--color-primary-light-9: mix($--color-white, $--color-primary, 90%) !default; /* ecf5ff */
$--color-success: #67c23a !default;
$--color-warning: #eb9e05 !default;
$--color-danger: #fa5555 !default;
$--color-info: #878d99 !default;
...
3. Modify variables
Edit the element-variables.scss file directly, for example, modify the theme color to the color you need (such as: purple) )
$--color-primary: purple;
4. Compile the theme
After modifying the variables, compile the theme (if the variables are modified again after compilation, you need to re-compile the theme) Compile)
et
> ✔ build theme font
> ✔ build element theme
5. Introduce a custom theme
The last step is to introduce the compiled theme file into the project (the compiled file defaults to In the theme file in the root directory, you can also specify the packaging directory through the -o parameter), introduce
import '../theme/index.css'
import ElementUI from 'element-ui'
import Vue from 'vue'
Vue.use(ElementUI)
in the entry file main.js, write some styles in the project, and see if the theme color changes: (Theme The color changes to purple)
<p>
  <el-button>默认按钮</el-button>
  <el-button type="primary">主要按钮</el-button>
  <el-button type="success">成功按钮</el-button>
  <el-button type="info">信息按钮</el-button>
  <el-button type="warning">警告按钮</el-button>
  <el-button type="danger">危险按钮</el-button>
 </p>
Second method: Directly modify the element style variable
Directly modify the element's style variable in the project, (The premise is that your document is also written using scss)
1. First, use vue-cli to install a new project:
1, install vue:
npm i -g vue
2, install vue-cli in the project directory:
npm i -g vue-cli
3, create a new project (vue-project) based on webpack
vue init webpack vue-project
4, enter in sequence The following command line, run vue-project
cd vue-project
npm i
npm run dev
2. Install elementUI, sass-loader, node-sass (use scss in the project to write dependent plug-ins)
1, install element-ui
npm i element-ui -S
2, install sass-loader, node-sass
npm i sass-loader node-sass -D
Let me tell you here, there is no need to configure webpack.base.conf. js file, vue-loader will configure the corresponding loader according to different types of files to package our style files (if you are interested, you can look at the core code of vue-loader)
3. Changes element style variables
1. Create element-variables.scss file under src (the name can be customized) and write the following code:
/* 改变主题色变量 */
$--color-primary: teal;
/* 改变 icon 字体路径变量,必需 */
$--font-path: '../node_modules/element-ui/lib/theme-chalk/fonts';
@import "../node_modules/element-ui/packages/theme-chalk/src/index";
2. At the entrance Just introduce the above file into the file main.js
import Vue from 'vue'
import Element from 'element-ui'
import './element-variables.scss'
Vue.use(Element)
Let’s see the effect. Introduce some styles into the file to see, such as button
<p>
  <el-button>默认按钮</el-button>
  <el-button type="primary">主要按钮</el-button>
  <el-button type="success">成功按钮</el-button>
  <el-button type="info">信息按钮</el-button>
  <el-button type="warning">警告按钮</el-button>
  <el-button type="danger">危险按钮</el-button>
 </p>
The default color has been changed to our custom Yes, if there are other changes, just change the variables in the element-variable.scss file.
The above is what I compiled for everyone. I hope it will be helpful to everyone in the future.
Related articles:
By creating tags in js dynamics and setting attribute methods (detailed tutorial)
Achieved in jQuery Methods for adding and assigning tag sub-elements
How to change the P tag text value in jQuery
The above is the detailed content of Use elementUI to implement custom theme methods in Vue. For more information, please follow other related articles on the PHP Chinese website!

Hot AI Tools

Undresser.AI Undress
AI-powered app for creating realistic nude photos

AI Clothes Remover
Online AI tool for removing clothes from photos.

Undress AI Tool
Undress images for free

Clothoff.io
AI clothes remover

Video Face Swap
Swap faces in any video effortlessly with our completely free AI face swap tool!

Hot Article
Hot Tools

Notepad++7.3.1
Easy-to-use and free code editor

SublimeText3 Chinese version
Chinese version, very easy to use

Zend Studio 13.0.1
Powerful PHP integrated development environment

Dreamweaver CS6
Visual web development tools

SublimeText3 Mac version
God-level code editing software (SublimeText3)
Hot Topics


 Where are themes located in Windows 11?
Aug 01, 2023 am 09:29 AM
Where are themes located in Windows 11?
Aug 01, 2023 am 09:29 AM
Windows 11 has so many customization options, including a range of themes and wallpapers. While these themes are aesthetic in their own way, some users still wonder where they stand in the background on Windows 11. This guide will show you the different ways to access the location of your Windows 11 theme. What is the Windows 11 default theme? The default theme background of Windows 11 is an abstract royal blue flower blooming with a sky blue background. This background is one of the most popular, thanks to the anticipation before the release of the operating system. However, the operating system also comes with a range of other backgrounds. Therefore, you can change the Windows 11 desktop theme background at any time. Themes are stored in Windo
 How to detail the location of the win10 theme folder
Dec 27, 2023 pm 09:37 PM
How to detail the location of the win10 theme folder
Dec 27, 2023 pm 09:37 PM
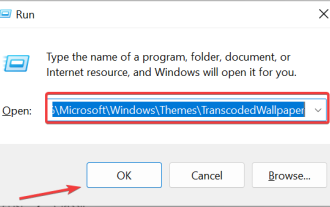
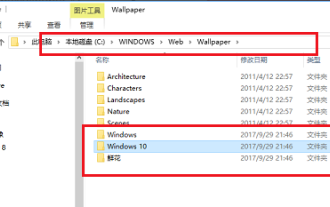
Recently, many friends feel that the theme of Win10 does not meet their own aesthetics and want to change the theme. After downloading it online, they find that the folder cannot be found. Then the editor will show you how to find the folder of the Win10 theme. Which folder is the win10 theme in? 1. The default storage path location of Win10 system wallpapers: 1. Microsoft saves these pictures in the path C:\Windows\Web\Wallpaper. Under it are the default saves of pictures with three different themes. Location, 2, flowers and lines and colors theme pictures are also saved in the folder with the same name! The naming principle is imgXXX. We only need to follow this principle to change the name of the related image we want to set and paste the image into
 How to quickly set up a custom avatar in Netflix
Feb 19, 2024 pm 06:33 PM
How to quickly set up a custom avatar in Netflix
Feb 19, 2024 pm 06:33 PM
An avatar on Netflix is a visual representation of your streaming identity. Users can go beyond the default avatar to express their personality. Continue reading this article to learn how to set a custom profile picture in the Netflix app. How to quickly set a custom avatar in Netflix In Netflix, there is no built-in feature to set a profile picture. However, you can do this by installing the Netflix extension on your browser. First, install a custom profile picture for the Netflix extension on your browser. You can buy it in the Chrome store. After installing the extension, open Netflix on your browser and log into your account. Navigate to your profile in the upper right corner and click
 How to unapply a theme (change or remove) in Windows 11
Sep 30, 2023 pm 03:53 PM
How to unapply a theme (change or remove) in Windows 11
Sep 30, 2023 pm 03:53 PM
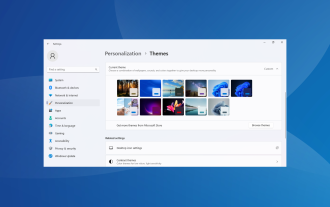
Themes play an integral role for users who wish to modify their Windows experience. It may change the desktop background, animations, lock screen, mouse cursor, sounds, icons, etc. But what if you want to remove themes in Windows 11? It's equally simple and there are options available, both for the current user profile and for the entire system, i.e. all users. Additionally, you can even delete custom themes in Windows 11 if they are no longer used for that purpose. How do I find my current topic? Press + to open the Settings app > Go to Personalization from the navigation pane > Click on Themes > The current theme will be listed on the right. How about WindowsI
 How to customize background image in Win11
Jun 30, 2023 pm 08:45 PM
How to customize background image in Win11
Jun 30, 2023 pm 08:45 PM
How to customize background image in Win11? In the newly released win11 system, there are many custom functions, but many friends do not know how to use these functions. Some friends think that the background image is relatively monotonous and want to customize the background image, but don’t know how to customize the background image. If you don’t know how to define the background image, the editor has compiled the steps to customize the background image in Win11 below. If you are interested If so, take a look below! Steps for customizing background images in Win11: 1. Click the win button on the desktop and click Settings in the pop-up menu, as shown in the figure. 2. Enter the settings menu and click Personalization, as shown in the figure. 3. Enter Personalization and click on Background, as shown in the picture. 4. Enter background settings and click to browse pictures
 How to create and customize Venn diagrams in Python?
Sep 14, 2023 pm 02:37 PM
How to create and customize Venn diagrams in Python?
Sep 14, 2023 pm 02:37 PM
A Venn diagram is a diagram used to represent relationships between sets. To create a Venn diagram we will use matplotlib. Matplotlib is a commonly used data visualization library in Python for creating interactive charts and graphs. It is also used to create interactive images and charts. Matplotlib provides many functions to customize charts and graphs. In this tutorial, we will illustrate three examples to customize Venn diagrams. The Chinese translation of Example is: Example This is a simple example of creating the intersection of two Venn diagrams; first, we imported the necessary libraries and imported venns. Then we create the dataset as a Python set, after that we use the "venn2()" function to create
 How to customize shortcut key settings in Eclipse
Jan 28, 2024 am 10:01 AM
How to customize shortcut key settings in Eclipse
Jan 28, 2024 am 10:01 AM
How to customize shortcut key settings in Eclipse? As a developer, mastering shortcut keys is one of the keys to improving efficiency when coding in Eclipse. As a powerful integrated development environment, Eclipse not only provides many default shortcut keys, but also allows users to customize them according to their own preferences. This article will introduce how to customize shortcut key settings in Eclipse and give specific code examples. Open Eclipse First, open Eclipse and enter
 How to create custom pagination in CakePHP?
Jun 04, 2023 am 08:32 AM
How to create custom pagination in CakePHP?
Jun 04, 2023 am 08:32 AM
CakePHP is a powerful PHP framework that provides developers with many useful tools and features. One of them is pagination, which helps us divide large amounts of data into several pages, making browsing and manipulation easier. By default, CakePHP provides some basic pagination methods, but sometimes you may need to create some custom pagination methods. This article will show you how to create custom pagination in CakePHP. Step 1: Create a custom pagination class First, we need to create a custom pagination class. this
