

How to write vue plug-in using vue-cli
This article mainly introduces the method of writing vue plug-ins using vue-cli. Now I will share it with you and give you a reference.
Use vue components to create templates, use webpack to package and generate plug-ins, and then use them globally
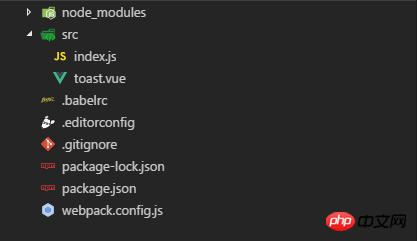
1. vue init webpack-simple generates the project directory
2. Adjust the directory structure
3. Modify webpack.config.js
var path = require('path')
var webpack = require('webpack')

module.exports = {
 entry: './src/index.js',
 output: {
  path: path.resolve(__dirname, './dist'),
  publicPath: '/dist/',
  filename: 'vue-toast.js',
  // 打包后的格式(三种规范amd,cmd,common.js)通过umd规范可以适应各种规范,以及全局window属性
  libraryTarget:'umd',
 },
 module: {
  rules: [
   {
    test: /\.vue$/,
    loader: 'vue-loader',
   },
   {
    test: /\.js$/,
    loader: 'babel-loader',
    exclude: /node_modules/
   },

  ]
 },
 plugins:[]
}Develop a toast plug-in, which can be released with the help of npm platform. I won’t explain too much here
toast.vue
<template>
<transition name="toast-fade">
<p class="toast"
:class="objClass"
v-show="isActive"
@mouseenter="onMouseenter"
@mouseleave="onMouseleave"
>
<button class="toast-close-button" @click="hide">×</button>
<p class="toast-container">
<p class="toast-title">{{title}}</p>
<p class="toast-content">{{content}}</p>
</p>
</p>
</transition>
</template>
<script>
export default {
data: () => ({
list: [],
title: null,
content: null,
type: null,
isActive: false,
timer: null,
onShow: () => {},
onHide: () => {}
}),
computed: {
objClass () {
// 样式'success, error, warning, default'
return this.type ? 'toast-' + this.type : null
}
},
methods: {
// 显示
show (params) {
let {content, title, onShow, onHide, type} = params
this.type = type
this.content = content
this.title = title
this.onShow = onShow
this.onHide = onHide
this.isActive = true
this.setTimer()
},
// 隐藏
hide () {
this.isActive = false
},
// 计时器
setTimer () {
clearTimeout(this.timer)
this.timer = setTimeout(() => {
this.isActive = false
}, 4000)
},
// 鼠标移至组件时保持显示状态
onMouseenter () {
clearTimeout(this.timer)
},
// 鼠标移开组件时重新定时
onMouseleave () {
if (this.isActive) this.setTimer()
}
},
watch: {
isActive (val) {
if (val && typeof this.onShow === 'function') {
this.onShow()
} else if (!val && typeof this.onHide === 'function') {
this.onHide()
}
}
}
}
</script>
<style>
.toast {
position: fixed;
top: 10px;
right: 10px ;
display: block;
width: 300px;
overflow: hidden;
box-shadow: 0 0 6px #999;
opacity: .8;
border-radius: 3px 3px;
padding: 15px 15px 15px 15px;
background-position: 15px center;
background-repeat: no-repeat;
color: #333;
background-color: #f0f3f4;
}
.toast-success {
color: #fff;
background-color: #51a351;
padding: 15px 15px 15px 50px;
background-image: url("data:image/png;base64,iVBORw0KGgoAAAANSUhEUgAAABgAAAAYCAYAAADgdz34AAAAAXNSR0IArs4c6QAAAARnQU1BAACxjwv8YQUAAAAJcEhZcwAADsMAAA7DAcdvqGQAAADsSURBVEhLY2AYBfQMgf///3P8+/evAIgvA/FsIF+BavYDDWMBGroaSMMBiE8VC7AZDrIFaMFnii3AZTjUgsUUWUDA8OdAH6iQbQEhw4HyGsPEcKBXBIC4ARhex4G4BsjmweU1soIFaGg/WtoFZRIZdEvIMhxkCCjXIVsATV6gFGACs4Rsw0EGgIIH3QJYJgHSARQZDrWAB+jawzgs+Q2UO49D7jnRSRGoEFRILcdmEMWGI0cm0JJ2QpYA1RDvcmzJEWhABhD/pqrL0S0CWuABKgnRki9lLseS7g2AlqwHWQSKH4oKLrILpRGhEQCw2LiRUIa4lwAAAABJRU5ErkJggg==") !important;
}
.toast-error {
color: #fff;
background-color: #bd362f;
padding: 15px 15px 15px 50px;
background-image: url("data:image/png;base64,iVBORw0KGgoAAAANSUhEUgAAABgAAAAYCAYAAADgdz34AAAAAXNSR0IArs4c6QAAAARnQU1BAACxjwv8YQUAAAAJcEhZcwAADsMAAA7DAcdvqGQAAAHOSURBVEhLrZa/SgNBEMZzh0WKCClSCKaIYOED+AAKeQQLG8HWztLCImBrYadgIdY+gIKNYkBFSwu7CAoqCgkkoGBI/E28PdbLZmeDLgzZzcx83/zZ2SSXC1j9fr+I1Hq93g2yxH4iwM1vkoBWAdxCmpzTxfkN2RcyZNaHFIkSo10+8kgxkXIURV5HGxTmFuc75B2RfQkpxHG8aAgaAFa0tAHqYFfQ7Iwe2yhODk8+J4C7yAoRTWI3w/4klGRgR4lO7Rpn9+gvMyWp+uxFh8+H+ARlgN1nJuJuQAYvNkEnwGFck18Er4q3egEc/oO+mhLdKgRyhdNFiacC0rlOCbhNVz4H9FnAYgDBvU3QIioZlJFLJtsoHYRDfiZoUyIxqCtRpVlANq0EU4dApjrtgezPFad5S19Wgjkc0hNVnuF4HjVA6C7QrSIbylB+oZe3aHgBsqlNqKYH48jXyJKMuAbiyVJ8KzaB3eRc0pg9VwQ4niFryI68qiOi3AbjwdsfnAtk0bCjTLJKr6mrD9g8iq/S/B81hguOMlQTnVyG40wAcjnmgsCNESDrjme7wfftP4P7SP4N3CJZdvzoNyGq2c/HWOXJGsvVg+RA/k2MC/wN6I2YA2Pt8GkAAAAASUVORK5CYII=") !important;
}
.toast-warning {
color: #fff;
background-color: #f89406;
padding: 15px 15px 15px 50px;
background-image: url("data:image/png;base64,iVBORw0KGgoAAAANSUhEUgAAABgAAAAYCAYAAADgdz34AAAAAXNSR0IArs4c6QAAAARnQU1BAACxjwv8YQUAAAAJcEhZcwAADsMAAA7DAcdvqGQAAAGYSURBVEhL5ZSvTsNQFMbXZGICMYGYmJhAQIJAICYQPAACiSDB8AiICQQJT4CqQEwgJvYASAQCiZiYmJhAIBATCARJy+9rTsldd8sKu1M0+dLb057v6/lbq/2rK0mS/TRNj9cWNAKPYIJII7gIxCcQ51cvqID+GIEX8ASG4B1bK5gIZFeQfoJdEXOfgX4QAQg7kH2A65yQ87lyxb27sggkAzAuFhbbg1K2kgCkB1bVwyIR9m2L7PRPIhDUIXgGtyKw575yz3lTNs6X4JXnjV+LKM/m3MydnTbtOKIjtz6VhCBq4vSm3ncdrD2lk0VgUXSVKjVDJXJzijW1RQdsU7F77He8u68koNZTz8Oz5yGa6J3H3lZ0xYgXBK2QymlWWA+RWnYhskLBv2vmE+hBMCtbA7KX5drWyRT/2JsqZ2IvfB9Y4bWDNMFbJRFmC9E74SoS0CqulwjkC0+5bpcV1CZ8NMej4pjy0U+doDQsGyo1hzVJttIjhQ7GnBtRFN1UarUlH8F3xict+HY07rEzoUGPlWcjRFRr4/gChZgc3ZL2d8oAAAAASUVORK5CYII=") !important;
}
.toast:hover {
opacity: 1;
box-shadow: 0 0 18px #888;
transition: all 200ms ease;
}
.toast-container {
vertical-align: middle;
}
.toast-fade-enter, .toast-fade-leave-active {
opacity: 0;
transform: translateX(100%);
}
.toast-fade-leave-active,
.toast-fade-enter-active {
transition: all 400ms cubic-bezier(.36,.66,.04,1);
}
.toast-title {
font-size: 14px;
font-weight: bold;
}
.toast-close-button {
padding: 2px 2px;
border: none;
background: transparent;
position: relative;
right: -10px;
top: -15px;
float: right;
font-size: 20px;
font-weight: bold;
color: #ffffff;
-webkit-text-shadow: 0 1px 0 #ffffff;
text-shadow: 0 1px 0 #ffffff;
-ms-filter: progid:DXImageTransform.Microsoft.Alpha(Opacity=80);
filter: alpha(opacity=80);
}
</style>index.js
import ToastComponent from './toast.vue'
let Toast = {};
Toast.install = function(Vue, options = {}) {
  // extend组件构造器
  const VueToast = Vue.extend(ToastComponent)
  let toast = null
  function $toast(params) {
    return new Promise( resolve => {
      if(!toast) {
        toast = new VueToast()
        toast.$mount()
        document.querySelector(options.container || 'body').appendChild(toast.$el)
      }
      toast.show(params)
      resolve()
    })
  }
  Vue.prototype.$toast = $toast
}
if(window.Vue){
  Vue.use(Toast)
}
export default Toastnpm run build will generate a dist file in the root directory
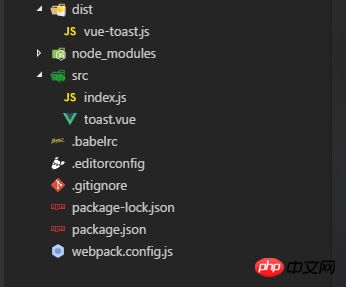
You can use it next
demo.html
<!DOCTYPE html>
<html lang="en">
<head>
<meta charset="UTF-8">
<title>Title</title>
<meta name="viewport" content="width=device-width,initial-scale=1.0,maximum-scale=1.0,user-scalable=no">
<!--引入-->
<script src="node_modules/vue/dist/vue.js"></script>
<script src="dist/vue-toast.js"></script>
</head>
<body>
<p id="app">
<h1>vue-toast,{{msg}}</h1>
<p class="demo-box">
<button @click="test">默认效果</button>
</p>
</p>
<script>
var vm = new Vue({
el: "#app",
data: {
msg: '你好'
},
methods: {
test() {
this.$toast({
title:'消息提示',
content: '您有一条新消息',
type: 'warning',
onShow: ()=>{
console.log('on toast show')
},
onHide: ()=>{
console.log('on toast hide')
}
})
}
}
})
</script>
</body>
</html>Summary:
1. Use the Vue constructor to create it through the vue component A subclass: Vue.extend(component)
2. The path of webpack configuration output must be an absolute path
3. Webpack basic configuration: entry, output, module, plugins
The above is what I compiled for everyone. I hope it will be helpful to everyone in the future.
Related articles:
vue Example of simple auto-complete input box
Vue routing lazy loading implementation method
How to package js with webpack
The above is the detailed content of How to write vue plug-in using vue-cli. For more information, please follow other related articles on the PHP Chinese website!

Hot AI Tools

Undresser.AI Undress
AI-powered app for creating realistic nude photos

AI Clothes Remover
Online AI tool for removing clothes from photos.

Undress AI Tool
Undress images for free

Clothoff.io
AI clothes remover

Video Face Swap
Swap faces in any video effortlessly with our completely free AI face swap tool!

Hot Article
Hot Tools

Notepad++7.3.1
Easy-to-use and free code editor

SublimeText3 Chinese version
Chinese version, very easy to use

Zend Studio 13.0.1
Powerful PHP integrated development environment

Dreamweaver CS6
Visual web development tools

SublimeText3 Mac version
God-level code editing software (SublimeText3)
Hot Topics


 PyCharm Beginner's Guide: Comprehensive understanding of plug-in installation!
Feb 25, 2024 pm 11:57 PM
PyCharm Beginner's Guide: Comprehensive understanding of plug-in installation!
Feb 25, 2024 pm 11:57 PM
PyCharm is a powerful and popular Python integrated development environment (IDE) that provides a wealth of functions and tools so that developers can write code more efficiently. The plug-in mechanism of PyCharm is a powerful tool for extending its functions. By installing different plug-ins, various functions and customized features can be added to PyCharm. Therefore, it is crucial for newbies to PyCharm to understand and be proficient in installing plug-ins. This article will give you a detailed introduction to the complete installation of PyCharm plug-in.
![Error loading plugin in Illustrator [Fixed]](https://img.php.cn/upload/article/000/465/014/170831522770626.jpg?x-oss-process=image/resize,m_fill,h_207,w_330) Error loading plugin in Illustrator [Fixed]
Feb 19, 2024 pm 12:00 PM
Error loading plugin in Illustrator [Fixed]
Feb 19, 2024 pm 12:00 PM
When launching Adobe Illustrator, does a message about an error loading the plug-in pop up? Some Illustrator users have encountered this error when opening the application. The message is followed by a list of problematic plugins. This error message indicates that there is a problem with the installed plug-in, but it may also be caused by other reasons such as a damaged Visual C++ DLL file or a damaged preference file. If you encounter this error, we will guide you in this article to fix the problem, so continue reading below. Error loading plug-in in Illustrator If you receive an "Error loading plug-in" error message when trying to launch Adobe Illustrator, you can use the following: As an administrator
 Share three solutions to why Edge browser does not support this plug-in
Mar 13, 2024 pm 04:34 PM
Share three solutions to why Edge browser does not support this plug-in
Mar 13, 2024 pm 04:34 PM
When users use the Edge browser, they may add some plug-ins to meet more of their needs. But when adding a plug-in, it shows that this plug-in is not supported. How to solve this problem? Today, the editor will share with you three solutions. Come and try it. Method 1: Try using another browser. Method 2: The Flash Player on the browser may be out of date or missing, causing the plug-in to be unsupported. You can download the latest version from the official website. Method 3: Press the "Ctrl+Shift+Delete" keys at the same time. Click "Clear Data" and reopen the browser.
 What is the Chrome plug-in extension installation directory?
Mar 08, 2024 am 08:55 AM
What is the Chrome plug-in extension installation directory?
Mar 08, 2024 am 08:55 AM
What is the Chrome plug-in extension installation directory? Under normal circumstances, the default installation directory of Chrome plug-in extensions is as follows: 1. The default installation directory location of chrome plug-ins in windowsxp: C:\DocumentsandSettings\username\LocalSettings\ApplicationData\Google\Chrome\UserData\Default\Extensions2. chrome in windows7 The default installation directory location of the plug-in: C:\Users\username\AppData\Local\Google\Chrome\User
 How to write Bloom filter algorithm using C#
Sep 21, 2023 am 10:24 AM
How to write Bloom filter algorithm using C#
Sep 21, 2023 am 10:24 AM
How to use C# to write a Bloom filter algorithm. The Bloom Filter (BloomFilter) is a very space-efficient data structure that can be used to determine whether an element belongs to a set. Its basic idea is to map elements into a bit array through multiple independent hash functions and mark the bits of the corresponding bit array as 1. When judging whether an element belongs to the set, you only need to judge whether the bits of the corresponding bit array are all 1. If any bit is 0, it can be judged that the element is not in the set. Bloom filters feature fast queries and
 Does PyCharm Community Edition support enough plugins?
Feb 20, 2024 pm 04:42 PM
Does PyCharm Community Edition support enough plugins?
Feb 20, 2024 pm 04:42 PM
Does PyCharm Community Edition support enough plugins? Need specific code examples As the Python language becomes more and more widely used in the field of software development, PyCharm, as a professional Python integrated development environment (IDE), is favored by developers. PyCharm is divided into two versions: professional version and community version. The community version is provided for free, but its plug-in support is limited compared to the professional version. So the question is, does PyCharm Community Edition support enough plug-ins? This article will use specific code examples to
 Write a method to calculate power function in C language
Feb 19, 2024 pm 01:00 PM
Write a method to calculate power function in C language
Feb 19, 2024 pm 01:00 PM
How to write exponentiation function in C language Exponentiation (exponentiation) is a commonly used operation in mathematics, which means multiplying a number by itself several times. In C language, we can implement this function by writing a power function. The following will introduce in detail how to write a power function in C language and give specific code examples. Determine the input and output of the function The input of the power function usually contains two parameters: base and exponent, and the output is the calculated result. therefore, we
 Detailed explanation of how to install and set up the EclipseSVN plug-in
Jan 28, 2024 am 08:42 AM
Detailed explanation of how to install and set up the EclipseSVN plug-in
Jan 28, 2024 am 08:42 AM
Detailed explanation of how to install and set up the EclipseSVN plug-in Eclipse is a widely used integrated development environment (IDE) that supports many different plug-ins to extend its functionality. One of them is the EclipseSVN plugin, which enables developers to interact with the Subversion version control system. This article will detail how to install and set up the EclipseSVN plug-in and provide specific code examples. Step 1: Install the EclipseSVN plug-in and open Eclipse
