
 Web Front-end
JS Tutorial
Vue multi-entry file construction Example explanation of Vue multi-page construction
Web Front-end
JS Tutorial
Vue multi-entry file construction Example explanation of Vue multi-page construction
Vue multi-entry file construction Example explanation of Vue multi-page construction
下面我就为大家分享一篇vue 多入口文件搭建 vue多页面搭建的实例讲解,具有很好的参考价值,希望对大家有所帮助。
红色为更改后的不同之处

vue 多入口文件搭建
在webpack.base.conf
中修改
var
path = require('path')
var
config = require('../config')
var
utils = require('./utils')
var
projectRoot =
path.resolve(__dirname,'../')
var glob = require('glob');
var entries = getEntry('./src/module/*.js'); // 获得入口js文件
module.exports = {
entry: entries,
output: {
path:config.build.assetsRoot,
publicPath:process.env.NODE_ENV
 ==='production' ?
config.build.assetsPublicPath :config.dev.assetsPublicPath,
filename: '[name].js'
},
resolve: {
extensions: ['','.js',
'.vue'],
fallback: [path.join(__dirname,'../node_modules')],
alias: {
'src':path.resolve(__dirname,'../src'),
'assets':path.resolve(__dirname,'../src/assets'),
'components':path.resolve(__dirname,'../src/components')
}
},
resolveLoader: {
fallback: [path.join(__dirname,'../node_modules')]
},
module: {
loaders: [
{
test: /\.vue$/,
loader:'vue'
},
{
test: /\.js$/,
loader:'babel',
include:projectRoot,
exclude: /node_modules/
},
{
test: /\.json$/,
loader:'json'
},
{
test: /\.html$/,
loader:'vue-html'
},
{
test: /\.(png|jpe?g|gif|svg)(\?.*)?$/,
loader:'url',
query: {
limit:10000,
name:utils.assetsPath('img/[name].[hash:7].[ext]')
}
},
{
test: /\.(woff2?|eot|ttf|otf)(\?.*)?$/,
loader:'url',
query: {
limit:10000,
name:utils.assetsPath('fonts/[name].[hash:7].[ext]')
}
}
]
},
vue: {
loaders:utils.cssLoaders()
}
}
function getEntry(globPath) {
var entries = {},
basename, tmp, pathname;
glob.sync(globPath).forEach(function (entry) {
basename = path.basename(entry, path.extname(entry));
console.log(1,basename);
tmp = entry.split('/').splice(-3);
console.log(2,tmp);
pathname = basename; // 正确输出js和html的路径
console.log(3,pathname);
entries[pathname] = entry;
console.log(4,entry);
});
console.log("base-entrys:");
console.log(5,entries);
return entries;
}
这样一来的话,就在中细分,最后输出html都在dist下。
这里的字符串操作也是和路径的情况相匹配的,如果有需要进行其他方式的设定,注意在这里修改路径的识别。
vue多页面搭建

原本的webpack.dev.conf中有一个插件的设置内容
对这部分内容进行修改
var
config = require('../config')
var
webpack = require('webpack')
var
merge = require('webpack-merge')
var
utils = require('./utils')
var
baseWebpackConfig =
require('./webpack.base.conf')
var
HtmlWebpackPlugin =
require('html-webpack-plugin')
var path = require('path');
var glob = require('glob');
// add hot-reload related code to entry chunks
Object.keys(baseWebpackConfig.entry).forEach(function
(name) {
baseWebpackConfig.entry[name] = ['./build/dev-client'].concat(baseWebpackConfig.entry[name])
})
module.exports =merge(baseWebpackConfig,
{
module: {
loaders:
utils.styleLoaders({
sourceMap: config.dev.cssSourceMap })
},
// eval-source-map is faster for development
devtool:
'#eval-source-map',
plugins: [
new
webpack.DefinePlugin({
'process.env':config.dev.env
}),
// https://github.com/glenjamin/webpack-hot-middleware#installation--usage
new
webpack.optimize.OccurenceOrderPlugin(),
new
webpack.HotModuleReplacementPlugin(),
new
webpack.NoErrorsPlugin(),
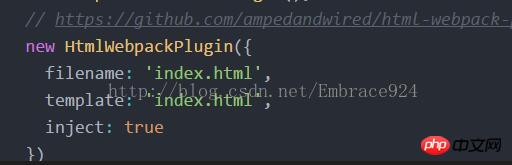
// https://github.com/ampedandwired/html-webpack-plugin
]
})
function getEntry(globPath) {
var entries = {},
basename, tmp, pathname;
glob.sync(globPath).forEach(function(entry) {
basename = path.basename(entry, path.extname(entry));
tmp = entry.split('/').splice(-3);
pathname = basename; // 正确输出js和html的路径
entries[pathname] = entry;
});
console.log("dev-entrys:");
console.log(entries);
return entries;
}
var pages = getEntry('./pages/*.html');
console.log("dev pages----------------------");
for (var pathname in pages) {
console.log("filename:" + pathname + '.html');
console.log("template:" + pages[pathname]);
// 配置生成的html文件,定义路径等
var conf = {
filename: pathname + '.html',
template: pages[pathname], // 模板路径
minify: { //传递 html-minifier 选项给 minify 输出
removeComments: true
},
inject: 'body', // js插入位置
chunks: [pathname, "vendor", "manifest"] // 每个html引用的js模块,也可以在这里加上vendor等公用模块
};
// 需要生成几个html文件,就配置几个HtmlWebpackPlugin对象
module.exports.plugins.push(new HtmlWebpackPlugin(conf));
}
----------------------------------------------
webpack.prod.conf配置
和webpack.dev.conf.js中做类似的处理,
先注释掉原来的HtmlWebpackPlugin,然后在下面添加函数,
通过迭代插入多个HtmlWebpackPlugin。
var
path =require('path')
var
config =require('../config')
var
utils =require('./utils')
var
webpack =require('webpack')
var
merge =require('webpack-merge')
var
baseWebpackConfig =require('./webpack.base.conf')
var
ExtractTextPlugin =require('extract-text-webpack-plugin')
var
HtmlWebpackPlugin =require('html-webpack-plugin')
var
env =process.env.NODE_ENV ==='testing'
?
require('../config/test.env')
:
config.build.env
var
glob =require('glob');
module.exports =merge(baseWebpackConfig,
{
module: {
loaders:
utils.styleLoaders({sourceMap:
config.build.productionSourceMap,extract:
true })
},
devtool:
config.build.productionSourceMap ?'#source-map' :
false,
output: {
path:
config.build.assetsRoot,
filename:
utils.assetsPath('js/[name].[chunkhash].js'),
chunkFilename:
utils.assetsPath('js/[id].[chunkhash].js')
},
vue: {
loaders:
utils.cssLoaders({
sourceMap:
config.build.productionSourceMap,
extract:
true
})
},
plugins: [
// http://vuejs.github.io/vue-loader/workflow/production.html
new
webpack.DefinePlugin({
'process.env':env
}),
new
webpack.optimize.UglifyJsPlugin({
compress: {
warnings:
false
}
}),
new
webpack.optimize.OccurenceOrderPlugin(),
// extract css into its own file
new
ExtractTextPlugin(utils.assetsPath('css/[name].[contenthash].css')),
// generate dist index.html with correct asset hash for caching.
// you can customize output by editing /index.html
// see https://github.com/ampedandwired/html-webpack-plugin
// new HtmlWebpackPlugin({
// filename: process.env.NODE_ENV === 'testing'
// ? 'index.html'
// : config.build.index,
// template: 'index.html',
// inject: true,
// minify: {
// removeComments: true,
// collapseWhitespace: true,
// removeAttributeQuotes: true
// // more options:
// // https://github.com/kangax/html-minifier#options-quick-reference
// },
// // necessary to consistently work with multiple chunks via CommonsChunkPlugin
// chunksSortMode: 'dependency'
// }),
// split vendor js into its own file
new
webpack.optimize.CommonsChunkPlugin({
name:
'vendor',
minChunks:
function (module,count) {
// any required modules inside node_modules are extracted to vendor
return (
module.resource &&
/\.js$/.test(module.resource)
&&
module.resource.indexOf(
path.join(__dirname,'../node_modules')
) ===
0
)
}
}),
// extract webpack runtime and module manifest to its own file in order to
// prevent vendor hash from being updated whenever app bundle is updated
new
webpack.optimize.CommonsChunkPlugin({
name:
'manifest',
chunks: ['vendor']
})
]
})
if (config.build.productionGzip)
{
var
CompressionWebpackPlugin =require('compression-webpack-plugin')
webpackConfig.plugins.push(
new
CompressionWebpackPlugin({
asset:
'[path].gz[query]',
algorithm:
'gzip',
test:
newRegExp(
'\\.(' +
config.build.productionGzipExtensions.join('|')
+
')$'
),
threshold:
10240,
minRatio:
0.8
})
)
}
function getEntry(globPath) {
var entries = {},
basename, tmp,pathname;
glob.sync(globPath).forEach(function (entry) {
basename = path.basename(entry,path.extname(entry));
tmp = entry.split('/').splice(-3);
pathname = tmp.splice(0,1) + '/' + basename; // 正确输出js和html的路径
entries[pathname] =entry;
});
console.log("prod-entrys:");
console.log(entries);
return entries;
}
var pages =getEntry('./pages/*.html');
console.log("prod pages-----");
for (varpathname inpages) {
console.log("filename:"+pathname +'.html');
console.log("template:"+pages[pathname]);
// 配置生成的html文件,定义路径等
var conf = {
filename: pathname +'.html',
template: pages[pathname],// 模板路径
minify:{ //
removeComments:true,
collapseWhitespace: false
},
inject: true,// js插入位置
chunks: [pathname,"vendor", "manifest"]// 每个html引用的js模块,也可以在这里加上vendor等公用模块
};
// 需要生成几个html文件,就配置几个HtmlWebpackPlugin对象
module.exports.plugins.push(newHtmlWebpackPlugin(conf));
}上面是我整理给大家的,希望今后会对大家有帮助。
相关文章:
The above is the detailed content of Vue multi-entry file construction Example explanation of Vue multi-page construction. For more information, please follow other related articles on the PHP Chinese website!

Hot AI Tools

Undresser.AI Undress
AI-powered app for creating realistic nude photos

AI Clothes Remover
Online AI tool for removing clothes from photos.

Undress AI Tool
Undress images for free

Clothoff.io
AI clothes remover

Video Face Swap
Swap faces in any video effortlessly with our completely free AI face swap tool!

Hot Article
Hot Tools

Notepad++7.3.1
Easy-to-use and free code editor

SublimeText3 Chinese version
Chinese version, very easy to use

Zend Studio 13.0.1
Powerful PHP integrated development environment

Dreamweaver CS6
Visual web development tools

SublimeText3 Mac version
God-level code editing software (SublimeText3)
Hot Topics


 Can Tmp format files be deleted?
Feb 24, 2024 pm 04:33 PM
Can Tmp format files be deleted?
Feb 24, 2024 pm 04:33 PM
Tmp format files are a temporary file format usually generated by a computer system or program during execution. The purpose of these files is to store temporary data to help the program run properly or improve performance. Once the program execution is completed or the computer is restarted, these tmp files are often no longer necessary. Therefore, for Tmp format files, they are essentially deletable. Moreover, deleting these tmp files can free up hard disk space and ensure the normal operation of the computer. However, before deleting Tmp format files, we need to
 What to do if the 0x80004005 error code appears. The editor will teach you how to solve the 0x80004005 error code.
Mar 21, 2024 pm 09:17 PM
What to do if the 0x80004005 error code appears. The editor will teach you how to solve the 0x80004005 error code.
Mar 21, 2024 pm 09:17 PM
When deleting or decompressing a folder on your computer, sometimes a prompt dialog box "Error 0x80004005: Unspecified Error" will pop up. How should you solve this situation? There are actually many reasons why the error code 0x80004005 is prompted, but most of them are caused by viruses. We can re-register the dll to solve the problem. Below, the editor will explain to you the experience of handling the 0x80004005 error code. Some users are prompted with error code 0X80004005 when using their computers. The 0x80004005 error is mainly caused by the computer not correctly registering certain dynamic link library files, or by a firewall that does not allow HTTPS connections between the computer and the Internet. So how about
 Different uses of slashes and backslashes in file paths
Feb 26, 2024 pm 04:36 PM
Different uses of slashes and backslashes in file paths
Feb 26, 2024 pm 04:36 PM
A file path is a string used by the operating system to identify and locate a file or folder. In file paths, there are two common symbols separating paths, namely forward slash (/) and backslash (). These two symbols have different uses and meanings in different operating systems. The forward slash (/) is a commonly used path separator in Unix and Linux systems. On these systems, file paths start from the root directory (/) and are separated by forward slashes between each directory. For example, the path /home/user/Docume
 How to transfer files from Quark Cloud Disk to Baidu Cloud Disk?
Mar 14, 2024 pm 02:07 PM
How to transfer files from Quark Cloud Disk to Baidu Cloud Disk?
Mar 14, 2024 pm 02:07 PM
Quark Netdisk and Baidu Netdisk are currently the most commonly used Netdisk software for storing files. If you want to save the files in Quark Netdisk to Baidu Netdisk, how do you do it? In this issue, the editor has compiled the tutorial steps for transferring files from Quark Network Disk computer to Baidu Network Disk. Let’s take a look at how to operate it. How to save Quark network disk files to Baidu network disk? To transfer files from Quark Network Disk to Baidu Network Disk, you first need to download the required files from Quark Network Disk, then select the target folder in the Baidu Network Disk client and open it. Then, drag and drop the files downloaded from Quark Cloud Disk into the folder opened by the Baidu Cloud Disk client, or use the upload function to add the files to Baidu Cloud Disk. Make sure to check whether the file was successfully transferred in Baidu Cloud Disk after the upload is completed. That's it
 What is hiberfil.sys file? Can hiberfil.sys be deleted?
Mar 15, 2024 am 09:49 AM
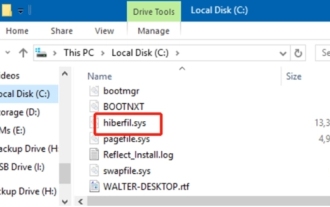
What is hiberfil.sys file? Can hiberfil.sys be deleted?
Mar 15, 2024 am 09:49 AM
Recently, many netizens have asked the editor, what is the file hiberfil.sys? Can hiberfil.sys take up a lot of C drive space and be deleted? The editor can tell you that the hiberfil.sys file can be deleted. Let’s take a look at the details below. hiberfil.sys is a hidden file in the Windows system and also a system hibernation file. It is usually stored in the root directory of the C drive, and its size is equivalent to the size of the system's installed memory. This file is used when the computer is hibernated and contains the memory data of the current system so that it can be quickly restored to the previous state during recovery. Since its size is equal to the memory capacity, it may take up a larger amount of hard drive space. hiber
 Detailed explanation of the role of .ibd files in MySQL and related precautions
Mar 15, 2024 am 08:00 AM
Detailed explanation of the role of .ibd files in MySQL and related precautions
Mar 15, 2024 am 08:00 AM
Detailed explanation of the role of .ibd files in MySQL and related precautions MySQL is a popular relational database management system, and the data in the database is stored in different files. Among them, the .ibd file is a data file in the InnoDB storage engine, used to store data and indexes in tables. This article will provide a detailed analysis of the role of the .ibd file in MySQL and provide relevant code examples to help readers better understand. 1. The role of .ibd files: storing data: .ibd files are InnoDB storage
 How to implement page jump in 3 seconds: PHP Programming Guide
Mar 25, 2024 am 10:42 AM
How to implement page jump in 3 seconds: PHP Programming Guide
Mar 25, 2024 am 10:42 AM
Title: Implementation method of page jump in 3 seconds: PHP Programming Guide In web development, page jump is a common operation. Generally, we use meta tags in HTML or JavaScript methods to jump to pages. However, in some specific cases, we need to perform page jumps on the server side. This article will introduce how to use PHP programming to implement a function that automatically jumps to a specified page within 3 seconds, and will also give specific code examples. The basic principle of page jump using PHP. PHP is a kind of
 Detailed explanation of log viewing command in Linux system!
Mar 06, 2024 pm 03:55 PM
Detailed explanation of log viewing command in Linux system!
Mar 06, 2024 pm 03:55 PM
In Linux systems, you can use the following command to view the contents of the log file: tail command: The tail command is used to display the content at the end of the log file. It is a common command to view the latest log information. tail [option] [file name] Commonly used options include: -n: Specify the number of lines to be displayed, the default is 10 lines. -f: Monitor the file content in real time and automatically display the new content when the file is updated. Example: tail-n20logfile.txt#Display the last 20 lines of the logfile.txt file tail-flogfile.txt#Monitor the updated content of the logfile.txt file in real time head command: The head command is used to display the beginning of the log file
