
 Web Front-end
JS Tutorial
How to use the VueSliderShow function of the responsive adaptive carousel component plug-in based on Vue2x
Web Front-end
JS Tutorial
How to use the VueSliderShow function of the responsive adaptive carousel component plug-in based on Vue2x
How to use the VueSliderShow function of the responsive adaptive carousel component plug-in based on Vue2x
This time I will show you how to use the VueSliderShow function of the responsive adaptive carousel component plug-in based on Vue2x_, and how to use the VueSliderShow function of the responsive adaptive carousel component plug-in based on Vue2xNotesThere are Which ones, the following are practical cases, let’s take a look.
VueSliderShow, hence the name, is a carousel component plug-in for vue. The plug-in:
1. Supports any scaling of the browser and is compatible with mobile terminals.
2. Support automatic switching, stop switching when the mouse passes, click to switch on paging/any page, switch left and right,
3. Support text introduction (more than one line will be automatically omitted)
This article talks about the development of a The whole process of a responsive adaptive carousel component plug-in based on Vue2x, including publishing to npm, building your own npm package, and tips for downloading and installing. Reading this article requires some Vue syntax sugar (custom tags, calculated attributes, Parent-child component communication, etc.), as well as basic knowledge of ES6, npm, etc. Let’s take a look at Demo

Sample source code address
Install
npm i vueslideshow
in vue2.x:
<template>
 //轮播组件的位置
 <p>
 <slider-show :slides="slides" :inv="invTime"></slider-show>
 </p>
</template>
<script>
import sliderShow from 'vueslidershow'
export default {
 components: {
 sliderShow
 },
 data () {
 return {
 invTime: 2000,
 slides: [
 {
 src: require('../assets/1.jpg'),
 title: '测试测试测试1',
 href: 'detail/analysis'
 }
 ]
 }
 }
}Parameter description:
1.invTime: Control the carousel speed
2.slides: Specific carousel data array form, including pictures, text, and links Parameter
3. Note: Since it is responsive and adaptive, the pushed pictures must be highly consistent with the
dividing line. Let’s start on the road and step into the theme! !
Written in front: vue official website provides an introduction to developing plug-ins. Interested veterans can first go to the official website to develop plug-ins,
#0. All of you must have experience with Vue and front-end. These basic project environments and construction projects, as well as the transformation and initialization of Vue projects, are all done with your eyes open. Things have happened, so I will briefly mention them here:
1. Vue environment configuration, (node, vue-cli)
2. Initialization project, Vue init webpack vueslideshow. The installation depends on npm install (vue-router is installed by default during installation)
Transformation initialization project:
(0) Before transformation Analyze our needs: a responsive adaptive carousel component. The reason why it is a component is that we hope that it can be shared with the code segment. It supports dynamic configuration. The carousel component is nothing more than pictures and text, automatically Switch, optional switch.
(1) Clear app.vue to the following
<template>
 <p id="app">
 <router-view/>
 </p>
</template>
<script>
export default {
 name: 'App'
}
</script>(2) In the components folder, create index.vue, sliderShow.vue (because it is a sample project, according to the specification Poor) Let the index.js startup page in the router folder point to index.vue
import Vue from 'vue'
import Router from 'vue-router'
import Index from '@/components/index'
Vue.use(Router)
export default new Router({
 routes: [
 {
 path: '/',
 component: Index
 }
 ]
})Development project:
(1) index As the parent component, .vue references the carousel component through es6, declares to use the carousel sliderShow component, and then passes two invTime and slides attribute parameters to the sliderShow component, which are the carousel switching time and data transfer. Here we have the slides array, Static simulation data is used, and the formal environment is data requested through the request interface.
<template>
 <p>
 <slider-show :slides="slides" :inv="invTime"></slider-show>
 </p>
</template>
<script>
import sliderShow from './sliderShow'
export default {
components: {
 sliderShow
},
 data () {
 return {
 invTime: 2000,
 slides: [
 {
 src: require('../assets/1.jpg'),
 title: '测试测试测试1',
 href: 'detail/analysis'
 },
 {
 src: require('../assets/2.jpg'),
 title: '测试测试测试2',
 href: 'detail/count'
 }
 ]
 }
 }
}(2) sliderShow.vue
Interpretation of the template code (the layout is briefly discussed here). There are two mouses in the outermost layer passing through the clearInv event. The main reason is that the mouse When passing the focus image, no switching is performed to facilitate clicking on the image to jump. Move the mouse out and execute the runInv event to continue automatic switching. The transition controls the appearance and disappearance of the two images respectively, switching left and right, and clicking on the specific paging switch. A common goto is used here. () method transfers different values to determine the specific data page to be displayed. This value can be calculated through the calculated attribute in vue.
<template>
 <p class="slide-show" @mouseover="clearInv" @mouseout="runInv">
 <p class="slide-img">
 <a :href="slides[nowIndex].href" rel="external nofollow" >
 <transition name="slide-fade">
 <img v-if="isShow" :src="slides[nowIndex].src">
 </transition>
 <transition name="slide-fade-old">
 <img v-if="isShows" :src="slides[nowIndex].src">
 </transition>
 </a>
 </p>
 <p class="slide-title"><a>{{ slides[nowIndex].title }}</a></p>
 <ul class="slide-pages">
 <li v-for="(item, index) in slides"
 @click="goto(index)"
 >
 <a :class="{on: index === nowIndex}"></a>
 </li>
 </ul>
 <a @click="goto(prevIndex)" class="callbacks-nav"><</a>
 <a @click="goto(nextIndex)" class="callbacks-nav next">></a>
 </p>
</template>
<script>
export default {
 props: {
 slides: {
 type: Array,
 default: []
 },
 inv: {
 type: Number,
 default: 1000
 }
 },
 data () {
 return {
 nowIndex: 0,
 isShow: true,
 isShows:false
 }
 },
 computed: {
 prevIndex () {
 if (this.nowIndex === 0) {
 return this.slides.length - 1
 }
 else {
 return this.nowIndex - 1
 }
 },
 nextIndex () {
 if (this.nowIndex === this.slides.length - 1) {
 return 0
 }
 else {
 return this.nowIndex + 1
 }
 }
 },
 methods: {
 goto (index) {
 this.isShow = false
 setTimeout(() => {
 this.nowIndex = index
 this.isShows = true
 }, 10)
 },
 runInv () {
 this.invId = setInterval(() => {
 this.goto(this.nextIndex)
 }, this.inv)
 },
 clearInv () {
 clearInterval(this.invId)
 }
 },
 mounted () {
 this.runInv();
 }
}
</script>ES6 logical segment code interpretation, sliderShow.vue accepts data passed from the parent component through props
props: {
 slides: {
 type: Array,
 default: []
 },
 inv: {
 type: Number,
 default: 1000
 }
},计算属性,前一页,这里就控制nowIndex,在当前数据索引里减一,当是第一条数据的时候,我们要跳到最后一条,所以当第一条数据的时候我们这里判断它并让他赋值最后一条数据,后一页和前一页相似,判断最后一页数据,跳到第一页。
computed: {
 prevIndex () {
 if (this.nowIndex === 0) {
 return this.slides.length - 1
 }
 else {
 return this.nowIndex - 1
 }
 },
 nextIndex () {
 if (this.nowIndex === this.slides.length - 1) {
 return 0
 }
 else {
 return this.nowIndex + 1
 }
 }
},通过Index值,从而改变具体数据
goto (index) {
 this.isShow = false
 setTimeout(() => {
 this.nowIndex = index
 this.isShows = true
 }, 10)
},当页面加载完后直接执行runInv()方法,然后自动切换,setInterval()/ clearInterval()是js内置的定时器,setInterval()里按照父组件里传的时间来调用函数的方法,clearInterval()是结束定时器的循环调用函数
runInv () {
 this.invId = setInterval(() => {
 this.goto(this.nextIndex)
 }, this.inv)
 },
 clearInv () {
 clearInterval(this.invId)
 }
 },
 mounted () {
 this.runInv();
}轮播组件插件就基本上ok了,下面讲解一下把这个轮播组件插件放到npm里,构建自己的npm包。
分割线 npm!!!!!
构建npm包:
0、在https://www.npmjs.com创建自己的账号
1、新建一个项目文件夹VueSliderShow,把上面的sliderShow.vue文件复制文件。打开cmd进入到VueSliderShow目录,然后命令行执行:npm init(按流程填写相关信息,都可以按照自己的实际情况写),然后会生成一个package.json,例如下面是我这个组件的基本信息
{
 "name": "vueslideshow",
 "version": "1.0.2",
 "description": "a slider implement by vuejs",
 "main": "index.js",
 "scripts": {
 "test": "echo \"Error: no test specified\" && exit 1"
 },
 "repository": {
 "type": "git",
 "url": "https://github.com/HongqingCao/My-Code/tree/master/VueSliderShow"
 },
 "author": "HongqingCao",
 "license": "ISC"
}2、创建一个index.js
var sliderShow = require('./sliderShow')
module.exports = sliderShow3、创建一个README.md,描述一下这个组件,可以参考一下我写的
# vueslidershow
> a slider implement by vuejs
>一个vue的响应式自适应轮播图组件
[Demo](https://github.com/HongqingCao/My-Code/tree/master/VueSliderShow)
###### 
## Install
" bash
npm i vueslideshow
"
## 应用案例
#### in vue2.x:
"html
<template>
<p>
<slider-show :slides="slides" :inv="invTime"></slider-show>
</p>
</template>
<script>
import sliderShow from './sliderShow'
export default {
components: {
sliderShow
},
data () {
return {
invTime: 2000,
slides: [
{
src: require('../assets/1.jpg'),
title: '测试测试测试1',
href: 'detail/analysis'
}
]
}
}
}
"
<br>
### 参数说明:
1.invTime,控制轮播速度
2.slides,具体的轮播数据数组形式,包含图片,文字,链接三个参数
3.由于是响应式自适应所以推的图片必须高度一致,更友好
## License
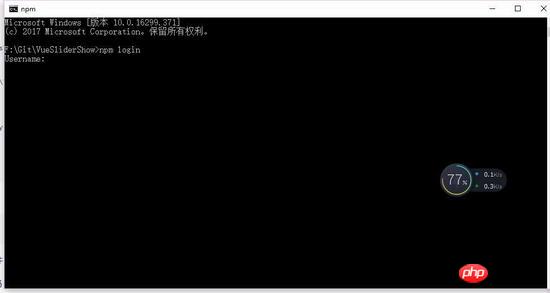
[MIT](LICENSE)4、命令行npm login,登录自己的账号和密码
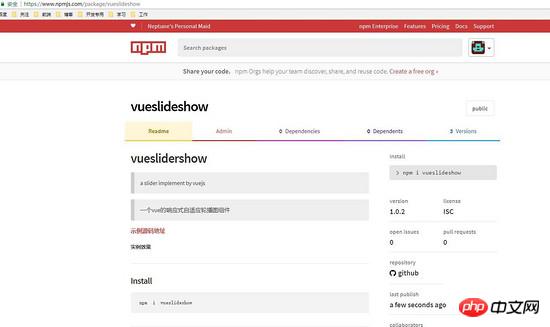
5、发布到npm执行命令行: npm publish,成功后你会发现你的npm里已经有一个包了

你可以点击进入详情看看
6、尝试下载安装在自己项目里:npm i vueslideshow,安装完后在node_modules就可以看到自己的插件啦

7、应用就如一开始的插件介绍一样,可以往上看
最后总结
从开发到发布一款基于Vue2x的响应式自适应轮播组件插件VueSliderShow,到这里就已经开发完毕,当然里面肯定也有一定的bug在里面,我用了transition去包裹两个img其实目前是没用到这个过渡属性,后期可以各位老铁自己补一些绚丽的切换动画,最后再次附上github示例源码
相信看了本文案例你已经掌握了方法,更多精彩请关注php中文网其它相关文章!
推荐阅读:
The above is the detailed content of How to use the VueSliderShow function of the responsive adaptive carousel component plug-in based on Vue2x. For more information, please follow other related articles on the PHP Chinese website!

Hot AI Tools

Undresser.AI Undress
AI-powered app for creating realistic nude photos

AI Clothes Remover
Online AI tool for removing clothes from photos.

Undress AI Tool
Undress images for free

Clothoff.io
AI clothes remover

Video Face Swap
Swap faces in any video effortlessly with our completely free AI face swap tool!

Hot Article
Hot Tools

Notepad++7.3.1
Easy-to-use and free code editor

SublimeText3 Chinese version
Chinese version, very easy to use

Zend Studio 13.0.1
Powerful PHP integrated development environment

Dreamweaver CS6
Visual web development tools

SublimeText3 Mac version
God-level code editing software (SublimeText3)
Hot Topics


 How to implement dual WeChat login on Huawei mobile phones?
Mar 24, 2024 am 11:27 AM
How to implement dual WeChat login on Huawei mobile phones?
Mar 24, 2024 am 11:27 AM
How to implement dual WeChat login on Huawei mobile phones? With the rise of social media, WeChat has become one of the indispensable communication tools in people's daily lives. However, many people may encounter a problem: logging into multiple WeChat accounts at the same time on the same mobile phone. For Huawei mobile phone users, it is not difficult to achieve dual WeChat login. This article will introduce how to achieve dual WeChat login on Huawei mobile phones. First of all, the EMUI system that comes with Huawei mobile phones provides a very convenient function - dual application opening. Through the application dual opening function, users can simultaneously
 PHP Programming Guide: Methods to Implement Fibonacci Sequence
Mar 20, 2024 pm 04:54 PM
PHP Programming Guide: Methods to Implement Fibonacci Sequence
Mar 20, 2024 pm 04:54 PM
The programming language PHP is a powerful tool for web development, capable of supporting a variety of different programming logics and algorithms. Among them, implementing the Fibonacci sequence is a common and classic programming problem. In this article, we will introduce how to use the PHP programming language to implement the Fibonacci sequence, and attach specific code examples. The Fibonacci sequence is a mathematical sequence defined as follows: the first and second elements of the sequence are 1, and starting from the third element, the value of each element is equal to the sum of the previous two elements. The first few elements of the sequence
 How to implement the WeChat clone function on Huawei mobile phones
Mar 24, 2024 pm 06:03 PM
How to implement the WeChat clone function on Huawei mobile phones
Mar 24, 2024 pm 06:03 PM
How to implement the WeChat clone function on Huawei mobile phones With the popularity of social software and people's increasing emphasis on privacy and security, the WeChat clone function has gradually become the focus of people's attention. The WeChat clone function can help users log in to multiple WeChat accounts on the same mobile phone at the same time, making it easier to manage and use. It is not difficult to implement the WeChat clone function on Huawei mobile phones. You only need to follow the following steps. Step 1: Make sure that the mobile phone system version and WeChat version meet the requirements. First, make sure that your Huawei mobile phone system version has been updated to the latest version, as well as the WeChat App.
 Master how Golang enables game development possibilities
Mar 16, 2024 pm 12:57 PM
Master how Golang enables game development possibilities
Mar 16, 2024 pm 12:57 PM
In today's software development field, Golang (Go language), as an efficient, concise and highly concurrency programming language, is increasingly favored by developers. Its rich standard library and efficient concurrency features make it a high-profile choice in the field of game development. This article will explore how to use Golang for game development and demonstrate its powerful possibilities through specific code examples. 1. Golang’s advantages in game development. As a statically typed language, Golang is used in building large-scale game systems.
 How to implement exact division operation in Golang
Feb 20, 2024 pm 10:51 PM
How to implement exact division operation in Golang
Feb 20, 2024 pm 10:51 PM
Implementing exact division operations in Golang is a common need, especially in scenarios involving financial calculations or other scenarios that require high-precision calculations. Golang's built-in division operator "/" is calculated for floating point numbers, and sometimes there is a problem of precision loss. In order to solve this problem, we can use third-party libraries or custom functions to implement exact division operations. A common approach is to use the Rat type from the math/big package, which provides a representation of fractions and can be used to implement exact division operations.
 PHP Game Requirements Implementation Guide
Mar 11, 2024 am 08:45 AM
PHP Game Requirements Implementation Guide
Mar 11, 2024 am 08:45 AM
PHP Game Requirements Implementation Guide With the popularity and development of the Internet, the web game market is becoming more and more popular. Many developers hope to use the PHP language to develop their own web games, and implementing game requirements is a key step. This article will introduce how to use PHP language to implement common game requirements and provide specific code examples. 1. Create game characters In web games, game characters are a very important element. We need to define the attributes of the game character, such as name, level, experience value, etc., and provide methods to operate these
 Using PHP to implement SaaS: a comprehensive analysis
Mar 07, 2024 pm 10:18 PM
Using PHP to implement SaaS: a comprehensive analysis
Mar 07, 2024 pm 10:18 PM
I'm really sorry that I can't provide real-time programming guidance, but I can provide you with a code example to give you a better understanding of how to use PHP to implement SaaS. The following is an article within 1,500 words, titled "Using PHP to implement SaaS: A comprehensive analysis." In today's information age, SaaS (Software as a Service) has become the mainstream way for enterprises and individuals to use software. It provides a more flexible and convenient way to access software. With SaaS, users don’t need to be on-premises
 Detailed explanation of using Golang to implement data export function
Feb 28, 2024 pm 01:42 PM
Detailed explanation of using Golang to implement data export function
Feb 28, 2024 pm 01:42 PM
Title: Detailed explanation of data export function using Golang. With the improvement of informatization, many enterprises and organizations need to export data stored in databases into different formats for data analysis, report generation and other purposes. This article will introduce how to use the Golang programming language to implement the data export function, including detailed steps to connect to the database, query data, and export data to files, and provide specific code examples. To connect to the database first, we need to use the database driver provided in Golang, such as da
