
 Web Front-end
JS Tutorial
Detailed explanation of the case of simple pop-up window function implemented by Vue component
Web Front-end
JS Tutorial
Detailed explanation of the case of simple pop-up window function implemented by Vue component
Detailed explanation of the case of simple pop-up window function implemented by Vue component
This time I will bring you a detailed explanation of the case of Vue component implementing simple pop-up window function. What are the precautions for Vue component to implement simple pop-up window function. The following is a practical case, let's take a look.
I have been using the element-ui framework recently and used the Dialog dialog component. The effect achieved is roughly the same as a pop-up component I made in my previous mobile project. Then I wanted to share with you the implementation method of this pop-up window component. The following article will guide you through the implementation of a pop-up window component.
The main content of this article will involve the implementation of pop-up window masks, the use of slot slots, props and $emit parameters, and the specific component codes are also uploaded. If you like it, you can like/follow and support it. I hope everyone can gain something from reading this article.
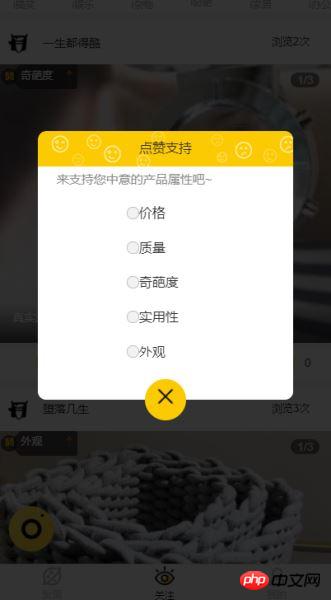
The final effect of the component

- First build the html and css styles, mask layer and content layer of the component.
- Customize the pop-up window content: The pop-up window component accepts the pop-up window content passed from the parent component through the slot slot.
- Customized pop-up window style: The pop-up window component receives the pop-up window width, up, down, left and right positions passed from the parent component through props.
- Component switch: The props passed in through the parent component control the display and hiding of the component. When the child component is closed, the event $emit triggers the parent component to change the value.
<template>
<p class="dialog">
<!--外层的遮罩 点击事件用来关闭弹窗,isShow控制弹窗显示 隐藏的props-->
<p class="dialog-cover back" v-if="isShow" @click="closeMyself"></p>
<!-- transition 这里可以加一些简单的动画效果 -->
<transition name="drop">
<!--style 通过props 控制内容的样式 -->
<p class="dialog-content" :style="{top:topDistance+'%',width:widNum+'%',left:leftSite+'%'}" v-if="isShow">
<p class="dialog_head back">
<!--弹窗头部 title-->
<slot name="header">提示信息</slot>
</p>
<p class="dialog_main" :style="{paddingTop:pdt+'px',paddingBottom:pdb+'px'}">
<!--弹窗的内容-->
<slot name="main">弹窗内容</slot>
</p>
<!--弹窗关闭按钮-->
<p class="foot_close" @click="closeMyself">
<p class="close_img back"></p>
</p>
</p>
</transition>
</p>
</template>background. The css of the specific content can be set according to your own needs.
<style lang="scss" scoped>
 // 最外层 设置position定位
 .dialog {
 position: relative;
 color: #2e2c2d;
 font-size: 16px;
 }
 // 遮罩 设置背景层,z-index值要足够大确保能覆盖,高度 宽度设置满 做到全屏遮罩
 .dialog-cover {
 background: rgba(0,0,0, 0.8);
 position: fixed;
 z-index: 200;
 top: 0;
 left: 0;
 width: 100%;
 height: 100%;
 }
 // 内容层 z-index要比遮罩大,否则会被遮盖,
 .dialog-content{
 position: fixed;
 top: 35%;
 // 移动端使用felx布局
 display: flex;
 flex-direction: column;
 justify-content: center;
 align-items: center;
 z-index: 300;
 }
</style>The above is a single slot It is called the default slot. The correct way to use the slot in the parent component is:
<my-component>
 <!--在my-component里面的所有内容片段都将插入到slot所在的DOM位置,并且会替换掉slot标签-->
 <!--这两个p标签,将替换整个slot标签里面的内容-->
 <p>这是一些初始内容</p>
 <p>这是更多的初始内容</p>
</my-component>
<p class="dialog_head back ">
<!--弹窗头部 title-->
<slot name="header">提示信息</slot>
</p>
<p class="dialog_main " :style="{paddingTop:pdt+'px',paddingBottom:pdb+'px'}">
<!--弹窗的内容-->
<slot name="main">弹窗内容</slot>
</p>The method of using the pop-up component slot in the parent component is as follows.
<dialogComponent>
 <p slot="header">插入到name为header的slot标签里面</p>
  <p class="dialog_publish_main" slot="main">
  这里是内容插入到子组件的slot的name为main里面,可以在父组件中添加class定义样式,事件类型等各种操作
  </p>
</dialogComponent>
Then bind the props data in the parent component.
<script>
export default {
 props: {
 isShow: {
 //弹窗组件是否显示 默认不显示
  type: Boolean,
  default: false,
  required:true, //必须
 },
 //下面这些属性会绑定到p上面 详情参照上面的html结构
 // 如: :style="{top:topDistance+'%',width:widNum+'%'}"
 widNum:{
 //内容宽度
  type: Number,
  default:86.5
 },
 leftSite:{
  // 左定位
  type: Number,
  default:6.5
 },
 topDistance: {
  //top上边距
  type: Number,
  default:35
 },
 pdt:{
  //上padding
  type: Number,
  default:22
 },
 pdb:{
  //下padding
  type: Number,
  default:47
 }
 },
}
</script><dialogComponent :is-show="status.isShowPublish" :top-distance="status.topNum"> </dialogComponent>
ps:props传递数据不是双向绑定的,而是 单向数据流 ,父组件的数据变化时,也会传递到子组件中,这就意外着我们不应该在子组件中修改props。所以我们在关闭弹窗的时候就 需要通过 $emit 来修改父组件的数据 ,然后数据会自动传到子组件中。
现在基本上弹窗组件都已实现的差不多了,还差一个弹窗的关闭事件,这里就涉及到子组件往父组件传参了。
4. $emit 触发父组件事件修改数据,关闭弹窗
Vue中在子组件往父组件传参,很多都是通过 $emit 来触发父组件的事件来修改数据。
在子组件中,在点击关闭,或者遮罩层的时候触发下面这个方法:
methods: {
 closeMyself() {
  this.$emit("on-close");
  //如果需要传参的话,可以在"on-close"后面再加参数,然后在父组件的函数里接收就可以了。
 }
}父组件中的写法:
<dialogComponent :is-show="status.isShowPublish" :top-distance="status.topNum" @on-close="closeDialog">
 </dialogComponent>
 //"on-close是监听子组件的时间有没有触发,触发的时候执行closeDialog函数
methods:{
 closeDialog(){
 // this.status.isShowPublish=false;
 //把绑定的弹窗数组 设为false即可关闭弹窗
 },
}可以用弹窗组件实现下列这种信息展示,或者事件交互:
弹窗组件代码
相信看了本文案例你已经掌握了方法,更多精彩请关注php中文网其它相关文章!
推荐阅读:
The above is the detailed content of Detailed explanation of the case of simple pop-up window function implemented by Vue component. For more information, please follow other related articles on the PHP Chinese website!

Hot AI Tools

Undresser.AI Undress
AI-powered app for creating realistic nude photos

AI Clothes Remover
Online AI tool for removing clothes from photos.

Undress AI Tool
Undress images for free

Clothoff.io
AI clothes remover

Video Face Swap
Swap faces in any video effortlessly with our completely free AI face swap tool!

Hot Article
Hot Tools

Notepad++7.3.1
Easy-to-use and free code editor

SublimeText3 Chinese version
Chinese version, very easy to use

Zend Studio 13.0.1
Powerful PHP integrated development environment

Dreamweaver CS6
Visual web development tools

SublimeText3 Mac version
God-level code editing software (SublimeText3)
Hot Topics
 1662
1662
 14
1418
52
1311
25
1261
29
1234
24
14
1418
52
1311
25
1261
29
1234
24

 The easiest way to query the hard drive serial number
Feb 26, 2024 pm 02:24 PM
The easiest way to query the hard drive serial number
Feb 26, 2024 pm 02:24 PM
The hard disk serial number is an important identifier of the hard disk and is usually used to uniquely identify the hard disk and identify the hardware. In some cases, we may need to query the hard drive serial number, such as when installing an operating system, finding the correct device driver, or performing hard drive repairs. This article will introduce some simple methods to help you check the hard drive serial number. Method 1: Use Windows Command Prompt to open the command prompt. In Windows system, press Win+R keys, enter "cmd" and press Enter key to open the command
 What functions does Doubao app have?
Mar 01, 2024 pm 10:04 PM
What functions does Doubao app have?
Mar 01, 2024 pm 10:04 PM
There will be many AI creation functions in the Doubao app, so what functions does the Doubao app have? Users can use this software to create paintings, chat with AI, generate articles for users, help everyone search for songs, etc. This function introduction of the Doubao app can tell you the specific operation method. The specific content is below, so take a look! What functions does the Doubao app have? Answer: You can draw, chat, write articles, and find songs. Function introduction: 1. Question query: You can use AI to find answers to questions faster, and you can ask any kind of questions. 2. Picture generation: AI can be used to create different pictures for everyone. You only need to tell everyone the general requirements. 3. AI chat: can create an AI that can chat for users,
 The difference between vivox100s and x100: performance comparison and function analysis
Mar 23, 2024 pm 10:27 PM
The difference between vivox100s and x100: performance comparison and function analysis
Mar 23, 2024 pm 10:27 PM
Both vivox100s and x100 mobile phones are representative models in vivo's mobile phone product line. They respectively represent vivo's high-end technology level in different time periods. Therefore, the two mobile phones have certain differences in design, performance and functions. This article will conduct a detailed comparison between these two mobile phones in terms of performance comparison and function analysis to help consumers better choose the mobile phone that suits them. First, let’s look at the performance comparison between vivox100s and x100. vivox100s is equipped with the latest
 Comparative analysis of the functions and performance of JPA and MyBatis
Feb 19, 2024 pm 05:43 PM
Comparative analysis of the functions and performance of JPA and MyBatis
Feb 19, 2024 pm 05:43 PM
JPA and MyBatis: Function and Performance Comparative Analysis Introduction: In Java development, the persistence framework plays a very important role. Common persistence frameworks include JPA (JavaPersistenceAPI) and MyBatis. This article will conduct a comparative analysis of the functions and performance of the two frameworks and provide specific code examples. 1. Function comparison: JPA: JPA is part of JavaEE and provides an object-oriented data persistence solution. It is passed annotation or X
 What is a Bluetooth adapter used for?
Feb 19, 2024 pm 05:22 PM
What is a Bluetooth adapter used for?
Feb 19, 2024 pm 05:22 PM
What does a Bluetooth adapter do? With the continuous development of science and technology, wireless communication technology has also been rapidly developed and popularized. Among them, Bluetooth technology, as a short-distance wireless communication technology, is widely used in data transmission and connection between various devices. The Bluetooth adapter plays a vital role as an important device that supports Bluetooth communication. A Bluetooth adapter is a device that can turn a non-Bluetooth device into a device that supports Bluetooth communication. It realizes wireless connection and data transmission between devices by converting wireless signals into Bluetooth signals. Bluetooth adapter
 What exactly is self-media? What are its main features and functions?
Mar 21, 2024 pm 08:21 PM
What exactly is self-media? What are its main features and functions?
Mar 21, 2024 pm 08:21 PM
With the rapid development of the Internet, the concept of self-media has become deeply rooted in people's hearts. So, what exactly is self-media? What are its main features and functions? Next, we will explore these issues one by one. 1. What exactly is self-media? We-media, as the name suggests, means you are the media. It refers to an information carrier through which individuals or teams can independently create, edit, publish and disseminate content through the Internet platform. Different from traditional media, such as newspapers, television, radio, etc., self-media is more interactive and personalized, allowing everyone to become a producer and disseminator of information. 2. What are the main features and functions of self-media? 1. Low threshold: The rise of self-media has lowered the threshold for entering the media industry. Cumbersome equipment and professional teams are no longer needed.
 What are the functions of Xiaohongshu account management software? How to operate a Xiaohongshu account?
Mar 21, 2024 pm 04:16 PM
What are the functions of Xiaohongshu account management software? How to operate a Xiaohongshu account?
Mar 21, 2024 pm 04:16 PM
As Xiaohongshu becomes popular among young people, more and more people are beginning to use this platform to share various aspects of their experiences and life insights. How to effectively manage multiple Xiaohongshu accounts has become a key issue. In this article, we will discuss some of the features of Xiaohongshu account management software and explore how to better manage your Xiaohongshu account. As social media grows, many people find themselves needing to manage multiple social accounts. This is also a challenge for Xiaohongshu users. Some Xiaohongshu account management software can help users manage multiple accounts more easily, including automatic content publishing, scheduled publishing, data analysis and other functions. Through these tools, users can manage their accounts more efficiently and increase their account exposure and attention. In addition, Xiaohongshu account management software has
 PHP Tips: Quickly Implement Return to Previous Page Function
Mar 09, 2024 am 08:21 AM
PHP Tips: Quickly Implement Return to Previous Page Function
Mar 09, 2024 am 08:21 AM
PHP Tips: Quickly implement the function of returning to the previous page. In web development, we often encounter the need to implement the function of returning to the previous page. Such operations can improve the user experience and make it easier for users to navigate between web pages. In PHP, we can achieve this function through some simple code. This article will introduce how to quickly implement the function of returning to the previous page and provide specific PHP code examples. In PHP, we can use $_SERVER['HTTP_REFERER'] to get the URL of the previous page
