

How to edit and manipulate images on canvas
This time I will show you how to edit and operate images on canvas, and what are the precautions for editing and operating images on canvas. The following is a practical case, let's take a look.
This article will be divided into several small functions to introduce canvas image editing in detailZoom
The following is an analysis chart. It is assumed that by default, the image and canvas have the same width and height. The scale range of the image is 0.5 to 3. What changes when scaling is the size and coordinate position of the imageW(宽) = canvas.width * scale H(高) = canvas.height * scale x坐标 = (W - canvas.width)/2; y坐标 = (H - canvas.height)/2;
<canvas id="drawing" >
<p>The canvas element is not supported!</p>
</canvas>
<br>
<input id="scale-range" min="0.5" max="1.5" step="0.01" type="range" >
<script>
var drawing = document.getElementById('drawing');
if(drawing.getContext){
 var context = drawing.getContext('2d');
 var slider = document.getElementById('scale-range');
 var W = 400;
 var H = 290;
 drawing.width = W;
 drawing.height = H;
 var image = new Image();
 image.src="http://sandbox.runjs.cn/uploads/rs/26/ddzmgynp/chunfen.jpg";
 image.onload = function(){
  drawImgByScale(slider.value);
  slider.onmousemove = function(){
   drawImgByScale(slider.value);
  }
 }
 function drawImgByScale(scale){
  var imgW = W * scale;
  var imgH = H * scale;
  var dx =(W - imgW)/2;
  var dy =(H - imgH)/2;
  context.clearRect(0,0,W,H);
  context.drawImage(image,dx,dy,imgW,imgH);
 }
}
</script>to add the picture and watermark, and use toDataURL() and the a tag to download the watermarked picture. Function
<canvas id="drawing" >
<p>The canvas element is not supported!</p>
</canvas>
<p>
<span>
<input type="file" id="addImgHelper" >
<button id="addImg">选择图片</button>
</span>
<span>
  <button id="addWaterMark" disabled>添加水印</button>
  <span>水印文字为</span>
  <input id="waterMarkWords" type="text" value="小火柴的蓝色理想">
 </span>
 <span>
  <button id="downloadImg" disabled>下载图片</button>
  <a id="downloadImgHelper" href="#" rel="external nofollow" download="带水印图片" ></a>
 </span>
</p>
<script>
if(drawing.getContext){
 var cxt = drawing.getContext('2d');
 var W,H;
 addImg.onclick = function(){
  addImgHelper.click();
 }
 addImgHelper.onchange = function(){
  addWaterMark.disabled = true;
  downloadImg.disabled = true;
  var file = addImgHelper.files[0];
  if(file && /image/.test(file.type)){
   var reader = new FileReader();
   reader.readAsDataURL(file);
   reader.onload = function(){
    var img = new Image();
    img.src= reader.result;
    img.onload = function(){
     addWaterMark.disabled = false;
     drawing.width = W = img.width;
     drawing.height = H = img.height;
     cxt.drawImage(img,0,0);
     addWaterMark.onclick = function(){
       downloadImg.disabled = false;
       cxt.clearRect(0,0,W,H);
       cxt.drawImage(img,0,0);
       var str = waterMarkWords.value;
       cxt.font = "bold 50px Arial";
       cxt.lineWidth = '1';
       cxt.fillStyle = 'rgba(255,255,255,0.5)';
       cxt.textBaseline = "bottom";
       cxt.textAlign = 'end';
       cxt.fillText(str,W-10,H-10,W/2);
       downloadImg.onclick = function(){
        downloadImgHelper.href = drawing.toDataURL('image/png');
        downloadImgHelper.click();
       }
     }
    }
   }
  }
 }
}
</script>Magnifying glass effect Mainly uses the technology of off-screen canvas. The off-screen canvas places a magnified version of the picture, while the ordinary canvas places the normal version of the picture
<canvas id="drawing" >
  <p>The canvas element is not supported!</p>
</canvas>
<canvas id="drawingOff" >
  <p>The canvas element is not supported!</p>
</canvas>
<script>
if(drawing.getContext){
 var cxt = drawing.getContext('2d');
 var cxtOff = drawingOff.getContext('2d');
 var W,H;
 var scale = 1.5;
 var img = new Image();
 img.src="http://sandbox.runjs.cn/uploads/rs/26/ddzmgynp/chunfen.jpg";
 img.onload = function(){
  W = img.width;
  H = img.height;
  drawing.width = W/scale;
  drawing.height = H/scale;
  drawingOff.width = W;
  drawingOff.height = H;
  cxt.drawImage(img,0,0,W/scale,H/scale);
  cxtOff.drawImage(img,0,0);
  drawing.onmousedown = function(e){
   e = e || event;
   var x0 = this.offsetLeft;
   var y0 = this.offsetTop;
   drawMagnifier(e);
   drawing.onmousemove = function(e){
    drawMagnifier(e);
   }
   document.onmouseup = function(e){
    cxt.clearRect(0,0,W/scale,H/scale);
    cxt.drawImage(img,0,0,W/scale,H/scale);
    drawing.onmousemove = null;
   }
   function drawMagnifier(e){
    cxt.clearRect(0,0,W/scale,H/scale);
    cxt.drawImage(img,0,0,W/scale,H/scale);
    var x = (e.clientX-x0);
    var y = (e.clientY-y0);
    var r = 40;
    var dx = x - r;
    var dy = y - r;
    var sx = x*scale - r;
    var sy = y*scale - r;
    cxt.save();
    cxt.beginPath();
    cxt.arc(x,y,r,0,Math.PI*2);
    cxt.lineWidth = 4;
    cxt.strokeStyle = '#069';
    cxt.stroke();
    cxt.clip();
    cxt.drawImage(drawingOff,sx,sy,2*r,2*r,dx,dy,2*r,2*r);
    cxt.restore();
   }
  }
 }
}
</script><canvas id="drawing1" >
<p>The canvas element is not supported!</p>
</canvas>
<canvas id="drawing2" >
<p>The canvas element is not supported!</p>
</canvas>
<br>
<button id="noGreen">无绿色</button>
<button id="noBlue">无蓝色</button>
<button id="toGrey">灰度</button>
<button id="toBlackWhite">黑白</button>
<button id="reverse">反色</button>
<script>
if(drawing1.getContext){
var cxt1 = drawing1.getContext('2d');
var cxt2 = drawing2.getContext('2d');
var img = new Image();
img.src="chunfen.jpg";
img.onload = function(){
cxt1.drawImage(img,0,0);
function filter(fn){
var imageData = cxt1.getImageData(0,0,img.width,img.height);
cxt2.clearRect(0,0,drawing2.width,drawing2.height);
var data = imageData.data;
for(var i = 0, len = data.length; i < len; i+=4){
fn(data,i)
}
imageData.data = data;
cxt2.putImageData(imageData,0,0);
}
function fnNoGreen(data,i){
data[i+1] = 0;
}
function fnNoBlue(data,i){
data[i+2] = 0;
}
function fnReverse(data,i){
var red = data[i];
var green = data[i+1];
var blue = data[i+2];
var alpha = data[i+3];
data[i] = 255 - red;
data[i+1] = 255 - green;
data[i+2] = 255 - blue;
}
function fnToGrey(data,i){
var red = data[i];
var green = data[i+1];
var blue = data[i+2];
var alpha = data[i+3];
var average = Math.floor((red+green+blue)/3);
data[i] = data[i+1] = data[i+2] = average;
}
function fnToBlackWhite(data,i){
var red = data[i];
var green = data[i+1];
var blue = data[i+2];
var alpha = data[i+3];
var average = Math.floor((red+green+blue)/3);
if(average > 255/2){
var result = 255;
}else{
var result = 0;
}
data[i] = data[i+1] = data[i+2] = result;
}
toGrey.onclick = function(){
filter(fnToGrey);
}
noGreen.onclick = function(){
filter(fnNoGreen);
}
noBlue.onclick = function(){
filter(fnNoBlue);
}
toBlackWhite.onclick = function(){
filter(fnToBlackWhite);
}
reverse.onclick = function(){
filter(fnReverse);
}
}
}
</script>function fnToBlur(n){
cxt2.clearRect(0,0,drawing2.width,drawing2.height);
var imageData = cxt1.getImageData(0,0,drawing2.width,drawing2.height);
var tempImageData = imageData;
var data = imageData.data;
var tempData = tempImageData.data;
var blurR = n;
var totalnum = (2*blurR + 1)*(2*blurR + 1);
for(var i = blurR; i < drawing2.height - blurR; i++){
for(var j = blurR; j < drawing2.width - blurR; j++){
var totalr = 0, totalg = 0, totalb = 0;
for(var dx = -blurR; dx <= blurR; dx++){
for(var dy = -blurR; dy <= blurR; dy++){
var x = i + dx;
var y = j + dy;
var p = x*drawing2.width + y;
totalr += tempData[p*4+0];
totalg += tempData[p*4+1];
totalb += tempData[p*4+2];
}
}
var p = i*drawing2.width + j;
data[p*4+0] = totalr / totalnum;
data[p*4+1] = totalg / totalnum;
data[p*4+2] = totalb / totalnum;
}
}
imageData.data = data;
cxt2.putImageData(imageData,0,0);
}function fnToMosaic(n){
cxt2.clearRect(0,0,drawing2.width,drawing2.height);
var imageData = cxt1.getImageData(0,0,drawing2.width,drawing2.height);
var tempImageData = imageData;
var data = imageData.data;
var tempData = tempImageData.data;
var size = n;
var totalnum = size*size;
for(var i = 0; i < drawing2.height; i+=size){
for(var j = 0; j < drawing2.width; j+=size){
var totalr = 0, totalg = 0, totalb = 0;
for(var dx = 0; dx < size; dx++){
for(var dy = 0; dy < size; dy++){
var x = i + dx;
var y = j + dy;
var p = x*drawing2.width + y;
totalr += tempData[p*4+0];
totalg += tempData[p*4+1];
totalb += tempData[p*4+2];
}
}
var p = i*drawing2.width + j;
var resr = totalr / totalnum;
var resg = totalg / totalnum;
var resb = totalb / totalnum;
for(var dx = 0; dx < size; dx++){
for(var dy = 0; dy < size; dy++){
var x = i + dx;
var y = j + dy;
var p = x*drawing2.width + y;
data[p*4+0]= resr;
data[p*4+1]= resg;
data[p*4+2]= resb;
}
}
}
}
imageData.data = data;
cxt2.putImageData(imageData,0,0);
}
<script> if(drawing1.getContext){ var cxt1 = drawing1.getContext('2d'); var cxt2 = drawing2.getContext('2d'); var img = new Image(); img.src="chunfen.jpg"; img.onload = function(){ cxt1.drawImage(img,0,0); toLightBlur.onclick = function(){ fnToBlur(1); } toHeavyBlur.onclick = function(){ fnToBlur(3); } toLightMosaic.onclick = function(){ fnToMosaic(4); } toHeavyMosaic.onclick = function(){ fnToMosaic(9); } function fnToBlur(n){ cxt2.clearRect(0,0,drawing2.width,drawing2.height); var imageData = cxt1.getImageData(0,0,drawing2.width,drawing2.height); var tempImageData = imageData; var data = imageData.data; var tempData = tempImageData.data; var blurR = n; var totalnum = (2*blurR + 1)*(2*blurR + 1); for(var i = blurR; i < drawing2.height - blurR; i++){ for(var j = blurR; j < drawing2.width - blurR; j++){ var totalr = 0, totalg = 0, totalb = 0; for(var dx = -blurR; dx <= blurR; dx++){ for(var dy = -blurR; dy <= blurR; dy++){ var x = i + dx; var y = j + dy; var p = x*drawing2.width + y; totalr += tempData[p*4+0]; totalg += tempData[p*4+1]; totalb += tempData[p*4+2]; } } var p = i*drawing2.width + j; data[p*4+0] = totalr / totalnum; data[p*4+1] = totalg / totalnum; data[p*4+2] = totalb / totalnum; } } imageData.data = data; cxt2.putImageData(imageData,0,0); } function fnToMosaic(n){ cxt2.clearRect(0,0,drawing2.width,drawing2.height); var imageData = cxt1.getImageData(0,0,drawing2.width,drawing2.height); var tempImageData = imageData; var data = imageData.data; var tempData = tempImageData.data; var size = n; var totalnum = size*size; for(var i = 0; i < drawing2.height; i+=size){ for(var j = 0; j < drawing2.width; j+=size){ var totalr = 0, totalg = 0, totalb = 0; for(var dx = 0; dx < size; dx++){ for(var dy = 0; dy < size; dy++){ var x = i + dx; var y = j + dy; var p = x*drawing2.width + y; totalr += tempData[p*4+0]; totalg += tempData[p*4+1]; totalb += tempData[p*4+2]; } } var p = i*drawing2.width + j; var resr = totalr / totalnum; var resg = totalg / totalnum; var resb = totalb / totalnum; for(var dx = 0; dx < size; dx++){ for(var dy = 0; dy < size; dy++){ var x = i + dx; var y = j + dy; var p = x*drawing2.width + y; data[p*4+0]= resr; data[p*4+1]= resg; data[p*4+2]= resb; } } } } imageData.data = data; cxt2.putImageData(imageData,0,0); } } } </script>
Detailed explanation of the use of js publisher-subscriber model
node.js operates audio and video files for encryption
The above is the detailed content of How to edit and manipulate images on canvas. For more information, please follow other related articles on the PHP Chinese website!

Hot AI Tools

Undresser.AI Undress
AI-powered app for creating realistic nude photos

AI Clothes Remover
Online AI tool for removing clothes from photos.

Undress AI Tool
Undress images for free

Clothoff.io
AI clothes remover

Video Face Swap
Swap faces in any video effortlessly with our completely free AI face swap tool!

Hot Article
Hot Tools

Notepad++7.3.1
Easy-to-use and free code editor

SublimeText3 Chinese version
Chinese version, very easy to use

Zend Studio 13.0.1
Powerful PHP integrated development environment

Dreamweaver CS6
Visual web development tools

SublimeText3 Mac version
God-level code editing software (SublimeText3)
Hot Topics


 PyCharm usage tutorial: guide you in detail to run the operation
Feb 26, 2024 pm 05:51 PM
PyCharm usage tutorial: guide you in detail to run the operation
Feb 26, 2024 pm 05:51 PM
PyCharm is a very popular Python integrated development environment (IDE). It provides a wealth of functions and tools to make Python development more efficient and convenient. This article will introduce you to the basic operation methods of PyCharm and provide specific code examples to help readers quickly get started and become proficient in operating the tool. 1. Download and install PyCharm First, we need to go to the PyCharm official website (https://www.jetbrains.com/pyc
 What is sudo and why is it important?
Feb 21, 2024 pm 07:01 PM
What is sudo and why is it important?
Feb 21, 2024 pm 07:01 PM
sudo (superuser execution) is a key command in Linux and Unix systems that allows ordinary users to run specific commands with root privileges. The function of sudo is mainly reflected in the following aspects: Providing permission control: sudo achieves strict control over system resources and sensitive operations by authorizing users to temporarily obtain superuser permissions. Ordinary users can only obtain temporary privileges through sudo when needed, and do not need to log in as superuser all the time. Improved security: By using sudo, you can avoid using the root account during routine operations. Using the root account for all operations may lead to unexpected system damage, as any mistaken or careless operation will have full permissions. and
 Linux Deploy operation steps and precautions
Mar 14, 2024 pm 03:03 PM
Linux Deploy operation steps and precautions
Mar 14, 2024 pm 03:03 PM
LinuxDeploy operating steps and precautions LinuxDeploy is a powerful tool that can help users quickly deploy various Linux distributions on Android devices, allowing users to experience a complete Linux system on their mobile devices. This article will introduce the operating steps and precautions of LinuxDeploy in detail, and provide specific code examples to help readers better use this tool. Operation steps: Install LinuxDeploy: First, install
 What to do if you forget to press F2 for win10 boot password
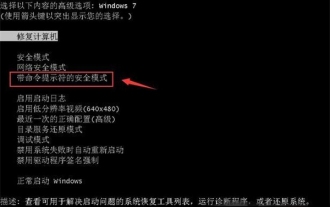
Feb 28, 2024 am 08:31 AM
What to do if you forget to press F2 for win10 boot password
Feb 28, 2024 am 08:31 AM
Presumably many users have several unused computers at home, and they have completely forgotten the power-on password because they have not been used for a long time, so they would like to know what to do if they forget the password? Then let’s take a look together. What to do if you forget to press F2 for win10 boot password? 1. Press the power button of the computer, and then press F2 when turning on the computer (different computer brands have different buttons to enter the BIOS). 2. In the bios interface, find the security option (the location may be different for different brands of computers). Usually in the settings menu at the top. 3. Then find the SupervisorPassword option and click it. 4. At this time, the user can see his password, and at the same time find the Enabled next to it and switch it to Dis.
 Huawei Mate60 Pro screenshot operation steps sharing
Mar 23, 2024 am 11:15 AM
Huawei Mate60 Pro screenshot operation steps sharing
Mar 23, 2024 am 11:15 AM
With the popularity of smartphones, the screenshot function has become one of the essential skills for daily use of mobile phones. As one of Huawei's flagship mobile phones, Huawei Mate60Pro's screenshot function has naturally attracted much attention from users. Today, we will share the screenshot operation steps of Huawei Mate60Pro mobile phone, so that everyone can take screenshots more conveniently. First of all, Huawei Mate60Pro mobile phone provides a variety of screenshot methods, and you can choose the method that suits you according to your personal habits. The following is a detailed introduction to several commonly used interceptions:
 Learn the canvas framework and explain the commonly used canvas framework in detail
Jan 17, 2024 am 11:03 AM
Learn the canvas framework and explain the commonly used canvas framework in detail
Jan 17, 2024 am 11:03 AM
Explore the Canvas framework: To understand what are the commonly used Canvas frameworks, specific code examples are required. Introduction: Canvas is a drawing API provided in HTML5, through which we can achieve rich graphics and animation effects. In order to improve the efficiency and convenience of drawing, many developers have developed different Canvas frameworks. This article will introduce some commonly used Canvas frameworks and provide specific code examples to help readers gain a deeper understanding of how to use these frameworks. 1. EaselJS framework Ea
 PHP PDO Tutorial: An Advanced Guide from Basics to Mastery
Feb 19, 2024 pm 06:30 PM
PHP PDO Tutorial: An Advanced Guide from Basics to Mastery
Feb 19, 2024 pm 06:30 PM
1. Introduction to PDO PDO is an extension library of PHP, which provides an object-oriented way to operate the database. PDO supports a variety of databases, including Mysql, postgresql, oracle, SQLServer, etc. PDO enables developers to use a unified API to operate different databases, which allows developers to easily switch between different databases. 2. PDO connects to the database. To use PDO to connect to the database, you first need to create a PDO object. The constructor of the PDO object receives three parameters: database type, host name, database username and password. For example, the following code creates an object that connects to a mysql database: $dsn="mysq
 Astar staking principle, income dismantling, airdrop projects and strategies & operation nanny-level strategy
Jun 25, 2024 pm 07:09 PM
Astar staking principle, income dismantling, airdrop projects and strategies & operation nanny-level strategy
Jun 25, 2024 pm 07:09 PM
Table of Contents Astar Dapp Staking Principle Staking Revenue Dismantling of Potential Airdrop Projects: AlgemNeurolancheHealthreeAstar Degens DAOVeryLongSwap Staking Strategy & Operation "AstarDapp Staking" has been upgraded to the V3 version at the beginning of this year, and many adjustments have been made to the staking revenue rules. At present, the first staking cycle has ended, and the "voting" sub-cycle of the second staking cycle has just begun. To obtain the "extra reward" benefits, you need to grasp this critical stage (expected to last until June 26, with less than 5 days remaining). I will break down the Astar staking income in detail,
