
 Web Front-end
JS Tutorial
Detailed explanation of VueJs building Axios interface request tool example
Web Front-end
JS Tutorial
Detailed explanation of VueJs building Axios interface request tool example
Detailed explanation of VueJs building Axios interface request tool example

In this article, we mainly introduce to you VueJs to build the Axios interface request tool. axios is an HTTP client based on Promise for browsers and nodejs. Friends who need it can refer to it. I hope it can help you.
axios Introduction
axios is a Promise-based HTTP client for browsers and nodejs. It has the following characteristics:
From browsing Create an XMLHttpRequest in the server
Issue an http request from node.js
- ##Support Promise API
- Interception of requests and responses
- Convert request and response data
- Cancel request
- Automatically convert JSON data
- Client supports preventing CSRF/XSRF
// 配置API接口地址
var root = 'https://cnodejs.org/api/v1'
// 引用axios
var axios = require('axios')
// 自定义判断元素类型JS
function toType (obj) {
 return ({}).toString.call(obj).match(/\s([a-zA-Z]+)/)[1].toLowerCase()
}
// 参数过滤函数
function filterNull (o) {
 for (var key in o) {
  if (o[key] === null) {
   delete o[key]
  }
  if (toType(o[key]) === 'string') {
   o[key] = o[key].trim()
  } else if (toType(o[key]) === 'object') {
   o[key] = filterNull(o[key])
  } else if (toType(o[key]) === 'array') {
   o[key] = filterNull(o[key])
  }
 }
 return o
}
/*
 接口处理函数
 这个函数每个项目都是不一样的,我现在调整的是适用于
 https://cnodejs.org/api/v1 的接口,如果是其他接口
 需要根据接口的参数进行调整。参考说明文档地址:
 https://cnodejs.org/topic/5378720ed6e2d16149fa16bd
 主要是,不同的接口的成功标识和失败提示是不一致的。
 另外,不同的项目的处理方法也是不一致的,这里出错就是简单的alert
*/
function apiAxios (method, url, params, success, failure) {
 if (params) {
  params = filterNull(params)
 }
 axios({
  method: method,
  url: url,
  data: method === 'POST' || method === 'PUT' ? params : null,
  params: method === 'GET' || method === 'DELETE' ? params : null,
  baseURL: root,
  withCredentials: false
 })
 .then(function (res) {
 if (res.data.success === true) {
  if (success) {
   success(res.data)
  }
 } else {
  if (failure) {
   failure(res.data)
  } else {
   window.alert('error: ' + JSON.stringify(res.data))
  }
 }
 })
 .catch(function (err) {
  let res = err.response
  if (err) {
   window.alert('api error, HTTP CODE: ' + res.status)
  }
 })
}
// 返回在vue模板中的调用接口
export default {
 get: function (url, params, success, failure) {
  return apiAxios('GET', url, params, success, failure)
 },
 post: function (url, params, success, failure) {
  return apiAxios('POST', url, params, success, failure)
 },
 put: function (url, params, success, failure) {
  return apiAxios('PUT', url, params, success, failure)
 },
 delete: function (url, params, success, failure) {
  return apiAxios('DELETE', url, params, success, failure)
 }
}// The Vue build version to load with the `import` command
// (runtime-only or standalone) has been set in webpack.base.conf with an alias.
import Vue from 'vue'
import App from './App'
import router from './router'
Vue.config.productionTip = false
/* eslint-disable no-new */
new Vue({
el: '#app',
router,
template: '<App/>',
components: { App }
})// The Vue build version to load with the `import` command
// (runtime-only or standalone) has been set in webpack.base.conf with an alias.
import Vue from 'vue'
import App from './App'
import router from './router'
// 引用API文件
import api from './api/index.js'
// 将API方法绑定到全局
Vue.prototype.$api = api
Vue.config.productionTip = false
/* eslint-disable no-new */
new Vue({
el: '#app',
router,
template: '<App/>',
components: { App }
})<template>
<p>index page</p>
</template>
<script>
export default {
created () {
this.$api.get('topics', null, r => {
console.log(r)
})
}
}
</script>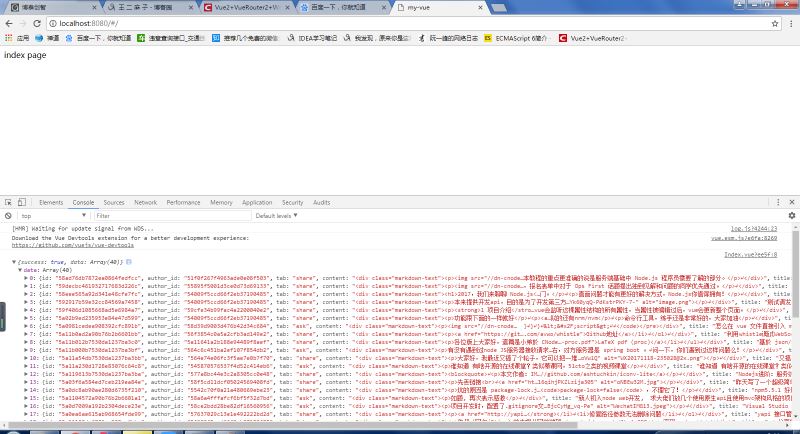
Detailed explanation of vue using axios to request data across domains
About vue2.0 setting proxyTable to use axios for cross-domain Request
The above is the detailed content of Detailed explanation of VueJs building Axios interface request tool example. For more information, please follow other related articles on the PHP Chinese website!

Hot AI Tools

Undresser.AI Undress
AI-powered app for creating realistic nude photos

AI Clothes Remover
Online AI tool for removing clothes from photos.

Undress AI Tool
Undress images for free

Clothoff.io
AI clothes remover

Video Face Swap
Swap faces in any video effortlessly with our completely free AI face swap tool!

Hot Article
Hot Tools

Notepad++7.3.1
Easy-to-use and free code editor

SublimeText3 Chinese version
Chinese version, very easy to use

Zend Studio 13.0.1
Powerful PHP integrated development environment

Dreamweaver CS6
Visual web development tools

SublimeText3 Mac version
God-level code editing software (SublimeText3)
Hot Topics


 How to implement an online speech recognition system using WebSocket and JavaScript
Dec 17, 2023 pm 02:54 PM
How to implement an online speech recognition system using WebSocket and JavaScript
Dec 17, 2023 pm 02:54 PM
How to use WebSocket and JavaScript to implement an online speech recognition system Introduction: With the continuous development of technology, speech recognition technology has become an important part of the field of artificial intelligence. The online speech recognition system based on WebSocket and JavaScript has the characteristics of low latency, real-time and cross-platform, and has become a widely used solution. This article will introduce how to use WebSocket and JavaScript to implement an online speech recognition system.
 WebSocket and JavaScript: key technologies for implementing real-time monitoring systems
Dec 17, 2023 pm 05:30 PM
WebSocket and JavaScript: key technologies for implementing real-time monitoring systems
Dec 17, 2023 pm 05:30 PM
WebSocket and JavaScript: Key technologies for realizing real-time monitoring systems Introduction: With the rapid development of Internet technology, real-time monitoring systems have been widely used in various fields. One of the key technologies to achieve real-time monitoring is the combination of WebSocket and JavaScript. This article will introduce the application of WebSocket and JavaScript in real-time monitoring systems, give code examples, and explain their implementation principles in detail. 1. WebSocket technology
 How to use JavaScript and WebSocket to implement a real-time online ordering system
Dec 17, 2023 pm 12:09 PM
How to use JavaScript and WebSocket to implement a real-time online ordering system
Dec 17, 2023 pm 12:09 PM
Introduction to how to use JavaScript and WebSocket to implement a real-time online ordering system: With the popularity of the Internet and the advancement of technology, more and more restaurants have begun to provide online ordering services. In order to implement a real-time online ordering system, we can use JavaScript and WebSocket technology. WebSocket is a full-duplex communication protocol based on the TCP protocol, which can realize real-time two-way communication between the client and the server. In the real-time online ordering system, when the user selects dishes and places an order
 How to implement an online reservation system using WebSocket and JavaScript
Dec 17, 2023 am 09:39 AM
How to implement an online reservation system using WebSocket and JavaScript
Dec 17, 2023 am 09:39 AM
How to use WebSocket and JavaScript to implement an online reservation system. In today's digital era, more and more businesses and services need to provide online reservation functions. It is crucial to implement an efficient and real-time online reservation system. This article will introduce how to use WebSocket and JavaScript to implement an online reservation system, and provide specific code examples. 1. What is WebSocket? WebSocket is a full-duplex method on a single TCP connection.
 JavaScript and WebSocket: Building an efficient real-time weather forecasting system
Dec 17, 2023 pm 05:13 PM
JavaScript and WebSocket: Building an efficient real-time weather forecasting system
Dec 17, 2023 pm 05:13 PM
JavaScript and WebSocket: Building an efficient real-time weather forecast system Introduction: Today, the accuracy of weather forecasts is of great significance to daily life and decision-making. As technology develops, we can provide more accurate and reliable weather forecasts by obtaining weather data in real time. In this article, we will learn how to use JavaScript and WebSocket technology to build an efficient real-time weather forecast system. This article will demonstrate the implementation process through specific code examples. We
 Simple JavaScript Tutorial: How to Get HTTP Status Code
Jan 05, 2024 pm 06:08 PM
Simple JavaScript Tutorial: How to Get HTTP Status Code
Jan 05, 2024 pm 06:08 PM
JavaScript tutorial: How to get HTTP status code, specific code examples are required. Preface: In web development, data interaction with the server is often involved. When communicating with the server, we often need to obtain the returned HTTP status code to determine whether the operation is successful, and perform corresponding processing based on different status codes. This article will teach you how to use JavaScript to obtain HTTP status codes and provide some practical code examples. Using XMLHttpRequest
 How to use insertBefore in javascript
Nov 24, 2023 am 11:56 AM
How to use insertBefore in javascript
Nov 24, 2023 am 11:56 AM
Usage: In JavaScript, the insertBefore() method is used to insert a new node in the DOM tree. This method requires two parameters: the new node to be inserted and the reference node (that is, the node where the new node will be inserted).
 JavaScript and WebSocket: Building an efficient real-time image processing system
Dec 17, 2023 am 08:41 AM
JavaScript and WebSocket: Building an efficient real-time image processing system
Dec 17, 2023 am 08:41 AM
JavaScript is a programming language widely used in web development, while WebSocket is a network protocol used for real-time communication. Combining the powerful functions of the two, we can create an efficient real-time image processing system. This article will introduce how to implement this system using JavaScript and WebSocket, and provide specific code examples. First, we need to clarify the requirements and goals of the real-time image processing system. Suppose we have a camera device that can collect real-time image data
