

Detailed steps to implement TodoList with React
What I bring to you this time is the detailed steps of implementing TodoList using React. This article will give you a good analysis.
Let’s first talk about the functions to be implemented
(1) You can add tasks;
(2) The colors of completed tasks and unfinished tasks are distinguished;
(3 ) When adding tasks, modifying task status, and deleting tasks, the following number of completed tasks and total number of tasks will change;
The above are the functions to be implemented.
2. How to design next?
(1) Task storage data structure:
list: [{
      id: 0,
      name: '吃饭',
      status: 0
    }, {
      id: 1,
      name: '睡觉',
      status: 0
    }, {
      id: 2,
      name: '打豆豆',
      status : 0
    }]
Each task has its own id, task name, and task status. The task id is in addition to the identification The uniqueness of the task can also be used as the key value of the list item. We all know that when using lists in react, each item in the list must have a key value. This will allow each list item to be quickly located and reduce unnecessary queries when executing the Diff algorithm, thus helping to improve performance. .
(2) Division of components
TodoList as a whole is treated as a large component;
Each list item (ListItem) in the list is treated as a component;
Add the task box (Dialog) as a component.
3. Specific implementation
Take the implementation of ListItem as an example:
It is necessary to divide the list item into a component separately, so that each separate item They are all independent, making the logic of the code simpler, enhancing the reusability of the code, and making maintenance easier.
Of course, if you are smart, you will definitely think of a problem: every time the status of a Task changes or a Task is added or deleted, the number of tasks completed and the total number will change, but every ListItem How to achieve mutual independence? At this time, communication between parent and child components is used.
If you are a React beginner like me, there will be many articles on Baidu that talk about how to communicate between parent and child components. Let me briefly talk about my simple and crude understanding:
In Define the method of changing state data in the parent and child components, pass the method to the child component in the form of props, trigger the event processing program in the child component, and then execute the function passed by the parent component if certain conditions are met. .
The specific code is as follows:
Code in the parent component:
import React, { Component } from 'react';
import ListItem from './listItem';
import Dialog from './dialog';
import './main.css';

class TodoList extends Component {
  constructor (props) {
    super(props);

    //初始任务列表
    this.state = {
      list: [{
        id: 0,
        name: '吃饭',
        status: 0
      }, {
        id: 1,
        name: '睡觉',
        status: 0
      }, {
        id: 2,
        name: '打豆豆',
        status : 0
      }],
      finished: 0
    };
  }

  //添加新任务,在组件中以props的形式传递给子组件
  addTask (newitem) {
    var allTask = this.state.list;
    allTask.push(newitem);
    this.setState({
      list: allTask
    });
  }
  //更新完成的任务,在组件中以props的形式传递给子组件
  updateFinished (todoItem) {
    var sum = 0;
    this.state.list.forEach( (item) => {
      if (item.id === todoItem.id) {
        item.status = todoItem.status;
      }
      if (item.status === 1) {
        sum++;
      }
    });
    this.setState({
      finished: sum
    });
  }

  //更新任务总数,在组件中以props的形式传递给子组件
  updateTotal (todoItem) {
    var obj = [], sum = 0;
    this.state.list.forEach((item) => {
      if (item.id !== todoItem.id) {
        obj.push(item);
        if (item.status === 1 ) {
          sum++;
        }
      }
    });
    this.setState({
      list: obj,
      finished: sum
    });
  }

  render () {
    return (
      <div className="container">
        <h1>TodoList</h1>
        <ul>
          { this.state.list.map ((item, index) =>
            <ListItem
              item={item}
              finishedChange={this.updateFinished.bind(this)}
              totalChange={this.updateTotal.bind(this)}
              key={index}
            />
          )}
          <li>{this.state.finished}已完成 / {this.state.list.length}总数</li>
        </ul>
        <Dialog addNewTask={this.addTask.bind(this)} nums={this.state.list.length}/>
      </div>
    );
  }
}

export default TodoList;Code in the child component:
import React, { Component } from 'react';
class ListItem extends Component {
constructor (props) {
super(props);
this.handleFinished = this.handleFinished.bind(this);
this.handleDelete = this.handleDelete.bind(this);
}
handleFinished () {
var status = this.props.item.status;
status = (status === 0 ? 1 : 0);
var obj = {
id: this.props.item.id,
name: this.props.item.name,
status: status
}
this.props.finishedChange(obj); //执行父组件传来的方法
}
handleDelete () {
this.props.totalChange(this.props.item); //执行父组件传来的方法
}
render () {
const item = this.props.item;
const unfinish = {
backgroundColor: '#DFFCB5',
color: '#2EB872',
};
const finish = {
backgroundColor: '#FFFA9D',
color: '#FF9A3C',
textDecoration: 'line-through'
}
var itemStyle = item.status === 0 ? unfinish : finish;
return (
<li key={item.id} style={itemStyle}>
<span
onClick={this.handleFinished}
id={item.id}
className="check-btn"
style={{backgroundColor: item.status === 0 ? '#fff' : '#A1EAFB'}}
></span>
<span>{ item.name }</span>
<span onClick={this.handleDelete} className="delete-btn">删除</span>
</li>
);
}
}
export default ListItem;The above is a summary of this small A summary of the exercise. If you are a react newbie like me, I believe you will have a closer understanding of React after writing this.
I believe you have read the above Introduction You have mastered the method. For more exciting information, please pay attention to other related articles on the php Chinese website!
Related reading:
How to use vue to implement login verification
How to use Vue’s custom instructions to complete a drop-down menu
Use jQuery to deduplicate and sort arrays
The above is the detailed content of Detailed steps to implement TodoList with React. For more information, please follow other related articles on the PHP Chinese website!

Hot AI Tools

Undresser.AI Undress
AI-powered app for creating realistic nude photos

AI Clothes Remover
Online AI tool for removing clothes from photos.

Undress AI Tool
Undress images for free

Clothoff.io
AI clothes remover

Video Face Swap
Swap faces in any video effortlessly with our completely free AI face swap tool!

Hot Article
Hot Tools

Notepad++7.3.1
Easy-to-use and free code editor

SublimeText3 Chinese version
Chinese version, very easy to use

Zend Studio 13.0.1
Powerful PHP integrated development environment

Dreamweaver CS6
Visual web development tools

SublimeText3 Mac version
God-level code editing software (SublimeText3)
Hot Topics
 1670
1670
 14
1428
52
1329
25
1273
29
1256
24
14
1428
52
1329
25
1273
29
1256
24

 Steps to upgrade to the latest version of WeChat (Easily master the upgrade method to the latest version of WeChat)
Jun 01, 2024 pm 10:24 PM
Steps to upgrade to the latest version of WeChat (Easily master the upgrade method to the latest version of WeChat)
Jun 01, 2024 pm 10:24 PM
WeChat is one of the social media platforms in China that continuously launches new versions to provide a better user experience. Upgrading WeChat to the latest version is very important to keep in touch with family and colleagues, to stay in touch with friends, and to keep abreast of the latest developments. 1. Understand the features and improvements of the latest version. It is very important to understand the features and improvements of the latest version before upgrading WeChat. For performance improvements and bug fixes, you can learn about the various new features brought by the new version by checking the update notes on the WeChat official website or app store. 2. Check the current WeChat version We need to check the WeChat version currently installed on the mobile phone before upgrading WeChat. Click to open the WeChat application "Me" and then select the menu "About" where you can see the current WeChat version number. 3. Open the app
 This Apple ID is not yet in use in the iTunes Store: Fix
Jun 10, 2024 pm 05:42 PM
This Apple ID is not yet in use in the iTunes Store: Fix
Jun 10, 2024 pm 05:42 PM
When logging into iTunesStore using AppleID, this error saying "This AppleID has not been used in iTunesStore" may be thrown on the screen. There are no error messages to worry about, you can fix them by following these solution sets. Fix 1 – Change Shipping Address The main reason why this prompt appears in iTunes Store is that you don’t have the correct address in your AppleID profile. Step 1 – First, open iPhone Settings on your iPhone. Step 2 – AppleID should be on top of all other settings. So, open it. Step 3 – Once there, open the “Payment & Shipping” option. Step 4 – Verify your access using Face ID. step
 Shazam app not working in iPhone: Fix
Jun 08, 2024 pm 12:36 PM
Shazam app not working in iPhone: Fix
Jun 08, 2024 pm 12:36 PM
Having issues with the Shazam app on iPhone? Shazam helps you find songs by listening to them. However, if Shazam isn't working properly or doesn't recognize the song, you'll have to troubleshoot it manually. Repairing the Shazam app won't take long. So, without wasting any more time, follow the steps below to resolve issues with Shazam app. Fix 1 – Disable Bold Text Feature Bold text on iPhone may be the reason why Shazam is not working properly. Step 1 – You can only do this from your iPhone settings. So, open it. Step 2 – Next, open the “Display & Brightness” settings there. Step 3 – If you find that “Bold Text” is enabled
 iPhone screenshots not working: How to fix it
May 03, 2024 pm 09:16 PM
iPhone screenshots not working: How to fix it
May 03, 2024 pm 09:16 PM
Screenshot feature not working on your iPhone? Taking a screenshot is very easy as you just need to hold down the Volume Up button and the Power button at the same time to grab your phone screen. However, there are other ways to capture frames on the device. Fix 1 – Using Assistive Touch Take a screenshot using the Assistive Touch feature. Step 1 – Go to your phone settings. Step 2 – Next, tap to open Accessibility settings. Step 3 – Open Touch settings. Step 4 – Next, open the Assistive Touch settings. Step 5 – Turn on Assistive Touch on your phone. Step 6 – Open “Customize Top Menu” to access it. Step 7 – Now you just need to link any of these functions to your screen capture. So click on the first
 Clock app missing in iPhone: How to fix it
May 03, 2024 pm 09:19 PM
Clock app missing in iPhone: How to fix it
May 03, 2024 pm 09:19 PM
Is the clock app missing from your phone? The date and time will still appear on your iPhone's status bar. However, without the Clock app, you won’t be able to use world clock, stopwatch, alarm clock, and many other features. Therefore, fixing missing clock app should be at the top of your to-do list. These solutions can help you resolve this issue. Fix 1 – Place the Clock App If you mistakenly removed the Clock app from your home screen, you can put the Clock app back in its place. Step 1 – Unlock your iPhone and start swiping to the left until you reach the App Library page. Step 2 – Next, search for “clock” in the search box. Step 3 – When you see “Clock” below in the search results, press and hold it and
 WiFi calling not working on iPhone: Fix
Jun 03, 2024 am 11:16 AM
WiFi calling not working on iPhone: Fix
Jun 03, 2024 am 11:16 AM
Can't enable Wi-Fi calling on iPhone? Call quality is improved and you can communicate even from remote locations where cellular networks are not as strong. Wi-Fi Calling also improves standard call and video call quality. So, if you can't use Wi-Fi calling on your phone, these solutions might help you fix the problem. Fix 1 – Enable Wi-Fi Calling Manually You must enable the Wi-Fi Calling feature in your iPhone settings. Step 1 – For this, you have to open Settings. Step 2 – Next, just scroll down to find and open the “Phone” settings Step 3 – In the phone settings, scroll down and open the “Wi-Fi Calling” setting. Step 4 – In the Wi-Fi Calling page, change “This iPhone
 Screen recording goes black: here's the fix
May 03, 2024 pm 09:13 PM
Screen recording goes black: here's the fix
May 03, 2024 pm 09:13 PM
Are you trying to record something on your phone screen and it's going black? Typically, you can initiate screen recording from Control Center. In some cases, you cannot record items on the screen. We have mentioned all the scenarios along with the list of possible solutions that can help you record your screen properly. Reasons why screen recording goes black – If you try to record any DRM (Digital Rights Management) protected content while it’s playing on your iPhone screen, you won’t get anything. The output will be a pitch black screen. All leading OTT platforms like Netflix, Disney+, Hulu, and Peacock have this DRM that blocks any screen recording functionality. 2. Several websites prohibit the use of screen capture
 iPhone stuck in airplane mode: How to fix it
Jun 15, 2024 pm 02:16 PM
iPhone stuck in airplane mode: How to fix it
Jun 15, 2024 pm 02:16 PM
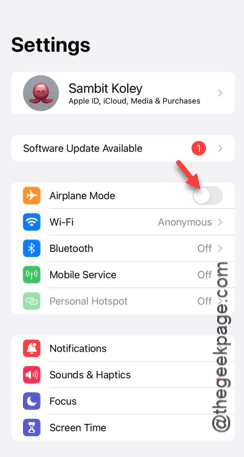
Airplane mode is very convenient in some situations. However, the same airplane mode may give you a headache if your iPhone suddenly gets stuck on it. In this article, we have designed this set of solutions to get your iPhone out of airplane mode. Quick fix – 1. Try disabling Airplane Mode directly from Control Center. 2. If you are unable to disable Airplane Mode from Control Center, you can disable Airplane Mode directly from the Settings tab – If these tips don’t work, follow the fixes below to resolve the issue. Fix 1 – Force Restart Your Device The process of force restarting your device is very simple. All you have to do is follow these step-by-step instructions. Step 1 – You can start the process by pressing and releasing the Volume Up button. step
