
 Web Front-end
JS Tutorial
Introduction to encapsulation examples of js custom bullet box plug-in
Web Front-end
JS Tutorial
Introduction to encapsulation examples of js custom bullet box plug-in
Introduction to encapsulation examples of js custom bullet box plug-in

First, let’s sort out our thoughts. Native javascript actually implements the alert() method, but that will temporarily interrupt the running of the program and is enough to make you ugly! So put aside these and think about it carefully, in fact, the pop-up frame is two p-layers, and a masking layer (mask layer) floating underneath, covering all elements, and it is best to be translucent. The other is the main part of the pop-up box. Generally, it needs to be centered horizontally and vertically, and usually contains a title. The main content needs to be customizable. If it is a modal box, there is usually a confirm/cancel button. Finally, there are some animation effects when popping up and closing.
Pop-up layer prompt information, this is the most common requirement in mobile front-end development. You may think of some popular pop-up box plug-ins, such as the classic artDialog, the cool Sweetalert, etc..
But slowly you will find that customization requirements are usually higher. General pop-up plug-ins may only meet most of the requirements. Customization is not as time-consuming as manually encapsulating one that suits your own development habits. Pop-up component, so that subsequent development efficiency will be greatly improved.
So you can encapsulate one yourself and put it in the public js in the project. If you can write it yourself, try not to use plug-ins....
Some default attribute values
pass through a foreach loop, similar to the incoming opts Inheriting the defaultOpts attribute, the before() method executed before calling the pop-up box is equivalent to some preparation work
var defaultOpts = {
        title: '',//标题
        content: '',//内容 文字 || html
        height: 50,//默认屏幕(父级)的50%
        width: 80,//默认屏幕(父级)的80%
        type: 'alert-default',//弹框类型
        effect: 'fadeIn',//出现效果,默认下跌落
        delayTime: 500,//效果延时时间,默认.5s
        autoClose: false,//自动关闭
        autoTime: 2000, //自动关闭时间默认2s
        autoEffect: 'default',//关闭效果
        ok: '确定',
        okCallback: function(){},//确定回调
        cancel: '取消',
        cancelCallback: function(){},//取消回调
        before : function() {
          console.log('before')
        },
        close: function() {
          console.log('close')
        },
        blankclose: false//空白处点击关闭
      }

    for (i in defaultOpts) {
      if (opts[i] === undefined) {
        opts[i] = defaultOpts[i]
      }
    }

opts.before && opts.before()dom structure
definition An array object, which contains the DOM element of the pop-up box. alert-mask is the full-screen mask layer, and alert-content is the main content area of the pop-up box. Finally, the array is converted to html through the .join('') function, and then used The append() method of jquery is appended to the end of the body node.
var alertHtml = [
'<section class="alert-main" id="alertMain">',
'<p class="alert-mask li-opacity" id="alertMask"></p>',
'<p class="alert-content '+ opts.type +'" id="alertContent">',
opts.content +'</p>',
'</section>'
]
$('body').append(alertHtml.join(''))Set the height and width, horizontally and vertically centered
I use fixed positioning here, and height is the height passed in (Percentage), the distance between top and the top of the screen is 100-the incoming height/2. This achieves vertical centering, and the same goes for the width. This method of horizontal and vertical centering is also what I think is the simplest and most practical after long-term practice. It is compatible with various screen sizes. Of course, there are many methods, you can try it yourself
##
var $alertContent = $('#alertContent'),
      $alertMain = $('#alertMain');

    $alertContent.css({
      'height': opts.height + '%',
      'top': (100 - opts.height)/2 + '%',
      'width': opts.width + '%',
      'left': (100 - opts.width)/2 + '%'
    })

    $('.li-opacity').css({
      '-webkit-animation-duration' : opts.delayTime/1000 + 's'
})Bomb frame effect
I have implemented four effects here, namely fadeIn falling and sideLeft flying from the left Enter, scale amplification, and info prompt information. As you can see, I defined a collection object, placed the corresponding css attributes respectively, and then assigned values uniformly through two setTimeout functionsvar effect = {
'fadeIn': 'top',
'fadeInStart': '-100%',
'fadeInValue': (100 - opts.height)/2 + '%',
'sideLeft': 'left',
'sideLeftStart': '-100%',
'sideLeftValue': (100 - opts.width)/2 + '%',
'scale': '-webkit-transform',
'scaleStart': 'scale(0)',
'scaleValue': 'scale(1)',
'info': '-webkit-transform',
'infoStart': 'scale(1.2)',
'infoValue': 'scale(1)'
}
setTimeout(function(){
$alertContent.css(effect[opts.effect],effect[opts.effect + 'Start']).addClass('alert-show')
setTimeout(function(){
$alertContent.css(effect[opts.effect], effect[opts.effect + 'Value'])
opts.close && opts.close()
},10)
},opts.delayTime)Click on the blank space Close
Usually the requirement is to click on the blank space of the pop-up box to close the pop-up box. This can be done with a click event. The focus is on the previous selector. jquery has given us so much convenience... . Of course, in the end, in order to prevent clicking on other elements of the page and prevent events from bubbling up, the default behavior of the component is...if(opts.blankclose) {
$('.alert-main :not(.alert-content)').on('click',function(event){
$alertMain.remove()
opts.close && opts.close()
event.stopPropagation()
event.preventDefault()
})
}Automatically close
When autoClose is true and autoTime is greater than zero, use a delay event to automatically close the pop-up boxif(opts.autoClose && opts.autoTime > 0) {
setTimeout(function(){$alertMain.remove()},opts.autoTime)
opts.close && opts.close()
}Demo:
css@-webkit-keyframes opacity {
0% {
opacity: 0; /*初始状态 透明度为0*/
}
50% {
opacity: 0; /*中间状态 透明度为0*/
}
100% {
opacity: 1; /*结尾状态 透明度为1*/
}
}
.li-opacity {
-webkit-animation-name: opacity; /*动画名称*/
-webkit-animation-iteration-count: 1; /*动画次数*/
-webkit-animation-delay: 0s; /*延迟时间*/
}
.alert-mask {
position: fixed;
height: 100%;
width: 100%;
left: 0%;
top: 0%;
z-index: 9998;
background-color: rgba(0,0,0,.7);
}
.alert-content {
position: fixed;
box-sizing: border-box;
border-radius: 4px;
z-index: 9999;
-webkit-transition: .4s;
-moz-transition: .4s;
transition: .4s;
display: none;
}
.alert-show {
display: block;
}
.alert-default {
background-color: white;
}<p class="alert" data-flag="fadeIn">fadeIn</p> <p class="alert" data-flag="sideLeft">sideLeft</p> <p class="alert" data-flag="scale">scale</p> <p class="alert" data-flag="info">info</p>
require.config({
jquery:'component/jquery/jquery-3.1.0.min',
liAlert: 'li/li-alert',//常用弹框组件
})
require(['jquery'],function($){
require(['liAlert'],function(){
$('.alert').on('click',function(event){
$.alert({
content: '<h1 style="display:flex;justify-content:center;">我是弹框</h1>',
effect: $(event.currentTarget).attr('data-flag'),
blankclose: true,
//autoClose: true
})
})
})
})
The above is the detailed content of Introduction to encapsulation examples of js custom bullet box plug-in. For more information, please follow other related articles on the PHP Chinese website!

Hot AI Tools

Undresser.AI Undress
AI-powered app for creating realistic nude photos

AI Clothes Remover
Online AI tool for removing clothes from photos.

Undress AI Tool
Undress images for free

Clothoff.io
AI clothes remover

Video Face Swap
Swap faces in any video effortlessly with our completely free AI face swap tool!

Hot Article
Hot Tools

Notepad++7.3.1
Easy-to-use and free code editor

SublimeText3 Chinese version
Chinese version, very easy to use

Zend Studio 13.0.1
Powerful PHP integrated development environment

Dreamweaver CS6
Visual web development tools

SublimeText3 Mac version
God-level code editing software (SublimeText3)
Hot Topics


 How to quickly set up a custom avatar in Netflix
Feb 19, 2024 pm 06:33 PM
How to quickly set up a custom avatar in Netflix
Feb 19, 2024 pm 06:33 PM
An avatar on Netflix is a visual representation of your streaming identity. Users can go beyond the default avatar to express their personality. Continue reading this article to learn how to set a custom profile picture in the Netflix app. How to quickly set a custom avatar in Netflix In Netflix, there is no built-in feature to set a profile picture. However, you can do this by installing the Netflix extension on your browser. First, install a custom profile picture for the Netflix extension on your browser. You can buy it in the Chrome store. After installing the extension, open Netflix on your browser and log into your account. Navigate to your profile in the upper right corner and click
 Detailed introduction to what wapi is
Jan 07, 2024 pm 09:14 PM
Detailed introduction to what wapi is
Jan 07, 2024 pm 09:14 PM
Users may have seen the term wapi when using the Internet, but for some people they definitely don’t know what wapi is. The following is a detailed introduction to help those who don’t know to understand. What is wapi: Answer: wapi is the infrastructure for wireless LAN authentication and confidentiality. This is like functions such as infrared and Bluetooth, which are generally covered near places such as office buildings. Basically they are owned by a small department, so the scope of this function is only a few kilometers. Related introduction to wapi: 1. Wapi is a transmission protocol in wireless LAN. 2. This technology can avoid the problems of narrow-band communication and enable better communication. 3. Only one code is needed to transmit the signal
 Detailed explanation of whether win11 can run PUBG game
Jan 06, 2024 pm 07:17 PM
Detailed explanation of whether win11 can run PUBG game
Jan 06, 2024 pm 07:17 PM
Pubg, also known as PlayerUnknown's Battlegrounds, is a very classic shooting battle royale game that has attracted a lot of players since its popularity in 2016. After the recent launch of win11 system, many players want to play it on win11. Let's follow the editor to see if win11 can play pubg. Can win11 play pubg? Answer: Win11 can play pubg. 1. At the beginning of win11, because win11 needed to enable tpm, many players were banned from pubg. 2. However, based on player feedback, Blue Hole has solved this problem, and now you can play pubg normally in win11. 3. If you meet a pub
 How to customize shortcut key settings in Eclipse
Jan 28, 2024 am 10:01 AM
How to customize shortcut key settings in Eclipse
Jan 28, 2024 am 10:01 AM
How to customize shortcut key settings in Eclipse? As a developer, mastering shortcut keys is one of the keys to improving efficiency when coding in Eclipse. As a powerful integrated development environment, Eclipse not only provides many default shortcut keys, but also allows users to customize them according to their own preferences. This article will introduce how to customize shortcut key settings in Eclipse and give specific code examples. Open Eclipse First, open Eclipse and enter
 The operation process of edius custom screen layout
Mar 27, 2024 pm 06:50 PM
The operation process of edius custom screen layout
Mar 27, 2024 pm 06:50 PM
1. The picture below is the default screen layout of edius. The default EDIUS window layout is a horizontal layout. Therefore, in a single-monitor environment, many windows overlap and the preview window is in single-window mode. 2. You can enable [Dual Window Mode] through the [View] menu bar to make the preview window display the playback window and recording window at the same time. 3. You can restore the default screen layout through [View menu bar>Window Layout>General]. In addition, you can also customize the layout that suits you and save it as a commonly used screen layout: drag the window to a layout that suits you, then click [View > Window Layout > Save Current Layout > New], and in the pop-up [Save Current Layout] Layout] enter the layout name in the small window and click OK
 Detailed introduction to whether i5 processor can install win11
Dec 27, 2023 pm 05:03 PM
Detailed introduction to whether i5 processor can install win11
Dec 27, 2023 pm 05:03 PM
i5 is a series of processors owned by Intel. It has various versions of the 11th generation i5, and each generation has different performance. Therefore, whether the i5 processor can install win11 depends on which generation of the processor it is. Let’s follow the editor to learn about it separately. Can i5 processor be installed with win11: Answer: i5 processor can be installed with win11. 1. The eighth-generation and subsequent i51, eighth-generation and subsequent i5 processors can meet Microsoft’s minimum configuration requirements. 2. Therefore, we only need to enter the Microsoft website and download a "Win11 Installation Assistant" 3. After the download is completed, run the installation assistant and follow the prompts to install Win11. 2. i51 before the eighth generation and after the eighth generation
 Introducing the latest Win 11 sound tuning method
Jan 08, 2024 pm 06:41 PM
Introducing the latest Win 11 sound tuning method
Jan 08, 2024 pm 06:41 PM
After updating to the latest win11, many users find that the sound of their system has changed slightly, but they don’t know how to adjust it. So today, this site brings you an introduction to the latest win11 sound adjustment method for your computer. It is not difficult to operate. And the choices are diverse, come and download and try them out. How to adjust the sound of the latest computer system Windows 11 1. First, right-click the sound icon in the lower right corner of the desktop and select "Playback Settings". 2. Then enter settings and click "Speaker" in the playback bar. 3. Then click "Properties" on the lower right. 4. Click the "Enhance" option bar in the properties. 5. At this time, if the √ in front of "Disable all sound effects" is checked, cancel it. 6. After that, you can select the sound effects below to set and click
 How to customize x-axis and y-axis in excel? (How to customize excel axis scale)
Mar 14, 2024 pm 02:10 PM
How to customize x-axis and y-axis in excel? (How to customize excel axis scale)
Mar 14, 2024 pm 02:10 PM
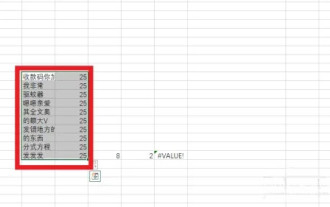
In an excel table, sometimes you may need to insert coordinate axes to see the changing trend of the data more intuitively. Some friends still don’t know how to insert coordinate axes in the table. Next, I will share with you how to customize the coordinate axis scale in Excel. Coordinate axis insertion method: 1. In the excel interface, select the data. 2. In the insertion interface, click to insert a column chart or bar chart. 3. In the expanded interface, select the graphic type. 4. In the right-click interface of the table, click Select Data. 5. In the expanded interface, you can customize it.
