
 Web Front-end
JS Tutorial
Advanced JavaScript (8) JS implements image preview and import server functions
Web Front-end
JS Tutorial
Advanced JavaScript (8) JS implements image preview and import server functions
Advanced JavaScript (8) JS implements image preview and import server functions

JS implements the file import function
During the project development process, the file upload function needs to be implemented. Take this opportunity to learn it.
This feature can be supported using the existing input type "file" in HTML. As shown below:
Only display the specified file type when browsing
##
accept attribute list
1.accept= "application/msexcel"
<!doctype html>
<html>
<head>
<meta content="text/html; charset=UTF-8" http-equiv="Content-Type" />
<title>Image preview example</title>
<script type="text/javascript">
var loadImageFile = (function () {
if (window.FileReader) {
var oPreviewImg = null, oFReader = new window.FileReader(),
rFilter = /^(?:image\/bmp|image\/cis\-cod|image\/gif|image\/ief|image\/jpeg|image\/jpeg|image\/jpeg|image\/pipeg|image\/png|image\/svg\+xml|image\/tiff|image\
/x\-cmu\-raster|image\/x\-cmx|image\/x\-icon|image\/x\-portable\-anymap|image\/x\-portable\-bitmap|image\/x\-portable\-graymap|image\/x\-portable\-pixmap|image\
/x\-rgb|image\/x\-xbitmap|image\/x\-xpixmap|image\/x\-xwindowdump)$/i;
oFReader.onload = function (oFREvent) {
if (!oPreviewImg) {
var newPreview = document.getElementById("imagePreview");
oPreviewImg = new Image();
oPreviewImg.style.width = (newPreview.offsetWidth).toString() + "px";
oPreviewImg.style.height = (newPreview.offsetHeight).toString() + "px";
newPreview.appendChild(oPreviewImg);
}
oPreviewImg.src = oFREvent.target.result;
arr = oPreviewImg.src.toString().split(",");
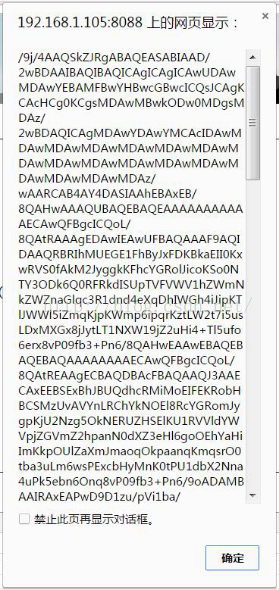
alert(arr[0]);
alert(arr[1]);
};
return function () {
var aFiles = document.getElementById("imageInput").files;
if (aFiles.length === 0) { return; }
if (!rFilter.test(aFiles[0].type)) { alert("You must select a valid image file!"); return; }
oFReader.readAsDataURL(aFiles[0]);
}
}
if (navigator.appName === "Microsoft Internet Explorer") {
return function () {
alert(document.getElementById("imageInput").value);
document.getElementById("imagePreview").filters.item("DXImageTransform.Microsoft.AlphaImageLoader").src = document.getElementById("imageInput").value;
}
}
})();
</script>
<style type="text/css">
#imagePreview {
width: 160px;
height: 120px;
filter: progid:DXImageTransform.Microsoft.AlphaImageLoader(sizingMethod=scale);
}
</style>
</head>
<body>
<p id="imagePreview">
</p>
<form name="uploadForm">
<p>
<input id="imageInput" type="file" name="myPhoto" onchange="loadImageFile();" /><br />
<input type="submit" value="Send" /></p>
</form>
</body>
</html>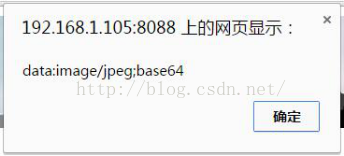
<p style="padding-top: 15px">
<label for="pic">更新广告图片 :</label>
<!-- <a class="btn btn-warning btn-sm" id="choice" ng-click="doChoice()" style="font-size:14px;
color:red; font-family:微软雅黑; border-radius: 9px;">选择文件</a> -->
<input id="imageInput" type="file" accept="image/jpeg" 	    	onchange="loadImageFile();" />
<i id="img" hidden="hidden"></i>
<i id="imgName" hidden="hidden"></i>
</p>
Copy after login
javaScript<p style="padding-top: 15px"> <label for="pic">更新广告图片 :</label> <!-- <a class="btn btn-warning btn-sm" id="choice" ng-click="doChoice()" style="font-size:14px; color:red; font-family:微软雅黑; border-radius: 9px;">选择文件</a> --> <input id="imageInput" type="file" accept="image/jpeg" onchange="loadImageFile();" /> <i id="img" hidden="hidden"></i> <i id="imgName" hidden="hidden"></i> </p>
arr = oPreviewImg.src.toString().split(",");
document.getElementById("img").innerHTML = arr[1];
document.getElementById("imgName").innerHTML = document.getElementById("imageInput").files[0].name;
//alert(document.getElementById("img").innerHTML);
//alert(document.getElementById("imageInput").files[0].name);// 获取 图片名称(PS:瞬间感觉自己好聪明啊~~)
//alert(arr[0]);// 获取图片格式与编码方式
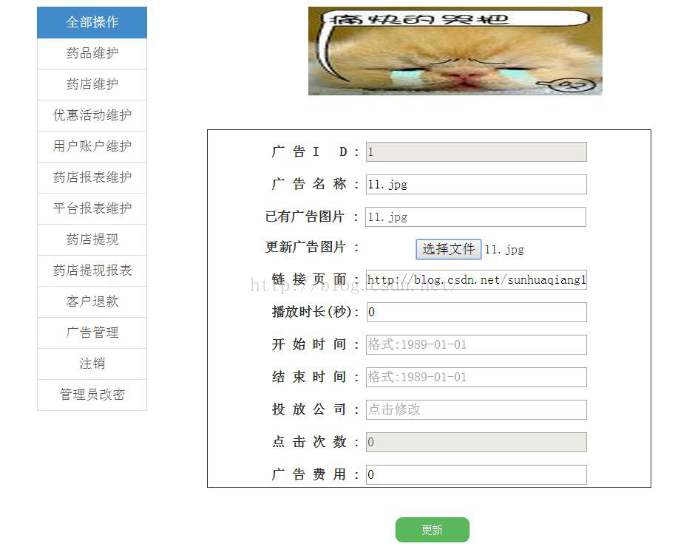
//alert(arr[1]);// 获取图片Base 64编码字节Copy after loginProgram screenshot
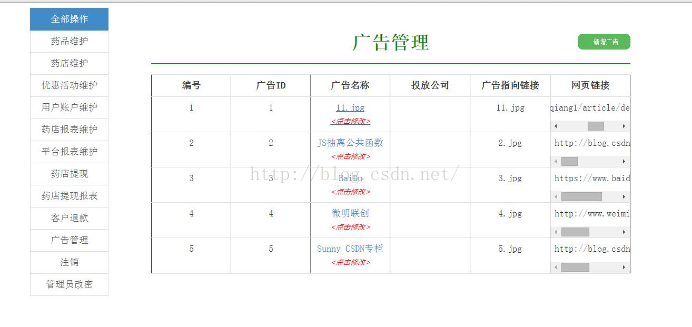
Advertising information is displayed at the top of the client:
arr = oPreviewImg.src.toString().split(",");
document.getElementById("img").innerHTML = arr[1];
document.getElementById("imgName").innerHTML = document.getElementById("imageInput").files[0].name;
//alert(document.getElementById("img").innerHTML);
//alert(document.getElementById("imageInput").files[0].name);// 获取 图片名称(PS:瞬间感觉自己好聪明啊~~)
//alert(arr[0]);// 获取图片格式与编码方式
//alert(arr[1]);// 获取图片Base 64编码字节
I also tried to use the ng plug-in ng-file-upload (see reference 1), but it ended in failure. I really didn’t understand the code. Writing it after the source code had no effect, and the layout was wrong. I was also ashamed.
The next problem I have to break through is paging. I often don’t realize the knowledge I have just come into contact with.

The above is the content of JavaScript Advanced (8) JS to implement image preview and import server functions. For more related content, please pay attention to the PHP Chinese website (www.php .cn)!
Related articles:
Use HTML5 to easily implement image preview
javascript implements image preview and upload (compatible with IE) code sharing

Hot AI Tools

Undresser.AI Undress
AI-powered app for creating realistic nude photos

AI Clothes Remover
Online AI tool for removing clothes from photos.

Undress AI Tool
Undress images for free

Clothoff.io
AI clothes remover

Video Face Swap
Swap faces in any video effortlessly with our completely free AI face swap tool!

Hot Article
Hot Tools

Notepad++7.3.1
Easy-to-use and free code editor

SublimeText3 Chinese version
Chinese version, very easy to use

Zend Studio 13.0.1
Powerful PHP integrated development environment

Dreamweaver CS6
Visual web development tools

SublimeText3 Mac version
God-level code editing software (SublimeText3)
Hot Topics


 How to implement image preview function in uniapp
Jul 04, 2023 am 10:36 AM
How to implement image preview function in uniapp
Jul 04, 2023 am 10:36 AM
How to implement image preview function in uni-app Introduction: In mobile application development, image preview is a commonly used function. In uni-app, we can implement the image preview function by using uni-ui plug-ins or custom components. This article will introduce how to implement the image preview function in uni-app, with code examples. 1. Use the uni-ui plug-in to implement the image preview function. uni-ui is a component library based on Vue.js developed by DCloud, which provides a rich UI group.
 How to handle image preview and zoom issues in Vue components
Oct 09, 2023 pm 09:34 PM
How to handle image preview and zoom issues in Vue components
Oct 09, 2023 pm 09:34 PM
How to handle image preview and zoom issues in Vue components requires specific code examples. Introduction: In modern web applications, image preview and zoom are very common requirements. As a popular front-end framework, Vue provides us with many powerful tools to deal with these problems. This article will introduce how to handle image preview and zoom in Vue components, and provide specific code examples. 1. Image preview: Image preview means that when the user clicks or hovers over the image, it can display a large version of the image or enlarge it in a specific area.
 How to implement picture browsing and picture preview functions in uniapp
Oct 20, 2023 pm 03:57 PM
How to implement picture browsing and picture preview functions in uniapp
Oct 20, 2023 pm 03:57 PM
How to implement image browsing and image preview functions in uniapp? In uniapp, we can use the uni-ui component library to implement image browsing and image preview functions. uni-ui is a component library based on Vue.js developed by DCloud, which provides a rich set of UI components, including image browsing and image preview components. First, we need to introduce the uni-ui component library into the project. Open the pages.json file of the project and add "un" in the "easycom" field
 Tips and best practices for implementing image preview function in Vue
Jun 25, 2023 pm 09:21 PM
Tips and best practices for implementing image preview function in Vue
Jun 25, 2023 pm 09:21 PM
Vue is a popular JavaScript framework for building single page applications (SPA). Image preview is a common feature in web applications, and there are many ways to implement image preview in Vue. This article will introduce in detail the techniques and best practices for implementing the image preview function in Vue. 1. Use the Vue plug-in The Vue plug-in provides a simple way to implement image preview. Vue plugins can be registered globally so they can be used throughout the application. Here are two commonly used Vue plug-ins:
 Use uniapp to implement image preview function
Nov 21, 2023 pm 02:33 PM
Use uniapp to implement image preview function
Nov 21, 2023 pm 02:33 PM
Using uniapp to implement image preview function In modern social media and mobile applications, the image preview function is almost standard. In uniapp, we can easily implement the preview function of pictures and provide users with a good experience. This article will introduce how to use uniapp to implement the image preview function and provide specific code examples. Import the required plug-ins In order to implement the image preview function, we need to use the uni.previewImage plug-in provided by uniapp. In the uniapp project,
 How to use the picture preview plug-in in uniapp to realize the picture enlargement viewing function
Oct 20, 2023 am 08:16 AM
How to use the picture preview plug-in in uniapp to realize the picture enlargement viewing function
Oct 20, 2023 am 08:16 AM
How to use the picture preview plug-in in uniapp to realize the picture enlargement viewing function. Specific code examples are required. With the popularity of mobile devices, pictures play an increasingly important role in our daily lives. When developing mobile applications, how to implement image enlargement viewing function has become a common requirement. Using the uniapp framework can implement such functions more quickly and is compatible with multiple platforms. In uniapp, you can use third-party plug-ins to realize the image enlargement and viewing function. The most commonly used plug-in is uni-
 WeChat applet implements image preview function
Nov 21, 2023 pm 12:38 PM
WeChat applet implements image preview function
Nov 21, 2023 pm 12:38 PM
WeChat applet is a lightweight application that can be used directly in WeChat. It has the advantages of cross-platform and easy operation. During the development process, we often encounter the need to implement the image preview function. This article will give a specific code example to teach you how to implement the image preview function in the WeChat applet. First, we need to introduce components into the WeChat applet page. Add the following code in the wxml file: <imagesrc="{{imageUrl}}"
 How to implement image preview function in Vue
Nov 07, 2023 am 10:27 AM
How to implement image preview function in Vue
Nov 07, 2023 am 10:27 AM
In today's web design, image carousel is a very common effect. When using the Vue framework to develop web pages, we can implement this function through Vue plug-ins. This article will provide specific code examples to introduce how to implement the image preview function in Vue. 1. Introducing plug-ins We can use the Vue plug-in vue-awesome-swiper to implement the image carousel function. Vue-awesome-swiper is a carousel diagram component that supports infinite loop carousels, dynamic addition and deletion of carousel items,
