

The use of elements in svg and the introduction of marker attributes

The graphics drawn using SVG are arrows, which can be defined in
A marker is an element that can connect the vertices of one or more paths, lines, polylines, or polygons. Flag type. The most common use case is to draw arrows or mark a (polymarker) graphic on the line of the output result.
Use the
<svg width="600px" height="100px">
    <defs>
    <marker id="arrow" markerWidth="10" markerHeight="10" refx="0" refy="3" orient="auto" markerUnits="strokeWidth"> <path d="M0,0 L0,6 L9,3 z" fill="#f00" />
    </marker>
    </defs>
    <line x1="50" y1="50" x2="250" y2="50" stroke="#000" stroke-width="5" marker-end="url(#arrow)" />
</svg>
Marker's properties
The markerWidth and markerHeight properties define the width and height of the marker window.
In the above example, I set both markerWidth and markerHeight to 10px. The triangle drawn in the path needs to fit into the 9px x 6px area, so I can also set the markerWidth to 9 and the markerHeight to 6. This is the minimum size that the marker can accept. Any size smaller than this will cause the graphic to be cropped.
The next two attributes, refX and refY, refer to the position coordinates of the connection between the graphic element and the marker. We also applied a transform to the scene behind it to move the marker and align it with it.
The next attribute, orient, is why I don’t need to adjust the marker when converting the direction of the line. It accepts an auto value, or an angle value, which determines whether the marker should be rotated when connected to other content.
auto This value indicates that the marker will rotate together with the applied element. The value 45deg means that the direction of the marker always remains 45deg and will not rotate with the connected elements. Most of the time this value is set to auto.
The last attribute is markerUNits, which is used to determine whether the marker is scaled. It defines markerWidth and markerHeight, as well as the coordinate system of the marker's content itself.
It accepts two values, strokeWidth and userSpaceOnUse. The default value is strokeWidth, which is what you will set in most cases because it allows your marker to scale with the line it is connected to.
strokeWidth: The marker value in the coordinate system and the unit of the current stroke width are the same size. In other words, the strokeWidth value allows your marker to be scaled.
userSpaceOnUse: The value of marker is the value of the current user coordinate system. That is to say, if your marker is a circle with a radius of 10px, it will always have a radius of 10px, regardless of the connected elements.
Marker properties - referencing markers in elements
marker-end="url(#arrow)”
There are four ways to apply markers to basic graphics such as line, path, polyline and polygon:
marker-start=”url(#marker-id)”
-
marker-mid=”url(#marker-id)”
marker-end=”url(#marker-id)”
marker=”url(#marker-id)”
Recommended related articles:
How to implement coordinate system transformation in svg (with code)Summary of various methods of using svg in react (with code)
The above is the detailed content of The use of elements in svg and the introduction of marker attributes. For more information, please follow other related articles on the PHP Chinese website!

Hot AI Tools

Undresser.AI Undress
AI-powered app for creating realistic nude photos

AI Clothes Remover
Online AI tool for removing clothes from photos.

Undress AI Tool
Undress images for free

Clothoff.io
AI clothes remover

Video Face Swap
Swap faces in any video effortlessly with our completely free AI face swap tool!

Hot Article
Hot Tools

Notepad++7.3.1
Easy-to-use and free code editor

SublimeText3 Chinese version
Chinese version, very easy to use

Zend Studio 13.0.1
Powerful PHP integrated development environment

Dreamweaver CS6
Visual web development tools

SublimeText3 Mac version
God-level code editing software (SublimeText3)
Hot Topics


 Let's talk about how to use SVG to achieve image mosaic effect
Sep 01, 2022 am 11:05 AM
Let's talk about how to use SVG to achieve image mosaic effect
Sep 01, 2022 am 11:05 AM
How to use SVG to achieve image mosaic effect without using Javascript? The following article will give you a detailed understanding, I hope it will be helpful to you!
 How to convert svg to jpg format
Nov 24, 2023 am 09:50 AM
How to convert svg to jpg format
Nov 24, 2023 am 09:50 AM
svg can be converted to jpg format by using image processing software, using online conversion tools, and using the Python image processing library. Detailed introduction: 1. Image processing software includes Adobe Illustrator, Inkscape and GIMP; 2. Online conversion tools include CloudConvert, Zamzar, Online Convert, etc.; 3. Python image processing library, etc.
 An in-depth analysis of how to use svg icons in vue3+vite
Apr 28, 2022 am 10:48 AM
An in-depth analysis of how to use svg icons in vue3+vite
Apr 28, 2022 am 10:48 AM
svg images are widely used in projects. The following article will introduce how to use svg icons in vue3 + vite. I hope it will be helpful to everyone!
 Detailed explanation of using SVG to add logo to favicon
Sep 07, 2022 am 10:30 AM
Detailed explanation of using SVG to add logo to favicon
Sep 07, 2022 am 10:30 AM
How to add logo to favicon using SVG? The following article will introduce to you how to use SVG to generate favicon with logo. I hope it will be helpful to you!
 VUE3 introductory tutorial: Use Vue.js plug-in to play with SVG
Jun 16, 2023 am 09:48 AM
VUE3 introductory tutorial: Use Vue.js plug-in to play with SVG
Jun 16, 2023 am 09:48 AM
With the continuous development of modern Web front-end development, more and more technologies are widely used in actual development. Among them, Vue.js is currently one of the most popular JavaScript frameworks. It is based on the MVVM model and provides a rich API and component library, making it easier to develop responsive, reusable, and efficient web applications. The latest version of Vue.js3 has better performance and richer features than the old version, which has attracted widespread attention and research. This article will introduce to you a
 How to use svg method in vue3+vite2
May 11, 2023 pm 05:55 PM
How to use svg method in vue3+vite2
May 11, 2023 pm 05:55 PM
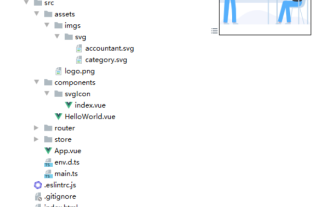
1. Install vite-plugin-svg-icons. You also need to install fast-glob related dependencies. Otherwise, when vite runs npmrundev, it will report the Cannotfindmodule'fast-glob' error npmifast-glob@3.x-Dnpmivite-plugin-svg. -icons@2.x-D 2. Create a new component index.vueimport{computed}from'vue';cons under src/components/svgIcon
 Draw SVG files on HTML5 canvas
Sep 15, 2023 pm 03:09 PM
Draw SVG files on HTML5 canvas
Sep 15, 2023 pm 03:09 PM
To draw HTMLImageElements on a canvas element, use the drawImage() method. This method defines an Image variable using src="mySVG.svg" and uses drawImage when loading. varmyImg=newImage();myImg.onload=function(){ ctx.drawImage(myImg,0,0);}img.src="http://www.example.com/files/sample.svg";
 How to use svg in vue3+vue-cli4
May 11, 2023 pm 05:58 PM
How to use svg in vue3+vue-cli4
May 11, 2023 pm 05:58 PM
1. Install svg-sprite-loadernpminstallsvg-sprite-loader--save-dev 2. Create a new component under src/components/svgIcon index.vueimport{computed}from"@vue/reactivity";exportdefault{name:"baseSvgIcon", props:{iconClass:{type:String},className:{type:String},},setup
