

Photoshop制作精致的金色木柄放大镜

教程难点是镜框及手柄部分的制作。镜框部分稍微复杂一点,有金属框和玻璃,需要分开完成。手柄部分需要用滤镜等做出木质纹理,然后调色,增加高光及暗部即可。
最终效果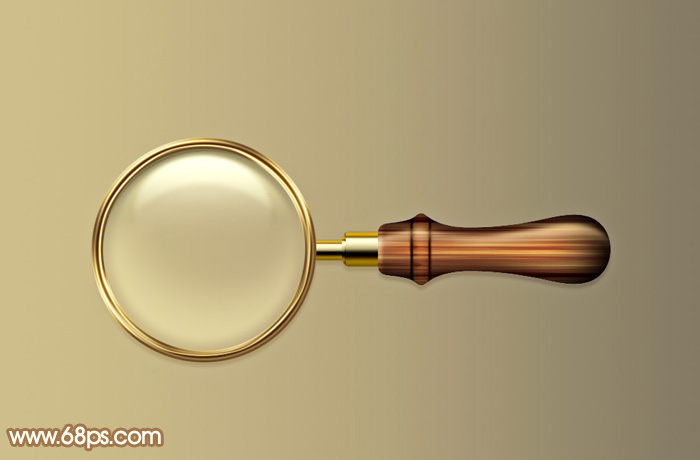
1、新建一个1000 * 700像素,分辨率为72的画布,背景填充黄褐色:#C1AE84。
新建一个组,先来制作玻璃镜框部分。在组里新建一个图层,按Ctrl + R 调出标尺,在左侧位置拉两条相交的参照线。然后以参照线的焦点为圆心,用椭圆选框工具,按住Alt + Shift拉出下图所示的正圆选区。 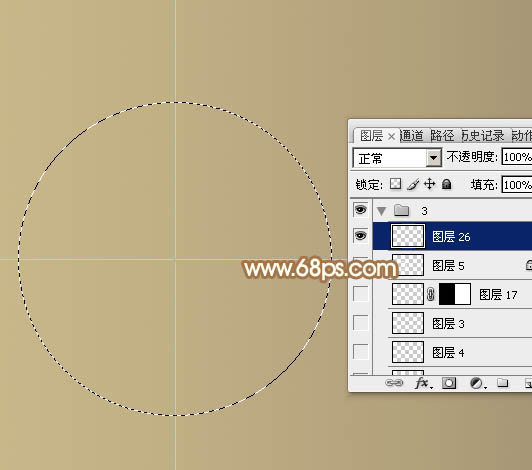
<图1>
2、用油漆桶把选区填充任意颜色,取消选区后效果如下图。 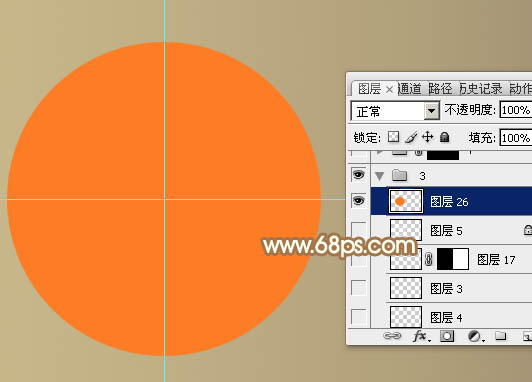
<图2>
3、再用椭圆选框工具,同上的方法拉出图3所示的选区,然后按Delete键删除,取消选区后效果如图4。 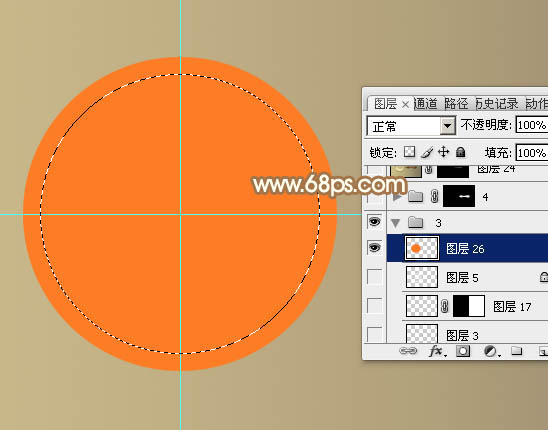
<图3> 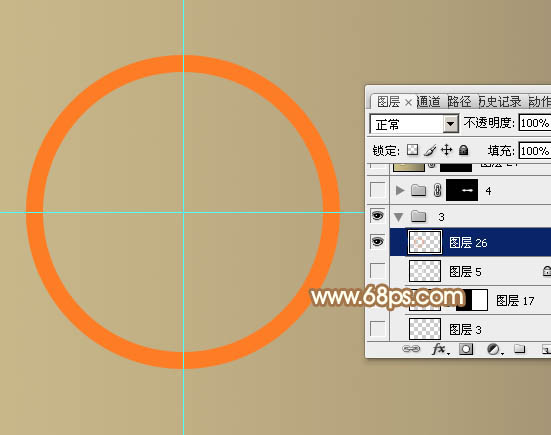
<图4>
4、选择菜单:图层 > 图层样式 > 内发光,参数设置如图5,点选渐变色,颜色设置如图6。 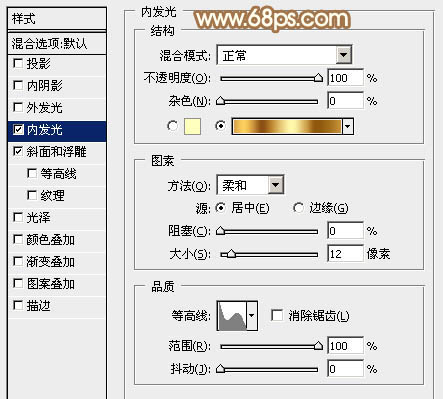
<图5> 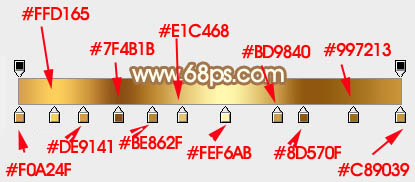
<图6>
再来设置斜面和浮雕,参数设置如下图。 
<图7>
5、加好图层样式后的效果如下图。 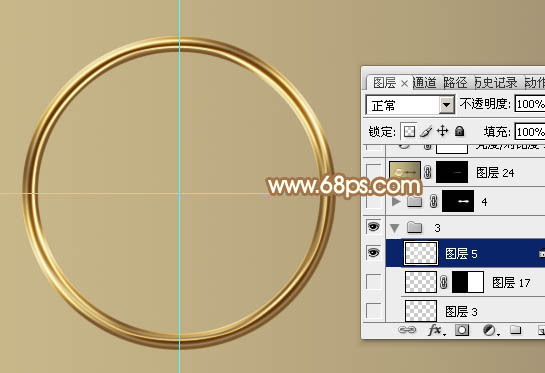
<图8>
6、在背景图层上面新建一个组,用椭圆选框工具拉出下图所示的正圆选区,给组添加图层蒙版,如下图。 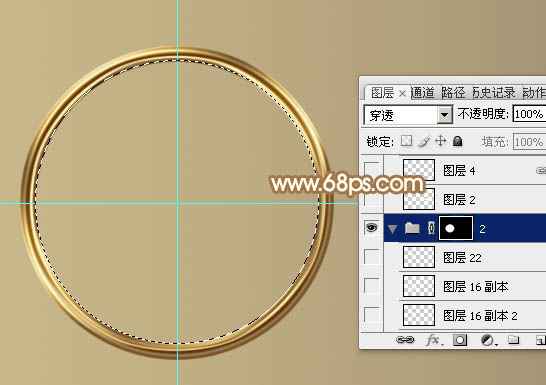
<图9>
7、在组里新建一个图层,用钢笔勾出顶部的暗部选区,羽化30个像素后填充暗褐色。 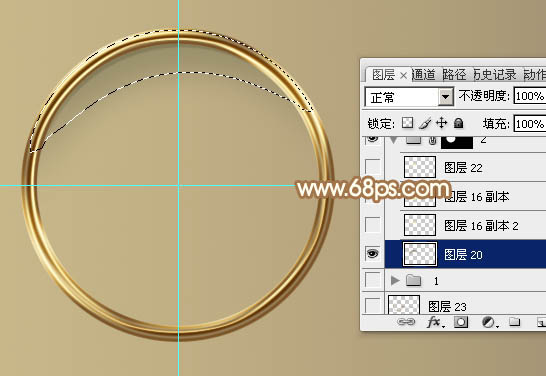
<图10>
8、新建一个图层,用钢笔勾出顶部高光选区,羽化10个像素后填充淡黄色:#FFF2BB,如下图。 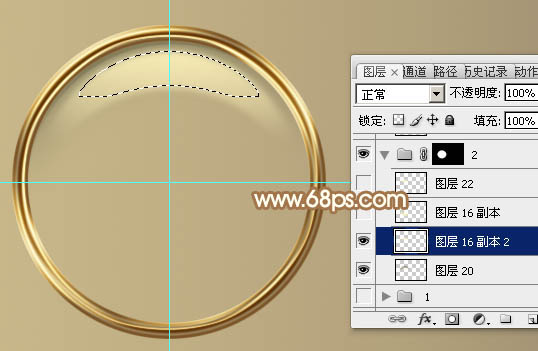
<图11>
9、新建一个图层,用钢笔勾出底部的高光选区,填充同上的颜色,适当降低图层不透明度,效果如下图。 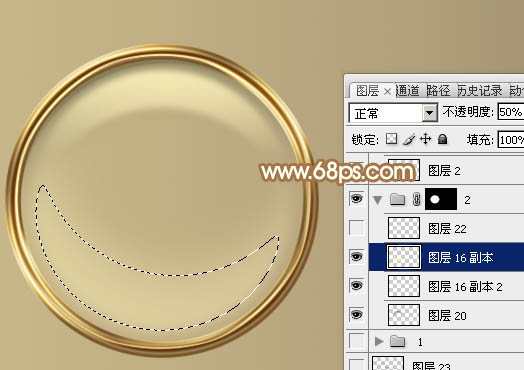
<图12>
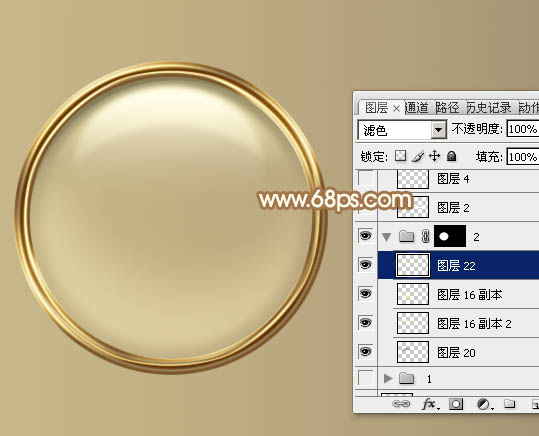
10、新建一个图层,用椭圆选框工具拉出下图所示的正圆选区,羽化5个像素后填充淡黄色。 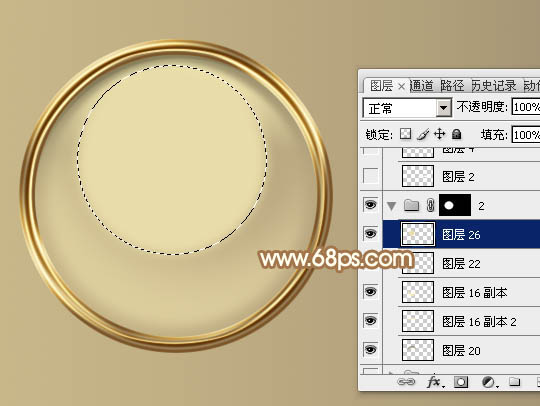
<图13>
11、取消选区后把混合模式改为“滤色”,添加图层蒙版,用黑色画笔擦掉底部区域,效果如图15。 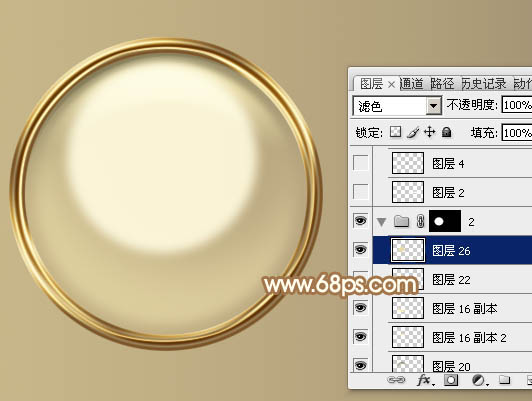
<图14>
<图15>
12、在背景图层上面新建一个组,在组里新建一个图层,用矩形选框工具拉出下图所示的矩形选区。 
<图16>
13、选择渐变工具,颜色设置如图17,然后由底部向上拉出图18所示的线性渐变。 
<图17> 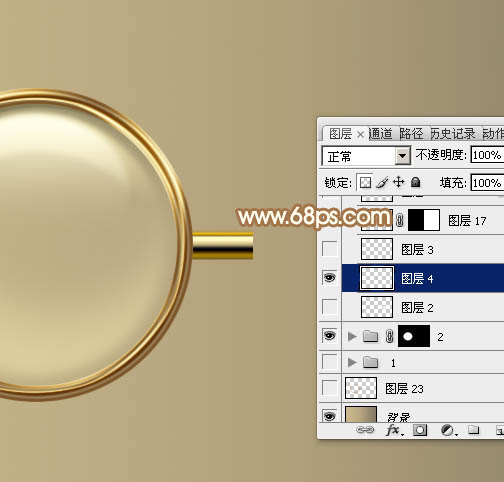
<图18>
14、新建一个图层,用钢笔勾出下图所示的选区,同上的方法加上渐变色,然后锁定图层像素区域,用矩形选框选取前面局部,再加上渐变色,效果如图20。 
<图19> 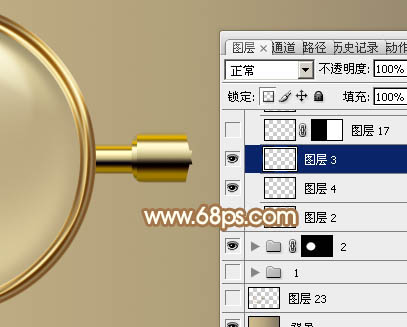
<图20>
15、局部增加一点暗部,效果如下图。 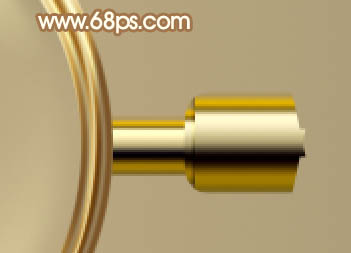
<图21>
16、现在来制作木柄部分,需要完成的效果如下图。 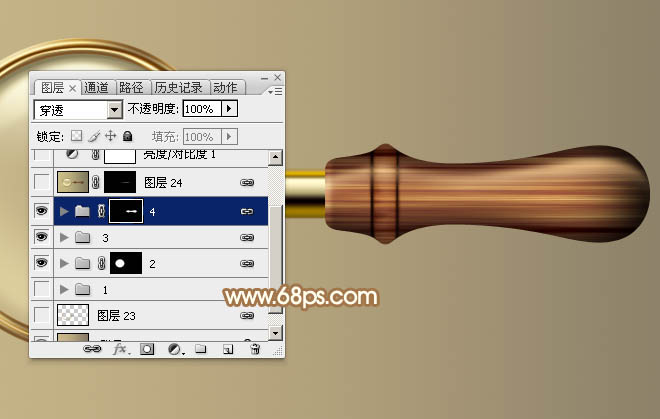
<图22>
17、新建一个组,用钢笔勾出手柄的轮廓,转为选区后给组添加图层蒙版,然后在组里新建一个图层,填充黑色,再按字母键“D”,把前,背景颜色恢复到默认的黑白,选择菜单:滤镜 > 渲染 > 纤维,如图23,确定后按Ctrl + T 把纹理调水平,效果如图24。 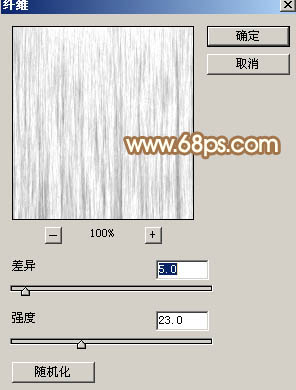
<图23> 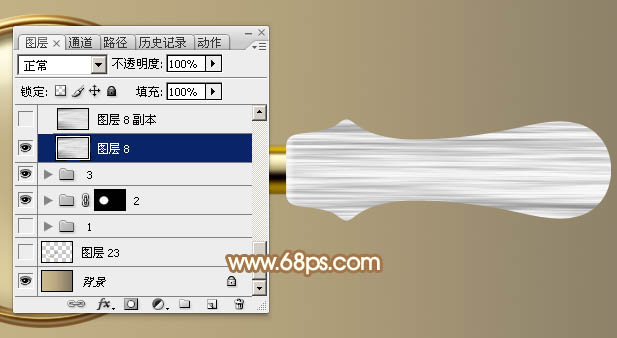
<图24>
18、按Ctrl + J 把纹理图层复制一层,选择菜单:滤镜 > 模糊 > 高斯模糊,数值为2,确定后把不透明度改为:50%,效果如下图。 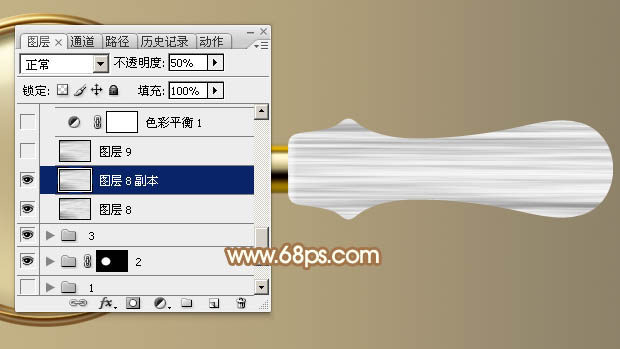
<图25>
19、按Ctrl + J 把当前图层复制一层,混合模式改为“正片叠底”,不透明度改为:100%,效果如下图。 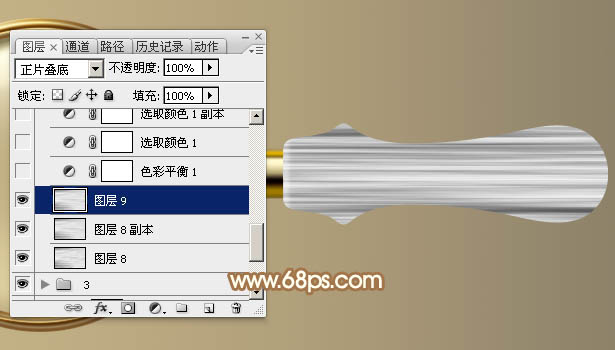
<图26>
20、这一步需要自己发挥,调整一下纹理的颜色,调成木板颜色。 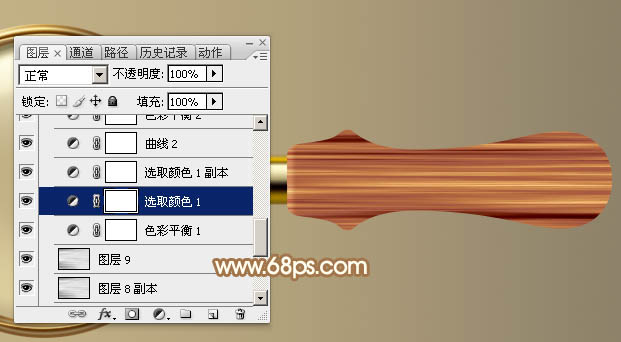
<图27>
21、新建一个图层,给木柄的边缘增加暗部。 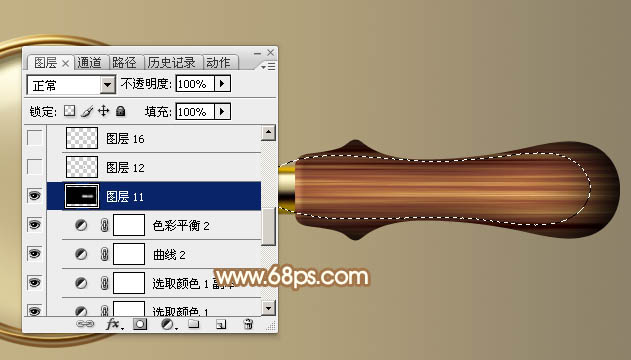
<图28>
22、局部增加一点高光,效果如下图。 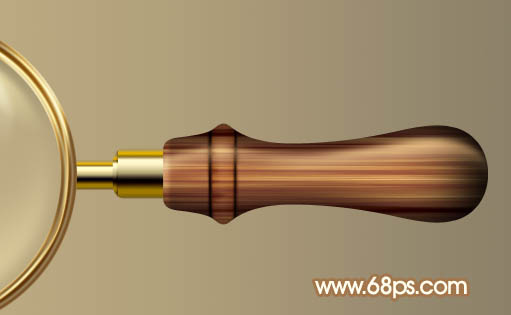
<图29>
最后调整一下细节,增加一点投影,完成最终效果。

Hot AI Tools

Undresser.AI Undress
AI-powered app for creating realistic nude photos

AI Clothes Remover
Online AI tool for removing clothes from photos.

Undress AI Tool
Undress images for free

Clothoff.io
AI clothes remover

Video Face Swap
Swap faces in any video effortlessly with our completely free AI face swap tool!

Hot Article
Hot Tools

Notepad++7.3.1
Easy-to-use and free code editor

SublimeText3 Chinese version
Chinese version, very easy to use

Zend Studio 13.0.1
Powerful PHP integrated development environment

Dreamweaver CS6
Visual web development tools

SublimeText3 Mac version
God-level code editing software (SublimeText3)
Hot Topics


 How to implement image magnifying glass effect with JavaScript?
Oct 18, 2023 am 08:45 AM
How to implement image magnifying glass effect with JavaScript?
Oct 18, 2023 am 08:45 AM
How to achieve image magnifying glass effect with JavaScript? In web design, the image magnifying glass effect is often used to display detailed product images. When the mouse is hovering over the image, a magnifying lens can be displayed at the mouse position to enlarge part of the image, thereby providing a clearer display of details. This article will introduce how to use JavaScript to achieve the image magnifying glass effect and provide code examples. 1. HTML structure First, you need to create a page layout with a magnifying glass. In HTML text
 How to implement the magnifying glass function in html5
Jan 28, 2023 am 11:00 AM
How to implement the magnifying glass function in html5
Jan 28, 2023 am 11:00 AM
How to implement the magnifying glass function in html5: 1. Create an HTML sample file; 2. Initialize the image using the html5 canvas tag; 3. Obtain the canvas and image objects; 4. Select the selection through methods such as "function drawAnchor() {...}" Enlarge the area and then draw it onto the original picture, ensuring that the center points of the two areas are consistent.
 How to use magnifying glass to magnify 150 in win11? win11 magnifying glass zoom shortcut keys share details
Mar 09, 2024 pm 01:04 PM
How to use magnifying glass to magnify 150 in win11? win11 magnifying glass zoom shortcut keys share details
Mar 09, 2024 pm 01:04 PM
The win11 system has many comprehensive functions, giving users a different use experience, but many users are also asking how to operate the win11 magnifying glass 150? Users can directly click Settings under the start icon, and then select auxiliary options to operate. Let this site carefully introduce to users how to share the win11 magnifying glass shortcut keys for zooming in and out. Win11 magnifier zoom shortcut key sharing users can easily find the start icon on the taskbar below the computer desktop. After clicking, the start tab will pop up, and then select the settings icon to enter the settings interface. 3. Then the user finds the image section on the right page and clicks the magnifying glass option. A new page will open. 5.
 How to implement image scaling and magnifying glass effects in Vue?
Jun 25, 2023 pm 07:32 PM
How to implement image scaling and magnifying glass effects in Vue?
Jun 25, 2023 pm 07:32 PM
How to implement image scaling and magnifying glass effects in Vue? With the continuous development of Web technology, users have increasingly higher requirements for the display effects of images on websites. Among them, image zooming and magnifying glass effects are relatively common requirements. It is relatively simple to implement image scaling and magnifying glass effects in Vue. Next, I will introduce the specific implementation method in detail. 1. Basic method First, let us take a look at how to achieve the basic image scaling effect. The implementation method is simple, just use Vue’s built-in instructions
 Tips and methods for implementing magnifying glass effects with CSS
Oct 20, 2023 pm 02:12 PM
Tips and methods for implementing magnifying glass effects with CSS
Oct 20, 2023 pm 02:12 PM
Tips and methods for implementing magnifying glass effects with CSS Summary: CSS plays an important role in web design. It can not only control the style of text and images, but also achieve some cool special effects. This article will introduce how to use CSS to implement a magnifying glass effect and provide specific code examples. 1. Preparation Before starting, we need some image resources and basic HTML structure. <!DOCTYPEhtml><html><head>
 How to use the Magnifying Glass tool on Windows 11
Apr 17, 2023 pm 06:58 PM
How to use the Magnifying Glass tool on Windows 11
Apr 17, 2023 pm 06:58 PM
How to Use the Magnifying Glass Tool on Windows 11 If your PC and monitor don't quite give you a bird's eye view of text and objects on your screen, you'll need to use a magnifying glass. To launch Magnifier, use these steps: Press the Windows key, search for Magnifier, and select the top result. When the Magnifier utility opens, you will notice a small bar with controls. When you want to zoom in on an item, click the plus button. Magnifying glass will enlarge text or other objects. To decrease the zoom, click the minus button. You can zoom in or out on what you need to see better. It’s also worth noting that the magnifying glass has a reading option. Click the play button to have the text read to you through the system's speakers or connected headphones. it can speak loudly for you
 How to use Vue to achieve a picture magnifying glass effect
Nov 07, 2023 pm 03:02 PM
How to use Vue to achieve a picture magnifying glass effect
Nov 07, 2023 pm 03:02 PM
How to use Vue to achieve the picture magnifying glass effect Introduction: The picture magnifying glass effect is a common web page interactive effect. When the mouse is hovered over the picture, the picture can be enlarged and the details of the enlarged part can be displayed. This article will introduce how to use the Vue framework to achieve the picture magnifying glass effect, and provide specific code examples for reference. 1. Requirements analysis: We need to implement a picture magnifying glass effect in the Vue project. When the user hovers the mouse over the picture, the picture can be enlarged and the details of the enlarged part can be displayed. Specifically, we need to achieve the following functions
 How to use Layui to achieve picture magnifying glass effect
Oct 25, 2023 am 10:07 AM
How to use Layui to achieve picture magnifying glass effect
Oct 25, 2023 am 10:07 AM
Introduction to how to use Layui to achieve the picture magnifying glass effect: In web design, the picture magnifying glass effect is a common and practical function. It allows users to enlarge the picture and display details when the mouse hovers or clicks on the picture, providing a better user experience. This article will introduce how to use Layui to achieve the picture magnifying glass effect, and provide specific code examples to help readers easily implement this function. Steps: Introduce Layui and related dependent libraries. First, we need to introduce Layui related resource files into the page. Can be obtained from Lay
