

Apache 2.x 的 MySQL 用户认证模块的安装_MySQL

Apache
前面谈到 Samba 服务器的 MySQL 用户认证,实际上我老早就写过 Apache 针对 MySQL 的认证。不过以前只是测试而已,没有实际使用。前文提到知识管理,实际上在公司内部我们运行着一个基于 pLog 的博客系统。原先的系统没有发布到互联网,后来为了能让公司异地的各分支机构也能使用该博客系统,所以,决定发布到互联网。为了最小程度的降低对博客系统的 Hack ,所以我决定采用外挂的 mod_auth_mysql 模块来实现用户认证,从而降低公司内部系统暴露给非授权用户的风险。
在这次安装中,才发现原来 mod_auth_mysql 有好几种版本,而且文档几乎都是残缺不全的。本文下载的程序来自 sourceforge.net (sf.net)
http://modauthmysql.sourceforge.net/
目前的版本为 2.9.0 ,下载后,建立目录 mod_auth_mysql ,然后进入该目录解压。(不要直接在 /usr/local/src 下解压) ,根据 BUILD 文件的指示,安装步骤如下:
apxs -c -lmysqlclient -lm -lz mod_auth_mysql.c
apxs -i mod_auth_mysql.la
然后把下面这行加入 httpd.conf
LoadModule mysql_auth_module modules/mod_auth_mysql.so
实际上编译和安装并不困难,配置才是比较大的挑战,特别是要已经现有的用户表结合起来。我的 plog 数据库的用户表是 plog_users ,我设置的配置如下:
AuthType Basic
# 连接数据库的主机地址,一般用本地连接,所以为 localhost
AuthMySQLHost localhost
AuthMySQLPort nnnn
# 数据库的名字
AuthMySQLDB plog
# 连接数据库的用户?
AuthMySQLUser plogdb_user
# 连接数据库的口令
AuthMySQLPassword password
# none: not encrypted (plain text)
# crypt: UNIX crypt() encryption
# scrambled: MySQL PASSWORD encryption
# md5: MD5 hashing
# aes: Advanced Encryption Standard (AES) encryption
# sha1: Secure Hash Algorihm (SHA1)`
AuthMySQLPwEncryption md5
AuthMySQLEnable On
AuthMySQLUserTable plog_users
AuthMySQLNameField user
AuthMySQLPasswordField password
AuthMySQLGroupTable plog_users
AuthMySQLGroupField user_group
从以上配置可以知道,这个模块实际上对用户表没有特别的要求,只要能找到 用户名和对应的口令即可,如果需要对一个组作验证,那么需要 group 那个列。
由于公司内部所有的用户都具有相同的组,所以,在验证时一般采用组用户来验证,因此要在 plog_user 表添加列: user_group ,并把所有行的 user_group 列 update 为某固定值,例如 mygroup 。
在这里 groupTable 和 UserTable 是同一张表,如果需要一个用户属于多个 group ,那么必须另外建立 group 表。
做好以上工作后,在需要加密的目录添加 .htaccess 文件如下:
Authname "请用管理博客的口令和密码登陆"
Authtype Basic
Require group mygroup
这样一个外挂的验证系统部署完毕,这种部署对于电子商务应用中,多个不同应用的用户表整合具有很好的效果。修改的代码不多。
修改用户口令可以用 PHP 的

未来的中国站长, 更加专注中国网络的发展广告服务 |最新更新 | 加入收藏 | 设为首页
- 首页
- 互联网软件
- IDC产品
- 站长交易
- 项目外包
- 商业信息
- 招聘
- 公司库
- 站长商城
- 资 讯
- 下 载
- 学 院
- 工 具
- 论 坛
热门关键字:CSS布局配色参考Dreamweaver8 apacheApacheIIS6AjaxWML
| 视频教程 | 常用手册 | 常用广告代码 | js特效代码 |
站长学院 >> 网站开发技术教程 >> mysql教程 >> Apache 2.x 的 MySQL 用户认证模块的安装
Apache 2.x 的 MySQL 用户认证模块的安装
2009-1-9 20:51:00查看学习心得
{GetProperty(Content)}

Hot AI Tools

Undresser.AI Undress
AI-powered app for creating realistic nude photos

AI Clothes Remover
Online AI tool for removing clothes from photos.

Undress AI Tool
Undress images for free

Clothoff.io
AI clothes remover

Video Face Swap
Swap faces in any video effortlessly with our completely free AI face swap tool!

Hot Article
Hot Tools

Notepad++7.3.1
Easy-to-use and free code editor

SublimeText3 Chinese version
Chinese version, very easy to use

Zend Studio 13.0.1
Powerful PHP integrated development environment

Dreamweaver CS6
Visual web development tools

SublimeText3 Mac version
God-level code editing software (SublimeText3)
Hot Topics
 1666
1666
 14
1425
52
1327
25
1273
29
1253
24
14
1425
52
1327
25
1273
29
1253
24

 How to use Xiaohongshu account to find users? Can I find my mobile phone number?
Mar 22, 2024 am 08:40 AM
How to use Xiaohongshu account to find users? Can I find my mobile phone number?
Mar 22, 2024 am 08:40 AM
With the rapid development of social media, Xiaohongshu has become one of the most popular social platforms. Users can create a Xiaohongshu account to show their personal identity and communicate and interact with other users. If you need to find a user’s Xiaohongshu number, you can follow these simple steps. 1. How to use Xiaohongshu account to find users? 1. Open the Xiaohongshu APP, click the "Discover" button in the lower right corner, and then select the "Notes" option. 2. In the note list, find the note posted by the user you want to find. Click to enter the note details page. 3. On the note details page, click the "Follow" button below the user's avatar to enter the user's personal homepage. 4. In the upper right corner of the user's personal homepage, click the three-dot button and select "Personal Information"
 Local users and groups are missing on Windows 11: How to add it
Sep 22, 2023 am 08:41 AM
Local users and groups are missing on Windows 11: How to add it
Sep 22, 2023 am 08:41 AM
The Local Users and Groups utility is built into Computer Management and can be accessed from the console or independently. However, some users find that local users and groups are missing in Windows 11. For some people who have access to it, the message suggests that this snap-in may not work with this version of Windows 10. To manage user accounts for this computer, use the User Accounts tool in Control Panel. The issue has been reported in previous iterations of Windows 10 and is usually caused by issues or oversights on the user's side. Why are local users and groups missing in Windows 11? You are running Windows Home edition, local users and groups are available on Professional edition and above. Activity
 Log in to Ubuntu as superuser
Mar 20, 2024 am 10:55 AM
Log in to Ubuntu as superuser
Mar 20, 2024 am 10:55 AM
In Ubuntu systems, the root user is usually disabled. To activate the root user, you can use the passwd command to set a password and then use the su- command to log in as root. The root user is a user with unrestricted system administrative rights. He has permissions to access and modify files, user management, software installation and removal, and system configuration changes. There are obvious differences between the root user and ordinary users. The root user has the highest authority and broader control rights in the system. The root user can execute important system commands and edit system files, which ordinary users cannot do. In this guide, I'll explore the Ubuntu root user, how to log in as root, and how it differs from a normal user. Notice
 Explore Windows 11 guide: How to access user folders on your old hard drive
Sep 27, 2023 am 10:17 AM
Explore Windows 11 guide: How to access user folders on your old hard drive
Sep 27, 2023 am 10:17 AM
Certain folders are not always accessible due to permissions, and in today’s guide we will show you how to access user folders on your old hard drive on Windows 11. The process is simple but can take a while, sometimes even hours, depending on the size of the drive, so be extra patient and follow the instructions in this guide closely. Why can't I access my user folders on my old hard drive? User folders are owned by another computer, so you cannot modify them. You don't have any permissions on the folder other than ownership. How to open user files on old hard drive? 1. Take ownership of the folder and change permissions Find the old user directory, right-click on it and select Properties. Navigate to "An
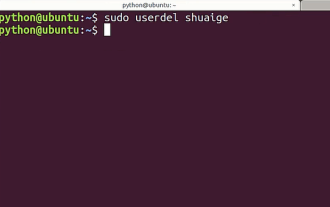 Tutorial: How to delete a normal user account in Ubuntu system?
Jan 02, 2024 pm 12:34 PM
Tutorial: How to delete a normal user account in Ubuntu system?
Jan 02, 2024 pm 12:34 PM
Many users have been added to the Ubuntu system. I want to delete the users that are no longer in use. How to delete them? Let’s take a look at the detailed tutorial below. 1. Open the terminal command line and use the userdel command to delete the specified user. Be sure to add the sudo permission command, as shown in the figure below. 2. When deleting, be sure to be in the administrator directory. Ordinary users do not have this permission. , as shown in the figure below 3. After the delete command is executed, how to judge whether it has been truly deleted? Next we use the cat command to open the passwd file, as shown in the figure below 4. We see that the deleted user information is no longer in the passwd file, which proves that the user has been deleted, as shown in the figure below 5. Then we enter the home file
 Windows 11 KB5031455 fails to install, causing other issues for some users
Nov 01, 2023 am 08:17 AM
Windows 11 KB5031455 fails to install, causing other issues for some users
Nov 01, 2023 am 08:17 AM
Microsoft began rolling out KB2 to the public as an optional update for Windows 503145511H22 or later. This is the first update to enable Windows 11 Moment 4 features by default, including Windows Copilot in supported areas, preview support for items in the Start menu, ungrouping of the taskbar, and more. Additionally, it fixes several Windows 11 bugs, including potential performance issues that caused memory leaks. But ironically, the optional update for September 2023 will be a disaster for users trying to install the update, or even for those who have already installed it. Many users will not install this Wi
 What is sudo and why is it important?
Feb 21, 2024 pm 07:01 PM
What is sudo and why is it important?
Feb 21, 2024 pm 07:01 PM
sudo (superuser execution) is a key command in Linux and Unix systems that allows ordinary users to run specific commands with root privileges. The function of sudo is mainly reflected in the following aspects: Providing permission control: sudo achieves strict control over system resources and sensitive operations by authorizing users to temporarily obtain superuser permissions. Ordinary users can only obtain temporary privileges through sudo when needed, and do not need to log in as superuser all the time. Improved security: By using sudo, you can avoid using the root account during routine operations. Using the root account for all operations may lead to unexpected system damage, as any mistaken or careless operation will have full permissions. and
 Win11 new version of drawing: remove background with one click to realize cutout function
Sep 15, 2023 pm 10:53 PM
Win11 new version of drawing: remove background with one click to realize cutout function
Sep 15, 2023 pm 10:53 PM
Microsoft invites WindowsInsider project members in the Canary and Dev channels to test and experience the new Paint application. The latest version number is 11.2306.30.0. The most noteworthy new feature of this version update is the one-click cutout function. Users only need to click once to automatically eliminate the background and highlight the main body of the picture, making it easier for users to perform subsequent operations. The whole step is very simple. The user imports the picture in the new layout application, and then clicks the "removebackground" button on the toolbar to delete the background in the picture. The user can also use a rectangle to select the area to remove the background.
