
 Mobile Tutorial
Android Phone
How to enable Do Not Disturb on OnePlus 9pro_How to enable Do Not Disturb on OnePlus 9pro
Mobile Tutorial
Android Phone
How to enable Do Not Disturb on OnePlus 9pro_How to enable Do Not Disturb on OnePlus 9pro
How to enable Do Not Disturb on OnePlus 9pro_How to enable Do Not Disturb on OnePlus 9pro

php Editor Baicao introduces to you the Do Not Disturb function of OnePlus 9 Pro. In this hustle and bustle era, Do Not Disturb can help you focus and be more productive. With simple settings, you can avoid distractions and stay quiet when you need to focus. OnePlus 9 Pro provides multiple ways to turn on Do Not Disturb mode, allowing you to choose the appropriate setting method according to your needs, making your life more convenient and comfortable.
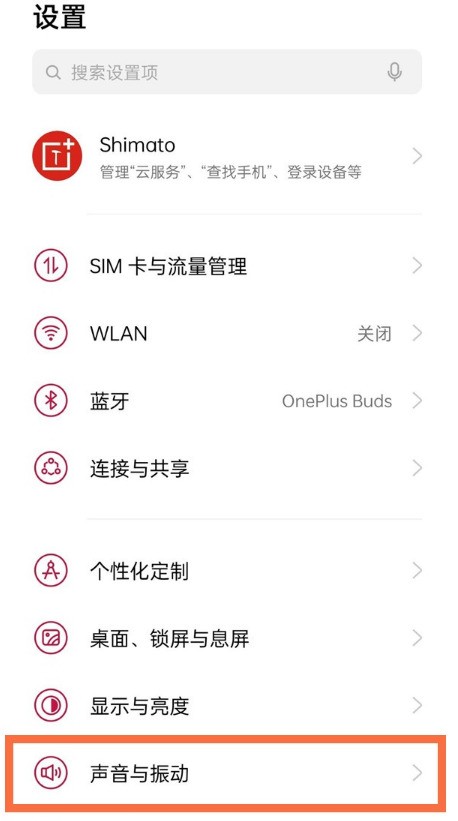
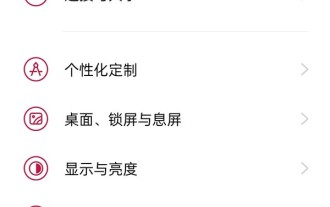
1. Click [Sound and Vibration] in the phone settings menu.
2. Turn on the switch on the right side of [Do Not Disturb].
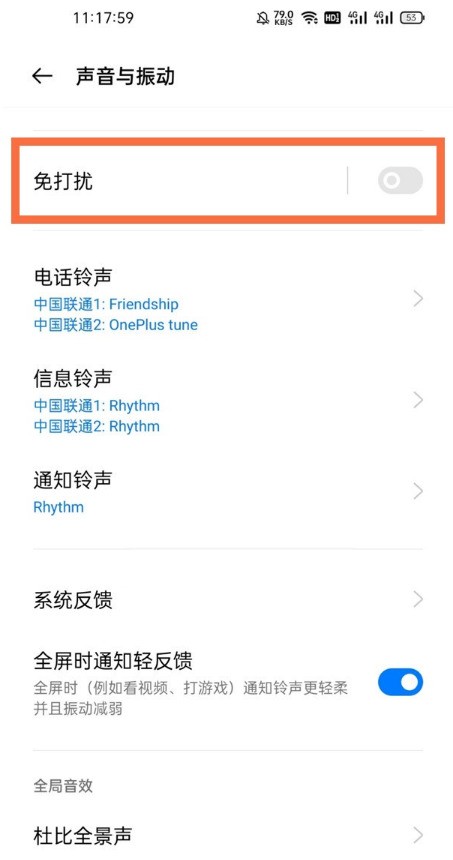
3. Click Do Not Disturb and you can also set the Do Not Disturb period.

The above is the detailed content of How to enable Do Not Disturb on OnePlus 9pro_How to enable Do Not Disturb on OnePlus 9pro. For more information, please follow other related articles on the PHP Chinese website!

Hot AI Tools

Undresser.AI Undress
AI-powered app for creating realistic nude photos

AI Clothes Remover
Online AI tool for removing clothes from photos.

Undress AI Tool
Undress images for free

Clothoff.io
AI clothes remover

Video Face Swap
Swap faces in any video effortlessly with our completely free AI face swap tool!

Hot Article
Hot Tools

Notepad++7.3.1
Easy-to-use and free code editor

SublimeText3 Chinese version
Chinese version, very easy to use

Zend Studio 13.0.1
Powerful PHP integrated development environment

Dreamweaver CS6
Visual web development tools

SublimeText3 Mac version
God-level code editing software (SublimeText3)
Hot Topics


 How to enable wide-angle mode on OnePlus 9pro_How to enable wide-angle mode on OnePlus 9pro
Mar 23, 2024 pm 01:20 PM
How to enable wide-angle mode on OnePlus 9pro_How to enable wide-angle mode on OnePlus 9pro
Mar 23, 2024 pm 01:20 PM
1. Find and open the camera icon on the desktop. 2. Click the three-number icon at the top of the photo page to enter the ultra-wide-angle interface. 3. You can also adjust the wide-angle range independently.
 How to set up dual wifi network acceleration on OnePlus 9pro_How to set up dual wifi network acceleration on OnePlus 9pro
Mar 23, 2024 am 09:16 AM
How to set up dual wifi network acceleration on OnePlus 9pro_How to set up dual wifi network acceleration on OnePlus 9pro
Mar 23, 2024 am 09:16 AM
1. Click [WLAN] in the phone settings menu. 2. Click [Dual WiFi Network Acceleration]. 3. Turn on the switch on the right side of [Smart Start Dual WiFi Network Acceleration].
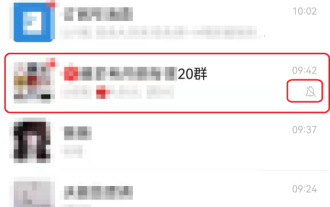 How to collapse a group chat in WeChat for Android to avoid interruptions?
Dec 31, 2023 pm 10:26 PM
How to collapse a group chat in WeChat for Android to avoid interruptions?
Dec 31, 2023 pm 10:26 PM
WeChat is a software that I believe everyone can’t live without in their daily life or work. Previously, the editor also introduced to you that the Mac version of WeChat supports the folding and pinned group chat function of the previous mobile version of WeChat. In a short period of time, the Windows version of WeChat also supports this very special feature of folding and pinned group chats. Practical features. At the same time, after the Mac version and Windows version support the function of folding the top group chat, they also bring the ability to add a do-not-disturb group to the folded group chat. At the same time, the editor also provides a detailed introduction to the joining method. However, many friends who use the Android version of WeChat don’t know how to add a DND group to a folded group chat on their mobile phones. Below, the Tianji editor will give you specific instructions.
 How to turn on the Bluetooth audio codec on OnePlus 9pro_Steps to turn on the Bluetooth audio codec on OnePlus 9pro
Mar 22, 2024 pm 06:21 PM
How to turn on the Bluetooth audio codec on OnePlus 9pro_Steps to turn on the Bluetooth audio codec on OnePlus 9pro
Mar 22, 2024 pm 06:21 PM
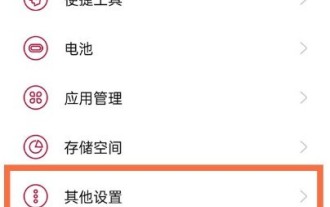
1. Click [Other Settings] in the phone settings menu. 2. Click [Developer Options]. 3. Click [Bluetooth Audio Codec]. 4. Check [LHDC]. Editor’s tip: This function requires the Bluetooth headset to also support the LHDC codec format.
 Where to set Do Not Disturb messages on DingTalk
Mar 20, 2024 pm 01:43 PM
Where to set Do Not Disturb messages on DingTalk
Mar 20, 2024 pm 01:43 PM
I believe that many people have been disturbed by frequent message reminders when using DingTalk, especially when resting or working, and they hope to completely close the messages in DingTalk. Well now, with the message do not disturb mode, you can easily block these interruptions and ensure that you can focus on work or rest peacefully during a specific period of time. But how to turn on DingTalk’s Do Not Disturb mode? Users who want to know can follow this article to learn more! How to enable Do Not Disturb messaging on DingTalk 1. Open DingTalk and click to enter your friend’s chat box. 2. Click the three dots in the upper right corner. 3. Turn on the switch on the right side of Do Not Disturb messages.
 How to enable Bluetooth on OnePlus 9pro_How to enable Bluetooth on OnePlus 9pro
Mar 23, 2024 pm 02:06 PM
How to enable Bluetooth on OnePlus 9pro_How to enable Bluetooth on OnePlus 9pro
Mar 23, 2024 pm 02:06 PM
1. Click [Bluetooth] in the phone settings menu. 2. Turn on the Bluetooth switch, and the phone will automatically search for connectable devices. Click on the device name and wait for successful pairing. 3. You can also pull down the status bar from the top of the screen and click the [Bluetooth] icon.
 How to hide the app name on OnePlus 9pro_How to hide the app name on OnePlus 9pro
Mar 23, 2024 pm 06:10 PM
How to hide the app name on OnePlus 9pro_How to hide the app name on OnePlus 9pro
Mar 23, 2024 pm 06:10 PM
1. Press and hold a blank space on the desktop to enter the desktop editing interface, and click [More]. 2. Click the [Icon] option. 3. Slide the button under [Application Name Size] to the far left.
 How to set the flash reminder function on OnePlus 9pro_How to set the flash reminder function on OnePlus 9pro
Mar 23, 2024 pm 02:51 PM
How to set the flash reminder function on OnePlus 9pro_How to set the flash reminder function on OnePlus 9pro
Mar 23, 2024 pm 02:51 PM
1. Find and open the phone on the desktop, click the three dots in the upper right corner. 2. Click the [Settings] option. 3. Turn on the switch on the right side of [Incoming Call Flash].
