
 Computer Tutorials
Computer Knowledge
Steps to reinstall Dell laptop system from USB flash drive
Computer Tutorials
Computer Knowledge
Steps to reinstall Dell laptop system from USB flash drive
Steps to reinstall Dell laptop system from USB flash drive

php editor Xiaoxin will introduce you in detail how to reinstall the Dell notebook system through a USB flash drive. This method can help you easily solve the problem of system crash or performance degradation and restore the smooth operation of the system. Next, we will guide you step by step through the steps of reinstalling the Dell laptop system with a USB flash drive, so that your laptop will look brand new!
First insert the USB flash drive into the computer’s power button
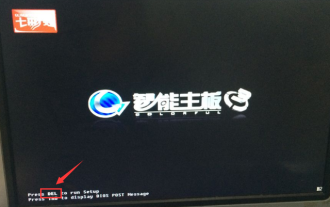
When this screen starts, press the USB flash drive startup shortcut key, and the system will start. Let’s take a look at the PE installation interface

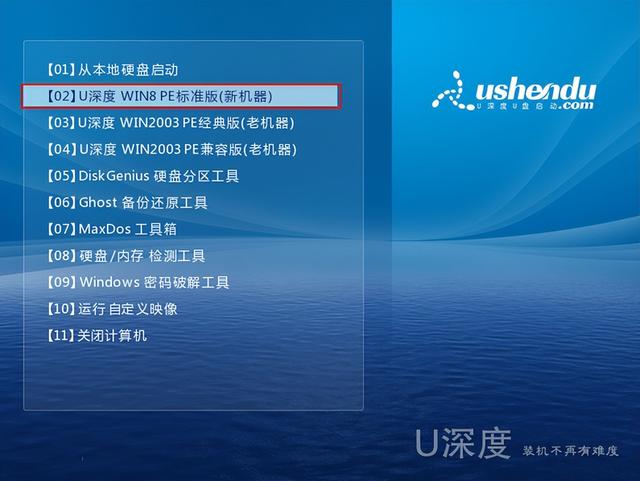
Select win8pe to enter u deepin pe
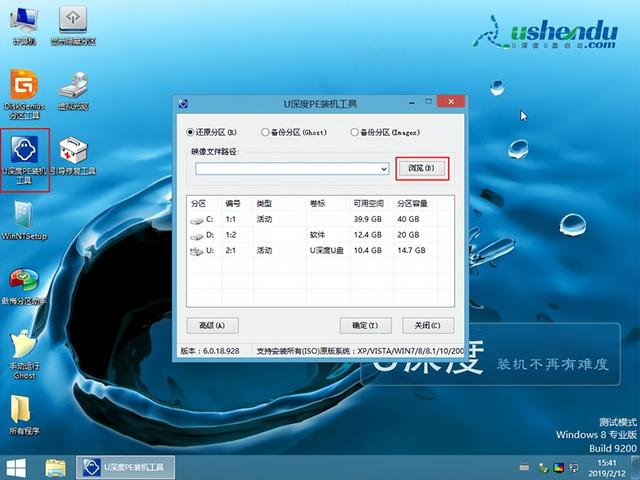
Then open u deepin installation pe tool

Here we choose to put it on the u disk System image, click OK
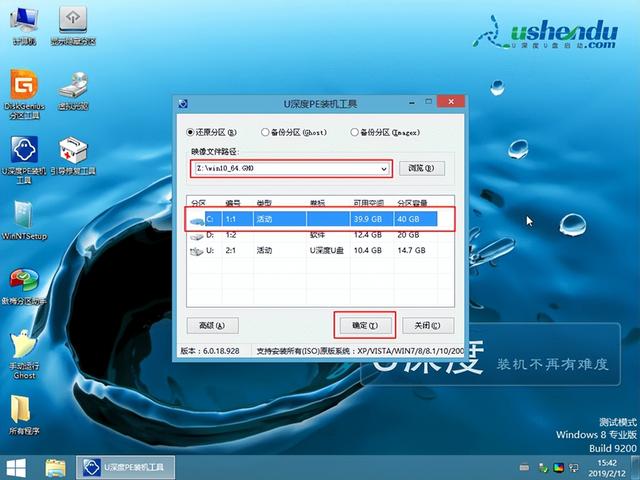
Click custom installation, we select the C drive, and then select Next
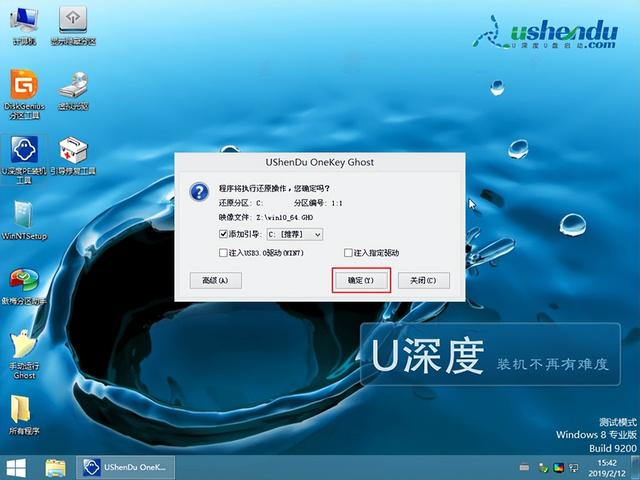
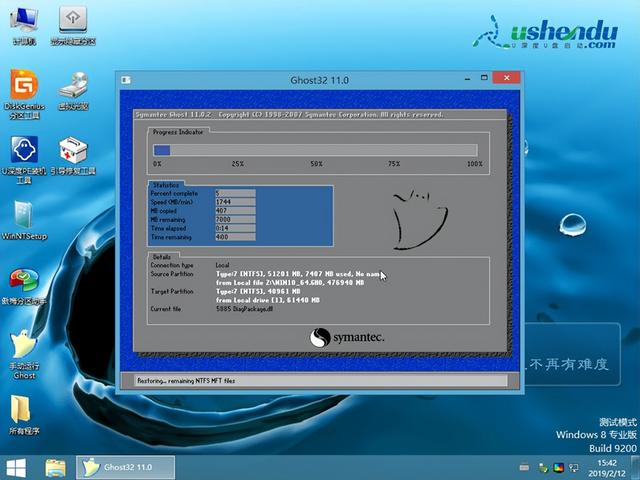
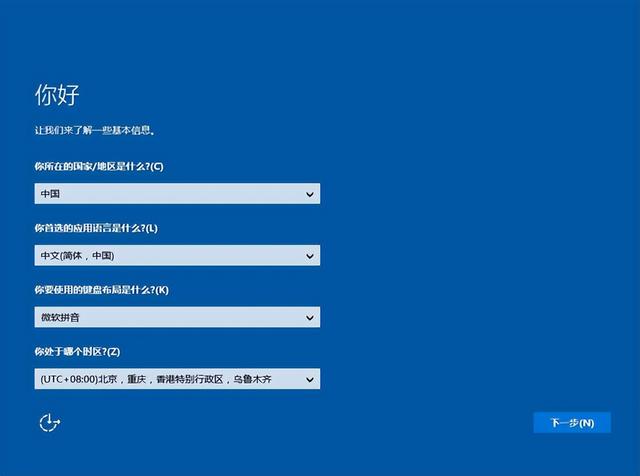
The installation steps are in progress, the system prompts, after the system After restarting, the pure version of the system will be installed
The above is the detailed content of Steps to reinstall Dell laptop system from USB flash drive. For more information, please follow other related articles on the PHP Chinese website!

Hot AI Tools

Undresser.AI Undress
AI-powered app for creating realistic nude photos

AI Clothes Remover
Online AI tool for removing clothes from photos.

Undress AI Tool
Undress images for free

Clothoff.io
AI clothes remover

Video Face Swap
Swap faces in any video effortlessly with our completely free AI face swap tool!

Hot Article
Hot Tools

Notepad++7.3.1
Easy-to-use and free code editor

SublimeText3 Chinese version
Chinese version, very easy to use

Zend Studio 13.0.1
Powerful PHP integrated development environment

Dreamweaver CS6
Visual web development tools

SublimeText3 Mac version
God-level code editing software (SublimeText3)
Hot Topics


 Ventoy secure boot settingsSecure Boot
Jun 18, 2024 pm 09:00 PM
Ventoy secure boot settingsSecure Boot
Jun 18, 2024 pm 09:00 PM
Ventoy is a USB boot tool that can directly boot ISO/WIM/IMG/VHD(x)/EFI and other types of files in the USB flash drive. It is very easy to use. Laptops have secure boot turned on by default. If they are not turned off or cannot be turned off, they cannot be booted from a USB device. Ventoy also supports secure boot. The principle is to inject a GRUB installation certificate into the current computer. As long as your computer After being injected once, any USB disk PE booted based on grub can pass. The official description of Ventoy is a GIF image. The playback speed is too fast and you may not be able to remember it. The editor has divided the GIF image to make it easier to understand. Ventoy secure boot has EnrollKey and Enro
 What is the warranty period for Dell laptops?
Apr 26, 2024 am 08:10 AM
What is the warranty period for Dell laptops?
Apr 26, 2024 am 08:10 AM
Dell’s after-sales maintenance warranty period for all three packages of Dell laptops is one year. The warranty time for different hardware is different. Specifically, hardware with a 36-month warranty includes: CPU, memory. Hardware with a 24-month warranty includes: motherboard, graphics card, LCD screen, hard drive, power adapter, keyboard, and mouse module. The warranty period for Dell notebooks is generally one to three years. Different models have different warranty periods. Generally, the entire machine has a one-year warranty, and specific parts have their own warranty periods. The warranty period for important parts is 3 years, such as memory and graphics card. The warranty period for minor components, such as hard drives, is two years. It should be noted that the higher-positioned Precision mobile workstation only supports basic warranty by default, but the warranty period is extended to 3 years. If you want to get professional
 Dell laptop black screen when booting
May 01, 2024 am 09:04 AM
Dell laptop black screen when booting
May 01, 2024 am 09:04 AM
Dell notebook has a black screen when it is turned on 1. If the notebook has a black screen when it is turned on, the indicator light is on, the main screen is black, and there is no wind when you place your hand on the fan of the host computer. Then it is a problem with the power adapter. At this time, it needs to be removed and replaced with a new one. Start switch problem. Black screen when booting, no self-test. Use the meter pin to short-circuit the startup terminal on the motherboard, and it will start normally. 2. Insufficient battery: Connect the power supply. Wait for a while and then restart. Graphics card failure: Replace the graphics card. If the laptop supports an external monitor, find a good monitor and connect it to your laptop. 3. Reason four: Monitor problem. If the power supply is normal, but the screen is still dark, try to connect another monitor to the computer (you can borrow one if necessary) to make sure it is not the monitor.
 How to solve the problem of notebook CPU frequency reduction
Apr 14, 2024 pm 09:04 PM
How to solve the problem of notebook CPU frequency reduction
Apr 14, 2024 pm 09:04 PM
Notebook computer frequency reduction method 1. Open the control panel on the computer desktop. Click Power Options in Control Panel. Change the power plan in Power Options to Energy Saving. After changing to energy saving, you can see in the task manager that the notebook CPU operating frequency has been reduced. 2. The heat dissipation function is realized simply through the physical thermal conduction principle. Place a plastic or metal cooling base on the bottom of your notebook and raise it to promote air circulation and heat radiation, which can achieve cooling effects. Install several cooling fans on the heat dissipation base to improve heat dissipation performance. 3. When no program is running, the CPU automatically reduces the frequency to save power; when the CPU temperature or the operating environment temperature is too high, the CPU automatically reduces the frequency to prevent burning. You can also try the suggestions from friends on the first floor. Please refer to the setting method.
 How to set up the hard drive to boot on a Dell computer
Mar 16, 2024 am 11:55 AM
How to set up the hard drive to boot on a Dell computer
Mar 16, 2024 am 11:55 AM
How to set the hard disk as the first startup item on a Dell desktop computer 1. How to boot a Dell computer from the hard disk is: first, use the shortcut key setting when the computer starts. When the computer enters the LOGO logo screen, immediately press the key in the upper left corner of the keyboard. Use the F2 key to enter the BIOS main interface, usually when the logo screen appears. Then, there will be a prompt to enter the BIOS button in the lower right corner of the screen. 2. The first step is to restart the computer. When you see the dell logo, press the Dell key to enter the BIOS. In the second step, after entering the BIOS interface, find and click to select SystemSummary and press the enter key. The third step is to find Satadrive012 to check whether the solid-state drive you installed has been recognized by the computer.
 Colorful motherboard boot USB flash drive shortcut key
Mar 19, 2024 pm 12:55 PM
Colorful motherboard boot USB flash drive shortcut key
Mar 19, 2024 pm 12:55 PM
Hello everyone, today I will share a graphic tutorial from Xiaobai System official website (xiaobaixitong.com). Colorful motherboard is a computer motherboard brand with very good performance, and it has certain advantages in all aspects, and its price-performance ratio is also very high. So here comes the question, how to set the USB boot option for Colorful motherboard? Don’t worry, the editor will show you how to set up the USB disk boot option in Colorful. Teach you step by step how to set the U disk boot option for Colorful motherboard: First, insert the U disk into the computer, then turn on the computer and quickly and intermittently press the startup shortcut key to enter the BIOS setting interface (please note: usually it will be displayed below the computer brand logo Start hotkey hints). 2. Enter BIOS settings
 What are the reasons for blue screen in computer assembly?
May 05, 2024 pm 12:49 PM
What are the reasons for blue screen in computer assembly?
May 05, 2024 pm 12:49 PM
What are the reasons for blue screen in computer assembly? There are hardware and software reasons. 1. Hardware reasons 1. Memory failure: If there is a problem with the memory, such as damage or failure, the computer will have a blue screen problem. You can use a memory test program (such as Memtest86) to test whether the memory is stable. 2. Hard disk problem: When there is a problem with the hard disk, such as a damaged sector or a problem with the magnetic head, it will also cause a blue screen problem. If you see hard disk error messages (such as harddiskfailure) on the blue screen interface, you need to replace the hard disk. 3.CPU overheating: When the CPU overheats, the computer will automatically shut down to protect the hardware from damage. If your computer frequently displays blue screens due to overheating, then
 What should I do if the system installation is too slow when reinstalling the system from USB disk in System Home?
Mar 01, 2024 pm 11:30 PM
What should I do if the system installation is too slow when reinstalling the system from USB disk in System Home?
Mar 01, 2024 pm 11:30 PM
When reinstalling the system, many users use the USB flash drive reinstallation system of System Home. However, when they reinstall the USB flash drive, they find that the loading speed is too slow. So how should we deal with it? What should I do if the system installation is too slow when reinstalling the system via USB flash drive in System Home? Reason introduction: 1. The transmission speed of the USB flash drive itself is slow, especially when processing large files, and the operation time is very long. 2. The USB interface of the computer and the extension cord will cause The signal is attenuated, making the USB disk reinstallation system installation too slow. Solution: 1. The U disk can only be used as a PE system disk. Just put the system GHO file into the U disk. 2. When the user starts the U disk and enters the PE system, he directly copies GHO to the D disk. 3. When restoring the system, you can directly quote the GHO file of the D drive
