
 Backend Development
PHP Tutorial
dedecms ad removal plug-in recommendation and installation steps
Backend Development
PHP Tutorial
dedecms ad removal plug-in recommendation and installation steps
dedecms ad removal plug-in recommendation and installation steps


Recommended dedecms ad removal plug-in and installation steps
In recent years, with the rapid development of the Internet, website advertising has become a major factor in many website operations. One of the important ways. However, sometimes too many and too obtrusive ads can affect the user experience and even lead to user churn. In this case, in order to provide users with a better browsing experience, many website administrators have begun to consider adding ad-removing plug-ins to their websites to block advertising content. For webmasters who use dedecms to build websites, it is particularly important to choose and install the appropriate ad removal plug-in.
This article will recommend several excellent dedecms ad removal plug-ins, and provide detailed installation steps and specific code examples to help website administrators quickly and simply implement the ad removal function.
Recommended ad-blocking plug-in
-
AdBlockPlus
AdBlockPlus is a powerful ad-blocking plug-in that can effectively block web pages Advertising content on the website to enhance user experience. It supports a variety of browsers and is updated in a timely manner. It is one of the first choices of many website administrators.
-
uBlock Origin
uBlock Origin is another ad blocking plug-in with powerful ad filtering function that can quickly and accurately block all types of ads. Advertising content. At the same time, uBlock Origin also supports custom rules, which can be added to filter advertisements according to actual needs.
-
AdGuard
AdGuard is a cross-platform ad blocking software that not only supports browser plug-ins, but also mobile App versions. It has functions such as ad blocking, privacy protection, and malicious website blocking, which can comprehensively improve users' online experience.
Installation steps
Taking the AdBlockPlus plug-in as an example, the following are the specific steps to install the ad-removing plug-in on the dedecms website:
1 . Download the plug-in file
First, download the plug-in file from the AdBlockPlus official website (https://adblockplus.org/), and select the version suitable for the dedecms system to download.
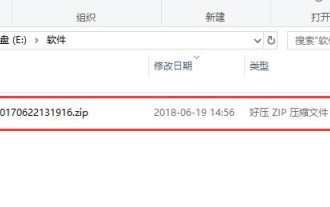
2. Unzip the plug-in file
Extract the downloaded plug-in compressed file to get the plug-in folder.
3. Copy the plug-in files
Copy all the files in the plug-in folder to the plug-in directory of dedecms, and make sure the file permissions are set correctly.
4. Modify the template file
Add the plug-in calling code in the dedecms template file to implement the ad removal function. For example, add the following code to the head tag of the page:
<script src="/path/to/adblockplus.js"></script>
5. Update the cache
After completing the above steps, remember to update the cache of dedecms to make the plug-in effective . Cache update operations can be performed through the background management interface.
Through the above steps, you can successfully install the AdBlockPlus plug-in and realize the ad removal function. Of course, you can also choose other ad removal plug-ins to install as needed.
Conclusion
In website operation, the application of ad removal plug-ins can not only improve the user experience, but also improve the browsing efficiency of the website. By choosing the right ad removal plug-in and following the correct installation steps, you can make your website appear cleaner and faster to users. I hope the recommended plug-ins and installation steps provided in this article can help you and make your website more attractive and competitive.
The above is the detailed content of dedecms ad removal plug-in recommendation and installation steps. For more information, please follow other related articles on the PHP Chinese website!

Hot AI Tools

Undresser.AI Undress
AI-powered app for creating realistic nude photos

AI Clothes Remover
Online AI tool for removing clothes from photos.

Undress AI Tool
Undress images for free

Clothoff.io
AI clothes remover

Video Face Swap
Swap faces in any video effortlessly with our completely free AI face swap tool!

Hot Article
Hot Tools

Notepad++7.3.1
Easy-to-use and free code editor

SublimeText3 Chinese version
Chinese version, very easy to use

Zend Studio 13.0.1
Powerful PHP integrated development environment

Dreamweaver CS6
Visual web development tools

SublimeText3 Mac version
God-level code editing software (SublimeText3)
Hot Topics


 PyCharm Beginner's Guide: Comprehensive understanding of plug-in installation!
Feb 25, 2024 pm 11:57 PM
PyCharm Beginner's Guide: Comprehensive understanding of plug-in installation!
Feb 25, 2024 pm 11:57 PM
PyCharm is a powerful and popular Python integrated development environment (IDE) that provides a wealth of functions and tools so that developers can write code more efficiently. The plug-in mechanism of PyCharm is a powerful tool for extending its functions. By installing different plug-ins, various functions and customized features can be added to PyCharm. Therefore, it is crucial for newbies to PyCharm to understand and be proficient in installing plug-ins. This article will give you a detailed introduction to the complete installation of PyCharm plug-in.
 Share three solutions to why Edge browser does not support this plug-in
Mar 13, 2024 pm 04:34 PM
Share three solutions to why Edge browser does not support this plug-in
Mar 13, 2024 pm 04:34 PM
When users use the Edge browser, they may add some plug-ins to meet more of their needs. But when adding a plug-in, it shows that this plug-in is not supported. How to solve this problem? Today, the editor will share with you three solutions. Come and try it. Method 1: Try using another browser. Method 2: The Flash Player on the browser may be out of date or missing, causing the plug-in to be unsupported. You can download the latest version from the official website. Method 3: Press the "Ctrl+Shift+Delete" keys at the same time. Click "Clear Data" and reopen the browser.
 What is the Chrome plug-in extension installation directory?
Mar 08, 2024 am 08:55 AM
What is the Chrome plug-in extension installation directory?
Mar 08, 2024 am 08:55 AM
What is the Chrome plug-in extension installation directory? Under normal circumstances, the default installation directory of Chrome plug-in extensions is as follows: 1. The default installation directory location of chrome plug-ins in windowsxp: C:\DocumentsandSettings\username\LocalSettings\ApplicationData\Google\Chrome\UserData\Default\Extensions2. chrome in windows7 The default installation directory location of the plug-in: C:\Users\username\AppData\Local\Google\Chrome\User
 How to install Apple Pingfang font_Apple Pingfang font installation steps
Mar 23, 2024 pm 02:16 PM
How to install Apple Pingfang font_Apple Pingfang font installation steps
Mar 23, 2024 pm 02:16 PM
1. First download the Apple Pingfang font software package from this site. After the download is completed, you will get the zip format compressed package. 2. Right-click the downloaded zip format compressed package and select to extract it to the current folder to get the full set of Apple Square Font folders. 3. Double-click to open the folder and you can get the full set of Apple Pingfang fonts in .ttf format.
 How Google Chrome allows animation plugins to run
Mar 28, 2024 am 08:01 AM
How Google Chrome allows animation plugins to run
Mar 28, 2024 am 08:01 AM
How does Google Chrome allow animation plugins to run? Google Chrome is very powerful. Many friends like to use this browser to watch video animations. However, if you want to watch various animated videos, you need to install animation plug-ins in the browser. Many friends use Google Chrome. After installing the animation plug-in, I still cannot care about the video. How should I deal with this problem? Next, let the editor show you the specific steps to allow the animation plug-in to run in Google Chrome. Friends who are interested can come and take a look. Specific steps for Google Chrome to allow animation plug-ins to run: 1. First run Google Chrome on your computer, and click the main menu button in the upper right corner of the homepage (as shown in the picture). 2. After opening the main menu, select the "Settings" option below (as shown in the picture). 3. In settings
 How to unblock Google Chrome plug-in
Apr 01, 2024 pm 01:41 PM
How to unblock Google Chrome plug-in
Apr 01, 2024 pm 01:41 PM
How to unblock the Google Chrome plug-in? Many users like to install various useful plug-ins when using Google Chrome. These plug-ins can provide rich functions and services and improve work efficiency. However, some users say that after installing plug-ins in Google Chrome, the plug-ins will always be displayed. is blocked, so how can you unblock the plug-in after encountering this situation? Now let the editor show you the steps to unblock plug-ins in Google Chrome. Friends in need should come and take a look. How to unblock plug-ins in Google Chrome Step 1. When the blocked prompt appears, click the "Control Bar" and select "Install ActiveX Control". 2. Then open the browser "Tools" menu and click "Internet Options". 3.
 How to skillfully use excel plug-ins to improve work efficiency
Mar 20, 2024 pm 05:56 PM
How to skillfully use excel plug-ins to improve work efficiency
Mar 20, 2024 pm 05:56 PM
Sometimes you will find that you are doing the same work as your colleagues, but it takes you 4 hours to complete it in one hour. Why is this? Maybe your colleague uses an excel plug-in. In fact, as an office worker, the excel plug-in is essential. So, next, the editor will introduce how to skillfully use excel plug-ins to improve work efficiency. In the [excel] software, after installing the [square grid] plug-in, you can select cells A to I in Table 1. Then, click [Square Grid] - [View] - [Lock Selected Area], so that the entered data will be protected from being modified at will. 2. Enter "=D2-C2" in cell D2, [select] cell E2, and click [Ctrl+Shift]
 Revealing the secrets of maven packaging plug-ins: in-depth analysis of the list of commonly used plug-ins
Feb 24, 2024 pm 03:39 PM
Revealing the secrets of maven packaging plug-ins: in-depth analysis of the list of commonly used plug-ins
Feb 24, 2024 pm 03:39 PM
Comprehensive analysis of Maven packaging plug-ins: Revealing the list of commonly used plug-ins. As an indispensable part of the Java project construction tool, Maven plays a vital role in the project management and construction process. Among them, the packaging plug-in, as a key component in the Maven build process, is responsible for compiling and packaging source code into executable programs or libraries, which is of great significance to the deployment and delivery of projects. This article will comprehensively analyze the commonly used packaging plug-ins in Maven, including their functions, configurations, code examples, etc., to help readers
