

WLAN extensibility module cannot start

This article details methods to resolve event ID 10000, which indicates that the wireless LAN expansion module cannot start. This error may appear in the event log of Windows 11/10 PC. The WLAN extensibility module is a component of Windows that allows independent hardware vendors (IHVs) and independent software vendors (ISVs) to provide users with customized wireless network features and functionality. It extends the capabilities of native Windows network components by adding Windows default functionality.
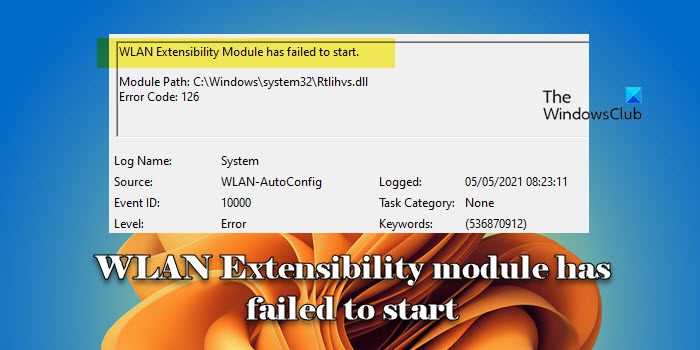
The WLAN extensibility module is started as part of initialization when the operating system loads network components. If the Wireless LAN Expansion Module encounters a problem and cannot start, you may see an error message in the log in Event Viewer with Event ID 10000.
WLAN expansion module failed to start.
Module path: C: WINDOWSSYSTEM32Rtlihvs.dll Error code: 126
The Wi-Fi extensibility module on your Windows 11/10 PC may have encountered an error or conflict, preventing it from starting properly.
WLAN expansion module cannot be started
If the WLAN extensibility module fails to start on a Windows 11/10 PC with event ID 1000, the following troubleshooting steps should be taken:
Let’s look at this in detail.
1] Disable and re-enable wireless network connections
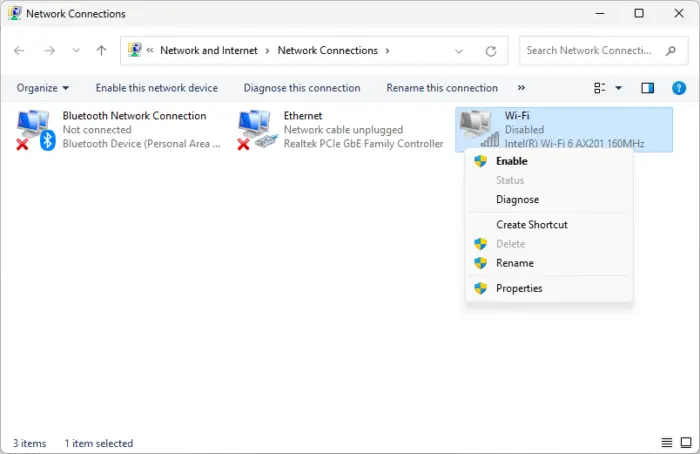
Disabling and re-enabling wireless network connections can help the operating system re-establish a connection to the wireless network and resolve temporary failures or conflicts.
Enter "Control" in the Windows search bar. Click on the control panel under ‘Best Matches’. The Control Panel window will appear. Click Network and Internet>Network and Sharing Center. Then click on the Wi-Fi network you are connected to.
The Wi-Fi status window will appear. Click the Disable button at the bottom.
Now, click on Change Adapter Settings in the left panel. Right-click the Wi-Fi network and select Enable.
2] Restart the WLAN AutoConfig service (Wlansvc)
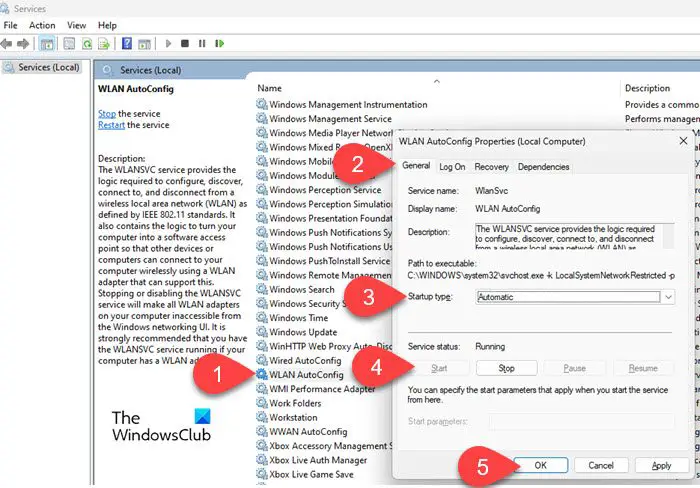
If the error persists, please restart the WLAN AutoConfig service. This service is responsible for managing wireless connections on Windows PCs and plays a vital role in the startup of WLANs.
Type "services" in the Windows search bar and click "Services" under "Best Matches" to open the Windows Service Manager (Services.exe). In the details pane, navigate to WLAN AutoConfig under the name.
Right click on it and select properties. On the General tab, select Automatic for Startup type, click Startup, and then click OK.
3]Update wireless adapter driver
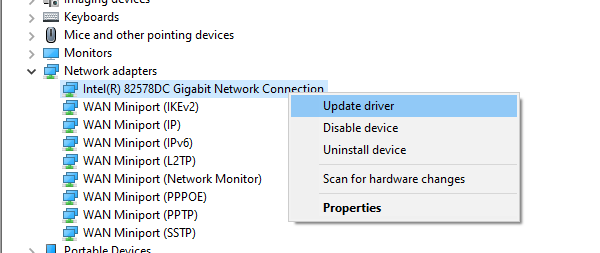
This issue may be caused by a corrupted or incompatible driver, so if the above solutions don't work, please update your wireless adapter driver.
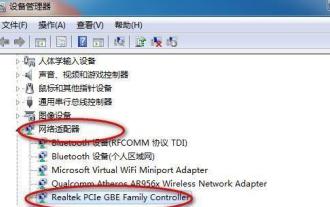
Right-click the Start button icon and select Device Manager. Expand the Network Adapters section. Right-click your wireless adapter and select Update Driver.
To reinstall the latest network adapter driver, select the Uninstall device option. When you restart your computer, Windows will search for and download the latest available drivers and install them automatically.
You can also contact the manufacturer of the wireless network adapter or the computer manufacturer to obtain the latest adapter driver. Visit their official website to get the latest driver updates and install them manually.
The above is the detailed content of WLAN extensibility module cannot start. For more information, please follow other related articles on the PHP Chinese website!

Hot AI Tools

Undresser.AI Undress
AI-powered app for creating realistic nude photos

AI Clothes Remover
Online AI tool for removing clothes from photos.

Undress AI Tool
Undress images for free

Clothoff.io
AI clothes remover

Video Face Swap
Swap faces in any video effortlessly with our completely free AI face swap tool!

Hot Article
Hot Tools

Notepad++7.3.1
Easy-to-use and free code editor

SublimeText3 Chinese version
Chinese version, very easy to use

Zend Studio 13.0.1
Powerful PHP integrated development environment

Dreamweaver CS6
Visual web development tools

SublimeText3 Mac version
God-level code editing software (SublimeText3)
Hot Topics


 What should I do if the Razer mouse driver cannot recognize the mouse?
May 06, 2024 pm 11:36 PM
What should I do if the Razer mouse driver cannot recognize the mouse?
May 06, 2024 pm 11:36 PM
Razer mouse drivers not recognized can be resolved by following these steps: check hardware connections, update drivers, reinstall drivers, check Windows settings, check for third-party software conflicts, run System File Checker (SFC) and reset Razer Snake Synapse. If the problem persists, the mouse hardware may be faulty, please contact Razer Support.
 How to solve the problem that Ethernet does not have a valid IP configuration
Apr 24, 2024 pm 02:27 PM
How to solve the problem that Ethernet does not have a valid IP configuration
Apr 24, 2024 pm 02:27 PM
To resolve the Ethernet without valid IP configuration issue, follow these steps: Check the physical connection and replace the cable. Check your network settings to make sure the IP address is obtained dynamically. Reset the Ethernet adapter. Refresh the DHCP lease. Update network drivers. If the problem persists, contact your ISP.
 Can any graphics card be installed on the motherboard?
Apr 29, 2024 am 09:16 AM
Can any graphics card be installed on the motherboard?
Apr 29, 2024 am 09:16 AM
Are all motherboards suitable for installing any independent graphics card? 90% of graphics cards and motherboards are compatible. The most important thing is the power supply. The more high-end graphics cards, the better the power supply specifications are. For example, use a 2060 graphics card. If the power supply is equipped with a 200W power supply, it will not match. It will be more comfortable to configure at least a 600W power supply. This configuration is a 4-core processor. The CPU is not very low, but the graphics card is only equipped with 9500GT. This is obviously an unreasonable combination of graphics cards. As long as you upgrade the graphics card, the performance of your computer will be greatly improved. In the case of corresponding interfaces, all motherboards are equipped with any independent graphics card, no. Can my graphics card be installed on the motherboard after I buy it? 1. Yes, the installation method is as follows: We must first determine whether the independent graphics card we purchased is compatible with our own.
 Solve the problem of being unable to access the Internet even though the broadband is connected (troubleshooting)
May 05, 2024 pm 06:01 PM
Solve the problem of being unable to access the Internet even though the broadband is connected (troubleshooting)
May 05, 2024 pm 06:01 PM
The Internet has become an indispensable part of people's lives in today's information age. But we can't get online, and sometimes we encounter some troubles. However, for example, the broadband is already connected. And take corresponding solution measures, we need to troubleshoot the problem step by step to restore the network connection in this case. Confirm the device connection status: Whether the mobile phone and other devices have been correctly connected to the broadband network, check the computer to ensure that the wireless network or wired network connection is normal. 2. Restart the broadband device: Reset the device and re-establish the connection, wait a few minutes and then turn it back on again. Try turning off the broadband router or modem. 3. Check the broadband account number and password: To avoid being unable to access the Internet due to incorrect account or password, make sure the broadband account number and password entered are correct. 4. Check D
 What to do if win11 bluetooth cannot be used_win11 bluetooth cannot be connected how to deal with it
May 08, 2024 am 10:37 AM
What to do if win11 bluetooth cannot be used_win11 bluetooth cannot be connected how to deal with it
May 08, 2024 am 10:37 AM
1. First, we click the search button in the taskbar below, search and enter [Device Manager]. 2. Then find our Bluetooth device in the device manager, right-click to select it, and click [Update Driver]. 3. If the Bluetooth device cannot be found in the device manager, then we can download Master Lu and update the driver in it. Method 2: 1. First, we enter [Settings] through the start menu. 2. Find the [devices] device in the setting interface. 3. Then click the [Bluetooth] option, and then set the switch below to [On].
 How to connect Redmi Note13RPro to the computer?
May 09, 2024 pm 06:52 PM
How to connect Redmi Note13RPro to the computer?
May 09, 2024 pm 06:52 PM
The phone Redmi Note13RPro has been very popular recently. Many consumers have purchased this phone. However, many users are using this phone for the first time, so they don’t know how to connect the Redmi Note13RPro to the computer. In this regard, the editor is here to explain to you Detailed tutorial introduction is provided. How to connect Redmi Note13RPro to the computer? 1. Use a USB data cable to connect the Redmi phone to the USB interface of the computer. 2. Open the phone settings, click Options, and turn on USB debugging. 3. Open the device manager on your computer and find the mobile device option. 4. Right-click the mobile device, select Update Driver, and then select Automatically search for updated drivers. 5. If the computer does not automatically search for the driver,
 How to update the driver for MyASUS?
Apr 29, 2024 pm 05:22 PM
How to update the driver for MyASUS?
Apr 29, 2024 pm 05:22 PM
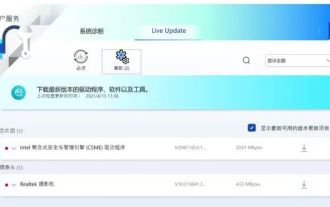
How to update the driver of ASUS Butler MyASUS? You can find LiveUpdate in the user service of the MyASUS software, which means online update. This function can update the computer's hardware driver and obtain the latest updates of the software. So below, the editor will tell my friends about ASUS Butler MyASUS Software update driver method. How to download the latest driver? LiveUpdate: You can view the latest available versions of computer drivers and application software. You can click the download button to download and install. After updating the driver, there may still be some problems with the operation of the hardware. At this time, system diagnosis can be performed. What should I do if the system encounters a problem? System diagnosis: Provide "charger&rd"
 What should I do if League of Legends does not support DX9? How to upgrade to DX11 when playing League of Legends on PC
May 06, 2024 pm 12:07 PM
What should I do if League of Legends does not support DX9? How to upgrade to DX11 when playing League of Legends on PC
May 06, 2024 pm 12:07 PM
Recently, "League of Legends" ushered in the 14.9 version update. After the update, "League of Legends" no longer supports DirectX9 in all regions around the world. In other words, if the user's computer graphics card can only support DirectX9, then the graphics card or device must be replaced. If there is no problem with the graphics card, you can update the driver. You can also update and upgrade the system, and the DirectX version will also be updated accordingly. It is understood that DirectX is a series of application development interfaces (APIs for short) developed by Microsoft. This API allows various applications to interact with your computer's hardware (including but not limited to mouse, keyboard, graphics card, etc.). Many applications use DirectX, but Direct
